eco-friendly-plumbing-fixes-Pooles-Plumbing

Help Save the Planet and Some Money Along the Way with Eco-Friendly Plumbing Fixes

Every aspect of our world seems to evolve and update with the ever-changing technology and discoveries in a continuous quest for convenience. What exactly that convenience may be and how advances in technology have improved a given area or aspect of our lives, really depends on that specific area. When it comes to plumbing there are many ways that technology has made and continues making things easier on both clients and plumbers as well. In this post, we will look at how technology, or any way in which you can be more “earth-conscious” in plumbing decisions needed to be made. For those issues in which you may be unsure of the “greenest” solution, below are several Eco-Friendly Plumbing Fixes.


When exploring Eco-Friendly Plumbing Fixes, you will realize, that much “good” can come of these methods. In addition to the obvious “good” that is done for environmental purposes, let us briefly remind you of personal “good” that can come from Eco-Friendly Plumbing Fixes. For one, if it’s “good” for the environment, it’s “good” for your entire surrounding community. Likewise, and on a personal level, these options below are “good” for your wallet and finances. Regardless, the three fixes listed below, will be an improvement in your plumbing system and far beyond.

Eco-Friendly Plumbing Fixes for Prevention of Clogs Using Household Products

We all have had to deal with clogs. Possibly a clogged toilet. Maybe a sink drain of yours was clogged. Well, no matter where the clog, I’m sure you can recall how you approached clearing it through. What follows is our advice for Eco-Friendly Plumbing Fixes in the case of a clog. In this first area of “fixes”, we will show how you can safely clear the clog with simple household products.

For starters, there is a possibility of avoiding the clog all together. To do this, you have to be more conscious of what you are putting down your drain. Placing some type of strainer in the kitchen sink will help keep larger or fibrous food items that create clogs. Likewise, using a strainer or nets in the shower or tub can also keep drains free of blockage. If however, you do get a clogged drain, there is a product that most everyone has that can lead to Eco-Friendly Plumbing Fixes.

Vinegar is the acidic, but natural product that we speak of for your Eco-Friendly Plumbing Fixes. You just simply pour some of the vinegar down the drain and wait to see if it helps to clear through. If this method does not “pop” the clog-free, you may eventually need to call in a professional. But first, read below and see if our next Eco-Friendly Plumbing Fixes could solve the issue.

Using an Auger for Eco-Friendly Plumbing Fixes

So, we tried unsuccessfully to use vinegar as one of our Eco-Friendly Plumbing Fixes to clear a clogged drain. After realizing our clog is “too stubborn” and the vinegar did not move it, we next look at other options. Now, it is at this point when many make a big and at times dangerous mistake in trying to clear the clog through.

The unsafe, not to mention dangerous to the environment fix that many go to next, is over the counter chemical “drain cleaners.” These are harmful in many ways and we do not recommend the usage of these chemicals at any point. We do though, have one other suggestion for Eco-Friendly Plumbing Fixes for those difficult clogs.

The Eco-Friendly Plumbing Fixes, spoken of above, is for you to use an auger to clear the drain trough. Just as a plumber would with a clog issue, the auger can usually get things clear. To use the auger, just follow the easy direction directly below this paragraph.

Steps to Use a Plumber’s Auger to Clear a Clogged Drain

  1. To start, insert the tip of the auger into the drain.
  2. Once inserted, using the crank, begin to rotate the auger so it begins cutting into the clog.
  3. Push as you rotate the crank, so the auger pierces and moves through the clog.
  4. Once loosened and cleared through, retract the auger from the drain.

How a Combi Boiler May Lead to Savings for You

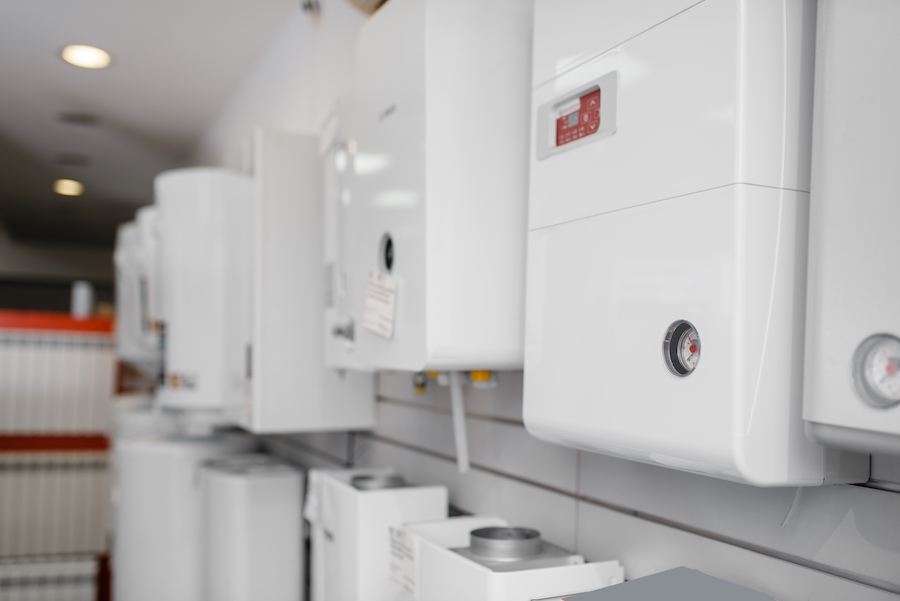
Moving along now to the last of our Eco-Friendly Plumbing Fixes, we will look at the combi boiler and whether it is for you or not. In case you are not familiar with this type of fixture, it replaces the need for a hot water heater. With this one appliance, you can heat your home and also keep hot water coming through your pipes at the same time.

How Does a Combi Boiler Work?

The simple answer on this question is that it heats water for your plumbing and heating systems. How this works is that the pipes from both of those systems enter the combi boiler. Each is then heated as they pass by the burner.

After being heated, then the water moves along to different locations throughout the home. This may either be at the baseboards or to water spigots throughout the house. The heat exchanger on the combi boiler will store any unused energy from the hot water pipes. This is then transferred to the leftover heat pipes to heat up the rest of your home.

Is the Combi Boiler among our Eco-Friendly Plumbing Fixes

Yes, the Combi Boiler is one of our Eco-Friendly Plumbing Fixes. First, they are energy efficient. Thus, when you need hot water, this unit will heat your water as needed rather than heating the whole tank full. Usually, a home that uses a combi boiler only needs one fixture to do what would normally be the job of two appliances.

If none of the Eco-Friendly Plumbing Fixes that we have spoken of remedies the clogged drain issue, then it’s time to call your friends at the Most Trusted name in Raleigh plumbing, Poole’s Plumbing. For information on how to contact us here at Poole’s visit poolesplumbing.com

Most-Common-Plumbing-Issues-pooles-plumbing

Most Common Plumbing Issues: Four More to Look Out For

In our last post, we began a look at eight of the Most Common Plumbing Issues facing homeowners on an everyday basis. We gave a run-through of four of the eight and in this post will look at the remaining issues. Likewise, we will give you some help in regard to what to look for to find the source of these plumbing problems before they become plumbing disasters.

I the previous blog post, we looked at pipes, drains, toilets, and faucets. These are all very common units that we see and notice regularly. The “final four” of our Moist Common Plumbing Issues, though, are not necessarily in locations that we are looking at as often. Thus, your trusted friends at Poole’s Plumbing will run you through these items in great detail. Knowing exactly where to find them and what to look for will not only be helpful, but more than likely will also prove to save you big in the long run.

The Most Common Plumbing Issues: Hoses, Pumps, Pressure, and Heaters

The remaining four of our Most Common Plumbing Issues as we note above, are not all in plain everyday sight. But, whether in the basement, outside the house or wherever each of these is located, we remind you the same as we did in the last post. That is to contact the pros at Poole’s Plumbing if you recognize any of them to avoid a bigger than necessary situation.

1) Leaky Hose Bibb

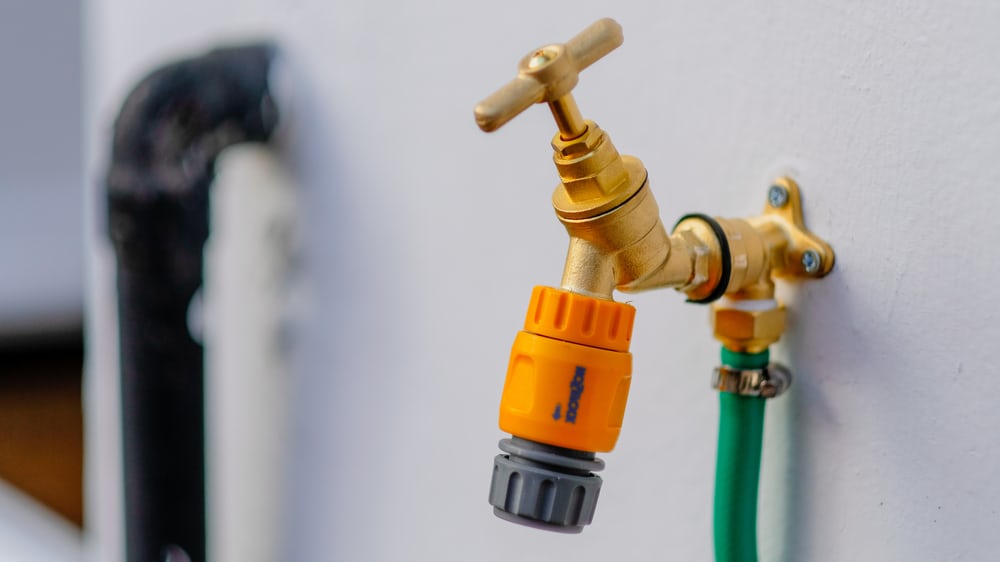
The hose bibb can be found outside the home, as its use is to bring water in from outside to distribute throughout the home. Once again, not a place you necessarily see every day, but given the function, I think you can see how a leak here could be disastrous if unattended.

This is one of the Most Common Plumbing Issues that people deal with in the spring and summer months. The leakage occurs after a long, cold winter, as many hose bibbs are not insulated for freezing temperatures. Our advice, in this case, is to invest in some frost-proof hose bibbs. While not always a guarantee, the more insulated hoses can give you peace of mind that this issue is resolved.

2) Sump Pump Failure

The sump pump, for those not in the know, is located in the basement of your home. Its main function is to pump seepage water from the basement to avoid a flood. That being said, you can see given its function why this is a very important fix among our Most Common Plumbing Issues.

When there is a sump pump failure, there can be several places to look for the problem. Usually, the source of the failure can be found among the issues listed below.

  • An overwhelming amount of water following a heavy rain
  • Improper installation
  • Clogged discharge pipes
  • A switch or switches that are stuck
  • Aging, if you’re pump is 10 years old or older this may be the source of the failure

3) Low Water Pressure

Now, this is a spot on our Most Common Plumbing Issues list that you definitely know if you’ve been a victim of. No one likes low water pressure. It is always an inconvenience, but it also can lead to serious damage as well if not addressed.

Many times when you have low water pressure the issue is, unfortunately, a result of a larger plumbing problem. Bullet pointed below is a list of four of the most probable causes if you have low water pressure.

  • A cracked or blocked sewer line or lines
  • Clogged drains or sewer
  • Pipe corrosion
  • Hidden water leaks in your home.

4) Water Heater Problems

Luckily for you, the fourth and final entry of our Most Common Plumbing Issues is water heater problems. No, you aren’t lucky to have the problems. You are however lucky that Poole’s Plumbing is the number one water heater experts in the Raleigh and surrounding area.

Now, we all know hot water is a necessity for so many reasons in our homes. Thus, when you suddenly are faced with water heater problems it can truly become a crisis. There are several sources though, that we can recommend you check to find where the problem is with your heating unit. These are listed below.

  • Corrosion or sediment build up in systems
  • Loose or broken electrical connections
  • Improper initial installation of your water heater
  • Heating element failures
  • The wrong size or type of system to support a home’s needs

The Most Common Plumbing Issues Can Prove a Real Mess

Between our first blog entry on the Most Common Plumbing Issues, and these four areas discussed today, we have tried to explain where you can look to find the source of each problem. However, in most cases, these issues are not advisable to try and fix on your own.

That being said, anytime you are faced with one of the Most Common Plumbing Issues we have walked through or any others, Poole’s Plumbing is here to help. The number one name in Raleigh plumbers for over two decades, Poole’s is happy to advise and follow up and fix any and all of your plumbing problems.

To see the previous blog post with the first four Most Common Plumbing Issues, visit the link here. Likewise to contact Poole’s Plumbing for any issues, visit poolesplumbing.com.


tankless-water-heaters-pooles-plumbing-2

Why Switch to Tankless Water Heaters?

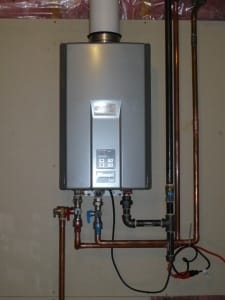
One plumbing product in the last decade that has seen a spike in popularity is Tankless Water Heater. You hear them mentioned all the time. But, even when doing some research on them, you still may be unsure of whether these are a good fit for you, personally. Well, not only are you in luck, but you have the Raleigh hot water heater experts at Poole’s Plumbing here to help better explain. We will give you  the “ins and outs” of Tankless Water Heaters and from there the decision is all yours.

At Poole’s Plumbing, we have long been known in the Raleigh area as advanced when it has come to the evolution of water heaters. Hence, our being called the ” Raleigh- area Water Heater experts.” So rather than leaving you confused as to the benefits of Tankless Water Heaters, the “experts” have got you covered. Below we will take an in-depth look at Tankless Water Heaters.

How do Tankless Water Heaters Work Differently from Traditional Style?

Once again, your friends at Poole’s Plumbing are here to set the record straight and give you all the details. To begin describing how Tankless Water Heaters operate differently, one must first understand how the traditional units work. That would be to have a tank of hot water that the traditional unit keeps heated constantly. Thus, when a faucet is turned on, hot water is readily available.

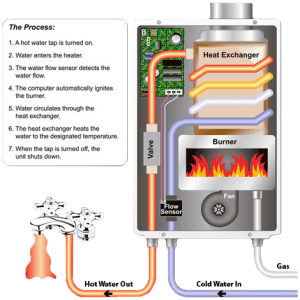
On the contrary, Tankless Water Heaters heat the water they hold “on demand.” Now, let’s explain what “on-demand” is exactly. When you turn on a shower or faucet for hot water, cold water enters the unit. In the tankless units, it will pass a heating element or burner and instantly reach the desired hot temperatures. So, with the Tankless Water Heaters, there is no wait time. To explain, the traditional unit would have to wait as the storage tank to refill. With the Tankless models, there is no storage or refill, as it simply heats the water as needed and as used.

What Does Eliminating the Storage Tank Mean to You?

So, again, there are so many articles that explain things like not having to store the water. However, most of these never go the one step further to explain what that means to you personally. Thus, being the Raleigh water heater experts, we would like to tell you exactly what it means to you.

So, below is several advantages that Tankless Water Heaters give you as opposed to the traditional units.

  • Size- Tankless Water Heaters are much smaller in size. They mount directly to the wall.
  • Eliminate Leakage- As we discuss above, there is no stored water with Tankless Water Heaters. This eliminates any chance of leakage and damage from that occurring.
  • Efficiency- The efficiency rate of Tankless Water Heaters is nearly 99 percent. This gives you the most energy-efficient and environmentally correct water heater.
  • Savings- Due to only heating water when it is needed, Tankless Water heaters also reduce your water heating costs. This is because thermal heat loss is completely eliminated since there is no storage needed. It’s estimated the Tankless Water Heaters save you as much as 50 percent on. water heating costs.
  • Life Span- Tankless Water Heaters have a longer life span on average than traditional units. The Tankless models usually last about 20 years. Consequently, the storage type models last between 8-12.

What is the Difference Between “Whole-House” or “Point-of-Use”?

With all of the apparent advantages of going tankless, you may already feel these units are what you need. However, one other major plus of them is their flexibility. To explain, you can go in two directions when choosing your tankless heater. The first option we will look at is “Whole-House” size heater.

Whole House Tankless Water Heaters

Pretty self-explanatory, but to go into detail, this is a large unit that is centrally located. The water comes from the unit through your pipes, to each hot water fixture. This is usually the most cost-effective option for purchase and installation. However, to continue being thorough, we must explain that there are some possible drawbacks to the “whole house” water heaters.

First, you have to wait for the water to get hot at the tap. This is similar to a traditional unit. The reason for this is that the further a fixture is from the water heater, the longer it takes the hot water to travel and get there. The other possible issue is that with a Tankless Water Heater, you may only be able to get hot water from one or two sources at the same time. This is because the flow rate is less with a tankless model.

Point-of-Use Tankless Water Heaters

Where a “point-of-use” tankless water heater truly is most effective is by giving you instant hot water due to the placement of the unit. These are basically a smaller Tankless Water Heater that ia an easy install throughout one’s house. Popular placement includes under a sink or in a closet. This type not only eliminates any flow rate issues but also takes care of having to have the water travel through pipes at a great distance too.

Which if Any is Right for You?

So, there you have just about anything you would need to know as an introduction to Tankless Water Heaters. If you have any further questions, contact us, the number one trusted name in Tankless Water Heaters in the Raleigh area, Poole’s Plumbing. We can service, install, or just answer your questions. To reach us, go to poolesplumbing.com.

water-heating-up-pooles-plumbing

What Takes So Long for Water Heating Up

Regardless of the time of year, the weather outside, or the number of people in a household, the amount of time it takes Your Water to Heat Up is crucial. Straight up, if you need hot water, whether showering, cooking, or washing, you don’t want to wait. So, if you have been waiting too long for Your Water to Heat Up, the most trusted water heater authority in the Raleigh area, Pooler’s Plumbing has compiled the following list of 5 reasons you may be waiting for Your Water to Heat Up.

Just to give you five possible reasons why you are waiting for Your Water Heating Up is not really solving the problem for you though now, is it? Never fear, though, your friends at Poole’s have got you covered. To see how to speed your water heating process up, just continue reading the paragraphs below. Now let’s hurry up, that water of yours must be freezing!!!

Five Reasons that You May Be Waiting for Your Water Heating Up

Your Water Heater Is Failing

As water heaters get up in age, especially around the ten-year mark, they are nearing the end of service time. This can lead to the unit being less effective and even stopping to work entirely. If you discover this why you are Waiting for Your Water Heating Up, give Poole’s a call and we can come help you decide whether it should be fixed or replaced.

Water Heater is Too Far Away

Our first three “reasons” on this list, we will stick with looking at the water heater. This one would seem common sense for why you’re Waiting for Your Water Heating Up. Stated, the further your water heater from the faucets or your shower, then the longer it takes for the hot water to get to you and your family.

Undersized Water Heater

So, this is our third of three “reasons” for Waiting for Your Water Heating Up that could be water heater related. Likewise, as the case with our previous entry, this would also seem to be common sense. However, it can happen. Let’s say you initially had two people in your home, but over several years, you family has grown. This will lead to more hot water being used and your solution may be in just upgrading to a larger unit.

The Buildup of Sediment or Rust

Yes, technically this “reason” would find you checking your water heater as well. Regardless, over time, sediment does build up in your water heater. This results in dissolved minerals such as Calcium or magnesium settling on the bottom of the water heater’s tank. Seeing this is also where the unit’s electric heating element or burner is located, you may need to replace or flush out the water heater to help improve its effectiveness.

Low Volume Restrictor

Your reason for Waiting for Your Water Heating Up may not be as complex as thought. If you have a low volume restrictor installed, in your shower, or on any plumbing fixtures this can delay the delivery of water.

When Will the Hot Water Return?

Ok, so we just took an in-depth look at why you may be Waiting for Your Water Heating Up. The logical next question you would have is, when will the hot water return once it has run out. Well, ask, and you shall receive an answer…

To get to our answer though, we again refer to the specifics of your home’s water heater. On average, an 80-gallon gas water heater will take about an hour before hot water comes back. But the actual recovery time can vary greatly depending on the following four factors.

  • Size of Tank- Simply put, the larger your tank size, the longer the recovery time.
  • Type of Fuel- If you have an electric water heater, your unit will take about twice as long to reheat than a gas water heater does.
  • Time for Temperature to Rise- When it is cold outside and the incoming water temperature is, therefore, colder than usual, it takes longer to reheat.
  • “First Hour Rating” (FHR)- It will take less time for the water heater to reheat the higher your FHR is.

Don’t Sit Waiting for Your Water Heating Up, Poole’s Has all Your Water Heater Issues Covered. 

Poole’s’ Plumbing is known as the number one source and authority for water heaters across the Raleigh area. Whether you have a tankless or traditional water heater. Whether gas or electric. If you need a tune-up or a full replacement. Regardless of any of these services you need, Poole’s Plumbing will not leave you Waiting for Your Water to Heat Up.

To discuss hot water issues or have one of our professionals come take a look, visit us at poolesplumbing.com.


What Water Heater Size is Right for Me?

This is a question that almost all homeowners who built a new home are familiar with. Likewise, it is certainly a thought that has crossed anyone’s mind who has run out of hot water in their home at some point. No matter when you thought to ask, or if you hadn’t yet, regardless something you will want to know as a homeowner is what is the correct Water Heater Size you need.

The amount of hot water dispensed versus how much you and your family need are certainly one reason you need the correct Water heater Size. Likewise, if your unit is too big, you are looking at a spike in your monthly energy bill. So, luckily for you, the number one name in Raleigh area water heater experts is Poole’s Plumbing. Below, we will identify each style of water heater available and also how to calculate the size that fits your home.

Know Types Before Looking at Size

Yes, we know our purpose here is to decipher what is your ideal size of Water Heater. We will get to that for sure by the end of our article, but first, we’d like to get you more familiar with each of the three main types of residential water heaters.

Types of Water Heaters

  • Tankless Water Heater- a somewhat newer type of water heater. Usually, these cost more upfront but in the long run, saves you due to energy efficiency.
  • Storage Tank Water Heater- These are the standard and most common water heaters. Available in both gas and electric units. These type of water heaters has low upfront costs. These units have an insulated tank that stored hot water until it is needed.
  • Solar Water Heating System– This variety of water heater has a storage tank and a solar collector. With these, you can choose from two types of water systems, first there is active solar water heating. Which has controls and circulating pumps? Then there are passive solar water heating systems, too. They use none of the pumps or control that others did.

Now We Know the Type, Let’s Calculate Your Water Heater Size

Now that you are at least somewhat familiar with the three types of unit could have, it is time to calculate your correct size. The size that you will need varies from household to household, actually.

In general, however, basing the size on the number of people per home is the most accurate way to gauge your ideal Water Heater Size and eventual selection of one.

Below it is easily bullet-pointed out for you basing the number of people in a home against the Water Heater Size in gallons.

  • 30-40 Gallon Water Heater Size for a one or two-person household
  • 40- 50 Gallon Water Heater Size for a three or four-person household
  • 50 Gallon minimum Water Heater Size for a household of five or more people.

Where Can I Find Out my Current Water Heater Size?

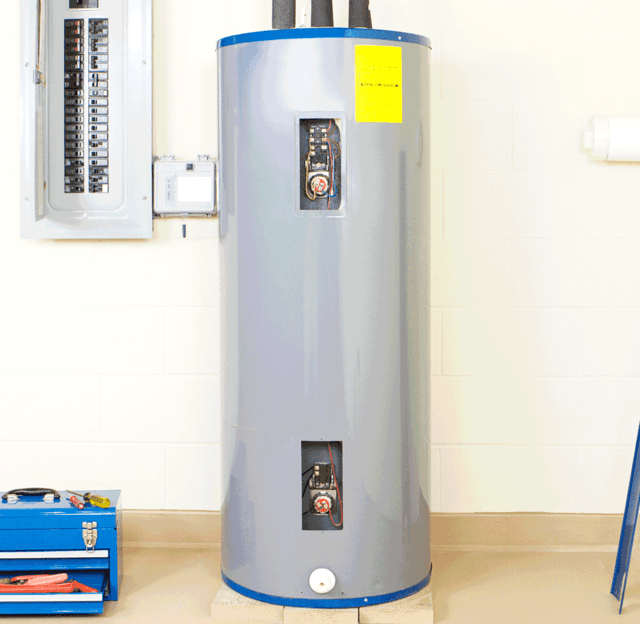
To see the Water Heater Size of the unit in your home right now, you need to look at the manufacturer’s label on the side of the tank. Not only does this tell you the size you have currently, but you can base your decision on size on that number and how often you run out of hot water.

If you would prefer, we here at Poole’s Plumbing would be happy to speak to you about any and all of your water heater questions or any plumbing questions we can be assistance with on top of that. After all, how do you think we became known as Raleigh’s top water heater experts? To contact us at Poole’s Plumbing, visit poolesplumbing.com

new-homeowners-plumbing-checklist-pooles plumbing

New Homeowners Plumbing Checklist: Six Points to Be Sure of Before Closing

Buying or building a new home is one of the most exciting moments in a person or a family’s life. Whether a first-time buyer, upgrading to the home of your dreams or downsizing in retirement. Closing on and purchasing a home is a big deal. However, amidst the excitement, you want to remember to be smart about your purchase. Many areas of the home need to be inspected thoroughly to be sure you are getting what you pay for. One area that you want to be 100 percent sure of is the plumbing. With this New Homeowners Plumbing Checklist from your friends at Poole’s Plumbing, we point out each of the six items you want to “check off” before you finalize any sale.


You will certainly want to give us a call, so Poole’s can perform a full plumbing inspection before closing. But, the six things making up your New Homeowners Plumbing Checklist below are things you can look for yourself upon touring the home.

New Homeowners Plumbing Checklist: Check for Pressure and Give it a Flush

The first half of your New Homeowners Plumbing Checklist will have you taking a look at water pressure. Likewise, we will discuss how to test each of the homes’ toilets in a very simple manner.

Big Pipes Mean Good Pressure

The first item in your “personal inspection” on your New homeowners Plumbing Checklist is the pipes. As anyone who has lived with low water pressure can attest, it is not something you want to endure. So, in your initial “walk-thru” or planning, check out the pipes. Make sure that they are a minimum of 3/4 inches from the water source to the home. Also, be certain that there is a minimum of 1/2 inches to the faucets also.

When sure that these distances are of the implied closeness, you can rest assured that water pressure will not be an issue.

Turn Those Faucets On and be Sure on the Pressure

Once you are sure of the pipe size, you can be pretty sure about having good water pressure. However, just to on and off each faucet in your home off and on. Do the same with your shower. There is no better way to gauge water pressure than by you seeing it yourself and deciding that it is either too low or just right for your household.

Flush to be Sure

The third item on your New Homeowners Plumbing Checklist is to be sure there are no issues at all with any of the toilets in your home. This is actually a pretty easy inspection process for you. That is because you simply go to each toilet in your home.

When you flush each of the toilets in your home, watch and listen to identify any problems. If you notice a weak flush, one that stays running too long, or strange noises, you will want to bring this to the attention of the builder or realtor.

New Homeowners Plumbing Checklist: A Long Look in the Basement and Saying “No to Lead”

The final three items on your New Homeowners Plumbing Checklist have you continuing your personal inspection. This part of your inspection though will take place when the walk-thru brings you to the basement.

Don’t Overlook the Basement and Crawl Spaces

This heading about says it all for this entry on your New Homeowners Plumbing Checklist. It is a fact that the most overlooked places that a new homeowner forgets to check in regard to plumbing is one of the spots they can actually miss the most, the basement. Take the time to look for any water damage, leaky pipes, or anything that appears to have been repaired that might not look like it was professionally done.

How Old is the Heater?

Earlier we would discuss water pressure. Now, let’s talk about temperature. While water pressure is very important, the temperature is equally as big of a deal. So, moving along on your New Homeowners Plumbing Checklist, this item just has you asking a few questions. When you take the tour of this home, ask the realtor to show you the water heater. Then, take a look to see if there is any corrosion or rust in the unit. Keeping in questioning mode, be sure to also ask the realtor what year the heater unit was installed and when it was last professionally serviced.

Stay Away from Lead

This would seem a common-sense type of entry to your New Homeowners Plumbing Checklist. But we would be remiss if we did not include something about the dangers of lead. The CDC reports that one out of every six children have more than the average amount of lead in their blood. This is a direct result of lead piping. Thus, unless you have a home that you want to entirely replace all the pipes in, we recommend staying away from any homes that have lead pipes.

The number one trusted name in Raleigh NC area plumbers is Poole’s Plumbing. We are more than happy to come through for your professional, final inspection before you close on your new home. To contact us about this or any of our services, visit poolesplumbing.com.


rusty-tap-water-pooles-plumbing

Why Do I Have Rusty Tap Water?

So, you are just up and out of bed. After a good night’s sleep, we all like to grab that toothbrush and get set to freshen up our “morning breath” and clean those teeth. You take a look down though as the water is about to run over your brush and something isn’t right. You rub your eyes to be sure, but it’s not your eyes playing tricks, the water is a brownish, rust color. As anyone would, you can’t help but wonder, why do I suddenly have Rusty Tap Water?


Rusty Tap Water pouring from your faucet or shower is certainly an eye-opening experience. Likewise, there is a very good chance that when. you first see it; you will have no idea what its cause would be. Well, luckily for you, your friends here at Poole’s Plumbing have got the What, Why, and How that you are looking for when you discover Rusty Tap Water. Also, a few suggestions on what the dangers can be when you notice your water has gone rusty.

What is the Cause of Rusty Tap Water?

First things first, we know the water is discolored, but the question is why do you have rusty tap water? well, that could be the result of a few things and may differ depending on the water’s temperature as well. So, let’s look at each possible scenario.

First, if you notice that all of your hot water has become Rusty Tap Water, then it’s very probable that sediment or rust has built up inside your water heater. The water heater may also be the cause if you notice both hot and cold appearing as Rusty Tap Water.

However, in the case that both hot and cold is coming out as Rusty Tap Water, it may not be anything to do with your plumbing at all. This could possibly come as a result of a break in a city or town water main or fire hydrant. Finally, if it strictly your cold-water showing discoloration, your issue is most likely with a particular water supply pipe in your home.

Is This Discolored Water a Danger to You and Your Family?

When you see Rusty Tap Water coming from your faucet, it is a reasonable concern to wonder is it dangerous? Contrary to what you may think, and depending on the minerals in your water, it probably is not a danger. The EPA regulates drinking water treatment, so even Rusty Tap Water will not contain severely dangerous contaminants.

Water contaminants such as lead or arsenic that would be extremely dangerous to consume are not going to be in your water. Likewise, secondary contaminants like manganese and iron are also covered by the EPA regulations. Thus, due to the required testing of public water systems, it may smell or taste bad and even could stain clothing. But even though Rusty Tap Water is gross and not ideal, it actually isn’t dangerous to drink or bathe with.

How to Fix Your Rusty Tap Water Issues

Cold Water

Ok, so now we have identified the source and gauged the danger of Rusty Tap Water. Next, we look at how to fix it. let us start with if it is only the cold water showing up rusty. To begin here, run your faucets at full blast for about 20 minutes or until clear. Hopefully, a piece of rust will dislodge. This would come from the inner pipes and into the water supply. If it is this simple, you will run the water until its completely clean again.

However, if it remains Rusty Tap Water pouring from your faucet, or the rust comes back after a while, you may have an issue. That issue would be corrosion of your pipes. If corrosion builds in your pipe walls, minerals enter your water supply and it will continue looking unsavory. If this is the problem, call us here at Poole’s Plumbing. You will need a pro to take a look at either having the pipes deep cleaned or replaced.

Hot Water

Now, if the Rusty Tap Water appears strictly when you are running hot water, we suggest you start the “fix” by draining your water heater. It is not uncommon for rust and sediment to build over time in your water heater and actually this should be done twice a year regularly. The sediment build-up isn’t just a cause of Rusty Tap Water, though, as it can also lead to a costly issue like leakage.

In the case that you flush the unit and still, there is Rusty Tap Water when you turn it on hot, once again, give us a call. The number one name in Raleigh water heater maintenance, Poole’s Plumbing has got your back. Sediment and rust buildup are not an issue to take lightly and in all honesty problems far larger than Rusty Tap Water could emerge if you don’t solve the problem.

Both Hot and Cold

As we allude to above, if both your hot and cold-water faucets are producing Rusty Tap Water, this problem is probably not one in. your home. You should in this instance call the water company. More than likely a fire hydrant or water main is at the root of this issue.

When reaching out to the water company, explain to them your tap water problem. More likely than not, they will be able to tell you what is going on, how they are working to fix it, and when you can expect clear water once again.

To read more about some of the water heater issues spoken of in this post or for any of your plumbing needs, check out the number one name in Raleigh plumbers, Poole’s Plumbing at poolesplumbing.com.


fall-plumbing-tips

5 Fall Plumbing Tips to Avoid

Many people who live in North Carolina would put enjoying four distinct and separate seasons as one of the perks of living in the Tar Heel State. No question, the changing of temperatures and weather experienced is certainly unique to each season in NC. However, with the difference in precipitation, and the switch from warm to cold temperatures, some household preparations must be made as the seasons change. By following the five Fall Plumbing Tips provided below, you can do your part to see that plumbing issues will not be a concern.

Looking at our Fall Plumbing Tips, these will help prepare both inside and outside of your home. We all know, that with the seasons changing can come unpredictable conditions. Thus, by doing each of these simple tasks and staying alert to give them a check periodically, you could be saving yourself both financially, and from an unnecessary mess!

Five Fall Plumbing Tips to Get You Ready for Season’s Change

Drain, Unhook, and Put Away the Hoses!

Of course, with dropping temperatures comes less and less lawn and yard maintenance. Thus, the first of our Fall Plumbing Tips will be putting away an item used almost exclusively in Spring and Summer, the garden hose.

Obviously, when the summer winds down, you will want to keep your hose for another year, so proper removal and storage is recommended. Likewise, you will want to make sure the hose is fully drained and then placed somewhere that it will not freeze as the Fall and Winter’s colder temperatures arrive.

If detached and allowed to freeze, the hose could expand and break. Even worse though in the case you hadn’t removed it from the outside faucet, the freezing process can lead to a much bigger problem. So, let’s remove, drain, and store properly before we move on with Fall Plumbing Tips.

Turning Things Off: Possibly the Most Important (and Easy) Entry of the Fall Plumbing Tips

A common thread you may start to notice here is how important it is to avoid anything from freezing at all costs. Nothing good in the way of plumbing is going to come from a water source, supply, pipe, etc. becoming frozen.

Your inside water supply and hose bibb are both main areas to be certain are shut off properly. In the case of the hose bibb, the first step is our above entry on the Fall Plumbing Tips. That being, remove the hoses. Next, check thoroughly all outdoor faucets for possible leaks. 

When sure there is no leakage, this is when we move to the inside water supply. Shut this down, and then return to the outside faucet, turn it on and drain any remaining water. Lastly, for extra protection, consider a hose bib cover or even a “frost-proof” hose bibb to be sure and eliminate any chances of a “freeze up.”

Staying on top of Your Sewer System

Whether most realize it or not, all three months, fall, winter, and spring can each have ill effects on a sewer system. A variety of issues can occur that are directly related to the colder temperatures and then eventually thawing out after the cold.

If you have ever experienced any sewer system issues, this is potentially a bi and costly enough issue that you may want to consult one of our specialists at Poole’s Plumbing actually. A discussion or visit from us to look at preventive maintenance or even an inspection could eventually save you big time in the long run.

Properly Maintaining Your Water Heater 

This is a part of our Fall Plumbing Tips, obviously, however, it also is a good idea to follow up on this year-round. Simple at-home maintenance and remembering to check for proper functionality can help you get the most from your water heater.

Water heaters normally tend to have anywhere from an 8-12-year lifespan. However, if you keep up on regularly flushing the unit this will both increase its efficiency and save you some money on bills as well heading into the Fall.

Last, But Certainly Not Least for Fall Plumbing Tips: Inspect Your Sump Pump

Usually found in your basement, the sump pump basically functions as a way to send water away from your home and to a place where it is no longer a problem. Thus, you can see how this is such an important entry among our Fall Plumbing Tips. 

Given the amount of precipitation we expect to see with the changing of the season each year, simply keeping watch that the sump pump is working correctly should seem a no brainer. If for some reason while monitoring, you notice it is not working, a call to your friends at Poole’s Plumbing can help you get the unit back working. Consequently, all you really need to do here is watch and in the case of a problem call immediately. Either way, with a little effort, this is a disaster you can avoid and a costly one at that.

The most trusted name in Raleigh are plumbers, Poole’s Plumbing understands that even if you follow our Five Fall Plumbing Tips, you still may have an issue. Likewise, you may simply want the peace of mind that a pro took a look at everything and you have no worry of becoming soaked or broke due to your plumbing this Fall. To contact us, visit poolesplumbing.com


water-heater-temperature-Pooles-Plumbing

Is There a “Correct” Hot Water Heater Temperature you Should be Set On?

Sure, most everyone knows the function and importance of a properly functioning water heater. However, were you aware that your Water Heater Temperature if not properly set can cost you big on your energy bill? Likewise, if  you set your Water Heater Temperature you could be short on hot water, or even worse.

In this post, we will examine and explain what Water Heater Temperature you will want to be at. We will detail the “when’s and why’s,” and in doing so, help you to conserve both hot water and money.

Is There a “Recommended” Temperature I Should Know Of?!?!

water-heater-temperature-raleigh-pooles-plumbing

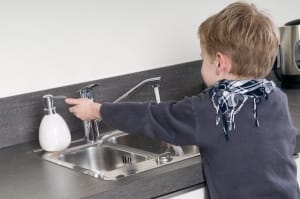
Being sure your temperature is not set too high can ensure little hands don’t get a burn.

Considering that your water heater accounts for just under twenty percent of your home’s energy, you should be familiar with Water Heater Temperature. If you are not, we will detail different factors you may not have thought of below.

One constant with Water Heater Temperature is it should not be set under 120 degrees. This not only ensures ample hot water but also prevents disease. Yes, disease, as stagnant water in a tank under 120 could grow bacteria. This could lead to a variety of illness issues, perhaps most dangerously, Legionella. Also, when at 120 degrees, you are low enough to eliminate scalding and stay efficient.

Factors to Consider for Water Heater Temperature Setting

Contrary to popular belief, the below recommendations have nothing to do with the type of plumbing that you have or materials your pipes are made from. Likewise, gas or electric does not play into our suggestions. Nor does your style, be it, a tankless or traditional style heater unit.

Different Temperatures and Why To Set Your Heater to Them or Why Not To

As noted, 120 degrees Fahrenheit is a temperature that will keep bacteria from growing and in many cases work just fine. However, there are reasons to set the temperature to numbers other than that as well.

Some of the specific temperature settings and reasons for these are below.

  • If you have a dishwasher at home without a “pre-heating” function. You will want to set Water Heater Temperature to 140 degrees
  • Likewise, if you have a weak immune system or respiratory disease, you also want the dial at 140 degrees
  • In a home with either elderly or very young occupants, it may be best to set the Water Heater Temperature to 120. At babycenter.com, it explains. “It takes just two seconds for a child to receive third-degree burns from water that is 150 degrees and five seconds if it is 140 degrees.” Many units leave a store set to these temperatures, so be careful.

Is There a Difference in Setting that Depends on the Number of People in a Household?

In short answer form, yes, this certainly can factor into your decision. Take for example a situation in which someone lives by themselves. Since the demand for hot water is less, these individuals may opt to keep the Water Heater Temperature down. On the contrary, those in a larger household, have a larger demand for a higher amount of hot water. In this situation, they may choose a slightly higher Water Heater Temperature.

Basically, to save on your energy costs through Water Heater Temperature settings, figure that every ten degrees less you set the water to will save 3-5 percent on your bill.

Poole’s Plumbing Can Answer Your Water Heater Temperature Questions

While this all seems a real easy process to read, we know sometimes things such as temperature selection can be more complicated. The number one name in Raleigh area water heater experts, Poole’s Plumbing will assist you with any further questions or work you need help with on yours. To contact us, visit our website at poolesplumbing.com.


Plumbing-Noises-Pooles Plumbing

We Ain’t Just Whistling: Beware of These Bad Plumbing Noises

Some minor “creaking” or a few noises are not necessarily that uncommon of an occurrence, especially if you reside in an older home. This type of sound can come from heavy winds blowing past or just from slight movements of your aging homes’ building material. However, you mustn’t just ignore and assume the strange noises that you hear are always just the wind. When we say this, we refer to noises you may hear associated with the plumbing in your home. No, not something identifiable, such as the “swooshing” sound of water moving through your pipes when you turn on the sink. The sounds we speak of are those that could turn out to be Bad Plumbing Noises.

In this article, we will enlighten you to four different sounds that could be construed as Bad Plumbing Noises. In addition to identifying each of these sounds and what to listen for, we also will touch on ways to go about resolving problems that stem from Bad Plumbing Noises.
Plumbing-Noises-Pooles Plumbing-Raleigh-NC

No matter what you think the issue is, its always best to pay full attention to any Plumbing Noises.

Bad Plumbing Noises: What am I Listening For? When Do I Make a Call?

The following are four specific Bad Plumbing Noises to listen for:
  • Banging
  • Rumbling
  • Vibrations
  • Whistling

How to Identify and Rectify a Problem Based on Hearing Bad Plumbing Noises

For each of the given “sounds” on the list above, you will want to take note of what exactly could be going on based upon the Bad Plumbing Noises you hear. Consequently, we will also advise you on how to go about addressing and resolving whatever issue is producing the Bad Plumbing Noises you hear.

Banging

As pertains to Bad Plumbing Noises, when you hear a banging-type sound, it most often is due to loose pipes hitting against nearby floors or walls. Banging noises can also be the result of your water pressure being too high. Basically stated, when water begins moving when you turn on a faucet. Then, when you shut the faucet off, there is still force behind its moving. So, it makes it that the water can’t initially stop. Thus, these “banging” type Bad Plumbing Noises you hear.
The solution to the “banging” Bad Plumbing Noises could be as simple as just securing your pipes so that they do not hit against the wall.

Rumbling

The next sound you should remember to be aware of is a “rumbling” type noise. This sound is usually a direct result of some type of sediment building up inside of a water heater unit. To more clearly explain, when this type of sediment collects, it eventually gets heated up as the system is warming the temperature of the water.
Once the debris/sediment that is in the water heater is heated, it begins shaking and moving within the unit. This, as a result produced the “rumbling” type of Bad Plumbing Noises that we speak of.

Vibrating

There once was a song by the legendary, “surf-rockers,” the Beach Boys called “Good Vibrations.” Well, with all due respect to the talents of that group, the “vibrating” that we speak of here would certainly not be categorized as “good.” On the contrary if you are hearing the “vibrating” type of Bad Plumbing Noises, it can most times be attributed to a faulty fill valve.
The “vibrations” that you would hear in this situation stem from an aging valve not being able to create the air-tight seal that it once did. As a seal loosens with age, the cap on the valve begin to wiggle because this makes so the gasket can’t entirely close. One good thing though is that if you do recognize this type of Bad Plumbing Noises, it is usually a pretty easy fix. Simply replace your fill valve, and those “vibrations” will become a thing of the past.

Whistling

Now, at the top of this post we touched upon the fact that you may hear some noises that do not equate to being Bad Plumbing Noises. Specifically, the fact that you can hear some interesting noises as heavy winds pick up outside of your home. No doubt, one such noise you might hear in that case would be the “whistle” of the wind. However, when it comes to Bad Plumbing Noises, a “whistling” sound to be wary of would be one coming from your toilet.
No, the “whistling toilet” is not some type of innovative and new commode. Quite the opposite actually, as the “whistle” sound from a toilet is almost certainly related to a leaky toilet valve. If you do hear these type of Bad Plumbing Noises, open up the toilet’s lid and give another listen. Once you’re certain the toilet is responsible for the whistling noises and a plumber is called, they will rectify the “whistle” for you by either adjusting the toilet’s mechanism or if too damaged, they may opt to replace the valve.
Bad Plumbing Noises that you hear in the form of any of these listed above, are ones that you do not want to ignore. If you do hear these types of noises, it is time to call the number one name in Raleigh professional plumbers, Poole’s Plumbing. To read more helpful stories like this or to contact us, visit poolesplumbing.com.
Traditional-Water-Heater-Pooles Plumbing

Should you go Tankless? Or Opt for the Traditional Water Heaters?

Should you go Tankless? Or opt for the Traditional Water Heaters? The Raleigh water heater specialists at Poole’s Plumbing specialize in installation and servicing of your water heater….tank or no tank! With a wide selection of both models, can help educate you on that choice.

Continuing in our series on water heaters, we will walk through benefits, drawbacks, and other considerations when making the decision on a Traditional Water Heaters or Tankless. We will look at and list these out for each style water heater, in easy to read bullet points below:

Traditional-Water-Heaters-Pooles-Plumbing

Regardless of which works best for you, making the proper choice in water heaters can be one that helps you save money.

Pros and Cons of Traditional Water Heaters (Tank)

Pros:

  • Lower initial cost – A traditional water heater installation can be half as much as a tankless water heater.
  • Easy and inexpensive to replace – Fewer installation complications means less possibility of a problem.

Cons:

  • Higher utility bill – Traditional units heat and reheat water at a pre-set temperature. Your water needs and water do not factor into this. This will increase your utility bill, especially during the winter months.
  • Bigger and harder to place – They occupy more room and can’t be placed outside.
  • Can run out of hot water – Have you ever been the last in line to get the shower after the rest of the family? If in a hurry…it’s gonna be a cold one. This problem can be avoided by purchasing a larger tank.
  • Shorter life – On average, traditional units last between 10-15 years. This means there’s more turnover and therefore you have to buy a traditional heater about twice as often as a tankless one.
Traditional-Water-Heaters-Hot-Water-Pooles Plumbing

Up to two to three gallons of hot water is accessible “on demand” with a tankless unit.

Pros and cons of Tankless Water Heaters

Pros:

  • Saves money in the long run – According to energy.gov, “For homes that use 41 gallons or less of hot water daily, tankless water heaters can be 24-34 percent more energy efficient than conventional storage tank water heaters.”
  • Doesn’t take up much space – They are small and can be more easily installed in more places. In some cases, tankless units can even be installed outside on a wall.
  • Longer Life – On average, a tankless model will last 20-plus years. In some cases, this is almost double the life of a traditional unit.
  • Hot Water on Demand – Provides two to three gallons of hot water per minute on demand.

Cons:

  • Higher Cost of Installation – Both the units and installation cost considerably more than the traditional units for the initial purchase and install.
  • “Retrofitting” – Replacing a traditional water heater with a tankless system is known as “retrofitting.” This is a bit more complicated than simply replacing a traditional with a traditional unit, or a tankless with a new tankless model. Thus, this will also factor into the installation cost increasing even further.
Tankless-Water-Heater-Pooles-Raleigh-Plumber

The tankless units are more compact and take up lesss space.

Other Considerations:

  • Water heating accounts for about 20 percent of your home energy budget.
  • A whole-house electric model costs $500-$700.
  • A whole-house gas model costs $1,000-$2,000.
  • Electric models are generally cheaper to install than gas.
  • Natural gas is currently less expensive but expected to surpass electricity in price in the coming years.
  • A standard bathtub holds about 35 gallons, soaking tubs hold between 45-80 gallons.

The Decision is Yours

The decision to “go tankless,” or to “go traditional,” when it comes to your selection in a water heater is all yours, but hopefully with some of the pros and cons here provided by us, your trusted Raleigh professional plumbers at Poole’s Plumbing, your decision can be one a bit more educated and as always, we would be happy to assist not only in the installation but also in giving any final advice on last minute questions you may have when it comes replacement time.

For more information on and from the most trusted name in Raleigh water heater installation and repair, Poole’s Plumbing, visit. poolesplumbing.com.

Water-Bill-Savings-Water-Meter

Water Bill Savings Await with A Few Easy Checkpoints

During these times of having to spend a lot more time in our homes, many are thinking of ways or projects to upgrade. While on quarantine and thinking of this, you can certainly achieve Water Bill Savings if you keep better tabs on your plumbing system. In this article, your friends here at Poole’s Plumbing will offer up eight reminders/tips that if you stay on top of will keep your household budget lower. So, in addition to being the “upgrade” you were hoping for, you will also save yourself money.

1.) Inspecting and Pumping Your Septic System

On average, it is recommended to have a household’s septic system inspected every three years by a professional. Similarly, a home’s septic tank should be pumped every three to five years.

2.) Water Bill Savings From Replacing Out-Dated Faucets

Water-Bill-Savings-Old-Faucet

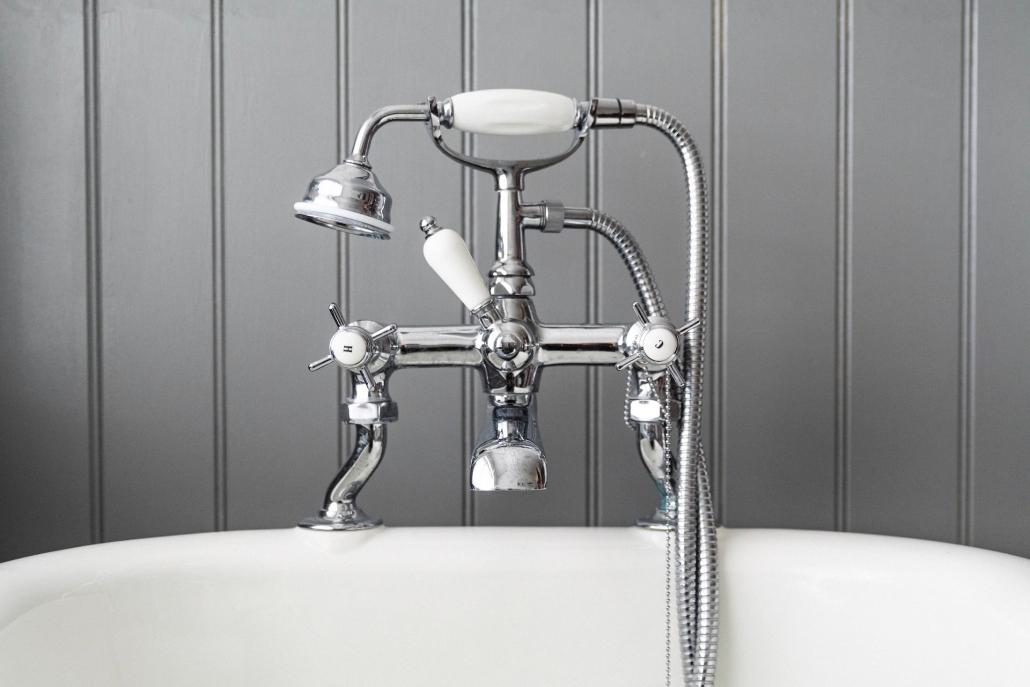
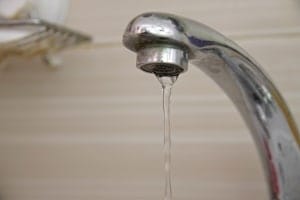
Replacing older faucets with a newer, more efficient model can help conserve.

Getting back to the “upgrades” you are hoping to make while quarantined. Maybe your kitchen or bathroom faucets have become outdated? Well, the upgrade, in this case, could not only be more attractive in appearance. It more than likely will prove more attractive financially in the big picture too.

To explain, as faucets get older, they don’t just look as they’ve gotten older. Your faucet adjusts the amount of water passing through and in time can see your bill increase as they become less efficient. With more current designs always aiming to conserve and reduce flow, replacing old faucets is a sure way to help you save.

3.) Keep a Closer Eye on Your Water Meter

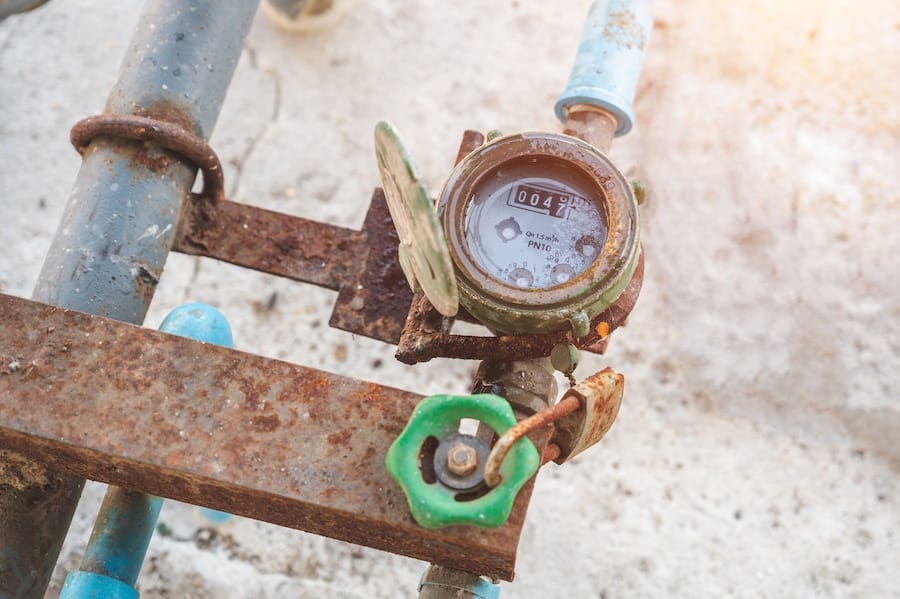
This should seem obvious once you read it. Water Bill Savings can stem from directly keeping a better eye on your water meter. By doing this, you can avoid or detect a possible leak, which will for sure lead to a higher bill.

The water meter in one’s home goes from the water mainline (outdoors) to a metered box also on the outside of your house.

4.) Recognizing Drips can Be Key in Water Bill Savings

Again, at the risk of pointing out the obvious comes the fourth entry on this list. That being said, when you notice puddles or standing water in your basement, this means you have a plumbing leak. 

A loose valve could be the cause of a leak. Likewise, it could be a cracked pipe, and either of these can cause mold and bacteria to form. If you see what you believe to be a leak, even if you can’t exactly identify where call the pros at Poole’s before things get out of hand.

5.) Water Heater Update = Water Bill Savings

Water-Bill-Savings-Laundry-Machine

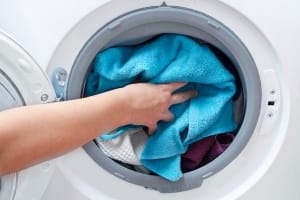
By monitoring load size and avoiding unnecessary small loads, you can conserve and save when doing laundry.

When it comes to giving plumbing tips from Poole’s Plumbing, there is a reason why they are called the “water heater experts.” Thus, any questions or tips involving your water heater is in the best hands when being addressed by Poole’s. 

For the purpose of our article, Water Bill Savings, it would serve you best to replace your water heater every ten years. The innovations and technological advances in these units are so significant even annually to make a huge difference.

In a case that you don’t want to replace, have your water heater drained every six months. This flushes out any sediment and impurities. Likewise, it will improve the heater’s overall performance and as a result, keep bills lower. 

6) Washing Machines: Watch Your Usage and Load Sizes

These once again may seem like an obvious or common sense type thing when it comes to Water Bill Savings. However, a reminder is well worth mentioning if it leads to water conservation and Water Bill Savings.

To conserve and save in the “laundry room,” start by only running your machine when you have a full load. Likewise, making sure that you are keeping the load cycle on its appropriate setting helps save water and energy. It is also recommended to spread out your laundry throughout the week. While it may seem you are conserving time by getting all laundry done at once, this can actually cause septic tank issues.

7.) Water Bill Savings from Inspecting your Toilet

Water-Bill-Savings-Pooles-Plumbing

Poole’s Plumbing can help you save by conducting a thorough inspection of your plumbing system.

Another place that many may not think of that can lead to water conservation and savings is your toilet. By simply monitoring and being sure your toilet is running properly, can be quite a difference-maker actually.

Consequently, the toilet on average accounts for 25-30 percent of household water usage. Points to check and keep your eye on include the flapper valve in addition to just being sure of no leakage. An upgrade to a newer model toilet is another sure way to save. This especially can factor in if your current model is over ten years old. With the innovations and “eco-friendly” technological advances with newer toilets, the amount of water used by your toilet is reduced significantly through an upgrade.

8.) A Professional Inspection Now Leads to Important Savings Later

Calling a professional plumber from Raleigh’s most trusted name in plumbers, Poole’s Plumbing, can also lead to savings in the long run. 

Having a professional inspection of all of your home’s plumbing systems can improve performance and greatly reduce the risk of future plumbing disasters. This simple step can save you money on utilities and emergency plumbing calls in the long run.

 If you’re thinking about making some upgrades to your house this year, it’s important to put your home’s plumbing system on your list. Small leaks or malfunctioning appliances can quickly add to your monthly utility bills. Here are just a few simple plumbing tips that can help keep your household budget in check and help save you money.

To see all the services offered by the most trusted plumbers in the Raleigh area, Poole’s Plumbing, visit poolesplumbing.com.

Draining-a-Water-Heater

Draining a Water Heater

It seems like an easy enough task. Draining a Water Heater. However, being the number one name in Raleigh water heater experts, Poole’s Plumbing would like to help make sure that the process is a safe and easy one for you. Thus, in this article, we will walk you through the entire process, which depending on what type of unit you have, is suggested to be drained every 6-12 months.  

Draining-a-Water-Heater-Valve

You will be opening the valve up before draining the heater and always be sure to check it as your last step.

Why and When Should You be Draining a Water Heater?

To begin in our guiding you to safely begin Draining a Water Heater, we first start off by explaining why you even do this, to begin with. Experts, like the number one Raleigh plumbers at Poole’s Plumbing, recommend that you drain your water heater every 6-12 months. 

This is so any buildup or sediment that may gather is cleared out. If this is not done, the buildup can cause your water heater to have to work harder to heat the water. Thus, the water heater is forced to unnecessarily use more energy. Consequently, this leads to higher energy bills, as well as shortening the life span of your unit.

Preparation and What to Expect When Upon Draining

Draining-a-Water-Heater-Pressure

Open the faucets relieves pressure before you drain the water heater.

One thing that you should be prepared for when Draining a Water Heater is to have/create a leak. This is because there is a good chance that once you open up the drain valve to empty the contents, it will not close again.

This is common when draining a water heater. In actuality, the 6-12 month recommended period is also a good time frame to replace the drain valve. These parts are usually cheap plastic. Regardless, as the valves get older it becomes less likely to completely close anyhow. If the time has come and the valve will no longer shut, then put a cap over it and  replace it completely.

A Seven-Step Plan for Draining a Water Heater

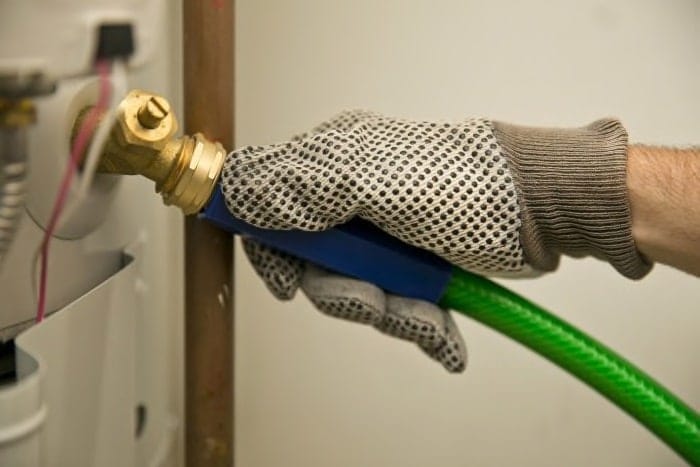
  1. Start with a Quick Flush- It would seem the first thing to do before Draining a Water Heater would be to shut off the water. However, before doing that, try flushing the unit a bit while the water pressure is still on. To do this, simply connect a garden hose to the drain for flushing. The pressure will blow out sediment that has built up in the valve. Doing this will help your tank drain faster. It is worth noting that if a large amount of sediment comes out, you can repeat this method of flushing a few times.
  2. Turn the Water Heater Off – Our next step in Draining a Water Heater starts by shutting off the gas. In the case that you have an electric water heater, shut off the power instead. Then, you will want to shut the water off entirely. You can do this by either using the valve in the cold water pipe above the water heater or the houses’ main water supply valve. Before moving along to our next step, test the water faucets to make sure the pressure is off, by simply turning them all on and checking for hot water.
  3. Open the Drain Valve- With a hose attached, next, we open up the drain valve. You will not see much drain out until you release the vacuum in the tank. To do this you must allow air into the tank. Do this by removing one end of the hot water pipe above the water heater. Once removing that end, pull the pipe to the side just a bit and the water will begin to pour fastly from the drain.
  4. Use Water to Flush the Tank- Once you have fully drained the tank, you can flush it out using a few gallons of water at a time. To do this, turn the water on for a few seconds at a time and let the water drain out. During this process, leave the hot water side pipe disconnected until flushing is complete. Reconnect the “hot side” pipe before refilling.
  5. Refill the Water Heater- The obvious next step after Draining a Water Heater is to refill it. Before you begin doing this though, you must disconnect the drain hose and shut off the drain valve. Also, don’t forget to reconnect that hot water pipe and tighten it well. At this point, you can turn the water heater’s water back on. Be sure to open up the “hot side” of a fixture in your house. Then, just leave the fixture running until all of the air is out of the lines. At this point nothing but water should be coming through. Then, you can turn back off the water.
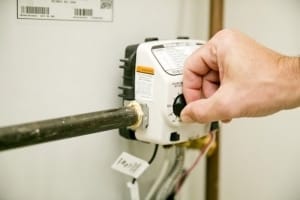
  6. Relight the Water Heater- The next step in Draining a Water Heater is to relight the pilot light. Again, if you have electric as opposed to gas, this is when its safe to turn the power back on. You should have hot water back with in an hour or so.
  7. Check the Drain Valve- The final step in our “Draining a Water Heater” tale. Check to see if your water heater drain closed correctly by looking for leaks at the spout.  If the valve does not close completely, you can put a cap on it or replace the valve entirely.
Draining-a-Water-Heater-Poole's Plumbing

After refilling the unit, you will then relight the pilot light.

The pros at Poole’s Plumbing became the most trusted name in Raleigh water heater installation through keeping ahead of the curve and staying on top of all the latest innovations. In their two decades of unmatched service to the Raleigh and Triangle area, they have earned the trust of the customer through offering advise such as this quick tutorial on Draining a Water Heater. Poole’s Plumbing work with the top names in water heaters and can installer service your unit, as needed. For more information on the Poole’s “Water Heater” guarantee, visit poolesplumbing.com.


Extending-Your-Water-Heaters-Lifespan

Extending Your Water Heaters Lifespan

When first purchasing a water heater, many factors can weigh into your selection process. Upon completing the proper research and settling on a specific unit that best fits your needs, you then want to keep up with maintenance. In an effort to help you maximize your purchase, this post will offer up some pointers to help you with Extending Your Water Heater Lifespan. In following these easy tips, you will not only optimize its efficiency but also save yourself money in the long run.

How Long Should My Water Heater Last?

This is a very valid question that basically anyone purchasing a water heater would be curious about. The actual answer to this question may vary slightly depending on your brand, type, or usage. However, generally, a water heater will work perfectly for a decade and in some cases longer. 

While ten years is a long time, why not take a few simple measures towards Extending Your Water Heaters Lifespan? With just a few easy maintenance tips and regular checking, you can make the heater last longer, while running safer and more efficiently.

Expanding-Your-Water-Heaters-Lifespan-Poole's-Plumbing

Testing the valve on your water heater is your very important first step

Tips for Extending Your Water Heaters Lifespan: Step One…the Valve Test

To begin with our water heater’s maintenance check, we will analyze the unit’s valve. This can be as easy as one action “test,” if all goes right upon our first method of checking. Regardless, even if it comes to a valve replacement, this is a simple procedure and one that is important in Extending Your Water Heaters Lifespan.

1- Test the Valve

 Our first tip in Extending Your Water Heaters Lifespan will have you taking a look at the valve. In case you aren’t sure, the valve can be found on the top or side of the unit. A function of the valve is to open automatically if the pressure has got too high in the tank. The tank could actually explode if the pressure were to get too high.

To test your valve, all you will need is an empty bucket. Then first, place the bucket under the water heater’s discharge pipe. Next, lift the lever on your pressure relief valve gently. This should release the water from the tank into your bucket. Consequently, by the water emptying out, you know that the valve is working correctly.

2- Replace the Valve (If Needed)

Just to be 100 percent clear, this step is unnecessary if the water empties from the tank as it should in the previous step. That being said, if the water does not empty, it is time to replace the valve in the best interest of Extending Your Water Heaters Lifespan.

This may sound like a big undertaking, however, replacing your valve in actuality, could not be simpler. To start the process, turn off the water, drain the tank, and unscrew the discharge pipe. Once these three steps are finished, next unscrew the old valve. Next, you will wrap the threads of the new valve you are installing with sealant tape and then screw it in. 

Extending-Your-Water-Heaters-Lifespan- Pooles

Draining your tank is essential to remove all sediment and debris.

To be sure this step is complete in this process of Extending Your Water Heaters Lifespan, check now for a leak. If the valve you replace was several years old, or never had been tested, it may leak. If that is the case, you need to replace the valve.

3-Check all of Your Work

It never hurts on any job to double-check your work and be sure that it is done correctly. To begin our check here, first close the shutoff valve. This valve is the one on the cold water supply which feeds your water heater. After this has been closed, turn on the hot water of any faucet in your home. 

This will release all pressure inside the water heater’s tank. If you have an electric unit, you will want to turn the power off at your main panel. Those with gas water heaters will simply turn the gas control dial to the off position. 

Tips for Extending Your Water Heaters Lifespan: Step Two…Drain the Tank

After you have completed checking the valves, step two in Extending Your Water Heaters Lifespan is draining the tank. More specifically, this part of our process is to flush any sediments or debris out of the bottom of the tank. The reasoning behind this is that the buildup of sediment in your tank will shorten the life of your water heater. Likewise, the sediment being present makes your unit have to work harder which equals a higher energy bill. Because there are many issues that can come about from sediment or debris in your tank, our next blog article will actually solely focus on draining your tank.

Most times when draining your tank, you will empty two or three gallons to be sure and get all sediment removed. However, always be sure to let the water flow out of the tank until you are no longer seeing any particles in the water. Basically, you are slowly opening the drain valve and letting all water run out until it’s is clear of any debris.

Tips for Extending Your Water Heaters Lifespan: Step Three…a Double Check and a Listen

Expanding-Your-Water-Heaters-Lifespan-Pooles-Plumbing

One of your last steps is to relight the pilot and restart your unit.

As you are readying to restart your water heater, there is no need to worry about a few noises you may hear. The sounds spoke of would resemble a gurgling or almost groaning type sound coming from your water heater. This is not anything to be alarmed by, it is simply the noise from air entering the system as the water drains.

That being said, you now want to be sure that your drain valve was closed tightly. If it does not, drain the tank completely, and replace that valve with a new one. Then you will want to restart your unit. Again, don’t worry about any gurgling or groaning noises coming from the heater. That sound is just air entering the system as water drains out. 

Tips for Extending Your Water Heaters Lifespan: Step Four…Time for a Restart

To continue with our final step in Extending Your Water Heaters Lifespan, we are going to restart the unit. To do so, open the shutoff valve and again let any faucet in the houses hot water run. This will purge any air from your system. Next, turn the power back on and relight your pilot. 

If the drain valve won’t close tightly when you’re done, drain your tank completely, unscrew the old valve and screw in a new one. To restart the water heater, open the shutoff valve and let the hot water run at any faucet to purge air from the system. Then turn on the power or relight the pilot. A turn of the dial to set the temperature to 120 degrees, and your check is done.

Summary and Items Needed to Extend the Lifespan

Extending-Your-Water-Heaters-Lifespan-Pooles Plumbing

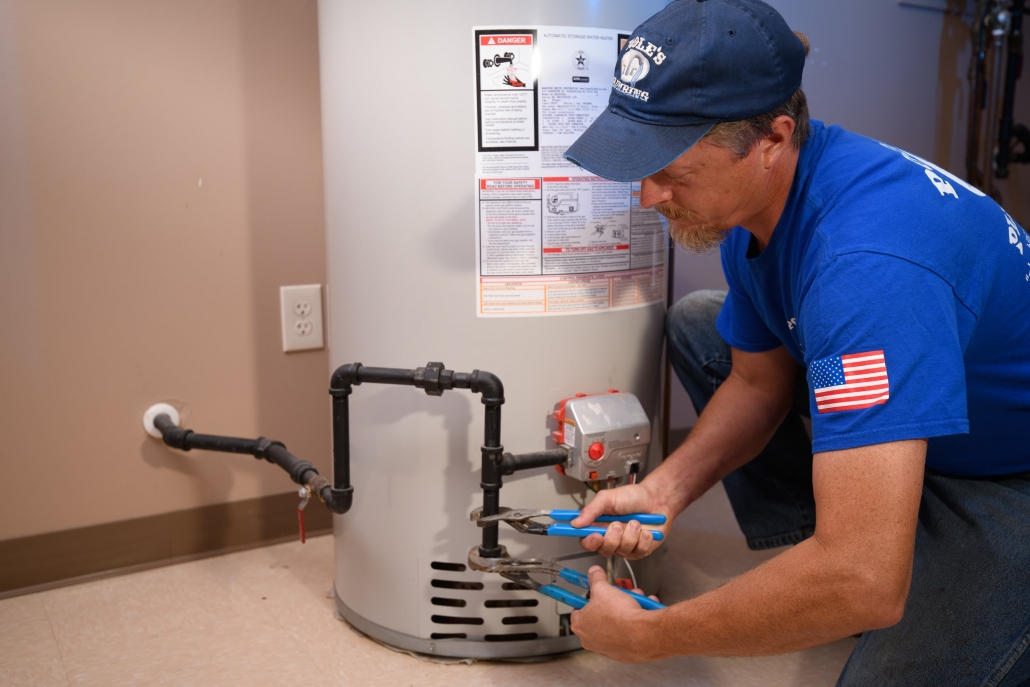
One of the very few items you need for this job is a simple pair of slip joint pliers.

So, that was easier than you thought, wasn’t it? Just to recap, we start off on the road to Extending Your Water Heaters Lifespan by checking your valve. So upon finding out the valve is functioning right (or if it isn’t replacing it), we moved on to emptying the tank. Once we are sure all sediment and debris are gone, we double-check everything we have done before restarting the water heater.

One last helpful hint in this process is to list materials you will need. However, it is a shortlist, as you only need four items. You need a bucket, plumbers tape, rags, and slip-joint pliers. Oh yeah, and if the pressure relief valve did not work, you will need to replace that. So, now we think you will agree that this is an easy way to help Extending Your Water Heaters Lifespan.

For more information on installation or maintaining water heaters, visit poolesplumbing.com.

Rinnai-Water-Heaters-Pooles-Plumbing

Demand Duo is Latest of Innovations in Rinnai Commercial Water Heaters

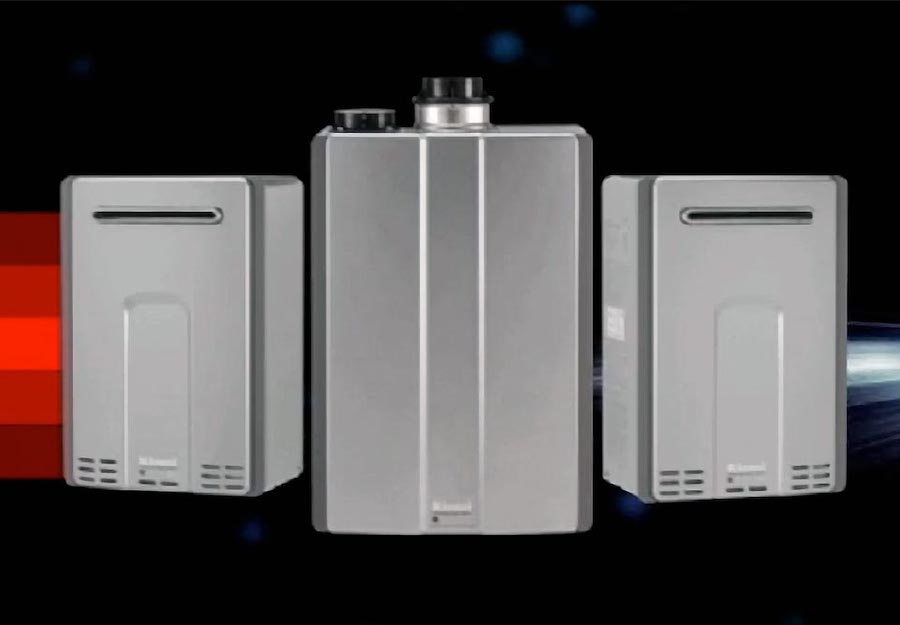
Already the number one name and manufacturer of water heaters in North America, Rinnai has announced its Demand Duo series. These Rinnai Water Heaters give customers the best benefits of both tank and tankless models.

Rinnai-Water-Heaters-Demand Duo

This is the Rinnai Demand Duo Hybrid Commercial Water Heating System

Get the Best of Both Worlds! (In Water Heaters)

At rinnai.us, the company that has continuously set the standard for both tankless and conventional water heaters explains the system. “Rinnai’s Demand Duo Hybrid Water Heating System is the smart choice when it’s time to replace a standard tank.”

 It goes on to say the following. “Featuring a part-tank, part-tankless design, the Demand Duo offers the best of both technologies in a quick and easy upgrade that delivers an endless supply of hot water.”

How Do they Combine Tank and Tankless Models in These Rinnai Water Heaters?

On the same page at rinnai.us, they also explain exactly how and what benefits come from combining the two types of water heaters. Likewise, they explain the benefits of combining them to make these Rinnai Water Heaters.

“The Rinnai Demand Duo pairs a durable, energy-efficient 119-gallon storage tank with a Rinnai C199 tankless unit.” They explain further, “This creates a direct replacement solution with connections similar to most high-efficiency tanks that provides continuous hot water. The article concludes, “This means the Demand Duo is simple to install and keeps pace with an establishment’s hot water needs.”

Greater Capacity? Longer Lifespan? How About Both!

Going further into detail, the official Rinnai website gives more detail on the incredible innovation in these water heaters. It explains how they have more capacity and last longer.

“Because the Demand Duo’s heat source is placed outside the tank, it actually offers more water heating capacity than traditional units.” It continues, “Furthermore, the removal of the heating element from inside the tank eliminates thermal stress on the tank itself, lengthening the life of the unit and its ability to consistently output hot water.”

The piece on these Rinnai Water Heaters concludes with the following. “Rinnai’s warranty on the Demand Duo is twice that of traditional commercial tanks and it is backed with a No-Risk Satisfaction Guarantee.”

Benefits of the Demand Duo Rinnai Water Heaters

  • Longer life vs. traditional tank
  • 2 times the warranty
  • 8-year heat exchanger and tank/ 6-year tank/ 5-year parts/ 2-year labor
  • Saves money with less energy cost vs. standard-efficiency water heater
  • Performs better by combining best of tank and tankless technologies
  • Ease of repair – all parts are replaceable

Other Key Features of Demand Duo Water Heaters

  • Built standard with 199,000 BTU C199 commercial tankless water heater
  • Ultra low NOx compliant
  • Commercial ENERGY STAR certified
  • Multiple venting options (PVC/CPVC, Room Air, Concentric, Common Vent)
  • System weight up to 250 lbs. lighter than competitive units

For more on the latest innovations in Rinnai Water Heaters and so much more, visit rinnai.us. Also, to see all the products and vendors associated with the Raleigh water heater experts at Poole’s, visit poolesplumbing.com.

Winter-Energy-Conservation-Pooles-Plumbing

Winter Energy Conservation Can Keep You Warm While You Save

With the first day of winter upon us this weekend, (December 21) this is our final installment of our four-part “winter plumbing tips series.” In this post, we will discuss ways that everyone can save a few bucks, even as the temperatures drop. By following these easy-to-do Winter Energy Conservation reminders from your friends at Poole’s Plumbing, you can still stay warm, but not feel “left in the cold” when your bills arrive.

Winter Energy Conservation Tactics Will Help You Save

In this article, we will focus on four major items to “keep an eye” on around the house this winter. Each area will be give details, showing you a few simple reminders that if kept on top of will lead to Winter Energy Conservation. Those three areas in your very own home to monitor are as follows.

  • Thermostat
  • Windows
  • Fire Place
  • Water Heater

The Thermostat: The Key to Winter Energy Conservation

Winter-Energy-Conservation-Thermostat

Keeping the thermostat turned down just 10 degrees while at work 8 hours each day can save you big.

The thermostat is a key area in which can make or break your attempt at Winter Energy Conservation and savings. You should attend to the thermostat regularly for a few reasons. First, and most obvious, keep the temperature on a setting that you can be comfortable with but with in reason also.

Remembering to turn the thermostat down when leaving home for an extended period of time is another way to conserve. Consequently, statistics from energy.gov show that turning the thermostat down at least ten degrees for eight hours daily would save the average person ten percent on heating bills annually. Both of these Winter Conservation Tips are as easy as remembering and taking a look at the thermostat, yet can certainly prove to save you in the long run.

The “Window” to Savings is an “Open and Shut” Case

Winter-Energy-Conservation-Windows

Keep curtains that face south in your home wide open during the winter months during hours of sunlight.

The windows in your home are another area that you can save through Winter Energy Conservation. To adjust your windows for optimal conservation, there are several easy actions you can take. To start, keep curtains that face south in your home wide open during the winter months during hours of sunlight. This can help to naturally heat your home, and once the sun goes down, you can easily close the curtains.

When speaking of conserving, with your windows an easy slogan to remember is “insulation equals Winter Energy Conservation.” Application of a clear plastic film to the inside of your windows can prevent drafts and keep the heat in. Likewise, you may use insulated drapes to help in this process as well.

Many Ways to Save Around the Fireplace

Winter-Energy-Conservation-Fireplace

Keeping the damper closed can help trap the warmth in a room longer.

The prevention of heat loss when using a fire place and maximizing the warmth coming from the fire are other easy methods of Winter Energy Conservation. To begin, always be 100 percent certain that the fireplace damper is closed unless you are actively using it. The reasoning on this is by closing the damper, warm air stays trapped in your home. On the contrary, leaving the damper open in the winter months is the equivalent violent of leaving a window open. Obviously, keeping the damper shut and the warm air makes for less of a need to turn up the temperature on the  thermostat.

It is also advised to keep the window nearest to the fireplace cracked open about one inch or less. Consequently, doing this when the fireplace is in use combined with closing doors leading to the room in which the fireplace sets will help conserve. Clearly, lower your thermostat anytime the fireplace is  in used is also advised. Two final tips “around the fireplace” are to caulk around the fireplace hearth and if not planning on usage, keep the flue sealed.

Adjusting and Servicing a Water Heater Can Help to Save

Winter-Energy-Conservation-Water-Heater

Having your water heater serviced regularly will ensure it is running at its most efficient.

Water heating costs on average accounts for about 25 percent of all energy used in the home. Thus, managing and monitoring your water heater is an essential part of Winter Energy Conservation. To start, adjust your water heater to its warm setting (120 degrees F). Also, having your water heater serviced regularly will ensure it is running at its most efficient. This can also prove to be a big savings, especially in these upcoming colder months. Likewise, regular drainage of your water heater’s tank every few months will aid in keeping costs down, too.

In the past four blog posts, we have covered many areas in which you can save this winter. Avoiding unnecessary plumbing issues and conserving energy can keep costs at a minimum and still keep you warm this winter. Poole’s Plumbing’s tips provided in the past six weeks should have you on your way to doing both. To see more on the most trusted name in Raleigh plumbing or to contact Poole’s Plumbing, visit poolesplumbing.com.

Thawing-and-Avoiding-Frozen-Pipes-Poole's Plumbing

Keep the Water Flowing All Winter by Thawing and Avoiding Frozen Pipes

The second installment of our “winter plumbing tips,” will focus on your role in dealing with or avoiding all together the issue of frozen pipes. We all know that as the fall months of October and November turn over into the frosty winter months of December and January here in North Carolina, there is still a chance of winter plumbing hazards. However, thanks to the most trusted name in Raleigh professional plumbers, Poole’s Plumbing, you can follow the easy steps below, to try and steer clear of a costly catastrophe by Thawing and Avoiding Frozen Pipes.

When Temperatures Reach Freezing, Know How to Treat Pipes in All Locations

Thawing-and-Avoiding-Frozen-Pipes-Freezing

Temperatures may drop below freezing, but there are ways to thaw and avoid frozen pipes altogether.

When it comes to needing to know the proper steps in Thawing and Avoiding Frozen Pipes is the recent colder weather we have seen in the past two weeks that has dipped at night below 40 degrees and even into the lower 30’s. Your pipes can freeze once the temperature does drop to 32 degrees Fahrenheit and those most vulnerable to the possibility of freezing would be any located in a basement area, a crawl space, an unconditioned or unfinished attic, those located on an exterior wall, and even pipes located underground.

When looking at it in those terms, pretty much any homeowner would have some type of piping in one of those location, thus, the Raleigh plumbing experts at Poole’s Plumbing can assist you with a few key pointers for Thawing and Avoiding Frozen Pipes at each location you may have them. If you happen to turn on a faucet and no water pours out, it could be due to a blockage caused by ice and in each given location, these following “do-it-yourself” tips could prove priceless in avoiding disaster.

Exposed Pipes

  • Remember to open up the faucet to relieve pressure
  • When suspecting a possible frozen pipe, always shut off the main water supply in case it has burst
  • Usage of a hair dryer, electric heating pad, or space heater can help in thawing. However, never use an open flame to try and thaw an exposed pipe.
Avoiding-and-Thawing-Frozen-Pipes

Use of a hair dryer is one possible way of thawing frozen pipes.

Pipes Behind a Wall

  • The easiest and safest method with these pipes is to turn your thermostat up and wait for them to thaw.
  • If immediately attention required carefully cut a whole in the wall near the pipe. Then utilize any of the above methods listed for thawing an exposed pipe

Avoiding Frozen Pipes in the Future

  • Before the winter months arrive, be sure that all garden hoses are disconnected from any spigots
  • Keep a faucet that may be connected to a line that would be in danger of freezing open. This will allow just a small trickle of cold water to run over night
  • Keep cabinets that it below your sinks open to allow the warm air from your home to circulate around them
  • Insulate any exposed, external wall pipes
  • Never leave your thermostat below 55 degrees in any situation. Even if going out of town or on vacation for an extended period of time.

By following these tips from the pros at Poole’s Plumbing, you can Thaw and Avoid Frozen Pipes. In doing so, you also can avoid serious water and financial damage with very little preparation or effort. In the case that a pipe has broken or cracked, you can contact the experts at Poole’s Plumbing here.

Winter-Plumbing-Tips-Poole's Plumbing

Avoid Water Back-Up and Frozen Pipes with Winter Plumbing Tips

Our next series featuring pointers to help you save will be getting you ready for the upcoming cold weather months. To begin, in this article, we will look at three major areas that could prove costly if not addressed or monitored in the winter months. Likewise, we will provide you simple Winter Plumbing Tips that will allow you to keep an eye on these areas and avoid unneeded spending and major damage.

Winter Plumbing Tips to Keep Water Warm and Wallets Closed!

Winter-Plumbing-Tips-Pilot Light

Keeping an eye out to be sure your pilot light stays lit is always a smart move.

A common area causing issues as the temperatures dip below freezing is with your hot water system. Whether your hot water heater is tankless or the more conventional model, our Winter Plumbing Tips can help you to keep water temperatures up even when outdoor temperature plummet.

The first of our Winter Plumbing Tips regarding your water heater may seem obvious to read but could be easily overlooked. This is simply to monitor and be sure that the temperature is set and stays at a high enough setting. Continuing with the “obvious but important,” in our Winter Plumbing Tips, we move along to the pilot light.

This comes into play for those who have a gas water heater and simply stated, give a random check every so often, to be sure that it remains lit. The third of our Winter Plumbing Tips “around” the water heater is again a reminder. That reminder is to have your water heater serviced regularly, and having it serviced before the temperature drop in winter is recommended.

If you have kept up with these three simple Winter Plumbing Tips, and still are not getting adequate temperature or volume of water, it’s best to call the professionals. At this point, the Raleigh water heater experts at Poole’s Plumbing can advise or if needed rectify the issue.

Thawed and Flowing Pipes Equal Dry and Happy Homeowners

 Winter-Plumbing-Tips-Pipes-Freezing

If you notice a restricted water flow, frozen pipes could be your issue.

The next of our Winter Plumbing Tips addresses the freezing of pipes in your house. This is a common issue that can prove messy and costly if not kept on top of. A combination of high water pressure from your main and the freezing winter temperatures are the cause of frozen pipes. As stated with the water heaters above, the key to avoiding an issue is all in awareness.

To be aware or monitor your pipes can be done by following the subsequent Winter Plumbing Tips. First, the most obvious way you may detect a frozen pipe is if you notice restricted water flow. Thus, once the temperature starts dropping in the upcoming weeks, keep an eye on this. In th case that you do feel a pipe may be frozen, the next of our Winter Plumbing Tips is another easy way to check.

If you do have reason to believe a pipe has become frozen, you may leave your tap open slightly. This will allow water flow and the movement helps to prevent freezing. If leaving the tap open is not an option, or if you try these Winter Plumbing Tips and freezing persists, you should first turn off the main water switch. Once the main is cut off, it then is time to call and let the Raleigh professional plumbers, Poole’s Plumbing step in and assist.

Checking the Hose Can Avoid Flooding and Woes

Winter-Plumbing-Tips-Poole's Plumbing-Raleigh

A frozen garden hose can lead to much bigger problems, including a pipe leaking or breaking.

One of the most catastrophic plumbing issues in the cold, or anytime, can be a water line leak or break. In the instance of either of these water line issues, severe damage and expense are sure to accompany. In a recurring theme, our Winter Plumbing Tips to avoid water line problems centers around awareness and monitoring the issue.

Perhaps surprisingly, a water line leak or break could stem from a frozen garden hose. How this can occur is when your hose connects to a spout when the temperatures reach freezing. If the hose still connects following the “freeze,” the ice inside the hose will gradually cause pressure to build up in your water lines. If this is not noticed and attended to, it will lead to a leak or break in your lines. Thus, when the severe cold is predicted, or even before, make sure all hoses and outdoor pipes are drained and the hoses are disconnected.

Winter Plumbing Tips : Insulate, Drain, and Keep Free to Avoid the Freeze

Winter-Plumbing-Tips-Faucet Jacket

Keeping a “faucet jacket” or some type of cover on outdoor faucets can combat the cold.

Staying outdoors with our pointers, installing insulated faucet jackets to all outdoor faucets will help to combat freezing weather. Likewise, locating your shut-off valves and utilizing them to drain water from your pipes can avoid a potential freeze. (These valves are often located underneath sinks and alongside water heaters.)

Last of our Winter Plumbing Tips, is to recognize that water drainage can be restricted by snow on the ground. If snow accumulates in the area surrounding your sump pump discharge line it can lead to back-up or freezing issues. Thus, knowing where this line is located and keeping it free of snow can save from a plumbing disaster.

When is it time to call the pros at Poole’s Plumbing?

You may follow these Winter Plumbing Tips and monitor each of these areas, yet still feel there is a problem. If this occurs, its time to call the pros. The most trusted name in Raleigh area plumbing, Poole’s Plumbing can both advise and rectify any plumbing issue. This includes during the cold winter months when freezing, cracking, and other disasters occur. To contact the experts at Poole’s, visit poolesplumbing.com.

leak-smart-sensor-poole's plumbing

The Leak Smart System: Getting to the “Heart” of the System

In this, our second post introducing the Leak Smart System, we begin looking at how the system actually works. While some are intimidated by technology, you can rest assured, this is one system that’s as easy as can be with options to find just the right system for you. In addition to explain how the Leak Smart System “detects and protects,” we start looking at individual parts of the system. In this article, we discuss the “heart” of the system, the sensors.

Leak-Smart-System-Poole's

The Leak Smart sensors can lead to bog saving and avoid a simple leak becoming a complex disaster.

Detection and Protection

At leaksmart.com, it explains, that “the Leak Smart System features sensors, a smart valve, a central hub, and a mobile app.” It continues to say the following. “These components ‘talk’ to each other to protect your home and keep you in control, wherever you are.”

The same section of the official website for the Leak Smart System further explains. “Leak Smart is a smart home solution that detects leaks and shuts off a home’s water main in 5 seconds or less.” It concludes, “protecting your home and everything in it from the devastation of water damage.”

The “Heart” of the System: The Sensors

We will tackle the different “valves” in our upcoming third post on the Leak Smart System. However, in this post we continue our introduction to the “world’s most intelligent leak and flood protection system with the “heart” of the system, the sensors.

Leak-Smart--System-LeakSmart-Sensor-Range-Extender

The Range Extender (pictured) boosts the sensors, allowing them to protect larger homes.

As also described at leaksmart.com, the sensor is a main part of the system. “The compact, waterproof Leak Smart Sensor detects leaks and monitors temperatures at high-risk areas in your home.” For those with. larger homes, the Leak Smart System has a “range extender,” to boost signals from the sensors and allow protection for a range of up to 6,000 square feet.

The site goes on to detail the following features of the sensors.

Key Features of the Leak Smart System Sensors:

  • Detects leaks and monitors temperature
  • Signals your Leak Smart Cut-in Valve or Snap Valve Controller to automatically shut off water the moment it detects a leak
  • Triggers an audible alarm, flashes blue, and sends instant notifications via email, text, and push notifications
  • Configures detect mode (to notify)
  • Configures protect mode (to notify and shut off valve)
  • Sensors are waterproof and fit into tight spaces without shifting or sliding

The Most Trusted Name in Raleigh Plumber’s Poole’s Plumbing is Now the Leak Smart “Pro’s” in the Triangle Area!

Already the name you know to trust for 24/7 emergency plumbing, water heater maintenance and installation, and more, you can now add another check in the “expert” column. Poole’s Plumbing is now offering the Leak Smart System and has all the answers you need. To contact the “Raleigh plumbing professionals,” visit poolesplumbing.com.

Fall-Indoor-Plumbing-Tips-Outdoor Faucet

Indoor Fall Plumbing Tips from Poole’s Plumbing

As the warmer weather of Summer slowly dips heading into the new season, there are many precautions you can take to avoid unneeded plumbing situations. While even the thought of “doing your own plumbing” seems preposterous, there are small measures that anyone can take at home. These measures and Indoor Fall Plumbing Tips from Poole’s Plumbing are easy to do and could help you save a bundle of money in the end. Likewise, it can also help to keep your water nice and warm with no issues as the outside temperatures drop.

Fall-Indoor-Plumbing-Tips-Poole's Plumbing

Shut Off Valves- Indoor Fall Plumbing Tips

Regardless of the season, it is smart practice to know where your homes’ main shut off valve. Likewise, if for nothing but peace of mind, be sure that you know how and are physically able to shut the valve off in case of an emergency. Whether the toilet is overflowing, a pipe has busted, or you are just doing maintenance, knowledge of the shut-off valve is essential.

  • Know where it is!– Number one, first and foremost among Indoor Fall Plumbing Tips. Also, among any at home, possible disaster avoiding plumbing situation…be aware of where the main shut off valve is in your home. In many instances, this knowledge could come in handy and even if it never does, it is good to know.
  • Open and Shut and Inside and Out!– This is one of our Indoor Fall Plumbing Tips pertaining to a time you will not be home. It is about as basic and simple as can be and anyone can do this and avoid possible issues. If you are leaving your home for an extended period of time or going on vacation, before you leave, turn the main shut off valve off. Additionally, once that is off, open all of the faucets in your home and allow them to drain.

Even though these are our Indoor Fall Plumbing Tips, one item here does involve checking outdoors. That would be, just as we suggested doing with the inside faucets, once those shut-off valves are turned off, open any outdoor faucets to allow drainage as well.

Fall-Indoor-Plumbing-Tips-Water Heater

A simple check of your water heater’s thermostat (pictured) can help avoid Fall Plumbing issues.

Water Heater Maintenance-Indoor Fall Plumbing Tips

Yes, Poole’s Plumbing is the Raleigh area water heater expert. Thus, it would seem a smart move to heed their Indoor Fall Plumbing Tips, especially when discussing ways to possibly conserve and save by mostly just keeping an eye on these units.

  • Flush it out!– Just like the valve tips, this one is almost self-explanatory. Since the temperature drops in Fall and even more into Winter, the water heater will be working harder. Thus flushing out the unit at the end of summer to remove residue and sediment will allow the unit to function at its optimum capacity. This also avoids corrosion occurring, which can actually shorten the lifespan of your water heater.
  • Check the Pressure SAFELY!– We repeat SAFELY!!! This is another of our simple Indoor Fall Plumbing Tips. Basically, you are checking the pressure relief valve of the water heater. This is done by lifting the lever and snapping it back. If the pressure is as it should be, you will see a burst of water into the drainpipe. If you do not, it is time to call Poole’s Plumbing. Remember though, this water is scalding hot so, did we mention when doing this to be SAFE?!?!
  • How’s the Weather in There?– Always be sure from time to time to check the thermostat on your water heater. This is among our Fall Indoor Plumbing Tips, however, it’s a smart practice year-round. The temperature should always be set at 120 degrees Fahrenheit for best performance.
Fall-Indoor-Plumbing-Tips-Pooles Plumbing

When leaving the house for extended periods of time set the temperature to 55 to avoid freezing pipes.

The last of our Fall Indoor Plumbing Tips pertains to when you will be leaving your home for a long period of time. Always remember to leave your heat turned on at no lower than 55 degrees Fahrenheit, so that no pipes freeze while you are away.

Indoors Today, Outdoors Tomorrow (Or Soon…)

We will follow this blog post with our suggested and easy Fall Outdoor Plumbing Tips. These simple do-at-home suggestions that anyone can accomplish can help for a worry-free period through the upcoming season as the temperature begins to drop.

If you do see some type of issue when following these easy-to-follow pointers, contact the Raleigh plumbing professionals at poolesplumbing.com.