shower-drain-unclogged-pooles-plumbing

Keep Your Shower Drain Unclogged with These Four Simple Gadgets

Of course, it is always a helpful skill to understand and know how to unclog a shower drain. We have all been to that point, where the buildup has got so bad that the water level is just rising and rising as we try to take a rinse. As noted, being able to pop that drain clean, even though at times gross, can certainly be a big help in these spots. But, what if there was some way, or in this case ways, to keep your Shower Drain Unclogged and not have the worry of popping it clear? What if with very minimal investment and by just remembering a few things before you stepped into the shower you could stop this issue from occurring altogether? Well, in this post, we will show you how this is possible with the usage of four simple gadgets that can change the way you shower.

Now, we cannot guarantee that you will never again have any type of clog or backup in your shower drain, obviously. Also, we realize that at times due to time constraints and other circumstances, we can all hurry and forget. It’s going to happen, we realize this. However, we think once you’ve read through these items below, that you’ll wholeheartedly agree it will not take much for you to keep that Shower Drain Unclogged.

Four Gadgets to Keep That Shower Drain Unclogged

In addition to you being excited about keeping that Shower Drain Unclogged, we also think you will be pleasantly surprised with how simple these items are that can help with the fix. Below are the four “magic” items to get you on the way to a faster flowing drain!

1) A Drain Screen

Well, this one should come as no big surprise. It’s even got the name of what we are fixing right in its title. But no matter how obvious a choice this would be to keep your Shower Drain Unclogged…you just have to use it. A drain screen can be picked up for purchase for next to nothing and especially for those households with members sporting long hair, they can go a long way towards helping.

This simple, screen like item just gets set over the shower drain when you go in and turn on the water. That’s all. Sure, it’s a little gross to pick up and empty into the trash after each usage. But it is certainly far less appalling than the buildup of months and months of the same residue being left behind to the point that it clogs…right?

2) Hair Brush

Another real innovative and new product we have here…am I right? Hey, if it helps and it works, it doesn’t necessarily always need to be some pricey, new innovative gadget. We are looking here to keep that Shower Drain Unclogged, and most households do have a hair brush, so let’s go with it!

Even if you don’t have a hair brush, like the drain screen above, you can get one for a minimal investment. But, getting to how the brush can help keep the Shower Drain Unclogged, it’s even simpler than using the screen if you can believe that. You see, and many may not think of this, but when you get in the shower and shampoo, then rinse, the condition then rinse, the hair that we find causing these type clogs basically is from what you lose in doing that.

Thus, before you get in the shower, take your brush and give a thorough brushing back of your hair. Yes, you will lose some in the brush and need to put that in the trash. However, instead of the hair that normally would go into the drain starting to accumulate, it is in the trash instead.

3) Shower Caddy

A lot of people already have one of these, but if you don’t, once again, a shower caddy can be easily located for purchase and is very inexpensive. Now, we don’t know for sure what you place on this “in-shower shelf-like item.” But, contrary to what our first two gadget descriptions have you. thinking, hair is not the only thing making you not keep that Shower Drain Unclogged.

In actuality, equally as much of an issue with clogged shower drains as hair, is soap. Solid pieces, or when the bar has dropped and gets soaked and some slides into the drain both can cause a problem. So, in addition to your shampoo, razors, shaving items, and whatever else goes on your caddy, be sure to have a spot for the soap. This way, you can help to be certain this is not going to cause anymore clogs.

4) Outdoor Pet Shower/Rinse Off

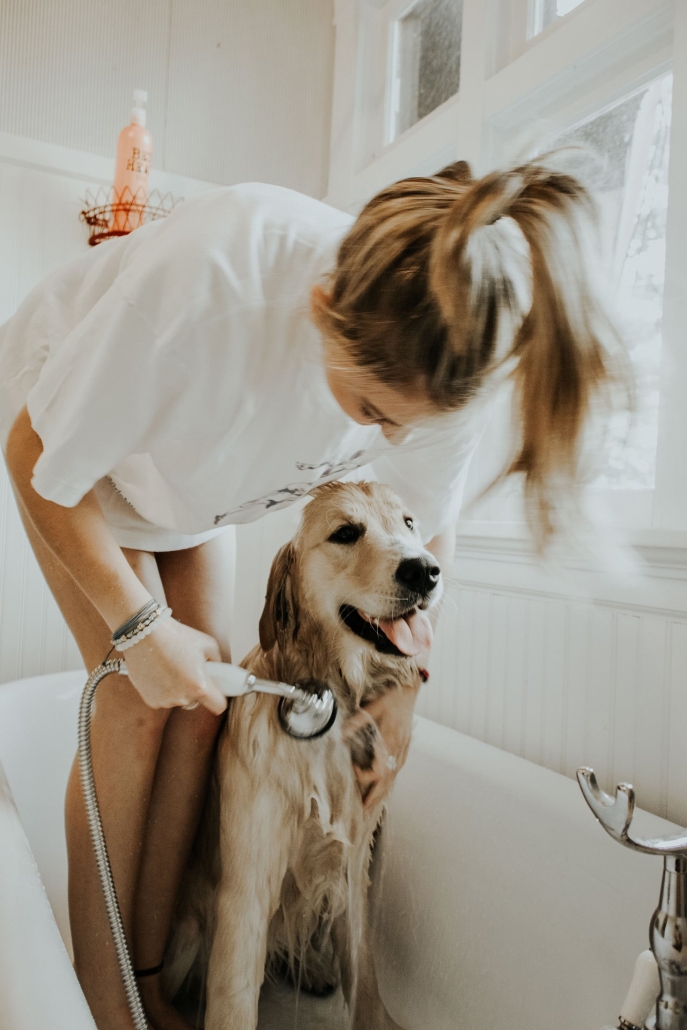
Ok, now we are not saying you need to get into major construction here. This is not a call to build  some type of luxurious “pet spa.” What we are saying is that you give your dog or other pets a bath. This is essential and we would never say to not clean your animal. So, if you do have extra money to somewhere outdoors install a small “pet shower,” that is great, and can help immensely in keeping your Shower Drain Unclogged.

For those without the extra funds for a small shower install, we understand. So, when warmer months are upon us, using a kiddie swimming pool that is near, a hose can work in the same way. This way, there is no chance that the fur and hair from the animal can get inside the shower drain. Whether you have a small shower installed or use the kiddie pool method, it’s tougher to bathe the animals in an outdoor setting in the cold of winter, regardless.

So, when the temperatures drop, and bathing your pet indoors is a must, just lay a washcloth over your drain before pulling the plug. Yes, the water will take longer to drain, but this traps all the hair and fur off the animal. It also allows it to wind up in the trash instead of the drain.

Keeping Your Shower Drain Unclogged is All Up to You

With usage of these very simple items and tips, and just a little thought prior to jumping in the shower, ou can significantly raise the chances of keeping the Shower Drain Unclogged. Once you get into the swing of things and used to checking on each of these four items, they will become equally as much a part of your shower as the shampoo and hot water.

For any information or to contact, Raleigh’s most trusted plumber for over two decades, visit poolesplumbing.com.


Most-Common-Plumbing-Issues-pooles-plumbing

Most Common Plumbing Issues: Four More to Look Out For

In our last post, we began a look at eight of the Most Common Plumbing Issues facing homeowners on an everyday basis. We gave a run-through of four of the eight and in this post will look at the remaining issues. Likewise, we will give you some help in regard to what to look for to find the source of these plumbing problems before they become plumbing disasters.

I the previous blog post, we looked at pipes, drains, toilets, and faucets. These are all very common units that we see and notice regularly. The “final four” of our Moist Common Plumbing Issues, though, are not necessarily in locations that we are looking at as often. Thus, your trusted friends at Poole’s Plumbing will run you through these items in great detail. Knowing exactly where to find them and what to look for will not only be helpful, but more than likely will also prove to save you big in the long run.

The Most Common Plumbing Issues: Hoses, Pumps, Pressure, and Heaters

The remaining four of our Most Common Plumbing Issues as we note above, are not all in plain everyday sight. But, whether in the basement, outside the house or wherever each of these is located, we remind you the same as we did in the last post. That is to contact the pros at Poole’s Plumbing if you recognize any of them to avoid a bigger than necessary situation.

1) Leaky Hose Bibb

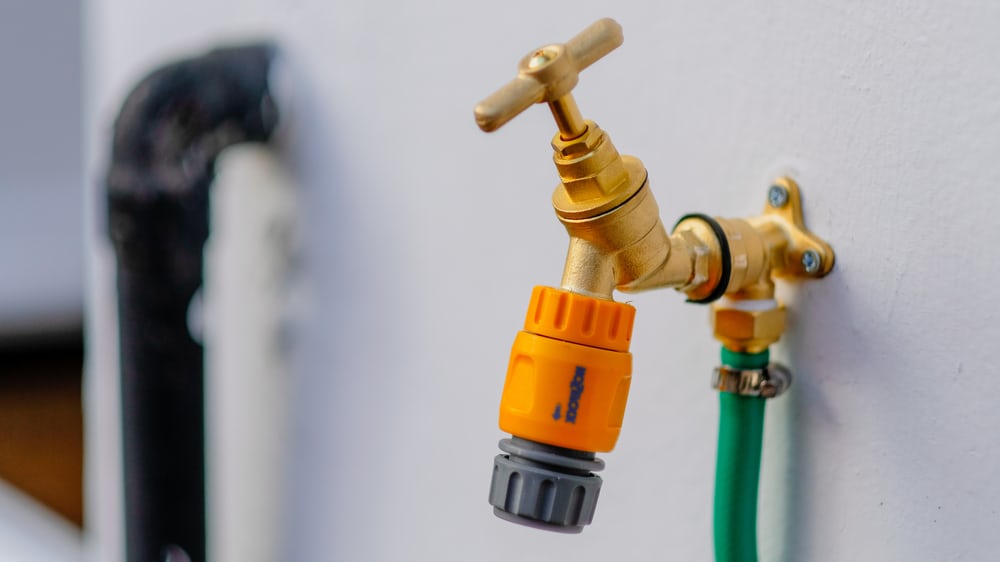
The hose bibb can be found outside the home, as its use is to bring water in from outside to distribute throughout the home. Once again, not a place you necessarily see every day, but given the function, I think you can see how a leak here could be disastrous if unattended.

This is one of the Most Common Plumbing Issues that people deal with in the spring and summer months. The leakage occurs after a long, cold winter, as many hose bibbs are not insulated for freezing temperatures. Our advice, in this case, is to invest in some frost-proof hose bibbs. While not always a guarantee, the more insulated hoses can give you peace of mind that this issue is resolved.

2) Sump Pump Failure

The sump pump, for those not in the know, is located in the basement of your home. Its main function is to pump seepage water from the basement to avoid a flood. That being said, you can see given its function why this is a very important fix among our Most Common Plumbing Issues.

When there is a sump pump failure, there can be several places to look for the problem. Usually, the source of the failure can be found among the issues listed below.

  • An overwhelming amount of water following a heavy rain
  • Improper installation
  • Clogged discharge pipes
  • A switch or switches that are stuck
  • Aging, if you’re pump is 10 years old or older this may be the source of the failure

3) Low Water Pressure

Now, this is a spot on our Most Common Plumbing Issues list that you definitely know if you’ve been a victim of. No one likes low water pressure. It is always an inconvenience, but it also can lead to serious damage as well if not addressed.

Many times when you have low water pressure the issue is, unfortunately, a result of a larger plumbing problem. Bullet pointed below is a list of four of the most probable causes if you have low water pressure.

  • A cracked or blocked sewer line or lines
  • Clogged drains or sewer
  • Pipe corrosion
  • Hidden water leaks in your home.

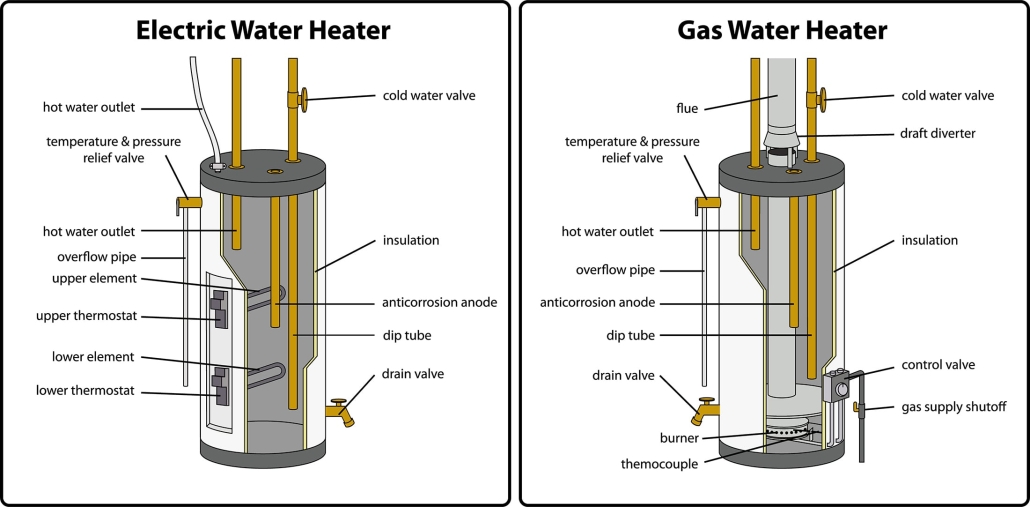
4) Water Heater Problems

Luckily for you, the fourth and final entry of our Most Common Plumbing Issues is water heater problems. No, you aren’t lucky to have the problems. You are however lucky that Poole’s Plumbing is the number one water heater experts in the Raleigh and surrounding area.

Now, we all know hot water is a necessity for so many reasons in our homes. Thus, when you suddenly are faced with water heater problems it can truly become a crisis. There are several sources though, that we can recommend you check to find where the problem is with your heating unit. These are listed below.

  • Corrosion or sediment build up in systems
  • Loose or broken electrical connections
  • Improper initial installation of your water heater
  • Heating element failures
  • The wrong size or type of system to support a home’s needs

The Most Common Plumbing Issues Can Prove a Real Mess

Between our first blog entry on the Most Common Plumbing Issues, and these four areas discussed today, we have tried to explain where you can look to find the source of each problem. However, in most cases, these issues are not advisable to try and fix on your own.

That being said, anytime you are faced with one of the Most Common Plumbing Issues we have walked through or any others, Poole’s Plumbing is here to help. The number one name in Raleigh plumbers for over two decades, Poole’s is happy to advise and follow up and fix any and all of your plumbing problems.

To see the previous blog post with the first four Most Common Plumbing Issues, visit the link here. Likewise to contact Poole’s Plumbing for any issues, visit poolesplumbing.com.


no-cold-water-pooles-plumbing

Why is No Cold Water Coming from the Shower?

This post is somewhat of a reversal from a plumbing question that seems to be asked more often but is very similar. Often times you see a plumbing blog discuss to do if there is no hot water coming into the shower. Not so much, however, do you see articles the other. way around. This is in spite of the fact that both can cause serious inconvenience. On the contrary, in this piece, we will examine what to do in the case there is No Cold Water coming out of your shower.

Now, of course it is terrible when you would go to take a shower and the water is ice cold. But, roles reversed, it is equally as bad to have No Cold Water at all, and scalding, hot water only. The cause of this is usually due to a valve located in a cartridge, that is actually fairly easily fixed. Below, we will look at all possible causes, and discuss how to fix the issue at home.

There is No Cold Water in the Shower? Why?

Upon discovering that you have No Cold Water coming from the shower, it is time for a bit of troubleshooting. To do this, simply check your faucets throughout the house. If these also have No Cold Water we can begin to identify the problem. First, check the valves wherever your main water supply is. There is the possibility that a valve was somehow shut off by accident. If this is the case, you are in luck. Problem solved. However, if there is No Cold Water and there are no valves shut off, give us a call and the pros from Poole’s Plumbing will have to take a look

Now, if the other faucets all do have cold water, a pressure-balancing valve is probably your issue.

What is the Pressure-Balancing Valve and Why Would it Fail?

The pressure-balancing valves in your shower regulate both the water pressure and the ratio of cold and hot water from the showerhead. These cartridges over time can see corrosion and mineral buildup, which will eventually ruin the cartridge.

To replace a failing pressure-balancing valve is not a very hard task. Actually, removing the old cartridge is the most difficult part of getting your No Cold Water issue solved.

Replace that Cartridge and Get cold water back!

Step one of the replacement process is to purchase a new cartridge. The easiest method here is to remove the old one and bring it with you to a hardware store. To remove, it is easiest to use a cartridge puller. Speaking of tools, bullet-pointed below is a list of six tools that will make this a much easier task. Likewise, these tools will be the beginning of the end of having No Cold Water.

Tools Needed for Shower Cartridge Removal

  • Cartridge Puller or tap with matching 4-6 in. bolt
  • Flathead and Phillips screwdriver
  • Allen wrenches/Hex keys
  • Needle-nose pliers
  • Silicone or Plumber’s Grease
  • Locking pliers

10 Steps to Saying Goodbye to No Cold Water

In actuality, this is 10 steps to replace your broken shower cartridge. But that being said, once fixed you will be back in business on the cold and hot side of the faucet.

Follow these ten steps in order and you’re well on the way to cold water in the shower once again.

1) Turn off the water supply to the shower.

2) Place a towel on top of the drain so no screws are lost or fall in

3) Remove the faucet handle and any metal covers or trim plates

4) Remember to take a picture of the inside of the faucet body. This is to have for reference when we go to reassembly.

5) Back inside the faucet body, remove other parts

6) Any dirt or mineral deposits are to be dissolved with a commercial cleaner

7) Using the needle-nose pliers, pull the retainer clip out of the faucet body.

8) Remove the cartridge using the “puller” that you purchased.

9) Use plumber’s grease or silicone, and paying close attention to the orientation, reinstall your new cartridge.

10) Likewise, reinstall the valve stem, retainer clip, and faucet parts. (Remember the photos you took! Aren’t you glad we had you take them!)

Oh, wait, one last thing once all is reassembled. Turn on the water supply and enjoy balancing out that hot water and say goodbye to having No Cold Water.

No Cold Water? No More!!!

Ok, we realize this is a pretty ambitious “do-it-yourself” project. So, if these steps and this type of work is some you are not confident in doing yourself, it’s understandable. Feel free to contact us at poolesplumbing.com and the most trusted name in Raleigh plumbing will be happy to be at your service!


what-is-a-sump-pump-pooles-plumbing

What is a Sump Pump? How Do I Know if I Need One?

Well, it sounds important…right? It rhymes, that’s undeniable. But seriously, many people I am sure are not fully aware of the answer to the question asked in the title of this post. What is a Sump Pump? Once you find out, equally as important of a second question is the following. How do I know if I need one?

To ask the question, What is a Sump Pump should not make anyone feel less intelligent or knowing than anyone else. Maybe you heard a neighbor discussing how it saved them from a flood? That alone should stoke one’s curiosity enough to ask exactly what this pump is and whether or not you need one.

What is a Sump Pump?

Ok, whether you know or not, we are going to tell you. A sump pump is a submersible device that gets installed in a pit dug at the lowest area in your home. Thus, the sump pump is usually found in a crawl space or the basement. The main function of a sump pump is to prevent your basement from a flood.

How Exactly Does it Work? 

Ok, now that we all know for sure, What is a Sump Pump, let’s move on to its actual function. Most of the time in actuality, the sump pump does nothing. Well, it is on standby actually, as if there are no heavy rains or deep water, then there is no function for the sump pump to perform.

However, when heavy precipitation does occur, the soil around one’s home becomes soaked and saturated. The groundwater in these type situations funnels then toward the pit which was dug for your pump. Once this starts filling with water, the sump pumps float switch is activated, and it turns on.

Once working, the pump drains to either a dry well, a detention pond, or a storm drain. In doing this it works to prevent the groundwater from rising to the level of the floor in your basement. So, basically, the sump pump is a little extra bit of flood insurance.

What is a Sump Pump Benefits?

Now we for sure know what a sump pump is. We also are versed on what its function is and how it works. Obviously, as noted, it can help keep your basement from flooding. But when laid out in a list, there are actually quite a few benefits. They are listed below.

  • Stop your basement from flooding
  • Safeguard any appliances in the basement from corrosion (washer, dryer, spare freezer, etc.)
  • Protect any paint and other wall coverings
  • Reduce the growth of fungus, mold, and mildew
  • Improve air quality
  • Protect and keep the foundation of your home intact
  • Keep your basement dry and comfortable year-round
  • Meet a requirement of many homeowner’s insurance coverage in case of a basement flood
  • Help protect against termites and other insects
  • You can worry less about bad weather

So…Do I Need One?

Ok, not to be repetitive here, but let’s re-trace our steps. We have a definition. It is clear what the purpose and function of a sump pump are. We even know how it works and what the many possible benefits are. Boy, we sure have come a long way since asking What is a Sump Pump?

However, while all of these things are pretty clear and straightforward, some locations need this type of device more than others. That being said, we would recommend having a sump pump if any of the things on the list below are true.

  • You live somewhere with heavy snow or rainfall
  • Your home sets on a flood-prone or poorly draining plot of land
  • You have had flooding and/or water issues in the past.
  • You have a finished basement

We hope in this post you have become more familiar with the sump pump. Hey, maybe you read through and it is not something that you need at all. But, if you learned from all we discussed in this article that you do need this installed, you’re in luck. Just give a call to the most trusted name in Raleigh plumbers for the past two decades, Poole’s Plumbing. To contact us, visit poolesplumbing.com.


unclog-a-bathroom-sink-pooles-plumbing

Identifying the Backup and How to Unclog a Bathroom Sink

What is the best way to Unclog a Bathroom Sink? This is an often-asked question and the answer is not as simple as you might think.

To begin with and before we get to how we Unclog a Bathroom Sink, we must identify what exactly is clogging it. Depending on the source of this blockage, there are different ways to go about freeing the backup. We do need to know this before we can begin unclogging, though. So, let’s begin by looking at the four items most often found responsible for a clog.

What is Causing the Clog?

As we note above, there are four common answers to what is clogging your bathroom drain, usually. Here we will look at each of these and discuss the best way to Unclog a Bathroom Sink in each of these instances.

  • Clumps of Hair- We have all seen this before. Hair will enter the sink drain and get caught or clumped inside fairly regularly. To Unclog a Bathroom Sink that hair is the cause, find an item like tweezers or a “zip-it” tool to pull from the drain. If that does not work, you must look at disassembling the whole drain, pulling the hair and reassembling after.
  • Damaged Pipes- The rusting or corroding of your pipes can be the cause of a slow drain or an eventual clog. If this is the problem, you should 1) replace the pipes as soon as possible. Likewise, 2) you can try snaking them to clear through and make things run faster.
  • Soap Scum- Much like the clumped hair, soap scum is a “clog maker” that most people are familiar with. This is a very common “clogger” of drains. To Unclog a Bathroom Sink which is due to soap scum build up try first to pour boiling water through the drain. baking soda and vinegar will also usually work to Unclog a Bathroom Sink. If neither of these work, use a plunger and warm water.
  • Obstruction in P-Trap- The P-Trap is the curved pipe that connects your bathroom sink to the pipe that goes into your wall. Small items can easily fall into the drain and get stuck in this pipe, causing clogging. To Unclog a Bathroom Sink in this case, you just clean out the P-Trap.

What if I tried all these and could not Unclog a Bathroom Sink?

So, you have tried each of the suggested methods to Unclog a Bathroom Sink. Now, if none of them worked, it’s time to contact a pro. Luckily for you, Poole’s Plumbing is the most trusted name in all areas of plumbing across the Raleigh area. Unclogging is no problem to our great staff, and we’d be happy to help you. To contact us at Poole’s for this or any plumbing needs, visit poolesplumbing.com.


winter-plumbing-preparation-pooles-plumbing

Winter Plumbing Preparation: Be Ready to Avoid Getting Stuck in the Cold

As we have noticed here locally over the past two months, as the seasons change, we can at times see some unpredictable weather. This could be said basically in the weeks and months surrounding the change of each season. In regard to how your home plumbing system is affected or any changes or preparation needed to be ready for a new season, the transition from Fall to Winter sees the most drastic measures needing to be taken. Now, that is not to make you worry, as the actual preparation is not difficult. However, the problems start when you are not on top of your Winter Plumbing Preparation. As you will see below, just taking some preventative measures can be the difference in some big savings.

As we just noted, to be on top of your Winter Plumbing Preparation does not take a plumber, per see. There are not many mechanical tasks to prepare and have you worry-free when it comes to any surprise plumbing issues this winter. But there are quite a few areas that you want to monitor. Whether indoors or outdoors, faucets or pipes, in this piece, we will walk through simple ways that you can with minimal effort have your home “winterized.”

Winter Plumbing Preparation: What are We Preparing For?

Well, the above subheading does raise a valid inquiry. So, for those of you maybe not familiar with Winter Plumbing Preparation, we will explain. Basically, the winter months see a big drop in temperature. At points during the winter, temperatures will go below freezing. This can be a plumbing issue, as your pipes could freeze. Likewise, with snow, ice, or sludge on the ground or in the air, outdoor plumbing items could get clogged or damaged as well.

Below, we will start our helpful hints for Winter Plumbing Preparation. In this series of articles, we will cover burst pipes, indoor plumbing, and outdoor faucets and plumbing as well. Hopefully, by the time you’ve finished reading these posts, you will be able to keep an eye on a few areas that even with temperatures dropping you can feel warm inside, knowing your plumbing system is ready for the cold.

What Causes Pipes to Burst in Winter?

Well, the cold. That’s the simple answer. But to go in detail, when temperatures drop below freezing, water freezes. When water freezes, it expands. When this water is contained inside pipes, this puts an incredible amount of pressure on your pipes. Whether the pipes are plastic or metal, if forced to expand too far, these pipes will crack.

Most at risk and most in need of your Winter Plumbing Preparation are the pipes that run along a home’s exterior walls. This is because these pipes tend to have little insulation. Likewise, pipes that are in an unheated area like a basement, attic, or kitchen cupboard are at greater risk as well. The pipes that are most “at-risk” for freezing, cracking or bursting are any located outdoors. Hose bibbs, pool supply lines, sprinkler system lines all are ones to be given attention during your Winter Plumbing Preparation.

Winter Plumbing Preparation for Indoor Plumbing

To start, we will take a look at some helpful hints for Winter Plumbing Preparation inside the house. Below are six reminders that could wind up saving you not only from a mess but also in repair costs.

  • Add additional insulation to basements, attics, and crawl spaces. This helps to raise and keep temperatures higher in these usually less insulated areas.
  • If going out of town for an extended period of time or not going to be at your house, set the thermostat no lower than 55 degrees
  • Repair any broken windows or door seals to help keep temperatures regulated inside the house
  • Keep your garage door closed
  • Open kitchen and bathroom faucets to let them drip during extremely cold temperatures. This helps to keep the water moving and doesn’t allow for it to freeze.
  • Remove all outdoor hoses from the spigot. Hoses can often time hold water inside them even after the water has been shut off. If the water in the hose is left to freeze it will expand and could cause damage to the spigot.

Outdoor Preparation is Next!

In our upcoming second post on Winter Plumbing Preparation, we will take things outdoors. Much like we did in this piece with indoor preparation, we will give you some helpful pointers and remind you of all the areas outdoors that you will want to be sure your Winter Plumbing Preparation is in order.

For information or to contact the most trusted name in Raleigh plumbing, Poole’s Plumbing, go to poolesplumbing.com.


fall-plumbing-tips

5 Fall Plumbing Tips to Avoid

Many people who live in North Carolina would put enjoying four distinct and separate seasons as one of the perks of living in the Tar Heel State. No question, the changing of temperatures and weather experienced is certainly unique to each season in NC. However, with the difference in precipitation, and the switch from warm to cold temperatures, some household preparations must be made as the seasons change. By following the five Fall Plumbing Tips provided below, you can do your part to see that plumbing issues will not be a concern.

Looking at our Fall Plumbing Tips, these will help prepare both inside and outside of your home. We all know, that with the seasons changing can come unpredictable conditions. Thus, by doing each of these simple tasks and staying alert to give them a check periodically, you could be saving yourself both financially, and from an unnecessary mess!

Five Fall Plumbing Tips to Get You Ready for Season’s Change

Drain, Unhook, and Put Away the Hoses!

Of course, with dropping temperatures comes less and less lawn and yard maintenance. Thus, the first of our Fall Plumbing Tips will be putting away an item used almost exclusively in Spring and Summer, the garden hose.

Obviously, when the summer winds down, you will want to keep your hose for another year, so proper removal and storage is recommended. Likewise, you will want to make sure the hose is fully drained and then placed somewhere that it will not freeze as the Fall and Winter’s colder temperatures arrive.

If detached and allowed to freeze, the hose could expand and break. Even worse though in the case you hadn’t removed it from the outside faucet, the freezing process can lead to a much bigger problem. So, let’s remove, drain, and store properly before we move on with Fall Plumbing Tips.

Turning Things Off: Possibly the Most Important (and Easy) Entry of the Fall Plumbing Tips

A common thread you may start to notice here is how important it is to avoid anything from freezing at all costs. Nothing good in the way of plumbing is going to come from a water source, supply, pipe, etc. becoming frozen.

Your inside water supply and hose bibb are both main areas to be certain are shut off properly. In the case of the hose bibb, the first step is our above entry on the Fall Plumbing Tips. That being, remove the hoses. Next, check thoroughly all outdoor faucets for possible leaks. 

When sure there is no leakage, this is when we move to the inside water supply. Shut this down, and then return to the outside faucet, turn it on and drain any remaining water. Lastly, for extra protection, consider a hose bib cover or even a “frost-proof” hose bibb to be sure and eliminate any chances of a “freeze up.”

Staying on top of Your Sewer System

Whether most realize it or not, all three months, fall, winter, and spring can each have ill effects on a sewer system. A variety of issues can occur that are directly related to the colder temperatures and then eventually thawing out after the cold.

If you have ever experienced any sewer system issues, this is potentially a bi and costly enough issue that you may want to consult one of our specialists at Poole’s Plumbing actually. A discussion or visit from us to look at preventive maintenance or even an inspection could eventually save you big time in the long run.

Properly Maintaining Your Water Heater 

This is a part of our Fall Plumbing Tips, obviously, however, it also is a good idea to follow up on this year-round. Simple at-home maintenance and remembering to check for proper functionality can help you get the most from your water heater.

Water heaters normally tend to have anywhere from an 8-12-year lifespan. However, if you keep up on regularly flushing the unit this will both increase its efficiency and save you some money on bills as well heading into the Fall.

Last, But Certainly Not Least for Fall Plumbing Tips: Inspect Your Sump Pump

Usually found in your basement, the sump pump basically functions as a way to send water away from your home and to a place where it is no longer a problem. Thus, you can see how this is such an important entry among our Fall Plumbing Tips. 

Given the amount of precipitation we expect to see with the changing of the season each year, simply keeping watch that the sump pump is working correctly should seem a no brainer. If for some reason while monitoring, you notice it is not working, a call to your friends at Poole’s Plumbing can help you get the unit back working. Consequently, all you really need to do here is watch and in the case of a problem call immediately. Either way, with a little effort, this is a disaster you can avoid and a costly one at that.

The most trusted name in Raleigh are plumbers, Poole’s Plumbing understands that even if you follow our Five Fall Plumbing Tips, you still may have an issue. Likewise, you may simply want the peace of mind that a pro took a look at everything and you have no worry of becoming soaked or broke due to your plumbing this Fall. To contact us, visit poolesplumbing.com


Traditional-Water-Heater-Pooles Plumbing

Should you go Tankless? Or Opt for the Traditional Water Heaters?

Should you go Tankless? Or opt for the Traditional Water Heaters? The Raleigh water heater specialists at Poole’s Plumbing specialize in installation and servicing of your water heater….tank or no tank! With a wide selection of both models, can help educate you on that choice.

Continuing in our series on water heaters, we will walk through benefits, drawbacks, and other considerations when making the decision on a Traditional Water Heaters or Tankless. We will look at and list these out for each style water heater, in easy to read bullet points below:

Traditional-Water-Heaters-Pooles-Plumbing

Regardless of which works best for you, making the proper choice in water heaters can be one that helps you save money.

Pros and Cons of Traditional Water Heaters (Tank)

Pros:

  • Lower initial cost – A traditional water heater installation can be half as much as a tankless water heater.
  • Easy and inexpensive to replace – Fewer installation complications means less possibility of a problem.

Cons:

  • Higher utility bill – Traditional units heat and reheat water at a pre-set temperature. Your water needs and water do not factor into this. This will increase your utility bill, especially during the winter months.
  • Bigger and harder to place – They occupy more room and can’t be placed outside.
  • Can run out of hot water – Have you ever been the last in line to get the shower after the rest of the family? If in a hurry…it’s gonna be a cold one. This problem can be avoided by purchasing a larger tank.
  • Shorter life – On average, traditional units last between 10-15 years. This means there’s more turnover and therefore you have to buy a traditional heater about twice as often as a tankless one.
Traditional-Water-Heaters-Hot-Water-Pooles Plumbing

Up to two to three gallons of hot water is accessible “on demand” with a tankless unit.

Pros and cons of Tankless Water Heaters

Pros:

  • Saves money in the long run – According to energy.gov, “For homes that use 41 gallons or less of hot water daily, tankless water heaters can be 24-34 percent more energy efficient than conventional storage tank water heaters.”
  • Doesn’t take up much space – They are small and can be more easily installed in more places. In some cases, tankless units can even be installed outside on a wall.
  • Longer Life – On average, a tankless model will last 20-plus years. In some cases, this is almost double the life of a traditional unit.
  • Hot Water on Demand – Provides two to three gallons of hot water per minute on demand.

Cons:

  • Higher Cost of Installation – Both the units and installation cost considerably more than the traditional units for the initial purchase and install.
  • “Retrofitting” – Replacing a traditional water heater with a tankless system is known as “retrofitting.” This is a bit more complicated than simply replacing a traditional with a traditional unit, or a tankless with a new tankless model. Thus, this will also factor into the installation cost increasing even further.
Tankless-Water-Heater-Pooles-Raleigh-Plumber

The tankless units are more compact and take up lesss space.

Other Considerations:

  • Water heating accounts for about 20 percent of your home energy budget.
  • A whole-house electric model costs $500-$700.
  • A whole-house gas model costs $1,000-$2,000.
  • Electric models are generally cheaper to install than gas.
  • Natural gas is currently less expensive but expected to surpass electricity in price in the coming years.
  • A standard bathtub holds about 35 gallons, soaking tubs hold between 45-80 gallons.

The Decision is Yours

The decision to “go tankless,” or to “go traditional,” when it comes to your selection in a water heater is all yours, but hopefully with some of the pros and cons here provided by us, your trusted Raleigh professional plumbers at Poole’s Plumbing, your decision can be one a bit more educated and as always, we would be happy to assist not only in the installation but also in giving any final advice on last minute questions you may have when it comes replacement time.

For more information on and from the most trusted name in Raleigh water heater installation and repair, Poole’s Plumbing, visit. poolesplumbing.com.

Stop-a-Running-Toilet

Flushing Away the Issue: How to Stop a Running Toilet

In this our next series of helpful “at-home” plumbing tips, we will address how to deal with various toilet issues. In many cases, simple monitoring and staying on top of toilet maintenance can help to avoid any major problems. For our first article in the series, we will go through a series of steps to help you Stop a Running Toilet. 

When addressing how to Stop a Running Toilet, there are several points and parts of the toilet that you will want to look at. In doing this troubleshooting, you can find the source of this annoyance and get on fixing it before it turns costly. Luckily, not only is finding the source of the problem somewhat easy but in most cases, the fix is a simple one too.

Stop-a-Running-Toilet-Poole's

The problem with your running toilet may just be that the flapper chain is too short or too long.

What Exactly Does it Mean When My “Toilet is Running?”

Before troubleshooting, it makes sense that you are sure you know what is going on in the case your “toilet is running.” While you may know this, it certainly does not hurt to review. 

To start, after you flush your toilet, water fills into the tank. As this happens, the water lifts a float that will shut the water off after it reaches the proper level. Likewise, there is a lever that will open the toilet’s flapper, causing the actual flush. The flapper then falls back into place when the water level goes down. This process can be interrupted, causing the toilet to keep running for several different reasons that leave the bowl unfilled following a flush and in some cases still running.

As noted above, typically one of four factors are going to play into how you can Stop a Running Toilet. With a thorough check for each, the issue can be narrowed down to reveal the problem. 

Common Possible Problem Areas to Address to Stop a Running Toilet

  • Flapper Seal or Flush Valve
  • Flapper Chain
  • Leaky Fill Valve
  • Old or Corroded Toilet Handle

Start with the Seal and Valve to Stop a Running Toilet

Stop-a-Running-Toilet-Poole's Plumbing

Troubleshooting your toilet’s fill valve and its parts may result in you being able to Stop a Running Toilet.

The first area to check in the instance of a running toilet is the flapper seal or flush valve. For older model toilets, there is a chain and flapper seal. On the contrary, for newer units, there is a flush valve. These three parts in one as compared to what is seen with the older models. These three parts are the flapper seal, overflow valve, and the actual flushing mechanism. 

Whether you have a brand new toilet or the same one for years, the seal eventually can become old and warped. When a seal is compromised, the water flow from the tank to the bowl becomes prohibited. The universally known way to check if you need to replace a flapper seal or flush valve is one involving food coloring. 

Yes, food coloring…Anyhow, you simply put a few drops of your food coloring into the water in your toilet’s tank. Then, after waiting a few minutes, simply check the toilet bowl. If upon checking, you see the water has become colored in the bowl without flushing, this means you will need to replace the flapper seal or flush valve to Stop a Running Toilet.

The “Too Long…or Too Short” of it. Checking the Flapper Chain

The next point that we want to check, to Stop a Running Toilet is the flapper chain. Like our check on the seal and valve, there are a few things to look for here. First, when your toilet was initially installed, the chain may have simply been too long or short. This would cause the flapper seal in some way to not close properly.

If your chain is too short, the seal will not shut and will allow water to run continuously. Consequently, if the chain is too long, it could also get in the way of the seal closing and prevent it from forming a watertight seal. Again to restate, this can be an easy fix for you. All you need to do to Stop a Running Toilet, in this case, is adjust the chain to proper functioning length.

Give Your Handle a Lift to Check for a Leak

The third possibility that may need to be addressed to Stop a Running Toilet is a leak in your fill valve. As with our earlier discussed issues, this could cause your toilet to run continuously.

To see if this is the issue, first, flush your toilet. Once you’ve flushed, lift the toilet’s flush arm while the tank is still refilling. This will stop the water flow if all is working correctly. If the water does keep flowing and starts pouring into the overflow valve, then this is your problem. To Stop a Running Toilet in this case, you will need to replace the fill valve, as this shows it leaks.

Whether You Loosen or Replace, a Sticky Handle Needs Fixing

Stop-a-Running-Toilet-Handle

If a toilet handle is tight, loosening may work, but a corroded handle must be replaced.

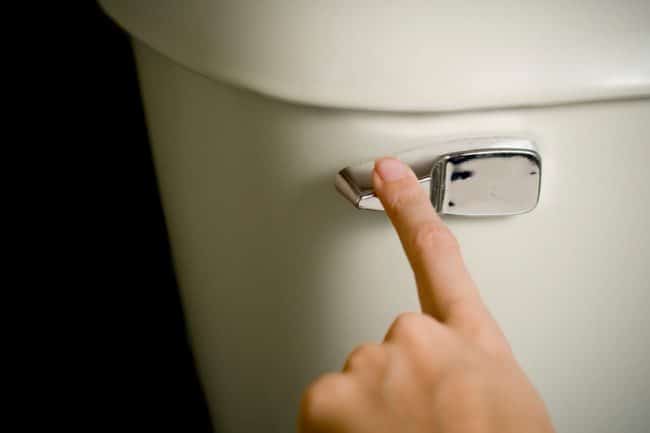
The last part that we will troubleshoot to Stop a Running Toilet is the toilet handle. When checking the handle, again begin with a regular flush. If upon flushing, you notice the handle staying down instead of moving back into place, we have an issue.

The issue with your toilet handle, in this case, is that it is either old, corroded, or just stiff. Regardless, any of those three scenarios call for a fix, as the entire time a handle is in that down position, the toilet is running. To Stop a Running Toilet by fixing the handle, first, try loosening it. If it no longer sticks after flushing, you’re good to go. If loosening does not help, you will need to take a closer look and simply replace any parts that have become corroded.

Done Troubleshooting and Still Didn’t Stop a Running Toilet…Give Us a Call

If you have completed an “at home” walk through each of these possibilities and not found the problem, give us a call! The number one name in Raleigh area plumbers, Poole’s Plumbing will come out, diagnose and fix the issue. Once and for all, one way or another we will help you Stop a Running Toilet! For more plumbing tips or to contact Poole’s Plumbing about taking care of your plumbing needs, visit poolesplumbing.com.

Indoor-Spring-Plumbing-Tips-Poole's Plumbing

“Check to Avoid a Wreck”: Indoor Spring Plumbing Tips from Poole’s Plumbing

Following the first post from this series, in this article, we will offer Indoor Spring Plumbing Tips. Just as with the outdoor checklist from the first offering of this series, these are things you can easily do yourself. However, despite being simple tasks, they can be the difference in major damage and wreckage due to a plumbing mishap if not monitored.

Indoor-Spring-Plumbing-Tips-Poole's

A clogged drain can lead to much worse problems when unattended too.

To many, plumbing can seem a somewhat intimidating thing to personally stay on top of. Thus, many feel when discussing plumbing and weather change they are not equipped to do their own upkeep. However, with these Indoor Spring Plumbing Tips, anyone can monitor their situation and thus avoid unnecessary issues.

Major Checking Points for Indoor Spring Plumbing Tips to Avoid Plumbing Disasters Inside Your Home as Winter Changes to Spring

  • Faucets
  • Drains
  • Shower Heads
  • Toilets
  • Water Supply Valve

Keeping it Unclogged: Indoor Spring Plumbing Tips for Inside Faucets and Drains

Ok, to start, this would seem one that everyone would already be aware of, right? Well, surprisingly, not everyone acts on things that are right under their noses in everyday life. One such item would be the first we touch on in our Indoor Spring Plumbing Tips. This would be checking all faucets.

Whether in the kitchen, bathrooms, laundry room or wherever you have a faucet, this is one is easy to upkeep. Simply look and be aware of your daily use of faucets that there are no leaks. Regularly checking for leaks and monitoring usage will help you conserve water. Likewise, it gives you the peace of mind that your faucets in no way are leaking and thus causing bigger problems.

In the same vein, just keeping a watch over all inside drains can be another way to avoid plumbing issues. As we all know, items like soap, hair, toothpaste caps, etc. can wind up causing a clog in our drains. One blockage can eventually lead to more serious blockages, that can spell disaster. Keeping an eye out as we suggest in these Indoor Spring Plumbing Tips can make all the difference in avoiding clogged drains. Similarly, the use of filters on all your inside drains can also prevent buildup that can lead to a costly clog.

Indoor-Spring-Plumbing-Tips-Pooles

A clean shower head can save money and conserve on wasteful usage.

A “Wrap” Can Keep Shower Heads Clean and No Deposits Will Be Seen

Much as the case is with faucets and drains, moving to the bathroom, showerheads are another easily clogged item. Our Indoor Spring Plumbing Tips continue with an easy at-home method of being sure your shower head is free and clear of clogs. A clean showerhead, like a faucet, can keep you assured of one less area that could lead to a larger plumbing issue in time.

The simple at-home method to keep your showerhead clean only takes 24 hours, with very little effort needed. This do-it-yourself solution among our Indoor Spring Plumbing Tips begins with a zip-lock baggie. First, remove your showerhead and place it in the baggie. Then fill the baggie with white vinegar and use a rubber band to tightly secure the baggie around the showerhead. Lastly, allow the showerhead to soak in the vinegar-filled baggie for 24 hours. This process breaks down mineral deposits and leaves the showerhead clean and clog-free.

Indoor Spring Plumbing Tips for ‘Toilet Testing’: Wiggling and Settling to Be Sure

Staying right in the bathroom for the next portion of our Indoor Spring Plumbing Tips, we look at the toilet. Once again, these simple at-home methods we suggest are to be sure your toilet has no cracks or leaks, which obviously could lead to larger issues. For our first “test” you can conduct, we give you the “flush test.” This begins with, you guessed it, flushing your toilet. If after you’ve flushed, the water flow does not seem to stop, wiggle or shake the handle. This should stop the water flow. However, if you needed to wiggle the handle, this is a red flag that something is wrong. Luckily, the “flush test’s” resulting in a wiggle is an inexpensive fix. Basically, it means you need to replace certain parts in the toilet’s tank. Following the instructions can then lead you to which parts you need to replace, but any and all of those parts are a minuscule investment compared to the costs you would face if this went unattended to.

Another obvious issue to look for with your toilet is any cracks. With a cracked toilet comes leaks, which not only can cause water damage but also can prove costly financially. A proven way to check for any leaks is the tried and true food color test. Follow the simple steps below to use this test to check for leaks.

Simple Indoor Spring Plumbing Tips to Check for Leaky or Cracked Toilet

  • Remove the lid from on top of your toilets’ tank
  • Add a few drops of food coloring to the water in the tank
  • Let the food coloring settle in the tank for 30 minutes
  • When this time is up, observe the water in the toilet bowl
  • If the water in the bowl has changed colors when you check after 30 minutes, there is a leak.
Indoor-Spring-Plumbing-Tips-Sticky-Valve-Pooles-Plumbing

Know the location of your main shut off valve and check it regularly to avoid possible plumbing situations.

Awareness of a Sticky Valve to Avoid a Sticky Situation

The final of our Indoor Spring Plumbing Tips starts with you either knowing where or locating where your water supply valve is. Regardless of what season or the temperature, you should know where this is located regardless. Assuming you do know where the valve is another easy ‘DIY’ solution is to check the valve regularly.

The valve check is to be certain that it is not sticking. Just turn the valve on and off several times to do this check, so you are sure it is functioning smoothly. A stuck valve may seem a small problem at first, but if ignored can lead to serious issues eventually.

This concludes our Indoor Spring Plumbing Tips from the experts at Poole’s Plumbing. To go back and see our outdoor plumbing tips for the upcoming season, visit the blog/news section at poolesplumbing.com.

Outdoor-Spring-Plumbing-Tips-Pooles-Plumbing

Outdoor Spring Plumbing Tips: Disaster Can be Avoided Outside Your Home

As the season begins to change here in North Carolina, we see the cold of Winter begin to change to a warmer Spring climate. With winter’s freezing temperatures being thawed by the air becoming warmer, many possible plumbing disasters could occur. Fear not, however! Your friends at Raleigh’s number one name in plumbing, Poole’s Plumbing, are here with their Outdoor Spring Plumbing Tips to remind and help you of items that can avoid these possible disasters and save you big in the long run!

Major Checking Points for Outdoor Spring Plumbing Tips to Avoid Clogs, Backups, or Leaks Outside Your Home as Winter Changes to Spring

  • Gutters
  • Downspouts
  • Drains
  • Hoses
  • Hose Bibs
  • Vents
  • Plumbing Pipes
  • Sump Pump
Outdoor-Spring-Plumbing-Tips-Clogged-Downspouts

Keep an eye on your downspouts to be sure the do not get clogged or restricted by debris.

Drains, Gutters, and Downspouts: Keep Them Clear, Have No Fear 

On top of the temperature change, another unavoidable weather trend as Winter turns to Spring is an increase in rainfall. Thus, with more rainfall comes the need to avoid any type of flooding. The first of our Outdoor Spring Plumbing Tips is to have you be sure your outside drains, gutters, and downspouts are completely clear and free of any debris. 

Items to check for that can pile up and cause a blockage in these areas are leaves, sticks, bird nests, or a host of other things. Any or all of these items can easily accumulate during the wintery winds and precipitation without you realizing it. In addition to the areas pointed out above, be certain to check all outside vents or pipes, too. Thus, upon the “winter thaw,” it is best to heed this first of our Outdoor Spring Plumbing Tips. This way, not only are these areas free and clear but so is your conscience knowing you need not worry about backup or flooding in these areas.

A frozen up hose bib can lead to disastrous results if not addressed early and properly.

Check for a Leak, Give Hoses and Hose Bib a Peek

Our next Outdoor Spring Plumbing Tips will take you to another area that is easy to look over since you likely haven’t used a hose all winter. That’s right, we move next to your outdoor hoses and hose bibs. As just mentioned, you don’t normally use a hose in the colder months, however, if you had the hose connected all Winter, you need to check.

When tacking these next Outdoor Spring Plumbing Tips, start by looking at the hose bib. Look initially at the faucet to be certain there are no leaks. Leaks can definitely be a problem especially if the hose was never disconnected prior to the cold temperatures of winter. This happens and is a fairly common problem as if hooked up all winter it can lead to your water supply-pipe freezing over. If this occurs it can lead to expansion of said pipe and thus, cracking or bursting. If in your checking, you see this to be the case, immediately call Poole’s Plumbing. This way, one of our expert plumbers can analyze and if needed replace the pipe before major water damage occurs.

Outdoor-Plumbing-Tips-Pooles-Plumbing-Sump Pump-Pit

Testing to be sure your sump pump if functioning properly should be a top priority when the cold weather begins heating up.

The Sump Pit: What is it? What Outdoor Spring Plumbing Tips Can Help to Keep Things “Pumping?”

All maintenance and Outdoor Spring Plumbing Tips to this point are very important and can avoid messy and costly problems. That being said, possibly the most important and top priority should be your sump pump. First off for those unfamiliar with the sump pump or sump pit, the pit is a hole, with a gravel base dug into the lowest point of your basement. When water comes into the sump pit, the pump’s sensor activates it, turning it on, and moving the water away from your home.

With the thawing and melting that will surely happen during the season change, your sump pump will be getting quite a “workout.” Thus, you must check to be sure it is working correctly. To follow this, which is next among our Outdoor Spring Plumbing Tips, first fill a few buckets with water. Then, pour the buckets into the sump pit. This should start up the pump with in a few seconds and the water should flow away from the house. However, if the pump does not start or you notice it not working properly, this could become a major issue. Again, if you do see the sump pump not starting, call the experts at Poole’s Plumbing. They can diagnose the problem in person and avoid the pump completely burning out. This will help you avoid the need for a far more vcostly repair.

From the Outside to Indoors in Our Next Post

Taking just a little time to go around the outside of the house to check on these items could be the difference between having or not having major plumbing issues. Not following these easy Outdoor Spring Plumbing Tips can lead to serious water damage, and serious damage to your wallet.

In our next post, the second in this two-part series, we move from outdoors to the inside of the home. Much like these Spring Outdoor Plumbing Tips, next post’s indoor suggestions can help you avoid damage and also help avoid unnecessary costly problems. To contract or for more on all the services Poole’s Plumbing can help you with visit poolesplumbing.com.

Winter-Energy-Conservation-Pooles-Plumbing

Winter Energy Conservation Can Keep You Warm While You Save

With the first day of winter upon us this weekend, (December 21) this is our final installment of our four-part “winter plumbing tips series.” In this post, we will discuss ways that everyone can save a few bucks, even as the temperatures drop. By following these easy-to-do Winter Energy Conservation reminders from your friends at Poole’s Plumbing, you can still stay warm, but not feel “left in the cold” when your bills arrive.

Winter Energy Conservation Tactics Will Help You Save

In this article, we will focus on four major items to “keep an eye” on around the house this winter. Each area will be give details, showing you a few simple reminders that if kept on top of will lead to Winter Energy Conservation. Those three areas in your very own home to monitor are as follows.

  • Thermostat
  • Windows
  • Fire Place
  • Water Heater

The Thermostat: The Key to Winter Energy Conservation

Winter-Energy-Conservation-Thermostat

Keeping the thermostat turned down just 10 degrees while at work 8 hours each day can save you big.

The thermostat is a key area in which can make or break your attempt at Winter Energy Conservation and savings. You should attend to the thermostat regularly for a few reasons. First, and most obvious, keep the temperature on a setting that you can be comfortable with but with in reason also.

Remembering to turn the thermostat down when leaving home for an extended period of time is another way to conserve. Consequently, statistics from energy.gov show that turning the thermostat down at least ten degrees for eight hours daily would save the average person ten percent on heating bills annually. Both of these Winter Conservation Tips are as easy as remembering and taking a look at the thermostat, yet can certainly prove to save you in the long run.

The “Window” to Savings is an “Open and Shut” Case

Winter-Energy-Conservation-Windows

Keep curtains that face south in your home wide open during the winter months during hours of sunlight.

The windows in your home are another area that you can save through Winter Energy Conservation. To adjust your windows for optimal conservation, there are several easy actions you can take. To start, keep curtains that face south in your home wide open during the winter months during hours of sunlight. This can help to naturally heat your home, and once the sun goes down, you can easily close the curtains.

When speaking of conserving, with your windows an easy slogan to remember is “insulation equals Winter Energy Conservation.” Application of a clear plastic film to the inside of your windows can prevent drafts and keep the heat in. Likewise, you may use insulated drapes to help in this process as well.

Many Ways to Save Around the Fireplace

Winter-Energy-Conservation-Fireplace

Keeping the damper closed can help trap the warmth in a room longer.

The prevention of heat loss when using a fire place and maximizing the warmth coming from the fire are other easy methods of Winter Energy Conservation. To begin, always be 100 percent certain that the fireplace damper is closed unless you are actively using it. The reasoning on this is by closing the damper, warm air stays trapped in your home. On the contrary, leaving the damper open in the winter months is the equivalent violent of leaving a window open. Obviously, keeping the damper shut and the warm air makes for less of a need to turn up the temperature on the  thermostat.

It is also advised to keep the window nearest to the fireplace cracked open about one inch or less. Consequently, doing this when the fireplace is in use combined with closing doors leading to the room in which the fireplace sets will help conserve. Clearly, lower your thermostat anytime the fireplace is  in used is also advised. Two final tips “around the fireplace” are to caulk around the fireplace hearth and if not planning on usage, keep the flue sealed.

Adjusting and Servicing a Water Heater Can Help to Save

Winter-Energy-Conservation-Water-Heater

Having your water heater serviced regularly will ensure it is running at its most efficient.

Water heating costs on average accounts for about 25 percent of all energy used in the home. Thus, managing and monitoring your water heater is an essential part of Winter Energy Conservation. To start, adjust your water heater to its warm setting (120 degrees F). Also, having your water heater serviced regularly will ensure it is running at its most efficient. This can also prove to be a big savings, especially in these upcoming colder months. Likewise, regular drainage of your water heater’s tank every few months will aid in keeping costs down, too.

In the past four blog posts, we have covered many areas in which you can save this winter. Avoiding unnecessary plumbing issues and conserving energy can keep costs at a minimum and still keep you warm this winter. Poole’s Plumbing’s tips provided in the past six weeks should have you on your way to doing both. To see more on the most trusted name in Raleigh plumbing or to contact Poole’s Plumbing, visit poolesplumbing.com.

Raleigh-Emergency-Plumbers-Poole's Plumbing

The Raleigh Emergency Plumbers Have the Answers for Your Frozen Pipe Questions

While there are many ways that you can try and prevent plumbing emergencies that come about in the winter months due to the the colder temperatures, sometimes you find yourself in a situation that you need a professional. Poole’s Plumbing, the Raleigh Emergency Plumbers has several tips and steps to follow in the case of frozen, cracked, or burst pipes from the freezing conditions.

Raleigh-Emergency-Plumbers- Poole's-Plumbing

The Raleigh Emergency Plumbers at Poole’s Plumbing are just a call away from heading your way.

Despite all of the measures discussed in the first of these two posts by the Raleigh Emergency Plumbers at Poole’s Plumbing detailing several ways that you can try to prepare and avoid a winter plumbing situation, sometimes these issues do occur. In the case of a faucet freezing up or a similar type issue, there may be some steps you an take to rectify the issue yourself, but in more complicated cases, it is always best to call the pros at Poole’s and leave the work to our staff of Raleigh Emergency Plumbers.

Indoor Faucets

Raleigh-Emergency-Plumbers- Frozen Faucet

Leave the cabinet doors open under the sink to try and keep pipes more heated.

In the case of an indoor faucet at your home or place of business freezing up, the following tips if followed may help you to nip the problem in the bud before any larger problems arise.

  1. Open and then leave the doors to any cabinets below your faucets opened so that more heat can get to them
  2. When you notice that it has gotten extremely cold, run a small bit of water from every valve in your home daily and let the water drip or trickle slowly into your sink.
  3. Be sure to keep all rooms in the house heated and let the warm air circulate freely throughout your entire home.

Already Frozen Pipes

Raleigh-Emergency-Plumbers-cracked pipe

In the case of an already burst or cracked pipe, contact the experts at Poole’s Plumbing.

If you do wind up with a burst or cracked pipe, you will likely need the Raleigh Emergency Plumbers for a service call. However, the following four steps can help if the pipes have frozen up on you and possibly avoid a more serious problem.

  1. Be sure you have no problems when the ice does melt inside the frozen pipe. Turn off your main shut off valve before you check.
  2. To relieve the pressure in the faucets, leave them turned on as the ice melts.
  3. Use either a heat gun or a hair dryer to help thaw the pipes.
  4. Remember that under NO circumstances should you use any type open flame or torch to attempt to thaw the pipes.

By utilizing the tips from the Raleigh Emergency Plumbers at Poole’s Plumbing you can avoid a plumbing disaster. To see the previous blog post for these other tips, visit the Poole’s Plumbing blog at www.poolesplumbing.com.

Thawing-and-Avoiding-Frozen-Pipes-Poole's Plumbing

Keep the Water Flowing All Winter by Thawing and Avoiding Frozen Pipes

The second installment of our “winter plumbing tips,” will focus on your role in dealing with or avoiding all together the issue of frozen pipes. We all know that as the fall months of October and November turn over into the frosty winter months of December and January here in North Carolina, there is still a chance of winter plumbing hazards. However, thanks to the most trusted name in Raleigh professional plumbers, Poole’s Plumbing, you can follow the easy steps below, to try and steer clear of a costly catastrophe by Thawing and Avoiding Frozen Pipes.

When Temperatures Reach Freezing, Know How to Treat Pipes in All Locations

Thawing-and-Avoiding-Frozen-Pipes-Freezing

Temperatures may drop below freezing, but there are ways to thaw and avoid frozen pipes altogether.

When it comes to needing to know the proper steps in Thawing and Avoiding Frozen Pipes is the recent colder weather we have seen in the past two weeks that has dipped at night below 40 degrees and even into the lower 30’s. Your pipes can freeze once the temperature does drop to 32 degrees Fahrenheit and those most vulnerable to the possibility of freezing would be any located in a basement area, a crawl space, an unconditioned or unfinished attic, those located on an exterior wall, and even pipes located underground.

When looking at it in those terms, pretty much any homeowner would have some type of piping in one of those location, thus, the Raleigh plumbing experts at Poole’s Plumbing can assist you with a few key pointers for Thawing and Avoiding Frozen Pipes at each location you may have them. If you happen to turn on a faucet and no water pours out, it could be due to a blockage caused by ice and in each given location, these following “do-it-yourself” tips could prove priceless in avoiding disaster.

Exposed Pipes

  • Remember to open up the faucet to relieve pressure
  • When suspecting a possible frozen pipe, always shut off the main water supply in case it has burst
  • Usage of a hair dryer, electric heating pad, or space heater can help in thawing. However, never use an open flame to try and thaw an exposed pipe.
Avoiding-and-Thawing-Frozen-Pipes

Use of a hair dryer is one possible way of thawing frozen pipes.

Pipes Behind a Wall

  • The easiest and safest method with these pipes is to turn your thermostat up and wait for them to thaw.
  • If immediately attention required carefully cut a whole in the wall near the pipe. Then utilize any of the above methods listed for thawing an exposed pipe

Avoiding Frozen Pipes in the Future

  • Before the winter months arrive, be sure that all garden hoses are disconnected from any spigots
  • Keep a faucet that may be connected to a line that would be in danger of freezing open. This will allow just a small trickle of cold water to run over night
  • Keep cabinets that it below your sinks open to allow the warm air from your home to circulate around them
  • Insulate any exposed, external wall pipes
  • Never leave your thermostat below 55 degrees in any situation. Even if going out of town or on vacation for an extended period of time.

By following these tips from the pros at Poole’s Plumbing, you can Thaw and Avoid Frozen Pipes. In doing so, you also can avoid serious water and financial damage with very little preparation or effort. In the case that a pipe has broken or cracked, you can contact the experts at Poole’s Plumbing here.

Winter-Plumbing-Tips-Poole's Plumbing

Avoid Water Back-Up and Frozen Pipes with Winter Plumbing Tips

Our next series featuring pointers to help you save will be getting you ready for the upcoming cold weather months. To begin, in this article, we will look at three major areas that could prove costly if not addressed or monitored in the winter months. Likewise, we will provide you simple Winter Plumbing Tips that will allow you to keep an eye on these areas and avoid unneeded spending and major damage.

Winter Plumbing Tips to Keep Water Warm and Wallets Closed!

Winter-Plumbing-Tips-Pilot Light

Keeping an eye out to be sure your pilot light stays lit is always a smart move.

A common area causing issues as the temperatures dip below freezing is with your hot water system. Whether your hot water heater is tankless or the more conventional model, our Winter Plumbing Tips can help you to keep water temperatures up even when outdoor temperature plummet.

The first of our Winter Plumbing Tips regarding your water heater may seem obvious to read but could be easily overlooked. This is simply to monitor and be sure that the temperature is set and stays at a high enough setting. Continuing with the “obvious but important,” in our Winter Plumbing Tips, we move along to the pilot light.

This comes into play for those who have a gas water heater and simply stated, give a random check every so often, to be sure that it remains lit. The third of our Winter Plumbing Tips “around” the water heater is again a reminder. That reminder is to have your water heater serviced regularly, and having it serviced before the temperature drop in winter is recommended.

If you have kept up with these three simple Winter Plumbing Tips, and still are not getting adequate temperature or volume of water, it’s best to call the professionals. At this point, the Raleigh water heater experts at Poole’s Plumbing can advise or if needed rectify the issue.

Thawed and Flowing Pipes Equal Dry and Happy Homeowners

 Winter-Plumbing-Tips-Pipes-Freezing

If you notice a restricted water flow, frozen pipes could be your issue.

The next of our Winter Plumbing Tips addresses the freezing of pipes in your house. This is a common issue that can prove messy and costly if not kept on top of. A combination of high water pressure from your main and the freezing winter temperatures are the cause of frozen pipes. As stated with the water heaters above, the key to avoiding an issue is all in awareness.

To be aware or monitor your pipes can be done by following the subsequent Winter Plumbing Tips. First, the most obvious way you may detect a frozen pipe is if you notice restricted water flow. Thus, once the temperature starts dropping in the upcoming weeks, keep an eye on this. In th case that you do feel a pipe may be frozen, the next of our Winter Plumbing Tips is another easy way to check.

If you do have reason to believe a pipe has become frozen, you may leave your tap open slightly. This will allow water flow and the movement helps to prevent freezing. If leaving the tap open is not an option, or if you try these Winter Plumbing Tips and freezing persists, you should first turn off the main water switch. Once the main is cut off, it then is time to call and let the Raleigh professional plumbers, Poole’s Plumbing step in and assist.

Checking the Hose Can Avoid Flooding and Woes

Winter-Plumbing-Tips-Poole's Plumbing-Raleigh

A frozen garden hose can lead to much bigger problems, including a pipe leaking or breaking.

One of the most catastrophic plumbing issues in the cold, or anytime, can be a water line leak or break. In the instance of either of these water line issues, severe damage and expense are sure to accompany. In a recurring theme, our Winter Plumbing Tips to avoid water line problems centers around awareness and monitoring the issue.

Perhaps surprisingly, a water line leak or break could stem from a frozen garden hose. How this can occur is when your hose connects to a spout when the temperatures reach freezing. If the hose still connects following the “freeze,” the ice inside the hose will gradually cause pressure to build up in your water lines. If this is not noticed and attended to, it will lead to a leak or break in your lines. Thus, when the severe cold is predicted, or even before, make sure all hoses and outdoor pipes are drained and the hoses are disconnected.

Winter Plumbing Tips : Insulate, Drain, and Keep Free to Avoid the Freeze

Winter-Plumbing-Tips-Faucet Jacket

Keeping a “faucet jacket” or some type of cover on outdoor faucets can combat the cold.

Staying outdoors with our pointers, installing insulated faucet jackets to all outdoor faucets will help to combat freezing weather. Likewise, locating your shut-off valves and utilizing them to drain water from your pipes can avoid a potential freeze. (These valves are often located underneath sinks and alongside water heaters.)

Last of our Winter Plumbing Tips, is to recognize that water drainage can be restricted by snow on the ground. If snow accumulates in the area surrounding your sump pump discharge line it can lead to back-up or freezing issues. Thus, knowing where this line is located and keeping it free of snow can save from a plumbing disaster.

When is it time to call the pros at Poole’s Plumbing?

You may follow these Winter Plumbing Tips and monitor each of these areas, yet still feel there is a problem. If this occurs, its time to call the pros. The most trusted name in Raleigh area plumbing, Poole’s Plumbing can both advise and rectify any plumbing issue. This includes during the cold winter months when freezing, cracking, and other disasters occur. To contact the experts at Poole’s, visit poolesplumbing.com.

Clogged-Sewer- Drains- Poole's Plumbing

Clogged Sewer Drains and How Tree Roots End Up in a Sewer Pipe

As we move on from our “clogged sink drain” series, we will continue to discuss “clogs” but n a more severe level. There may be no bigger of a plumbing issue than when a problem arises with clogged sewer drains. In this the first post focusing on Clogged Sewer Drains, we will look at one of the main causes of this. 

What is a Major Cause of Clogged Sewer Drains

Surface roots (shown) are not the tree roots you need to worry about clogging your drain.

The major cause of Clogged Sewer Drains that we will discuss in this post is one of the biggest sources of this problem. main reasons for a sewer backup is when they become clogged by tree roots. While this may seem like an unavoidable occurrence and even unexplainable, the most trusted name in Raleigh plumbers,  has several helpful tips that can expand your knowledge on not only How tree roots end up in your sewer pipe, but also the causes of the problem and some pointers on what your responsibilities are and how to deal and maintain your pipes to avoid severe damage.

How tree roots end up in your sewer pipe

Tree roots in your pipes can cause sewer backups and damage, causing many to ask, “How do they even end up there?” One of the ways the roots end up there, is obviously through either a cracked or loose joint in the sewer line. In many municipalities, roughly 50 percent of tree roots citywide enter through defective lateral sewer pipes. This is the underground piping that runs from your residence or place of business to the city’s sewer main. Maintenance of your own lateral sewer pipe and keeping it in good condition is usually your responsibility up to the point where it ties into the main, which at that point it is the cities. To reduce overflows and guard against damage, inspecting the lateral pipe and if there is an issue repairing or replacing in a timely manner can help to avoid major damage.

What actually causes the roots to grow in pipes?

The tree roots can penetrate the sewer pipe, in an attempt to feed off the water that lays with in.

This is certainly a question that most would ask, and the simplest answer is that the water vapor, which escapes through either a loose joint or a crack in a pipe attracts the roots. Due to this, tree roots inch towards and eventually will penetrate through any possible opening in a sewer pipe and actually feed off the water once inside, helping them to grow. This can even happen during the cold winter months when you may think a tree simply lies dormant, but regardless of the time of year, once inside the pipe, the root will continue to grow until it fills the pipe, leading to backups created by a mass formed from different materials unable to pass through such as, paper, grease, and other solid matter.

In the case of a very large root, combining with the mass, this is what leads to a clogged sewer. If the issue does get to the point where your sewer is clogged, you will need to call an expert like the Raleigh NC plumbers at Poole’s Plumbing to rectify the problem and make sure that the roots are removed as well as checking for structural damage in your sewer pipes.

Signs that Clogged Sewer Drains may be blocked due to roots that you can look for

Regardless of How tree roots end up your sewer, if you suspect there is some type of blockage, you should address the problem immediately and call the Raleigh NC plumbers at Poole’s, as once a root has entered the pipe and begins growing, it is just a matter of time before there is complete blockage and eventually a rupture in the pipe. Signs that a sewer may be experiencing a blockage by tree roots are:

  • Slow flowing drains
  • Gurgling sounds from your toilet bowl
  • Wet areas around floor drains and washing machine

Blockages in your sewer drain due to roots can lead to major plumbing issues. Knowing why tree roots end up in your sewer is the first step to avoiding a major plumbing disaster. For more information and instruction on this issue, check back for our second part in this series. That upcoming article will explain how to identify and what to do in the case of sewer blockage due to tree roots at the “plumbing blog” at poolesplumbing.com.

Clogged-Drain-Causes-Poole's Plumbing

Avoid Costly Blockages: Recognize Top Clogged Drain Causes

Following our two-part Fall Plumbing Tips series, the experts at Poole’s Plumbing have decided to continue in educating our loyal customers. There are many areas which will be covered in our upcoming blog posts. However, one that is very simple to address at home and if not monitored can prove costly. Likewise, it can also result in major damage or at very least a mess. Thus, this post will be the first of a three-part series where we begin by helping you recognize the Top Clogged Drain Causes.

Keeping all drains in the house flowing freely may seem an obvious priority. With just simple monitoring and very minimal or no maintenance, you can keep all drains unclogged, avoiding several possible issues. Depending on the Clogged Drain Causes which can occur, you could have a slight problem or an all-out disaster. Messy floor leaks, flooding, costly repairs, or just a terrible aroma developing all can come from many Clogged Drain Causes. We will look below at areas you will have a drain, and the top Clogged Drain Causes to look for in each.

Garbage and Other Disposals

Clogged-Drain-Causes-Pooles-Plumbing

Running your dishwasher only as necessary is one way to keep from causing a clogged drain.

It’s self-evident, but when it comes to Clogged Drain Causes garbage disposals can be a messy business. Bones and large chunks of greasy food can prove troublesome for your garbage disposal and lead to a clogged drain. You’ll want to toss most of these aforementioned offenders into your garbage and not directly into your disposal.

Laundry/Washing Machines

Remember, it is always best to be vigilant when taking care of those seemingly never-ending loads of laundry. Pay attention if and when your clogs tend to happen. If they seem to occur on days you’re running your washing machine then you’ve probably located the source of the problem. Multiple large loads in quick succession can cause the synthetic fabrics of your clothing to gather in drains and foil even your best efforts at keeping your drains free-flowing.

Dishwashers

Clogged-Drain-Causes-Pooles-Plumbing

Being sure to keep a proper sized laundry load is yet another way to avoid drain issues.

Much like the washing machine, keeping a consistent watch for and quickly addressing and Clogged Drain Causes with the dishwasher can be very cost-effective. We all know, the dishwasher is a lifesaver after a long day and a painstakingly cooked meal, but every once in a while if it becomes a Clogged Drain Causes, it can create extra work for you. Repeated running of your dishwasher or failure to properly remove solid waste from its innards before running a cycle can cause backups in your drain.

Sewer Line

This one could be a “biggie.” It may come as a surprise to many, but your main sewer line may be behind all your drainage woes. No matter if a clog occurs in an area in the line right beside your house or near the edge of the street, there is the chance it’s the sewer line. Municipalities have different guidelines governing what is your responsibility and what is not regarding the sewer line and you may be on the hook for a repair before you can restore the health of your drains. Check with your municipality to determine how to handle a clogged sewer line.

So, as earlier stated, a lot of unnecessary expenses and headaches, in general, can be avoided or at least minimized by simply being aware of possible Clogged Drain Causes and staying on top of keeping them clean. In the case that you do have a clog or backup issue that has become a concern, the Raleigh professional plumbers at Poole’s Plumbing are always just a call away and waiting to help you nip the problem in the bud before it becomes a plumbing disaster.

Outdoor-Fall-Plumbing-Tips-Pooles-Plumbing

Outdoor Fall Plumbing Tips from Poole’s Plumbing

The warmth of Summer officially gives way to the new Autumn season on Monday, September 23. With this seasonal change, the air slowly becomes brisker. Likewise, the days get shorter, too. Our Outdoor Fall Plumbing Tips can help you be prepared for the change in season.

Following up our initial “Indoor Fall Plumbing Tips” post, here are more easy tips that anyone can do. Just by keeping on top of things like these heading into Fall, you can avoid costly “surprises” moving into the Winter months.

Outdoor-Fall-Plumbing-Tips-Pooles Plumbing

Simply making sure to disconnect any outdoor hoses can avoid many potential problems in the long run.

Water Hoses-Outdoor Fall Plumbing Tips

We can start our Outdoor Tips in a similar spot that we left off with our “Indoor Tips.” That would be around the area where our water hoses would be.

  • Disconnect…and avoid a deep freeze!– This is one of the simpler Outdoor Fall Plumbing Tips, as we just remind you to disconnect any outdoor hoses you may have. If these are left connected, the hoses could freeze. Obviously with a frozen and unconnected hose could come expansion. Thus, connected faucets or pipes that run indoors could freeze and break as a result of that expansion.

So, disconnecting all outdoor hoses can for sure be an easy way to avoid a not-so-easy situation.

Fall-Outdoor-Plumbing-Tips-Pooles Plumbing

Check to be sure no outdoor faucets are leaking or dripping. This could lead to avoiding a flood later on.

Outside Faucets- Outdoor Fall Plumbing Tips

Much like the indoor faucets we discussed last post, a simple check on those outside can likewise help avoid catastrophe.

  • Avoid the Flood…Double Check for Leaks and Drips- Just check to be sure no outdoor faucets are leaking or dripping. If you see they are, be sure to tend to these repairs as soon as possible. If it is not a repair you can personally make, you will want to contact the Raleigh Plumbing professionals at Poole’s Plumbing.

Again, if there are no leaks, that is fantastic, however, if there are, you will want to contact Poole’s prior to temperatures having a chance to drop too low. Above all, you want to avoid a frozen pipe at all costs in this situation. Whether steel, plastic, or whatever the material, the pipes will crack if frozen and this could have pricey repercussions and could even lead to a flood.

  • Better Take Cover…or Make Sure of Coverage!- It is worth the time to go to a hardware or home store to get some type of insulation kit to make sure the outside faucets around your house are properly insulated. This helps you to avoid the exact problems discussed with our past two Outdoor Fall Plumbing Tips above.
Outdoor-Fall-Plumbing-Tips-Downspouts

Your attention to keep downspouts clear can avoid them freezing up as temperatures sink.

Downspouts and Gutters-

  • Down with Debris…Keep Spouts and Gutters Clean!- What most consider one of the most obvious of our Outdoor Fall Plumbing Tips. Furthermore, just clear all leaves and any other debris from your downspouts and gutters. If left unattended and then water starts freezing, it could get real messy if these are not cleared by the time it thaws.

Removal of any debris for downspouts and gutters before thawing time will no question help to avoid a Fall Plumbing disaster.

Outdoors and Indoors…You’re Covered.

Between this and our previous post, we’ve offered up many Fall Plumbing Tips. If followed correctly, these should take almost no time at all. In addition, avoiding a major plumbing accident, that could be costly, is well worth that little time to invest.

If you do have further questions on any of our tips or need repairs done, contact us at poolesplumbing.com.

Fall-Indoor-Plumbing-Tips-Outdoor Faucet

Indoor Fall Plumbing Tips from Poole’s Plumbing

As the warmer weather of Summer slowly dips heading into the new season, there are many precautions you can take to avoid unneeded plumbing situations. While even the thought of “doing your own plumbing” seems preposterous, there are small measures that anyone can take at home. These measures and Indoor Fall Plumbing Tips from Poole’s Plumbing are easy to do and could help you save a bundle of money in the end. Likewise, it can also help to keep your water nice and warm with no issues as the outside temperatures drop.

Fall-Indoor-Plumbing-Tips-Poole's Plumbing

Shut Off Valves- Indoor Fall Plumbing Tips

Regardless of the season, it is smart practice to know where your homes’ main shut off valve. Likewise, if for nothing but peace of mind, be sure that you know how and are physically able to shut the valve off in case of an emergency. Whether the toilet is overflowing, a pipe has busted, or you are just doing maintenance, knowledge of the shut-off valve is essential.

  • Know where it is!– Number one, first and foremost among Indoor Fall Plumbing Tips. Also, among any at home, possible disaster avoiding plumbing situation…be aware of where the main shut off valve is in your home. In many instances, this knowledge could come in handy and even if it never does, it is good to know.
  • Open and Shut and Inside and Out!– This is one of our Indoor Fall Plumbing Tips pertaining to a time you will not be home. It is about as basic and simple as can be and anyone can do this and avoid possible issues. If you are leaving your home for an extended period of time or going on vacation, before you leave, turn the main shut off valve off. Additionally, once that is off, open all of the faucets in your home and allow them to drain.

Even though these are our Indoor Fall Plumbing Tips, one item here does involve checking outdoors. That would be, just as we suggested doing with the inside faucets, once those shut-off valves are turned off, open any outdoor faucets to allow drainage as well.

Fall-Indoor-Plumbing-Tips-Water Heater

A simple check of your water heater’s thermostat (pictured) can help avoid Fall Plumbing issues.

Water Heater Maintenance-Indoor Fall Plumbing Tips

Yes, Poole’s Plumbing is the Raleigh area water heater expert. Thus, it would seem a smart move to heed their Indoor Fall Plumbing Tips, especially when discussing ways to possibly conserve and save by mostly just keeping an eye on these units.

  • Flush it out!– Just like the valve tips, this one is almost self-explanatory. Since the temperature drops in Fall and even more into Winter, the water heater will be working harder. Thus flushing out the unit at the end of summer to remove residue and sediment will allow the unit to function at its optimum capacity. This also avoids corrosion occurring, which can actually shorten the lifespan of your water heater.
  • Check the Pressure SAFELY!– We repeat SAFELY!!! This is another of our simple Indoor Fall Plumbing Tips. Basically, you are checking the pressure relief valve of the water heater. This is done by lifting the lever and snapping it back. If the pressure is as it should be, you will see a burst of water into the drainpipe. If you do not, it is time to call Poole’s Plumbing. Remember though, this water is scalding hot so, did we mention when doing this to be SAFE?!?!
  • How’s the Weather in There?– Always be sure from time to time to check the thermostat on your water heater. This is among our Fall Indoor Plumbing Tips, however, it’s a smart practice year-round. The temperature should always be set at 120 degrees Fahrenheit for best performance.
Fall-Indoor-Plumbing-Tips-Pooles Plumbing

When leaving the house for extended periods of time set the temperature to 55 to avoid freezing pipes.

The last of our Fall Indoor Plumbing Tips pertains to when you will be leaving your home for a long period of time. Always remember to leave your heat turned on at no lower than 55 degrees Fahrenheit, so that no pipes freeze while you are away.

Indoors Today, Outdoors Tomorrow (Or Soon…)

We will follow this blog post with our suggested and easy Fall Outdoor Plumbing Tips. These simple do-at-home suggestions that anyone can accomplish can help for a worry-free period through the upcoming season as the temperature begins to drop.

If you do see some type of issue when following these easy-to-follow pointers, contact the Raleigh plumbing professionals at poolesplumbing.com.

It’s Always “Cool” to Thaw and Avoiding Frozen Pipes

The second installment of our “winter plumbing tutorial,” will focus on your role in dealing with or avoiding all together the issue of frozen pipes. We all know that as the fall months of October and November turn over into the frosty winter months of December and January here in North Carolina,  there is still a chance of winter plumbing hazards, but thanks to the most trusted name in Raleigh professional plumbers, Poole’s Plumbing, you can follow the easy steps belows listed below, to try and steer clear of a costly catastrophe as you Thaw and Avoiding Frozen Pipes.

Case in point that we are not yet completely “out of the water,” when it comes to needing to know the proper steps to take to Thaw and Avoiding Frozen Pipes is the recent colder weather we have seen in the past two weeks that has dipped at night below 40 degrees and even into the lower 30’s. Your pipes can freeze once the temperature does drop to 32 degrees Fahrenheit and those most vulnerable to the possibility of freezing would be any located in a basement area, a crawl space, an unconditioned or unfinished attic, those located on an exterior wall, and even pipes located underground.

When looking at it in those terms, pretty much any homeowner would have some type of piping in one of those location, thus, the Raleigh plumbing experts at Poole’s Plumbing can assist you with a few key pointers to Thaw and Avoiding Frozen Pipes at each location you may have them. If you happen to turn on a faucet and no water pours out, it could be due to a blockage caused by ice and in each given location, these following “do-it-yourself” tips could prove priceless in avoiding disaster.

Exposed Pipes

  • Remember to open up the faucet to relieve pressure
  • When suspecting a possible frozen pipe, always shut off the main water supply in case it has burst
  • Usage of a hair dryer, electric heating pad, or space heater can help in thawing, but NEVER use an open flame to try and thaw an exposed pipe

Pipes Behind a Wall

  • The easiest and safest method with these pipes is to turn your thermostat up and wait for them to thaw.
  • In situations that need to be addressed immediately, carefully cut a whole in the wall and utilize any of the above methods listed for thawing an exposed pipe

Avoiding Frozen Pipes in the Future

  • Before the winter months arrive, be sure that all garden hoses are disconnected from any spigots
  • Keep a faucet that may be connected to a line that would be in danger of freezing open to allow just a small trickle of cold water to run over night
  • Keep cabinets that it below your sinks open to allow the warm air from your home to circulate around them
  • Insulate any exposed, external wall pipes
  • Never leave your thermostat below 55 degrees in any situation, even if going out of town or on vacation for an extended period of time.

By following these easy to do, at home tips from the pros at Poole’s Plumbing, you can not only Thaw and Avoiding Frozen Pipes, but you also can avoid serious water and financial damage with very little preparation or effort.