DIY plumbing Tips and Tricks

How to Drain a Water Heater: Proper Maintenance of Your Unit Can Make all the Difference

One may think that once the number one installer of water heaters in the Triangle area, Poole’s Plumbing, has set you up with a new unit that its all smooth sailing from there on in. However, proper maintenance and knowing How to Drain a Water Heater can significantly extend its life and also help you avoid a damaging water leak that can affect the interior of your home. Additionally, in an emergency knowing How to Drain a Water Heater can help in other ways, as it can offer gallons of fresh water, but such an emergency water supply will only be useful if the water in your tank has been previously attended to.

Several easy steps, pointers, and reminders we can offer up on How to Drain a Water Heater can make all the difference and are as follows:

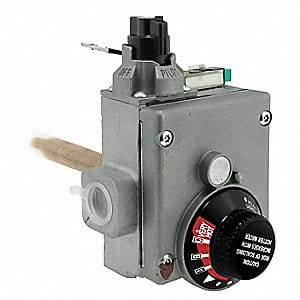
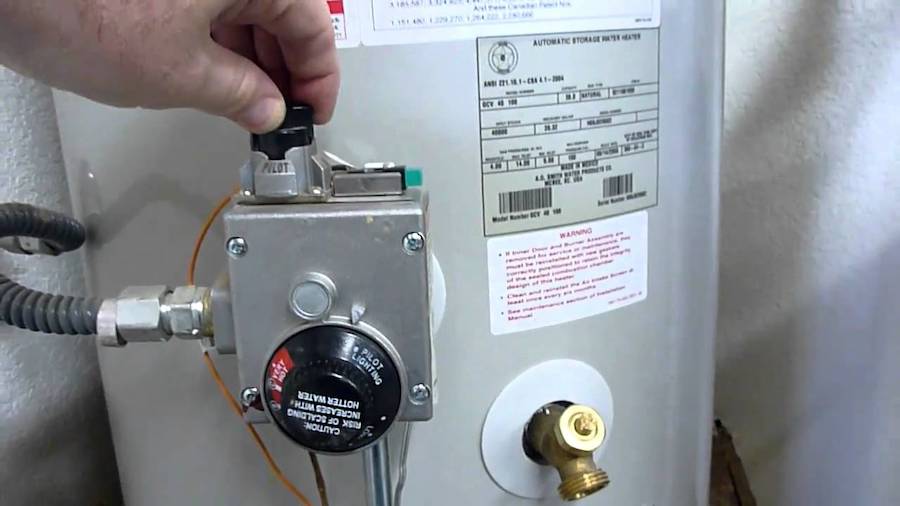
  1. Consider your type of water heater. Switch the thermostat on a gas heaterto the “pilot” setting to prepare for drainage, or simply turn the heater’s power off at the breaker box if you own an electric unit.  Remember to practice caution when tripping breakers, and bear in mind you may want to allow the water inside the heater to cool before proceeding to the drain valve next. This can take as long as two hours depending on your water heater model.
  2. Find the drain valve on your water heater and connect a hose to it. Switch off the cold water supply to the heater but refrain from opening the valve at this time.
  3. Prevent a vacuum from appearing in your lines by turning on the hot water in a tub or sink somewhere in your house before continuing.
  4. Open the drain valve on your water heater and allow all the water to drain from the tank. This will likely take thirty minutes to an hour.
  5. Turn the water supply to your water tank back on following the draining of its tank.  Wait until the water runs out of the drain valve’s hose that you connected earlier, then close the drain valve back up again. Check the instructions that come with your particular tank before acting further. Some water heaters will only need their tanks partially refilled with water before further troubleshooting, but others may require the tank to be completely full in order to avoid potential device damage.
  6. Turn the hot water faucet in your sink or tub back off, then restore power to your gas or electric water heater via the thermostat or breaker box, respectively.
  7. Test your water heater’s pressure relief valve after water temperature has been restored. This valve prevents overheating. Refer to your specific manufacturer instructions regarding the pressure relief valve in order to complete your repair.


As simple of a process as any of these steps are in helping you know How to Drain a Water Heater, as you can see, can make a huge difference, whether it is to avoid a bad situation or to simply extend the life of your unit. With the assistance and reminders here from your friends at the number one installer of water heaters in the Triangle area at Poole’s Plumbing, these are all do-at-home- easy ways to minimize or not run into any issues at all.

preventing-sewer-backup-problem-pooles plumbing

Preventing Sewer Backup Problems

Coming off our previous post on clearing clogged drains and the importance of doing so, one item discussed that could result in maybe the biggest catastrophe of any if unattended to is a sewer backup. One of the many specialized serviced offered by the most trusted name in Raleigh plumbers, Poole’s Plumbing, is drain and sewer clearing. With several options offered in clearing out your sewer, many times one is left wondering how they can help in preventing these situations. Below is a list of pointers that can help you do your part to help in Preventing Sewer Backup Problems.

Proper Disposal of Waste and Garbage Items

Whether it is paper products or grease and oil, proper disposal of waste is one way that you can personally help to avoid Sewer Backup Problems. In the case of paper products, try to stay away from paper towels, disposable diapers, feminine products, or any other paper products that are not easily dissolved from going down your toilet of drain. With grease or cooking oil, be sure that you pour it into an adequate, heat resistant container to be disposed of once it has cooled. Using hot water to wash grease or oil down the drain is not an adequate method of disposal, as once it cools it will simply solidify and eventually lead to a clog.

Have a Backwater Prevention Valve Installed

A backwater prevention valve is installed into an existing sewer line or drain line in your home’s basement to avoid Sewer Backup Problems. When this type fixture is properly maintained after installation, it allows sewage to go out, but not come back into your line.

Replacing Your Line and Tap with Plastic Piping

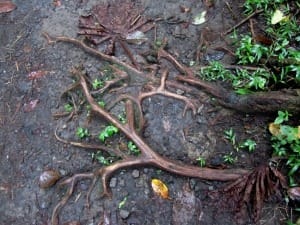
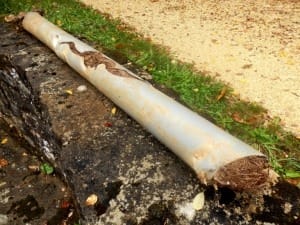
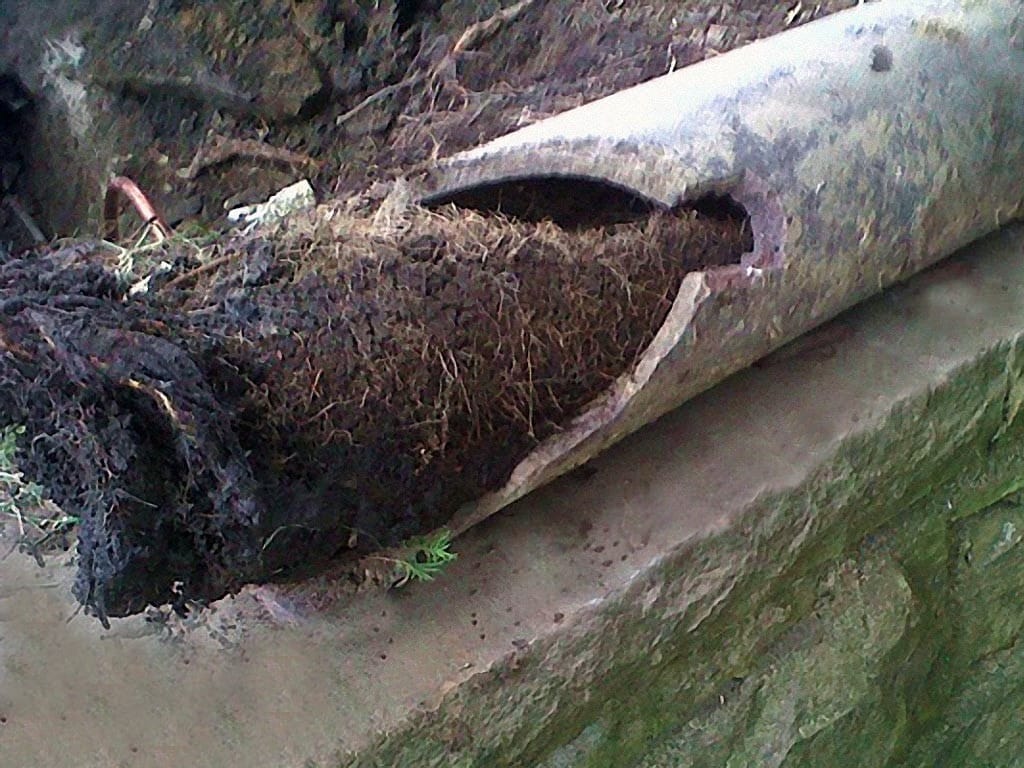
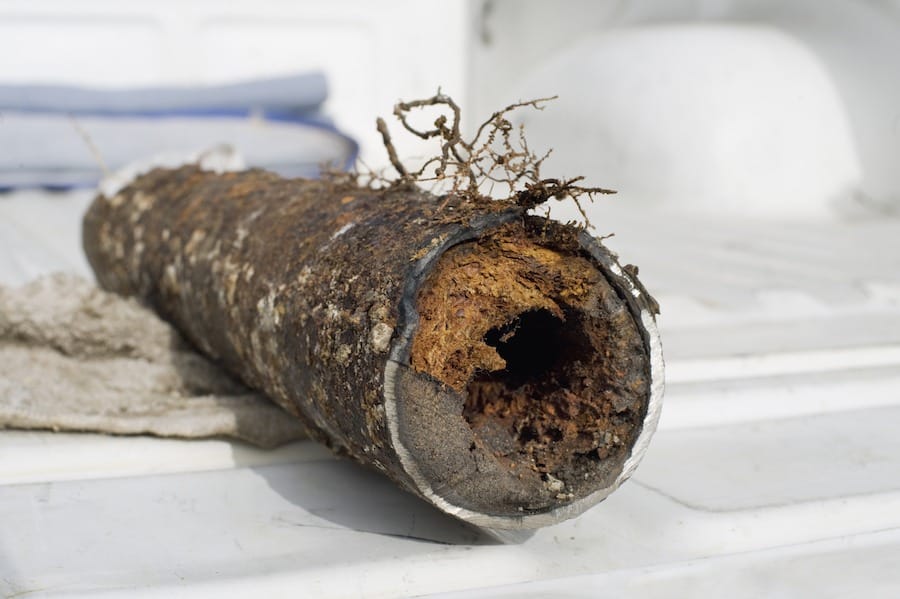
Replacing your current, aging line and tap with plastic pipe can help avoid the possibility of tree roots entering your line and causing unwanted Sewer Backup Problems.

Rectify any Illegal Plumbing Connections

Not only is this an obvious one for the fact that it is illegal, but it will also certainly  lead to debris clogging your sewer line. Stay away from connecting sump pumps, French drains, and other systems that control flooding to your sewer at all costs. If any of these are connecting it is advised to contact your Raleigh plumbers at Poole’s Plumbing to correct these to help with Preventing Sewer Backup Problems.

Our next article will focus on yet another specific drain  issue and that will be helping you to successfully clear and keep your kitchen sink drain cleaned.

It’s Always “Cool” to Thaw and Avoiding Frozen Pipes

The second installment of our “winter plumbing tutorial,” will focus on your role in dealing with or avoiding all together the issue of frozen pipes. We all know that as the fall months of October and November turn over into the frosty winter months of December and January here in North Carolina,  there is still a chance of winter plumbing hazards, but thanks to the most trusted name in Raleigh professional plumbers, Poole’s Plumbing, you can follow the easy steps belows listed below, to try and steer clear of a costly catastrophe as you Thaw and Avoiding Frozen Pipes.

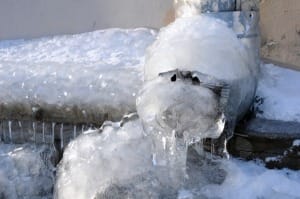
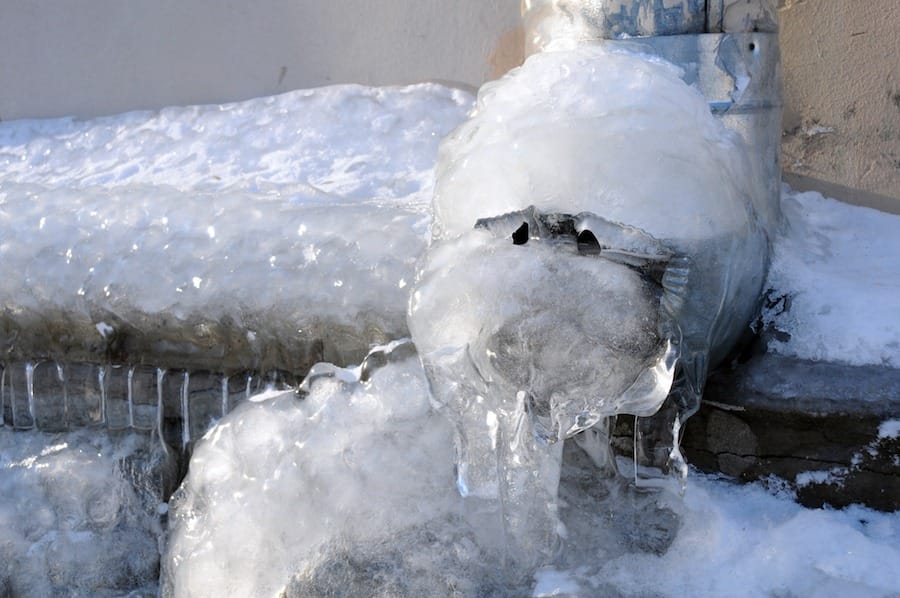
Case in point that we are not yet completely “out of the water,” when it comes to needing to know the proper steps to take to Thaw and Avoiding Frozen Pipes is the recent colder weather we have seen in the past two weeks that has dipped at night below 40 degrees and even into the lower 30’s. Your pipes can freeze once the temperature does drop to 32 degrees Fahrenheit and those most vulnerable to the possibility of freezing would be any located in a basement area, a crawl space, an unconditioned or unfinished attic, those located on an exterior wall, and even pipes located underground.

When looking at it in those terms, pretty much any homeowner would have some type of piping in one of those location, thus, the Raleigh plumbing experts at Poole’s Plumbing can assist you with a few key pointers to Thaw and Avoiding Frozen Pipes at each location you may have them. If you happen to turn on a faucet and no water pours out, it could be due to a blockage caused by ice and in each given location, these following “do-it-yourself” tips could prove priceless in avoiding disaster.

Exposed Pipes

  • Remember to open up the faucet to relieve pressure
  • When suspecting a possible frozen pipe, always shut off the main water supply in case it has burst
  • Usage of a hair dryer, electric heating pad, or space heater can help in thawing, but NEVER use an open flame to try and thaw an exposed pipe

Pipes Behind a Wall

  • The easiest and safest method with these pipes is to turn your thermostat up and wait for them to thaw.
  • In situations that need to be addressed immediately, carefully cut a whole in the wall and utilize any of the above methods listed for thawing an exposed pipe

Avoiding Frozen Pipes in the Future

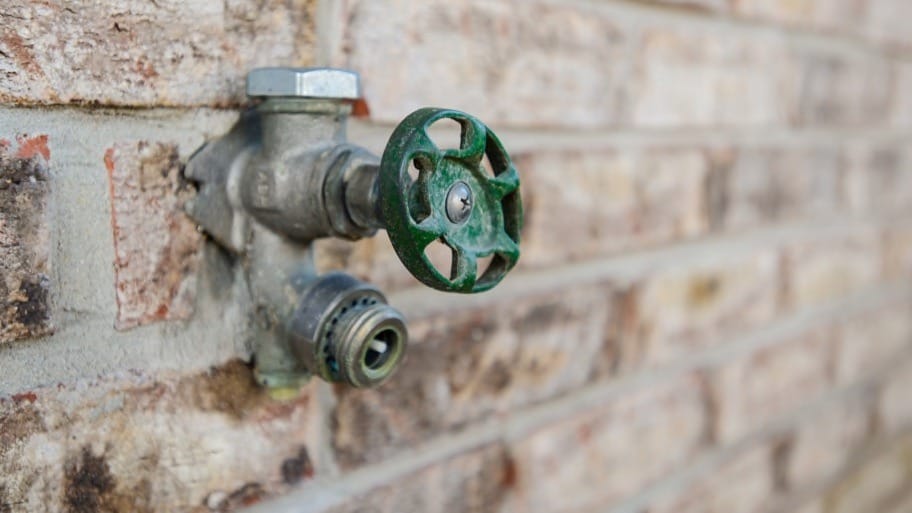
  • Before the winter months arrive, be sure that all garden hoses are disconnected from any spigots
  • Keep a faucet that may be connected to a line that would be in danger of freezing open to allow just a small trickle of cold water to run over night
  • Keep cabinets that it below your sinks open to allow the warm air from your home to circulate around them
  • Insulate any exposed, external wall pipes
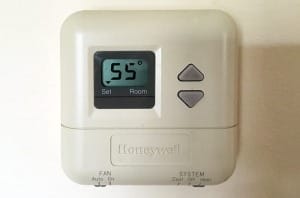
  • Never leave your thermostat below 55 degrees in any situation, even if going out of town or on vacation for an extended period of time.

By following these easy to do, at home tips from the pros at Poole’s Plumbing, you can not only Thaw and Avoiding Frozen Pipes, but you also can avoid serious water and financial damage with very little preparation or effort.

Water-Conservation-in-the-Bathroom

Save Money with Simple Water Conservation in the Bathroom

Everyone would like to save on costly water and utility bills each month, and through several easy and simple checks and steps that can be done and followed for Water Conservation in the Bathroom, the professional Raleigh plumbers at Poole’s Plumbing can help you get on the path to saving.

The first area to touch upon to help with Water Conservation in the Bathroom is your shower and bathtub. To begin here, a simple check of your showerhead would be in order. Aiming the head at a one-gallon bucket and timing to see how long it takes to fill can tell you when it may be time for a replacement. If the bucket is filled in less that 20 seconds you will want to look at replacing it with a more efficient, low-flow showerhead. Not only are the low flow models great for Water Conservation in the Bathroom, they are inexpensive and easy to install, they can cut your usage by more than 500 gallons of water per week. This combined with keeping a close eye on the time you and other family members actually spend taking a shower and limiting it to 5 minutes can save on average another 1,000 gallons of water per month.

In the bathtub there are also some very easily monitored step that can help you with Water Conservation in the Bathroom. For starters, using a plug before turning the water on as you adjust the temperature will help to avoid wasting water, as will having your very young children take a bath together rather than having to fill the tub and go through the entire process multiple times.

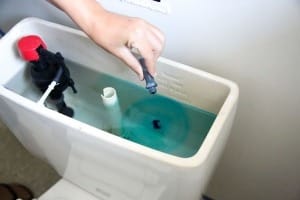
The toilet is an obvious spot in the bathroom where by just making sure all pieces and parts are operating correctly can get you on your desired path to Water Conservation in the Bathroom. The tank and flapper are both spots on the toilet that you want to check regularly to be sure they are functioning properly. The “food coloring” test is an easy way to be certain the tank isn’t leaking, as by putting a few drops in, you can tell it is leaking if the color seeps into the bowl. If there is a leak, it is an easy fix for the pros at Poole’s Plumbing and can conserve over 600 gallons per month. As for the flapper, checking on a consistent basis to sure it isn’t sticking will help with your Water Conservation in the Bathroom efforts. Also, if you hear a toilet flushing itself or constantly running, this also is more than likely an easily fixed leak and if not addressed could lead to wasting more than 500 gallons of water weekly. One last tip that may seem obvious, but can really help conserve is to put your tissues into the trash as opposed to flushing them down, as this also can add up with each wasted flush.

Lastly, monitoring your water usage at the sink can be another simple avenue to help with Water Conservation in the Bathroom. Again, these are common sense ways to save, as by just turning the faucet off while you brush your teeth, the average family of four would conserve about 200 gallons per week. Doing the same while shaving would save around 100 gallons a week as well. Much like recommended above with the toilets, when hearing a consistent drip from the faucet, having to problem rectified in a timely manner can also lead to big savings both with water and in your wallet.

Water Conservation in the Bathroom can be easily achieved and lead to you not wasting water or money unnecessarily. The plumbing experts at Poole’s Plumbing recommend these tips to you in beginning your conservation efforts and in Part Two of our water conservation articles will remind you of more simple ways to conserve water and money throughout the rest of the house.

Why it is Important to Keep Your Drains Clean and Clear

Maintaining a clean sink or bathtub drain is important for many reasons and can be done with minimal effort to help avoid running into costly and possibly dangerous plumbing issues. One obvious reason to clean your drains on a consistent basis is to avoid unpleasant odors. A more serious problem that could result from a neglected drain is the risk of pesky drain gnats. Also, failure to keep your drains clean will lead to buildup that eventually will cause water in your sink or tub to empty at a much slower rate. If you’ve tried your own maintenance and at home remedies and the problem with your drain persist, it may be time to call the most trusted name in Raleigh professional plumbing, Poole’s Plumbing to come and be sure the issue escalates no further.

As mentioned in the preceding paragraph, to Keeping Your Drains Clean is a simple process that can be done at home as long as you are willing to take a few minutes every few days to do so. The simplest way of avoiding unwanted buildup is to run scalding hot water through your tub and sink drains every couple days to make sure that there is no clogging and to keep gunk from building up. There are also many products available for purchase at most stores, that can keep your drains smelling clean and fresh. If you do notice buildup starting or clogging in your pipes it is best to immediately address the issue as early as possible, as neglecting these things could prove an expensive and messy mistake.

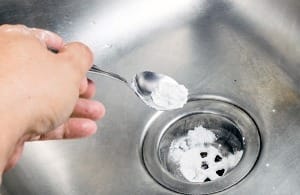
You must realize that to Keep Your Drains Clean that are clogged is not necessarily an immediate disaster, as there are many tried and true remedies that can be made to clear them, right in your home. Most of these solutions are made from items that you already have on hand. One of these tried and true methods is to pour one tablespoon of baking soda into the tub or sink drain. Immediately dump ¼ cup of either lemon juice or vinegar down the same drain and let it sit for 30 minutes. Finally, run hot water through the drain. Repeating this on a weekly basis will help clear buildup and prevent the clog from recurring. Additionally, this will help eliminate unwanted, foul odors. Another at home method is to pour a strong salt water mixture through your drains. This is a proven way to keep grease from buildup and to reduce bad odors.

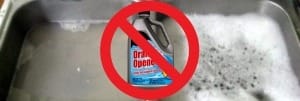
If you have tried the at home remedies and found them not working, there are many popular and potent chemical solutions that can be purchased at nearly any store or supermarket. If these chemicals do not work, it is best to call a professional plumber, who will be able to remove any blockage and have your drains flowing freely in short order.

There are many different websites that can offer up tips on keeping your drains clean through these and a variety of other methods in an eco-friendly manner. For further information on this topic, check cleaning or maintaining drains in the home improvement sections of any of the following sites, www.doityourself.com, www.popularmechanics.com, or www.care2.com.

As stated in our first paragraph of this article, there are many reasons why a clogged or dirty drain is something not to be ignored. If this a persistent problem, be sure to contact the most trusted name in Raleigh professional plumbing, Poole’s Plumbing.

Inside-Fall-Plumbing-Tips

Inside Fall Plumbing Tips: Avoiding a Catastrophe

Continuing with our helpful and easy pointers to give you a head start on avoiding any potentially costly plumbing disasters that could happen as a result of the changing of the seasons and the inevitable drop in temperature, the Raleigh professional plumbers at Poole’s Plumbing continue where we left off on our last article and head indoors for our Inside Fall Plumbing Tips.

As you already know, Poole’s Plumbing is the number one water heater expert in the Raleigh/Triangle area, and there are several easy procedures to follow in our Inside Fall Plumbing Tips to avoid not only losing hot water when the colder temperatures hit, but also to help avoid a messy situation both in your home and your wallet.

Water Heater Maintenance

  • With colder temperatures, your water heater unit is working harder during the fall and winter months. The first of our Inside Fall Plumbing Tips is to flush the unit out and remove any and all sediment buildup. If not done, corrosion can occur, which leads to reduced efficiency and actually can shorten the lifespan of your water heater.
  • Inside Fall Plumbing Tip number two regarding the water heater is to test the unit’s pressure relief valve. BE VERY CAREFUL WHEN DOING THIS, AS THE WATER IS HOT. But when you lift the lever and let it snap back, you should see a burst of water into the drainpipe and if you don’t call your helpful friends at Poole’s to come and take a look at it.
  • Be sure to check the thermostat on your unit. It should be set on 120 degrees Fahrenheit for best performance.

 Shut Off Valves

  • An Inside Fall Plumbing Tip that pertains to the outside of your home as well: if you have inside shut-off valves that lead to your outside faucets be sure they are closed and that those outside lines are full drained
  • Know where your home’s main shut off valve is and if you are leaving for a vacation or a long period, shut it off and open all faucets to allow them to drain.

One final Inside Fall Plumbing Tip also pertains to when you will be leaving your home for long periods of time. Always remember to leave your heat turned on at no lower than 55 degrees Fahrenheit, do that no pipes freeze while you are away.

Our Inside Fall Plumbing Tips and the previous blog post covering the outside of your house can help for a worry-free period through the upcoming months as the temperature begins to drop. If you do see some type of issue when following these easy-to-follow pointers, call the professionals at Poole’s at 919-661-6334 or contact us through our website at poolesplumbing.com.
 

Fall Outside Plumbing Tips

Fall Outside Plumbing Tips from Poole’s Plumbing

With the official first day of the Fall season coming and going on September 22, the leaves start changing colors, the temperature starts to drop, and much like you can count on each of these things happening, there are several preparation that you can take around your home to make sure that you avoid some costly plumbing disasters as the thermometer continues to head south and winter draws near. The friendly Raleigh professional plumbers at Poole’s Plumbing can help you by offering up their Fall Outside Plumbing Tips that are easy to follow and execute.

Disconnect Water Hoses 

To begin with our Fall Outside Plumbing Tips, you want to be certain to disconnect all outside water hoses. Plain and simple, if left connected, the hose can freeze up when the temperature reaches a certain point and this can lead to expansion that could see faucets and connected pipes indoors to freeze and then break.

Check for Leaky Outdoor Faucets

Be sure that no outside faucets are leaking or even dripping. If you notice they are, tend to the repairs if you are able to or call the Raleigh professional at Poole’s before the freezing weather has a chance to arrive. This if not attended to can also cause frozen pipes, which regardless of steel, plastic, or whatever they are made of will crack if frozen and could have damaging results and even cause a flood.

Cover Outside Faucets

It is worth the time to go to some type of hardware store or home center to get some type of insulation kit to make sure the outside faucets around your house are properly insulated to avoid the problems with pipes spoken of in the previous two Fall Outside Plumbing Tips above.

Clean Out Gutters and Downspouts

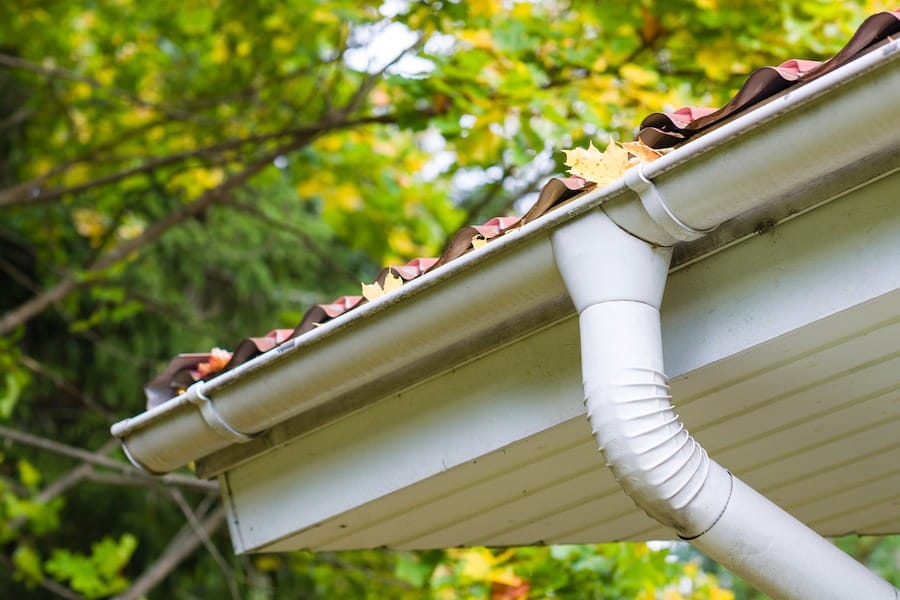
One of the Fall Outside Plumbing Tips that everyone seems to know of, yet still leads to as many or more issues than any of the others when the colder weather hit. Clear all leaves and any other debris from downspouts and gutters, as once the water starts freezing and thawing it is necessary to have easy drainage.

These easy-to-follow- Fall Outside Plumbing Tips from the experts at Poole’s Plumbing are one’s that you do not want to wait around on as the cool Fall temperature gives way to a brisker, colder winter. In the next blog entry at poolesplumbing.com we will continue our seasonal tips and head indoors for some helpful pointers to avoid potentially costly situations.

Constant or Conventional: What to Know When Selecting a Well Pump

When calling upon the Raleigh NC plumbers at Poole’s Plumbing for replacement or installation, it is essential to know the facts and both the pros and cons of both Constant Pressure and Conventional models when Selecting a Well Pump.

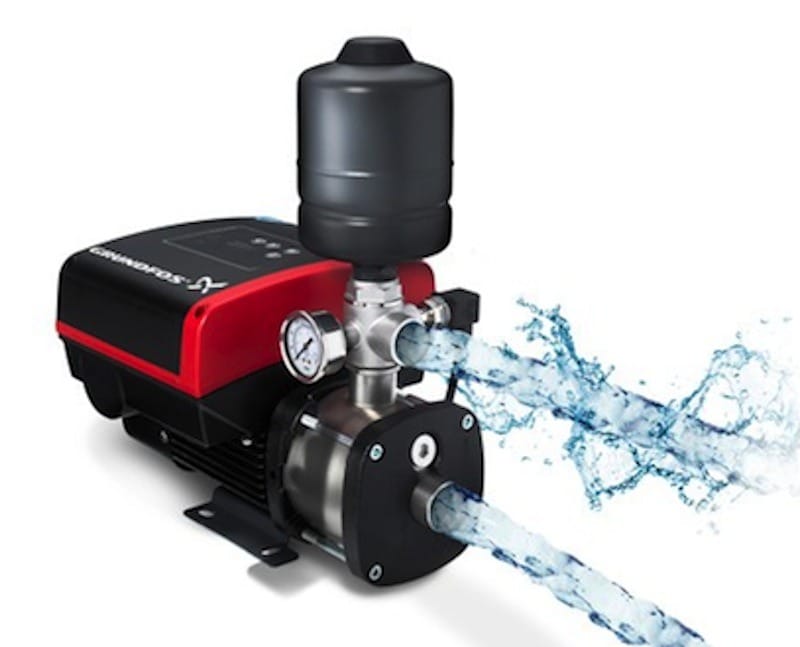
Constant Pressure Pump Selecting a Well PumpIn Selecting a Well Pump, it is essential to know which model best suits you and your needs as to not waste your money on a pump that may give you either too much or too little. The Constant Pressure Pump operates using a variable speed motor that is built in to the unit that allows the pump to speed up or slow down depending on your level of water usage. Thus, when you need more water, the Constant Pressure Pump runs faster, and when less water is used, it runs at a slower pace. Benefits of this type model include:

  • Better water pressure when taking a shower
  • More “city-like” water pressure coming from all faucets
  • Higher powered lawn irrigation
  • A smaller, low cost tank that takes up less space
  • Several built in features to prevent any damage to your pump
  • Convenient push button pressure selection

Conventional Pump System

The conventional or traditional system is your other option in Selecting a Well Pump. These units operate at only two speeds, on and off. A pressurized switch controls the Conventional Pump System, turning the unit on when a certain pressure level is reached and likewise, shutting it off once the necessary level is reached.  Benefits of the Conventional Pump System include:

  • A larger tank model produces longer cycles
  • Overall length of the pumping cycles being determined by the varying size of tank which you need
  • The pump not running while you are consuming water
  • Due to its “on” or “off” cycles, helps to conserve water and avoid unnecessary or wasteful usage.

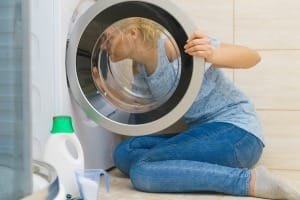
How Will I Save with a High Efficiency Washing Machine?

In the ongoing quest of the most trusted name in Raleigh plumbers, Poole’s Plumbing to help you better learn and in turn save and conserve water, we will answer a few questions that many consumers have, based upon one main uncertainty these same people may have, What exactly is a High Efficiency Washing Machine and what exactly are the savings that I can enjoy in purchasing one?

High Efficiency Washing Machine

Basically, to answer the main question on High Efficiency Washing Machines, they are a washer which uses different technological features to simply help reduce not only the amount of water needed per load of laundry you do, but in addition they also cut down on the amount of energy used as well. Thus, through the Poole’s Plumbing tips and suggestions that we have continued to talk about through our blog posts, a High Efficiency Washing Machine does exactly what we have been trying to help you (the consumer) to do, and that is conserve and save.

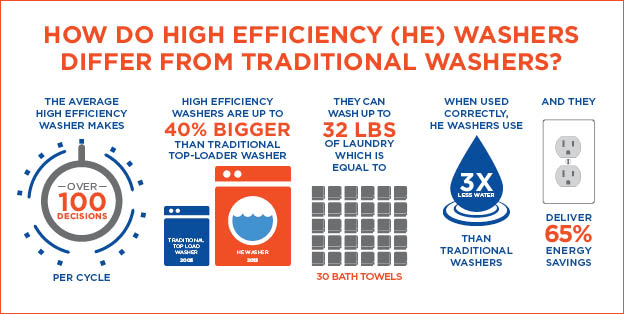
Following up the first question with another question, the obvious next thing that a customer would want to know is, how much is conserved or saved through the usage of a High Efficiency Washing Machine? This answer is actually pretty staggering, as on average, a High Efficiency Washing Machine uses up to 80 percent less water than traditional top-loading units. Not only is that a huge figure when you think about how much water would actually be conserved, but in the savings department, a High Efficiency Washing Machine also comes in at about a 65 percent average energy savings.

On top of these two facts, which basically equals less water usage, less energy usage, and as a direct result you saving money, the energy savings allows for you to be able to wash more laundry per load and these type units are about 40 percent larger and old up to 40 percent more clothes than a standard washing machine unit would.

So, basically, to answer the initial question of ,what is a High Efficiency Washing Machine? It is an item that can do the exact two things that the Raleigh plumbing experts at Poole’s Plumbing have been trying to help and educate you to do through their tips and advise, conserve and save.

Water Conservation in the Bathroom

Everyone would like to save on costly water and utility bills each month, and through several easy and simple checks and steps that can be done and followed for Water Conservation in the Bathroom, the professional Raleigh plumbers at Poole’s Plumbing can help you get on the path to saving.


Water Conservation in the BathroomThe first area to touch upon to help with Water Conservation in the Bathroom is your shower and bathtub. To begin here, a simple check of your showerhead would be in order. Aiming the head at a one-gallon bucket and timing to see how long it takes to fill can tell you when it may be time for a replacement. If the bucket is filled in less that 20 seconds you will want to look at replacing it with a more efficient, low-flow showerhead. Not only are the low flow models great for Water Conservation in the Bathroom, they are inexpensive and easy to install, they can cut your usage by more than 500 gallons of water per week. This combined with keeping a close eye on the time you and other family members actually spend taking a shower and limiting it to 5 minutes can save on average another 1,000 gallons of water per month.

In the bathtub there are lso some very easily monitored step that can help you with Water Conservation in the Bathroom. For starters, using a plug before turning the water on as you adjust the temperature will help to avoid wasting water, as will having your very young children take a bath together rather than having to fill the tub and go through the entire process multiple times.
The toilet is an obvious spot in the bathroom where by just making sure all pieces and parts are operating correctly can get you on your desired path to Water Conservation in the Bathroom. The tank and flapper are both spots on the toilet that you want to check regularly to be sure they are functioning properly. The “food coloring” test is an easy way to be certain the tank isn’t leaking, as by putting a few drops in, you can tell it is leaking if the color seeps into the bowl. If there is a leak, it is an easy fix for the pros at Poole’s Plumbing and can conserve over 600 gallons per month. As for the flapper, checking on a consistent basis to sure it isn’t sticking will help with your Water Conservation in the Bathroom efforts. Also, if you hear a toilet flushing itself or constantly running, this also is more than likely an easily fixed leak and if not addressed could lead to wasting more than 500 gallons of water weekly. One last tip that may seem obvious, but can really help conserve is to put your tissues into the trash as opposed to flushing them down, as this also can add up with each wasted flush.
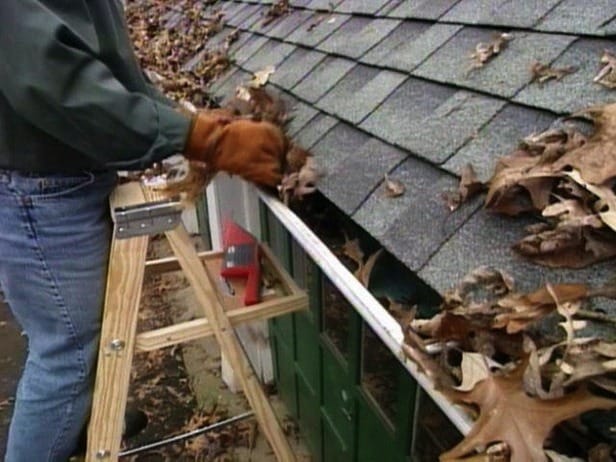
Water Conservation in the Bathroom

Lastly, monitoring your water usage at the sink can be another simple avenue to help with Water Conservation in the Bathroom. Again, these are common sense ways to save, as by just turning the faucet off while you brush your teeth, the average family of four would conserve about 200 gallons per week. Doing the same while shaving would save around 100 gallons a week as well. Much like recommended above with the toilets, when hearing a consistent drip from the faucet, having to problem rectified in a timely manner can also lead to big savings both with water and in your wallet.

Water Conservation in the Bathroom can be easily achieved and lead to you not wasting water or money unnecessarily. The plumbing experts at Poole’s Plumbing recommend these tips to you in beginning your conservation efforts and in Part Two of our water conservation articles will remind you of more simple ways to conserve water and money throughout the rest of the house.


“Rinse” Away Wasteful Water Usage with Laundry Room Water Conservation Tips

In the final article of our three part series aimed at helping you cut back both on costly water bills and on being wasteful around the house, the Raleigh NC professional plumbers at Poole’s Plumbing will take you straight to the washing machine and give you a few pointers as a part of our Laundry Room Water Conservation Tips.

Much as with the initial two articles in this series which covered conserving in both the kitchen and the bathroom, our Laundry Room Water Conservation Tips more than anything are simply a matter of staying on top of how your appliances work and operate as well as being conscious of the amount of water being used in your household and limiting that amount to what is needed.

To begin with, running your washing machine only when it is full rather than washing smaller loads can save the average family from wasting about 1,000 gallons of water per month. Likewise, being aware and keeping an eye on the size of load that you are washing and matching your water level to that load is another way that you can save.

In actuality, you can start acting on these Laundry Room Water Conservation Tips before you even set foot back in your home when buying your washing machine. By thinking of the best ways to save and conserve water when shopping for a new appliance, checking for a model that has a variety of load size and water cycle adjustments will allow you to better monitor your water usage when doing a wash. Also, with the innovative new technology always being applied to make products more green compliant, purchasing a water saving washing mating for example one with the Water Sense label to be sure your new appliance is high efficiency.

These easy-to-do Laundry Room Water Conservation Tips provided by the most trusted name in Raleigh NC plumbers, Poole’s Plumbing are simple ways to be mindful of the amount of water usage going on under your roof on a daily basis. Keeping a watchful eye out when doing your laundry in addition to utilizing the tips provided in part one and two of our water conservation three-part series, both in the kitchen and bathroom, can have you on the fast track to saving and conserving in no time.

DIY Drain Cleaning Made Easy

By Eva Sparks

Dealing with clogged drains isn’t something you can put off for long, but many people don’t even know where to begin. Other are worried that strong chemical cleaners may be harmful for their health. The good news is that, with just a bit of baking soda, vinegar, and some very hot water, you’ll be able to get all of your drains working like new again.

Baking soda and vinegar are the perfect drain cleaning agents for three main reasons. First, they don’t pose any risks to your health or to your drains. Second, when the two are mixed, they create carbon dioxide and sodium acetate, both of which can easily dissolve the grime and gunk that has built up in your plumbing. Third, the foaming bubbles they create further work to give your drains a thorough scrubbing.

Enough with singing the praises of using baking soda and vinegar to clean your drains; let’s go through the steps you need to take to actually do it.

Step 1 – Prepare 2 cups of baking soda, 1 cup of vinegar, 4 cups of boiling water, and bring them to your target drain.

Step 2 – Pour 1 cup of baking soda down the drain, followed by about half of your boiling water.

Step 3 – Pour your second cup of baking soda down the drain, followed by your cup of vinegar.

Step 4 – Quickly plug the drain to trap the bubbles in the pipe, allowing them to clean more effectively. You should be able to hear the mixture working.

Step 5 – When the sound of the bubbles begins to quiet down, open the drain again and pour your remaining hot water inside. This should clear away any remaining debris.

Step 6 – If your drain still doesn’t seem to be running as smoothly as it could, you can repeat steps 1-5 as many times as it takes for water to flow through it unimpeded.

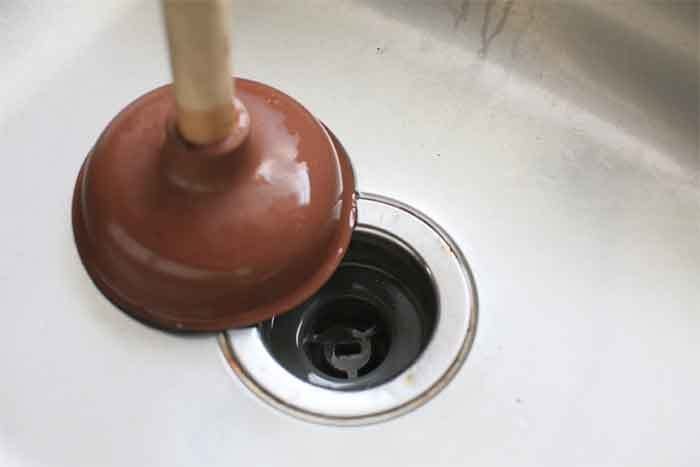
Some particularly grimy drains may also call for the use of a sink plunger. If the baking soda and vinegar doesn’t seem to be able to clear away all of the gunk, you can be sure that it has at least loosened it all up. After filling your drain with water you should seal it off with a plunger and quickly plunge up and down a few times. This should be enough to dislodge any remaining grime.

To keep your drains in tip top shape you should try not to let them get so clogged again. Clear them periodically with some baking soda, vinegar, and water, and you’ll save yourself from having to deal with many future drainage problems.

After that if your drain still doesn’t seem to be running as smoothly, you could have a bigger issue. Call your trusted local plumber.

Try These Plumbing Repair Projects Even If You’ve Never Picked Up a Wrench

If you had to call a plumber in every time something dripped or clogged up, you might wait too long. Having the right plumbing tools on hand is an excellent way to get to a problem as soon as it occurs, and to make sure that it doesn’t get out of control.

Certainly, some kinds of DIY plumbing repair projects aren’t for beginners (you should probably look up a professional plumber before you do extensive damage to your drainpipes trying fish out a lost wedding ring with a straightened-out wire hanger, for example). Many smaller problems are perfect for the DIY beginner, however. This simple home servicing guide should help you with the right ideas.

A non-working flush lever

If you have an old flush tank sitting on your toilet (rather than a wall-mounted flush lever), you should be able to handle the common loose handle problem. All you need to do is to take the lid off the tank and look inside. Often, the lever will have worked itself loose from the flapper, or from its metal chain. You may be able to simply screw any loose parts together, or visit a hardware store for broken parts.

Unclog the toilet

Some toilet clogs can be complicated and need a plumber. Before you look on Ask Doss for a professional, however, it would make sense to see what you can do with a plunger and an auger. You should first visit a home improvement store for the right tools. It takes a toilet plunger, rather than a sink plunger. A dozen strong thrusts should clear up any minor clogs. If this doesn’t do the trick, you need to send in an auger and crank away. It should attach to whatever foreign object is clogging up the works, and help you pull it out.

Correct a leaky sink drain

Leaky pipes are one of the simpler DIY plumbing projects. When you look under the sink, you should find some attachment that delivers waste water to the drain in the wall — a P-trap or bottle trap. You need to put a large basin under the drain to catch any splashes and use a large wrench to undo the nut that holds the trap in place. You can rinse the trap out, and replace the washer. Not only will the drain flow more freely now, but the new washer should also keep the water in, where it belongs.

Stop that drip

If you have a dripping faucet, you don’t have to keep using more force each passing day, to tighten it. Instead, you only need to replace the washer. Whether you have an old faucet that takes many turns to open and close or one of the newer ones that take a simple quarter-turn, it’s easy to do the work yourself. It does take patience, however. You need a small plumber’s wrench and to find an assistant to help you. While they hold the faucet from above, you go below and carefully unscrew the nut that holds it in place.

Once you have the faucet out, you can take it to a home improvement store and have them give you a replacement washer or cartridge. You want to take a video of yourself taking the faucet apart, however. Faucets contain many washers and other small components, and you want to make sure that you know how to put them back in the order that you find them.

One of the most important skills that the DIY plumber possesses is knowing when a project is too complicated. Venturing forth with a job that requires a greater level of skill and you possess a recipe for flooded floors and big bills. When you take baby steps, however, DIY can be nothing but rewarding.

Raleigh's-Most-Trusted-Plumbers

Hydro-jet, Pipe Cleaning

The Difference Between Snaking and Hydro Jetting

 At some point in time, most homeowners will experience a clogged sewer line. This issue can be quite a nuisance, so it is essential to prevent it before it happens. Regular cleaning is an excellent preventative measure, and it is effective when it comes to eliminating soap residue, tree roots and hair, the biggest culprits of serious clogs. The two most common cleaning methods are snaking and hydro-jet pipe cleaning. If you want to choose the best option for your home, it is important to learn about each. Poole’s Plumbing can help you decide which method will be most beneficial for you.

How Hydro Jetting Works

What exactly is hydro jetting? Basically, this method utilizes a powerful water stream to get rid of any debris stuck in the sewer line. The primary tool is a hose equipped with a specialized nozzle that releases water pressurized anywhere from 3,000 to 8,000 PSI. This level of water pressure is typically sufficient to blast out debris lodged in the line. Hydro jetting has several benefits, including:

  • Versatility: This method is useful for cleaning both commercial and residential sewer lines.
  • Effectiveness: Hydro jetting is highly effective at doing its job. It ensures the pipes remain clean as well.
  • Water Only: There are no chemicals involved with hydro jetting, meaning your pipes will not have to be subject to harsh chemicals just to get rid of clogs.

It is important that hydro jetting should be left to the pros, as older and more fragile pipes can be damaged by the powerful method.

Snaking

Snaking is different than hydro jetting in that is uses a steel cable called an auger with a special tip designed to penetrate tough clogs. While this method may not be as effective as hydro jetting, it is beneficial in that it does not cause damage to pipes.

If you need your sewer line cleaned and want plumbing done right the first time, contact us at Poole’s Plumbing today. We are experienced professionals who know how to get the job done. If you are a restaurant owner or have commercial needs, see our Commercial Services. One call does it all.

5 Plumbing Tasks You Should Leave to Professionals

Being able to make repairs around the home is a valuable skill to have, saving both money and time, and also giving a sense of satisfaction. Many domestic plumbing tasks can be carried out by anyone who’s reasonably good with their hands — leaking faucets, malfunctioning toilets, blocked pipes — you feasibly can fix all of these yourself, especially in this age of instant information and tutorials over the internet. However, there are some types of repair that should definitely be left to the plumbing experts, and here are five examples.

Water Heaters
Aside from routine cleaning, anything involving a water heater is probably a job for professionals. When working with a heater, you’ll be dealing with water, electricity, and probably gas or oil. If you make one mistake, the consequences can be severe. Also, an amateur is unlikely to have all the right tools to ensure safety, such as those needed to detect gas leaks or carbon monoxide emissions, and your home insurance may not cover any damage caused by faulty DIY repairs.

Sewer Repair
Not only is this an unpleasant job that you might prefer to give to someone else, but you could easily make things worse by tackling it yourself. What may seem like a simple leak could in fact be caused by a blockage or other problem deeper within the system. Without the right tools, such as cameras and other inspection devices, you might only apply a band aid with your fix. If you don’t address the main problem, you risk a more severe issue at a later stage, possibly involving the expense and disruption of digging up your whole yard.

Pipe Repairs or Replacement
Tightening a loose joint is one thing, but tackling anything more complicated is risky. A pipe system is only as strong as the weakest part. Without the right tools to ensure a proper job is done, you risk failure when the system is brought up to pressure. With water pipes, this can be a damaging leak that’s quickly noticed and fixed. With gas pipes, you might not even realize there’s a problem until disaster strikes.

Major Leaks

If you’re faced with a pipe spraying water across the room, it’s time to turn off the main supply and call in a professional. It might seem a simple matter to fix the obvious fault with a replacement joint or a spot of soldering, but this might only be the tip of the iceberg. If a major leak has occurred, it’s likely that other parts of the system are also in a similar state of wear and tear, and could be close to failure, possibly in a much more damaging and hard-to-fix location. A plumber will not only deal with the immediate problem, but also will check on the health of the rest of your pipework to prevent future failures.

Multi-Occupancy Buildings
In most jurisdictions, amateur plumbing repairs are illegal in buildings where other families also live, and so a certified professional needs to be used. Whether this restriction would ever be enforced over a simple leaking tap is of course your judgement to make, but certainly for any more major work, then it’s a point to be aware of if you want to avoid legal problems down the line.

Many plumbing repairs are fairly simple, and easier and quicker to carry out yourself rather than call in someone else. However, if you’re at all unsure, and when the consequences of a mistake can be serious, it pays to consult a professional. With most good plumbers now offering free call-outs and estimates, you’ve nothing to lose by getting an expert opinion.

Souther Ideal Home Show

Visit the Triangle’s Most Trusted Professional Plumbers, Poole’s Plumbing, at The Southern Ideal Home Show Raleigh

Souther Ideal Home ShowWith hundreds of experts representing the most trusted names in landscaping, decorating, remodeling, and home building, the Southern Ideal Home Show Raleigh is the Triangle’s Largest Home and Garden Event of the Fall Season. Stop by the “Kitchens and Bath” section at Exhibit #2310 and visit the Raleigh plumbing experts from Poole’s Plumbing for some helpful tips and ideas as well as some fantastic deals.

Southern Ideal Home Show Raleigh

Poole’s Plumbing

Exhibit #2310 in the “Kitchens and Bath” Section

Friday, September 23th — Sunday, September 25th

North Carolina State Fairgrounds

1025 Blue Ridge Road, Raleigh NC, 27607

raleigh-plumber-interview

Tankless Water Heater External Maintenance

Going with the Flow: Tips for Tankless Water Heater External Maintenance

The Raleigh professional plumbers at Poole’s Plumbing are the number one water heater specialists across the Triangle area, however, even if you have been enjoying the water savings and convenience of a tankless unit you had installed by us, to ensure you keep your hot water flowing, here are several things that you can do at home to perform important Tankless Water Heater External Maintenance.

As noted in a series of articles which include video instructions at the official Noritz website that can be found here, the first step in your Tankless Water Heater External Maintenance is to do an inspection, visually around the unit. Take a good look to make sure there are absolutely no combustible materials present can help to avoid a future hazard. One thing to look for is any type of discoloring on the outside of your tank and its remote control. Wipe this outside surface first with a wet cloth and then be sure to dry it, as despite being water resistant, your water heater is not waterproof. In cleaning the remote control never use oil or fatty detergents or benzene, as either of these can and will be harmful to it.

Tankless Water Heater External Maintenance

Much like the first simple step above of Water Heater External Maintenance, next, simply listen to your water heater to be certain that you don’t hear any abnormal sounds as the unit is operating. If you do hear something that you find abnormal, it is best to troubleshoot this type issue with one of the water heater specialists at Poole’s.

Checking for leaks in the pressure release valve may seem obvious, but this too is a part of Tankless Water Heater External Maintenance that can help to avoid a larger issue down the road. You will want to open the valve to make sure that it turns off correctly and that everything is working as it should. If you do find a leak or drip in the pressure release valve, it will need to be replaced. A thorough check of all connections to the water heater to make sure everything correctly fits can also help to detect leaks and save on a much larger problem occurring down the road.

If your water heater is a DV condensing model you will want to regularly check for dust or soot that has collected in the exhaust. To do this, you will want to use the end of a screwdriver to remove the screen from the intake valve and check for any type of debris. Before putting it back in, thoroughly clean both sides of the screen with a brush and some water, then allow it to fully dry before placing it back in. This will help to ensure that there can be proper airflow into the system.

Tankless Water Heater External Maintenance is crucial in keeping your flow of hot water steady and plentiful and by following these simple at home tips you will be more likely to catch a potential problem or issue before it becomes disastrous and costly. Our next post will be a second part in doing Tankless Water Heater Maintenance with a focus in that entry on how to maintain the internal area of your unit.

Inside-Fall-Plumbing-Tips

More Household Water Conservation Tips for the Kitchen and the Rest of Home

In the initial posting offering up tips on how to become smarter about conserving water in the bathroom, the Raleigh professional plumbers at Poole’s Plumbing listed several ways in which you could be smarter about not only your usage of water, but by doing so, save money on costly bills by simply being more observant and making sure all is running properly. The same applies to Household Water Conservation throughout the kitchen and the rest of your home, just by making a few simple adjustments and keeping a close eye on the functionality of your appliances.

Household Water Conservation

Starting out in the kitchen and laundry room, there are many simple steps that can be taken to start you on the road to savings and to avoid being wasteful through Household Water Conservation. Three major areas around the house where you can conserve are when using your faucet in the kitchen, while washing dishes, and when doing laundry. The following simple steps can be done by anyone to start your Household Water Conservation.

Faucets

  • Look for any leaks and if found, fix them immediately. (A faucet that leaks just 60 drops in a minute wastes over 190 gallons of water over the course of a month, this is the equivalent of over 2,300 gallons in a year’s time)
  • Install a faucet with the WaterSense label. Any aerator or faucet containing the U.S. EPA WaterSense name uses a maximum of 1.5 gallons per minute.
  • An obvious step that sometimes is overlooked is to simply turn your faucet off if washing hands or scrubbing dishes while lathering.
  • Do not run the water to thaw out frozen foods. Being mindful and thinking ahead to simply put these items in the refrigerator to thaw overnight is an easy way for Household Water Conservation

Dishwashing

  • As noted above under faucets, if washing by hand fill the sink with water to use and then shut the faucet off rather than keeping he tap running.
  • When running a dishwasher, only wash when it is completely full. This will cut down on the number of times you use the machine and thus help with your Household Water Conservation efforts.
  • Use the dishwasher as opposed to washing by hand when possible. Especially if you are mindful of water usage during “pre-rinsing,” the dishwasher will use considerably less water than running the tap as you scrub.
  • Lastly, if you have an older model dishwasher, look into a new, more efficient model. With technological advances, Household Water Conservation can be had easily, as most newer models will tell you the amount used per washing cycle.

Laundry

  • Just as stated above with the dishwasher, maybe the most simple way to achieve Household Water Conservation is by only doing full loads of laundry as opposed to starting up a half full washer.
  • If you have an older model washing machine, adjust the water level for the amount needed in each load. Many of the newer models will do this automatically
  • Once again, updating your older model may be the most efficient method of Household Water Conservation in the laundry room. Units built prior to 2011 on average use about 40 gallons per load, while the newer models use as little as 15 gallons per load.
  • Finding an EnergyStar model or checking when selecting a new unit for the lowest possible “water factor” will help you maximize your per load conservation.

Household Water Conservation

 Much like the conservation tips offered in our previous article touching on the bathroom, following these simple tips for Household Water Conservation can put you well on your way to avoiding wasteful water usage as well as starting on the road to savings.

Unclog a Shower Drain

Simple Household Spring Plumbing Tips Can Help to Save

As the changing of the season from Winter to Spring is even more apparent with the recent change in temperature, the second part of our Spring Plumbing Tips from the most trusted name in Raleigh NC plumbers, Poole’s Plumbing, has several more simple things that you can do around the house to help prepare and avoid major issues as the heavy rains of the season approach.

These basic check up and repair techniques are Spring Plumbing Tips that any home owner can follow and they not only get you ready for the changing of the season, but also is a safe way to avoid more significant damage in the case that you have actually developed some type of plumbing issue during the cold winter months.

To begin with these Spring Plumbing Tips, thoroughly check all faucets in both the kitchen and bathroom of your home. This can help you to conserve water and money, as can checking your toilets to be sure there aren’t any leaks. An easy way to do this would be to place a few drops of food coloring in the tank and if a leak has developed you will see the coloring in the bowl with in 30 minutes time. Checking for leaks or cracks in the toilet bowl also is a good idea when doing this.

Before moving along from checking your toilet, another of our suggested Spring Plumbing Tips is to be sure the units are flushing correctly. If by chance you need to shake or wiggle the handle, certain parts will need to be replaced. This can be done inexpensively and can not only fix the toilet but also save you money on water costs.

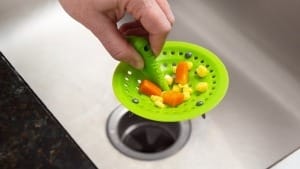
Spring Plumbing TipsChecking for clogs is next on the list of Spring Plumbing Tips. Beng certain that you have a filter on all of the drains in the house will prevent buildup such as soap, hair, or a variety of other substances from creating some type of blockage. Shower heads are another area that can easily become clogged due to mineral deposits. A simple solution to this is to fill a zip-lock bag with white vinegar and using are rubber band to secure it, wrap the full baggie around the head. Leaving this on the shower head for 24 hours will break the deposits down and have it completely clog-free and clean.

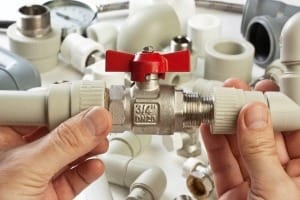
Lastly, you should check your water supply valve on occasion and turn them on and off. By doing this regularly, you can prevent the valve from sticking, which can lead to much more serious issues down the road.

By following these simple Spring Plumbing Tips and staying on top of these items around the house, in addition to checking each of the items detailed in Part One of our tips that can be seen here, you can with little effort have the plumbing in your home ready for the Spring and free and clear of any minor damage caused through the winter before it becomes more costly and a much bigger problem.

Spring Plumbing Tips

Following Spring Plumbing Tips Can Help Avoid a Costly Fix

As the colder weather here in the Triangle area starts to secede and give way to the warmer temperatures of a new season, the trusted Raleigh NC plumbers at Poole’s Plumbing want to remind you that there are many things to remember as you check around the house and look for possible repairs that may need to be done as part of our Spring Plumbing Tips.

By simply going through your bathroom, kitchen, appliances, and plumbing equipment in your home’s common areas and following these Spring Plumbing Tips early on in the season, you can avoid or at least lessen the likelihood of major and potentially costly repairs.

With the increase in rainfall that we are already experiencing one thing you for sure want to check up on is that all drains, gutters and downspouts are clear of any debris. Likewise, on top of the list of Spring Plumbing Tips and check points should be to make sure all vents and plumbing pipes are clear as they could be hindered or clogged from leaves, sticks, bird nests, or a host of other items after the winter “thaw out.”

Spring Plumbing Tips

Another very important item on your Spring Plumbing Tips checklist should be checking your hose bib. First look at the faucet to be sure there are no leaks. This is a somewhat common problem after the colder months when a hose has been attached to the hose bib for the entire winter. If it was hooked up for the winter, it could have lead to the water supply pipe freezing at some point and this in turn may have seen the pipe expand and crack. If you do discover this is the case, call your trusted Raleigh NC plumbers at Poole’s and have the pipe replaced before major water damage can occur.

Keeping your plubming system safe should be a top priority during any of the four seasons, but the most important Spring Plumbing Tip you can follow as the winter cold turns to the warmer months is to make sure your sump pump is ready to endure some hard work in the upcoming season. Checking this is as simple as pouring a few buckets of water into the sump pit for starters. It should then start up with in a few seconds and then after the water flows, it should turn itself off automatically. If this does not occur once again, you should contact the professionals at Poole’s Plumbing to come and see your sump pump first hand before it burns out completely and once again requires a much more costly remedy.

Taking just a little time to go through and around the house to check on these items and follow up on each of these Spring Plumbing Tips as the cold air begins to warm with the change of the season could be the difference between major plumbing issues and water damage at your home, not to mention some unnecessary damage to your wallet. In part two of our Spring Plumbing Tips, we will discuss some other simple ways around the house to conserve heading into the Spring.