DIY plumbing Tips and Tricks

Sulfur Smell in Your Drain is Nothing to Joke About

The smell is horrible. The comparison many give to it smelling like rotten eggs is pretty close, but it’s even worse. If you have that terrible Sulfur Smell in Your Drains permeating throughout your home, you will want it gone in a hurry.

The first item of business is answering why there is a Sulfur Smell in Your Drains. The obvious follow up to that is what is causing the smell. Luckily, the Raleigh area plumbing experts, Poole’s Plumbing is happy to help you address and figure out these types of issues. Consequently, we can help you get rid of that Sulfur Smell in Your House.

Sulfur Smell in Your Drains? Or is it From the Water Itself?

A valid question once you think there are Sulfur Smells in Your Drains is, is it for sure the drains? It could also be coming from your water itself. Thus, to test and see what the source is, you can follow the two steps bullet-pointed below.

  • Pour a glass of water from your sink that you have smelled the sulfur in.
  • Take it outside and smell it

Now, if you don’t smell anything from the water, the issue is definitely a Sulfur Smell in Your Drains. However, if you do smell it in the water, pour a second glass, but use a different sink. If both glasses have that awful odor, the issue is probably in the water. If only the water from the sink you initially smelled keeps the odor, you are probably looking at the drains.

What Exactly is Causing this Smell?

The Sulfur Smell in Your Drains can be from several things. First, and most common cause is a clogged or partially clogged drain. When. sinks become clogged, the drainage is much slower, and bacteria can build up in the p-trap and create hydrogen sulfide gas.

Likewise, the issue can come from a drink that has not been in use. This happens if the water in the p-trap dries up from it not being used, gas from the sewer line can rise out of the sink.

Another common offender (and we do mean offender if you had smelled this…) is a dirty garbage disposal. This one is on you people! Keep the food and bacteria out of the disposal or at least keep it clean.

What Can You Do About the Sulfur Smell in Your Drains?

Luckily, there are several things that you can do to prevent this awful stench from emitting in your home. First, always keep clean garbage disposal. Run it often and run either a disposal cleaner or ice cubes in it from time to time to keep the blades clean. Some lemon wedges or orange peels can help to emit a more pleasant scent from your disposal, too.

If the Sulfur Smell in Your Drains is coming from the bathroom sinks, one way to get rid of it and to eliminate the clog causing it. Pour a half-cup of Baking soda down the drain. Follow this with a full cup of vinegar, and then continue to flush with hot water. If this has not eliminated the smell, it’s time to call in the pros.

So, in conclusion, if you have the scent of rotten eggs or Sulfur Smells coming from your drain, it may be a simple fix. But if for one second you think it’s more serious, contact us at poolesplumbing.com. We will be happy to advise and lead the way to eliminate these odors for good!


flooding-in-your-house

Flooding in Your House: Act Fast to Minimize Damage

The ultimate plumbing disaster and nightmare for a homeowner is Flooding in Your House. Upon discovery that this is occurring or has already, it is easy to panic and in that state not know what to do. Regardless of your reaction, the one thing you don’t want to do is wait.

This is no question a scary situation for anyone. However, rather than make a bad situation worse financially than it needs to be, regardless of where we discover the source is, you want to act as fastly as possible. Below are our suggestions for what to do in the case of Flooding in Your House.

Top 5 Things to Do When you Discover Flooding in Your Home

1) Shut Your Water Off

If you realize you have Flooding in Your House, the first item of business is to stop any and all water flow. If you realize where the leaking or damaged fixture is you want to turn this off. Either way, you can just locate and turn off the main water shut off for the home also.

2) Protect or Move Your Furniture

When realizing of Flooding in Your House, this is an idea to save what you can. Carry any furniture or important items to a dry area. If for some reason you are unable to move the furniture, place a few layers of aluminum foil underneath the legs. Then pin-up the skirts, so no color from the furniture runs to the floor.

3) Turn Off any Electricity

Water and electricity just do not mix. Ever. Thus, when you see Flooding in Your House you want to get the power off as quickly as you can. Do this by going to the main circuit breaker and flip any switch on to off. Remember if the floor in front of the breaker panel is wet, stand on a dry wood plank before touching the breakers.

Flooding in Your Home: Getting the Cleanup Process Started ASAP

If you’ve realized that there is Flooding in Your House, you definitely want to call in a professional plumber, like us here at Poole’s Plumbing. Likewise, you want to get in touch with a restoration company. The purpose of the restoration company would be for in-depth cleaning and to be sure to prevent mold growth.

Though it is safer to wait for the restoration company so they can properly remove items. But getting things dry as quickly as possible is necessary. While you wait for the restoration company, the following things can be done to assist in rectifying Flooding in your House.

  • Remove as much excess water from the floor as possible. Mop up tile and hardwood, blot the wall-to-wall carpet with towels, and use a wet-dry shop vac (not your regular vacuum!) to remove standing water.
  • Get the windows open! Well, do this if it’s cool and dry outside. Otherwise, turn on the air conditioning to aid in drying. However, if the flooding is from sewage, and the water level has risen high, do not use the AC method.
  • Open all cabinets affected by the flood. Turn on any exhaust fans you can. Likewise, run any ceiling fans that can help speed up the drying process.

Document Damages for the Flooding

We discussed that when you do have Flooding in Your House that initial period of being scared. Seeing the damage to your home and your belongings can be startling but in this our last suggestion about Flooding in Your House, we remind you to document these items. Be sure to list an inventory of anything that has damaged, a list of when they were purchased and their cost or value. As you move along in your cleaning, take some pictures for when you file an insurance claim.

As we note throughout this post, we know Flooding in Your House can be a shocking and uncertain development. However, if you can take it all in stride and remain calm, make a call to the pros here at Poole’s Plumbing, and get the help you need, and the problem minimalized as much as possible. To reach us here at Poole’s Plumbing, visit poolesplumbing.com.
 

dishwasher-is-leaking-pooles-plumbing

My Dishwasher is Leaking…What May be the Cause?

We all love the convenience of just rinsing a dish and setting in the dishwasher to be cleaned. It’s a luxury that has almost come to be taken for granted. But that luxury can be appreciated very quickly when one discovers a problem with their dishwasher. One common issue that can develop is when you notice your Dishwasher is Leaking.

In the post below, we will take a look at why possibly your Dishwasher is Leaking. Likewise, with each possibility we explore, we will discuss a possible solution to that given issue.

Why Your Dishwasher is Leaking

Many of us have faced the situation. You see the water underneath and in front of the dishwasher. Obviously, you’ll want to put some towels down to dry up your floor, but then, our troubleshooting begins. Rest assured, when your Dishwasher is Leaking, many of the causes will leave you with an easy “do-it-yourself” fix. For exactly what to look for and how to go about fixing, see below.

Reasons that Your Dishwasher is Leaking

Before listing the possible reason that the Dishwasher is Leaking we should explain one situation to be aware of. This would be if you notice the leak happening while you run the kitchen sink. This would indicate a drainpipe issue. If that is the case, simply raise the dishwasher drainpipe above the level of the sink drain to rectify the problem

However, as with most instances, if the Dishwasher is Leaking while the dishwasher is running you could be facing any of the below problems.

Leaky Gasket

A faulty gasket on the dishwasher door is maybe the most common reason your Dishwasher is Leaking. To look and see if this is the issue, check the seal around the door. If there is a ripped or worn out area, replace the gasket and the leaking should be over.

Usage of Incorrect Detergent

If dish soap or laundry detergent is used in the dishwasher, this can cause excessive suds. Thus, the suds and water will seep out the door. To avoid this, only use the proper detergent for a dishwasher.

Cracked Hoses or Faulty Valves/Hose Connections

If your Dishwasher is Leaking and you notice the water coming from underneath, you have a water or valve issue. To address this, first either unplug the dishwasher or turn off the circuit breaker. To check and find the exact leak location, first, remove the toe kick from under the dishwasher. This allows access to each part you want to check. These include the water inlet valve, recirculation hose, drain hose, and other components. Simply run a hand along each of the hoses for a leak. Likewise, look for corrosions, loose connections, or a bad solenoid valve. Replacing any old or faulty parts can fix your issues and end the leakage.

Float Switch Problem

In the case that your dishwasher is too full, the doors are more likely to leak. The float switch functions to prevent the doors from overflowing. However, if the float switch is stuck on something, it may not work properly. If you see this, replacing that switch will solve the problem.

Drainage Issues

If your Dishwasher is Leaking and you noticed it has not been draining properly, the water level can rise too high. To check and fix drainage issues, look at the filter in the. bottom of the dishwasher. Remove anything that is clogging that filter and remove it.

Leaky Pump Seal

Give a check to the seal around your water pump to check this one. If you see water dripping from the pump housing or motor, you must remove the pump and then replace the rubber seal.

Dishwasher Sitting Crooked

This may seem an obvious check, however, it is important enough to remind you. The dishwasher must be set and sitting level to work correctly. To check this and be sure, use a carpenter’s level and adjust accordingly. An even dishwasher will make it far less likely that your Dishwasher is Leaking.

If Your Dishwasher is Leaking and You’ve Tried all these Suggestions

If you’ve taken a look at the areas above and are still unsure or not comfortable addressing that your Dishwasher is Leaking, we have you covered. Simply contact us at poolesplumbing.com and we can advise or if you need to come out and take a look at the issue.


types-of-plumbing-types-pooles-plumbing

Knowing the Right Types of Plumbing Pipes

It is a joyous and exciting time when building or buying a new home. Likewise, it is a very busy and sometimes stressful process as well. There are so many specifics that you want to be sure of and it weighs heavily on the new homebuyer to not forget any important details. One very important detail that you want to be sure of is finding the right Types of Plumbing Pipes and knowing which are best suited to get the job done right.

Is this really that important? Can’t you just totally rely on the builders and plumbing staff brought in for the right Types of Plumbing Types? Well, more than likely they would get you set up correctly. However, in case you don’t want to even take the slightest chance, below we will familiarize you with four different Types of Plumbing Pipes.

Different Metallic Types of Plumbing Pipes

As you are probably aware, the different Types of Plumbing Pipes are made from different materials. Each has reasoning and its benefits for being made as such. The first two types we will detail for you are made of metallic-like material, with copper first and then galvanized steel.

Copper Piping

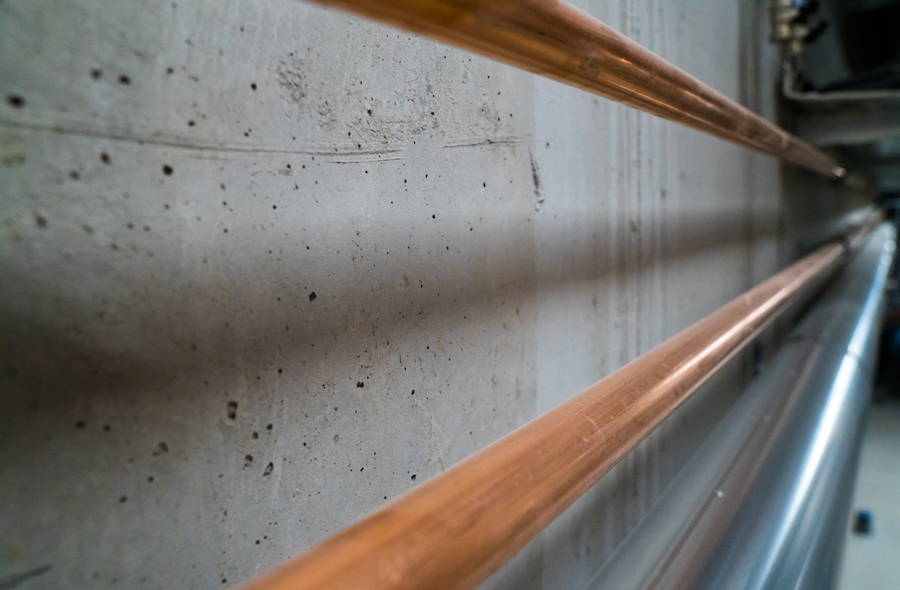
The first type of piping we will look at is copper. This is many times used to either construct or renovate gas line plumbing systems. Cooper pipe is known to be extremely durable and reliable in residential or commercial properties. They handle very high pressures and also extreme cold or hot temperatures. Copper piping is more expensive than our other options, but if installed right lasts 50-70 years on average. Below are the most important benefits or characteristics of copper pipe to take into consideration.

  • Very reliable against corrosion
  • Fire resistant
  • One of the most common materials available
  • Able to be used with hot and cold water
  • Does not release any dangerous materials into water
  • Must be soldered together by a professional

Galvanized Steel Piping

Next up among our Types of Plumbing Pipes is Galvanized Steel Pipe. These are obviously made of steel. But it is steel that has been dipped in a molten zinc protective coating. This helps prevent or at least delay rust or corrosion. These Types of Plumbing Pipes first became popular as an alternative to lead pipes in the months and years after World War I. The most popular that Galvanized piping saw was from those early days up and through the 1980’s. The one setback with these Types of Plumbing Pipes is that after decades of use they can develop corrosion and rust buildup which can create some serious plumbing issues. The benefits and characteristics of galvanized steel piping to consider are below.

  • They are less expensive than copper
  • More durability than copper pipe
  • They have a wider diameter to allow more water flow than other Types of Plumbing Pipes
  • Is mainly used for “gray” water (i.e., excess bath, sink, and appliance water)
  • Once they age and rust appears, there can be visible pieces of rust in the contents of your water

Plastic-Like and Non-Metallic Types of Plumbing Pipes

Just as with the two metallic Types of Plumbing Pipes, each of the two we will cover next has its benefits. These non-metallic pipes are very durable, as you might expect. Are they the right fit for your home or place of business? Well, take a look below and become more familiar with each and take any guessing out of the equation when answering that question.

Polyethylene Piping (PEX)

Our next analysis of the Types of Plumbing Pipes is made of plastic. Polyethylene or PEX pipe is used for water supply piping systems in homes or commercial locations. A major plus is the flexibility of this type of piping, which makes for easier installation. While initial installation costs are usually higher than other piping, there is practically no maintenance needed with PEX pipe. It ranges in sizes from 1/4 to 4 inches in diameter and is heat resistant and incredibly durable. The most important characteristics of PEX piping are shown below.

  • Easily installed
  • Generally leak-free
  • Helps conserve energy due to a reduced heat transfer
  • Less expensive than copper piping
  • Does not need to have a threaded connection or soldering
  • Corrosion-resistant
  • Most resistant piping to scale buildup
  • A good fit for smaller commercial or residential property

Polyvinyl Piping (PVC)

Our final analysis of Types of Plumbing Pipes is one used for an array of piping applications. Polyvinyl or as it’s better known, PVC piping can be used for anything from sprinkler systems to transport piping for drinking water. This is a very popular alternative to lead-based piping that is often used throughout the United States and England. It is known as a very durable pipe and is very reasonably priced also, which adds to this materials allure. The fact that it has the capability to operate for over 100 years is also a good selling point. Some of the characteristics of PVC piping that you should know are shown on the following list.

  • Different levels of thickness of the pipe are available depending on what type of job it’s being used for
  • Is often used for drinking water and sewage-related plumbing applications
  • The PVC piping used in the aforementioned drinking water pipes are specially designed to meet any and all health regulations and requirements
  • Polyvinyl is a low-carbon, recyclable plastic. Thus, PVC piping is an environmentally friendly selection

Making Sure You are Making the Right Choice

So, this concludes our look at the four main Types of Plumbing Pipes. Now that you are a bit more familiar with your options, your decision for which pipes to use for which jobs should make more sense than coming in blindly. A conversation with one of the professionals from your trusted Raleigh plumbers at Poole’s Plumbing before they start the installation process combined with your new-found knowledge should have you on the right path to plumbing pipe perfection.

To contact us about your pipes or any other plumbing issues you may have, visit poolesplumbing.com.


slow-filling-toilet-pooles-plumbing

What is the Cause of My Slow Filling Toilet?

It has happened to us all. All of a sudden you notice after a flush that it is seeming to take your bowl longer than usual to fill back up. This is not a real uncommon problem. Likewise, it does not need to be something that turns into a huge problem., This of course all depends on how quickly you detect and address your Slow Filling Toilet.

Now, if you just read that and thought, “oh no, how can I tell what’s causing my Slow Filling Toilet,” it’s ok. Your friends at Poole’s Plumbing have got your back! Below we will give you three main issues to look for that could be the source of the Slow Filling Toilet. Remember, it usually takes the toilet about one minute to refill. Any longer than this you should keep an eye on the following things listed below.

Possible Causes of a Slow Filling Toilet 

As we note above, these are three possible reasons behind a Slow Filling Toilet.

Problem #1 – Water Supply Valve

Just to be clear, the water supply valve is the knob coming out of the wall just below the toilet tank. What purpose it serves is to control the water flowing into your toilet. If this is in any way closed or not functioning right, it may not be able to deliver the needed amount of water at the speed to fill it correctly. This would result in a Slow Filling Toilet.

Another possible problem could occur with the valve if debris of some type has built up. This can also make the filling speed slower due to the water flow being restricted.

Troubleshoot Tip #1 for Slow Filling Toilet

 If you check the valve and it is completely open, and still not producing enough water to fill the tank, call Poole’s Plumbing. We will give a check for debris buildup.

Problem #2 – Your Float Ball is Water Logged

The float ball is pretty self descriptional. For those not familiar, it is the ball inside your tank that sits on top of the water. Its function is to control the amount of incoming water. If this ball becomes waterlogged, it will not allow the tank to fill correctly.

Thus, the water may either fill at a slower rate or the correct amount may not enter the tank. This would also create a Slow Filling Toilet situation.

Troubleshooting Tip #2 for Slow Filling Toilet

 Check your tanks’ water level. First, remove the tank’s lid to check. Then if you can see that it’s not full or that the ball is not floating at the top, it may be waterlogged. As with the first two problems, if this happens, you could see a Slow Filling Toilet.

This is not the worst news however, as replacing a float ball is simple. Just pull the old one from the arm and put a new one in its place. Of note also though is that a float ball is somewhat dated technology now when it comes to plumbing resources. You may want to get more modern components for your replacement if the ball is no longer working.

Problem #3- Issues with the Fill Valve Tube

Your fill valve tube is inside the toilet tank as well. Quite simply when you look in the tank, it is the tube attaching to the fill valve. The tube’s function is to control the tank’s water level. Over time, with any toilet, the fill valve can start wearing down. Likewise, they can move out of alignment or become clogged as well. If any of those three problems are occurring with your fill valve tube, it can stop the tank from properly filling up.

Troubleshooting Tip #3 for Slow Filling Toilet

If you rule out the water supply valve and a waterlogged float ball, you should look at the actual fill valve. Look for any signs of wear and tear of it being in an incorrect position. It should be on the left side of the tank. Likewise, it should have a tailpiece that extends through the tank’s bottom where it attaches to the supply tube or shut off valve.

So, if you happen to notice you have a Slow Filling Toilet, this is no reason to fret. Calmly, coolly, and assuredly just take a look at each of the possibilities above and analyze. If there is an issue that you are uncertain or uncomfortable in fixing personally, give us a call! Here at Poole’s Plumbing, we are the number one name in Raleigh plumbers for over 20 years. To contact us, following the link to our “Contact Us” section at poolesplumbing.com.


unclog-a-bathroom-sink-pooles-plumbing

Identifying the Backup and How to Unclog a Bathroom Sink

What is the best way to Unclog a Bathroom Sink? This is an often-asked question and the answer is not as simple as you might think.

To begin with and before we get to how we Unclog a Bathroom Sink, we must identify what exactly is clogging it. Depending on the source of this blockage, there are different ways to go about freeing the backup. We do need to know this before we can begin unclogging, though. So, let’s begin by looking at the four items most often found responsible for a clog.

What is Causing the Clog?

As we note above, there are four common answers to what is clogging your bathroom drain, usually. Here we will look at each of these and discuss the best way to Unclog a Bathroom Sink in each of these instances.

  • Clumps of Hair- We have all seen this before. Hair will enter the sink drain and get caught or clumped inside fairly regularly. To Unclog a Bathroom Sink that hair is the cause, find an item like tweezers or a “zip-it” tool to pull from the drain. If that does not work, you must look at disassembling the whole drain, pulling the hair and reassembling after.
  • Damaged Pipes- The rusting or corroding of your pipes can be the cause of a slow drain or an eventual clog. If this is the problem, you should 1) replace the pipes as soon as possible. Likewise, 2) you can try snaking them to clear through and make things run faster.
  • Soap Scum- Much like the clumped hair, soap scum is a “clog maker” that most people are familiar with. This is a very common “clogger” of drains. To Unclog a Bathroom Sink which is due to soap scum build up try first to pour boiling water through the drain. baking soda and vinegar will also usually work to Unclog a Bathroom Sink. If neither of these work, use a plunger and warm water.
  • Obstruction in P-Trap- The P-Trap is the curved pipe that connects your bathroom sink to the pipe that goes into your wall. Small items can easily fall into the drain and get stuck in this pipe, causing clogging. To Unclog a Bathroom Sink in this case, you just clean out the P-Trap.

What if I tried all these and could not Unclog a Bathroom Sink?

So, you have tried each of the suggested methods to Unclog a Bathroom Sink. Now, if none of them worked, it’s time to contact a pro. Luckily for you, Poole’s Plumbing is the most trusted name in all areas of plumbing across the Raleigh area. Unclogging is no problem to our great staff, and we’d be happy to help you. To contact us at Poole’s for this or any plumbing needs, visit poolesplumbing.com.


well-system-water-pressure-pooles-plumbing

How to Increase Well System Water Pressure

Many have never before relied on a well system for their plumbing or water source. Thus, they probably cannot imagine some of the water pressure issues that can go along with this. However, for those who do have to deal with Well System Water Pressure problems, it can truly be a frustrating one.

Just because you are a homeowner whose home uses a well system though does not mean you need to suffer through the problems that can arise with this. On the contrary, the trusted Raleigh professional plumbers here at Poole’s Plumbing are once again here to help. Thus, by checking regularly and following our troubleshooting tips below, you can stay on top of your Well System Water Pressure issues and nowhere to look and fix if they resurface again somewhere down the line.

Is There a Way to Improve My Well System Water Pressure on My Own?

To begin taking a look at improving your Well System Water Pressure, first, it is advisable to learn how to test your water pressure. The ideal level for Well System Water Pressure is between 40 and 60 psi. Once you have learned to check the pressure, remember to give this a look several times throughout the year, so if levels are dropping you are in the know before any problem persists.

Where Do I Start to Check the Pressure?

In order to accurately check your Well System Water Pressure, the first step is to turn off your circuit. This will be connected directly to your well pump. Once certain that the circuit is off, use a gauge to test your system’s air fill valve. As we note above, you are looking for this to read between 40 and 60 psi. Thus, if the Well System Water Pressure is outside of that range, adjust your pressure switch accordingly.

Even After Adjusting, My Well System Water Pressure is Still Low

So, you took the first step in troubleshooting the issue and got no results. Not to worry or get frustrated, as this can happen. Many times, if the Well System Water Pressure does not fix the issue, it can mean you have a clogged water pipe. This is not uncommon, as pipes can over time become filled with debris such as mineral deposits or sediment. These types of things entering your water pipes can allow the flow. Thus, this would lead to a decrease in pressure. If you think this is where the problem lies, we recommend calling the professionals here at Poole’s Plumbing. This way, we can come out and do a diagnostic test to see if you have a blockage or if possibly your pipes are too narrow.

Time to Inspect

So, to this point our troubleshooting has our pressure checked and eliminated the prospect of a clog. The next step to check our Well System Water Pressure level is inspection. The first thing to be inspected is the water itself. If you find that you have “hard water,” this could certainly be your water pressure issue. To diagnose this, look for calcium deposits on or near your faucets. If you see these things, you will want to install a water softener. This can take care of any hard water issues.

Now, when checking your Well System Water Pressure, you may be able to detect hard water in your pipes. However, another possible cause here is a failing pressure tank or well pump. If either of these is the issue, call us here at Poole’s Plumbing. We can do a diagnostic on your well pump and pressure tank to see what exactly the cause is. Likewise, once the issue is identified, we can get your water pressure up to a normal level.

What About a Constant Pressure System?

If you do not already have a constant pressure system, the purpose they serve is to keep water pressure from dropping even when multiple water sources or fixtures in your home are being used at once. You can install this device on your water line which enters your home. This will give your Well System Water Pressure a consistently strong flow.

If in any way, you are trying to diagnose your Well System Water Pressure and you are unsure, give us a call. Likewise, if any of these steps once you arrive at them make you uncomfortable, just go to poolesplumbing.com and get in touch, so we can get out and lend you a hand.

faucets-with-smart-technology-pooles-plumbing

Faucets with Smart Technology are Washing us Into the Future

Smart. Something we all aspire to be. This  one word can cover a lot of area, but when it comes to the particular subject for Faucets with Smart Technology, smart takes on dual meanings.

Technology. One word that any person reading this can read and think of countless ways our lives are different because of it. The ways that our cars operate. How we protect our homes. What we are watching and how we are watching television. Obviously, the evolution of the wall phone to the smartphone.

The inside of our homes is no different in that the more advances we see in technology, the more convenient or “smart” our homes get. The bathroom is no exception, as one can attest by looking at the innovations to toilets and showers. Likewise, and where will be discussing in this post, Faucets with Smart Technology are the “next wave” to be looking for.

Bathrooms have been “growing up” in regard to technology for quite some time now. Everything from lighting to the temperature setting on all appliances and areas. But, in this piece on Faucets with Smart Technology, we are not going to focus so much on the “pampering” aspects of the innovations. Instead, we will look at exactly how you can use Faucets with Smart Technology to be …well, smarter.

Being “Smart” and Connecting to Your Faucets with Smart Technology

There have been many Faucets with Smart Technology whose features evolved greatly. Most of us have seen how water temperature can be preset through the usage of apps. Likewise, the “touch-free,” motion sensor faucets have continued to see improvements over the years. However, this latest innovation to Faucets with Smart Technology we will discuss can not only aid convenience, but help you conserve and consume with no worries, and very little effort.

The product we speak of was first developed by a North-Eastern United States startup company and is a combination a water filter and meter. Thus, it allows you to connect any of your own smart devices to these Faucets with Smart Technology. Once you connect, the technology not only filters and informs you of the water quality levels but also monitors exactly how much is used.

So, whereas most filters would run on a time-based module, this type is based on the amount of water you consume. So, it can actually produce real-time data and information for you. This innovation basically tells you how good your water filter is working, the level of the water quality you are consuming is, and how much water you actually consume.

Monitoring, Filtering and Helping You Save Money

There are multiple ways for Faucets with Smart Technology to save you from wasting water. Likewise, they can save you  from wasting money. How exactly you ask? Well, let us explain.

Having  Faucets with Smart Technology helps you be able to plan ahead. As a result, you can accordingly adjust your usage. This is not the only way your Faucets with Smart Technology help you save though.

This new module can help you save on your water bill in a variety of ways. For example, it could be set to remind you when brushing your teeth to turn off the faucet. Likewise, it can recognize a leak, which we all know can be costly. So, you are both avoiding wasting water. Likewise, you will save on your monthly bills as a result of this.

Faucets with Smart Technology, With No Need for a New Faucet?!?!

Let’s say this company is able to secure the funding and release this product. As a result, consumers will have more accurate water consumption information than ever previously thought possible. In addition to this item in regard to Faucets with Smart Technology, you don’t even need a new faucet, as it will attach directly to your existing plumbing feature.

Your friends at Poole’s Plumbing are not only the most trusted name in Raleigh plumbers for the past two decades. They also are always staying on top of the latest innovations in all plumbing technology. As the innovations in Faucets with Smart Technology progress, we at Poole’s will keep you posted.  To contact us here at Poole’s for any and all of your plumbing needs, visit poolesplumbing.com.


water-heating-up-pooles-plumbing

What Takes So Long for Water Heating Up

Regardless of the time of year, the weather outside, or the number of people in a household, the amount of time it takes Your Water to Heat Up is crucial. Straight up, if you need hot water, whether showering, cooking, or washing, you don’t want to wait. So, if you have been waiting too long for Your Water to Heat Up, the most trusted water heater authority in the Raleigh area, Pooler’s Plumbing has compiled the following list of 5 reasons you may be waiting for Your Water to Heat Up.

Just to give you five possible reasons why you are waiting for Your Water Heating Up is not really solving the problem for you though now, is it? Never fear, though, your friends at Poole’s have got you covered. To see how to speed your water heating process up, just continue reading the paragraphs below. Now let’s hurry up, that water of yours must be freezing!!!

Five Reasons that You May Be Waiting for Your Water Heating Up

Your Water Heater Is Failing

As water heaters get up in age, especially around the ten-year mark, they are nearing the end of service time. This can lead to the unit being less effective and even stopping to work entirely. If you discover this why you are Waiting for Your Water Heating Up, give Poole’s a call and we can come help you decide whether it should be fixed or replaced.

Water Heater is Too Far Away

Our first three “reasons” on this list, we will stick with looking at the water heater. This one would seem common sense for why you’re Waiting for Your Water Heating Up. Stated, the further your water heater from the faucets or your shower, then the longer it takes for the hot water to get to you and your family.

Undersized Water Heater

So, this is our third of three “reasons” for Waiting for Your Water Heating Up that could be water heater related. Likewise, as the case with our previous entry, this would also seem to be common sense. However, it can happen. Let’s say you initially had two people in your home, but over several years, you family has grown. This will lead to more hot water being used and your solution may be in just upgrading to a larger unit.

The Buildup of Sediment or Rust

Yes, technically this “reason” would find you checking your water heater as well. Regardless, over time, sediment does build up in your water heater. This results in dissolved minerals such as Calcium or magnesium settling on the bottom of the water heater’s tank. Seeing this is also where the unit’s electric heating element or burner is located, you may need to replace or flush out the water heater to help improve its effectiveness.

Low Volume Restrictor

Your reason for Waiting for Your Water Heating Up may not be as complex as thought. If you have a low volume restrictor installed, in your shower, or on any plumbing fixtures this can delay the delivery of water.

When Will the Hot Water Return?

Ok, so we just took an in-depth look at why you may be Waiting for Your Water Heating Up. The logical next question you would have is, when will the hot water return once it has run out. Well, ask, and you shall receive an answer…

To get to our answer though, we again refer to the specifics of your home’s water heater. On average, an 80-gallon gas water heater will take about an hour before hot water comes back. But the actual recovery time can vary greatly depending on the following four factors.

  • Size of Tank- Simply put, the larger your tank size, the longer the recovery time.
  • Type of Fuel- If you have an electric water heater, your unit will take about twice as long to reheat than a gas water heater does.
  • Time for Temperature to Rise- When it is cold outside and the incoming water temperature is, therefore, colder than usual, it takes longer to reheat.
  • “First Hour Rating” (FHR)- It will take less time for the water heater to reheat the higher your FHR is.

Don’t Sit Waiting for Your Water Heating Up, Poole’s Has all Your Water Heater Issues Covered. 

Poole’s’ Plumbing is known as the number one source and authority for water heaters across the Raleigh area. Whether you have a tankless or traditional water heater. Whether gas or electric. If you need a tune-up or a full replacement. Regardless of any of these services you need, Poole’s Plumbing will not leave you Waiting for Your Water to Heat Up.

To discuss hot water issues or have one of our professionals come take a look, visit us at poolesplumbing.com.


signs-of-sewage-backups-Pooles Plumbing

Signs of Sewage Backups for Early Detection

A true plumbing emergency, sewage backup can not only be smelly and disgusting, but they are also dangerous. To avoid allowing this problem to be a disastrous one, the earlier a backup is identified, the better. Thus, the most trusted name in Raleigh area plumbers, Poole’s Plumbing has a list of common Signs of Sewage Backups to share and hopefully help you to save.

As we note above, it is crucial to nip this problem in the bud as soon as possible. Sewage backups can cause major damage to your plumbing system and they only get worse the longer they are undetected.

Common Signs of Sewage Backups

  • Bubbling in Your Drains or Toilet: 

    If you notice bubbles coming up through your toilet or any drain, this is a red flag. It more than likely means that wastewater can’t properly flow through the plumbing system. When this is blocked, that water backs up because it has nowhere it can go.

  • Multiple Drains Clogging at Same Time: 

    When you notice a clog, it is not always the hugest of issues. However, what makes clogs show possible Signs of Sewage Backups is when there are clogs in many drains at once. Usually, the first drains effected are the one lowest in your home in these cases.

  • Sewage-Like Odors: 

    One of the most obvious Signs of Sewage Backups is that horrible smell. Any foul stench coming from your drains or a sewage smell anywhere in the home usually means a sewage backup.

  • Strange Action from a Fixture While Using a Separate Fixture: 

    An example of this would be if you flush your toilet and notice a backup in the shower. This is an immediate red flag.

  • Sewage Coming from a Cleanout Pipe: 

    The capped pipes that provide actual access to the sewer line is a cleanout pipe. Thus, if you see sewage coming up from a pipe in your basement or yard, these are telltale Signs of Sewage Backups.

  • More Than One Fixture Draining Slowly at Same Time: 

    When wastewater cannot pass through the pipes, drains will by default be slow. Likewise, this type of issue will usually start at the home’s lowest drains. Then the Signs of Sewage Backups emerge as it moves up through your system.

  • Standing Water in a Cleanout Pipe: 

    Much as we noted that seeing sewage in a cleanout pipe shows Signs of Sewage Backups, so does seeing standing water. In any of these instances, it is always wise to check your cleanout pipe. Basically, any type of backup there will tell you that you have a backup problem.

Let Us Help So Signs Remain Just That…Signs

Being the number one name in Raleigh plumbers for the past twenty years, Poole’s Plumbing can assist you with any of these Signs of Sewage Backups. As we stress earlier in the post and again here, Signs of Sewage Backups that go undetected just continue to make matters worse. Unnoticed this situation can become messy and even hazardous. To contact us about a sewage backup or any plumbing needs, visit poolesplumbing.com.

What Water Heater Size is Right for Me?

This is a question that almost all homeowners who built a new home are familiar with. Likewise, it is certainly a thought that has crossed anyone’s mind who has run out of hot water in their home at some point. No matter when you thought to ask, or if you hadn’t yet, regardless something you will want to know as a homeowner is what is the correct Water Heater Size you need.

The amount of hot water dispensed versus how much you and your family need are certainly one reason you need the correct Water heater Size. Likewise, if your unit is too big, you are looking at a spike in your monthly energy bill. So, luckily for you, the number one name in Raleigh area water heater experts is Poole’s Plumbing. Below, we will identify each style of water heater available and also how to calculate the size that fits your home.

Know Types Before Looking at Size

Yes, we know our purpose here is to decipher what is your ideal size of Water Heater. We will get to that for sure by the end of our article, but first, we’d like to get you more familiar with each of the three main types of residential water heaters.

Types of Water Heaters

  • Tankless Water Heater- a somewhat newer type of water heater. Usually, these cost more upfront but in the long run, saves you due to energy efficiency.
  • Storage Tank Water Heater- These are the standard and most common water heaters. Available in both gas and electric units. These type of water heaters has low upfront costs. These units have an insulated tank that stored hot water until it is needed.
  • Solar Water Heating System– This variety of water heater has a storage tank and a solar collector. With these, you can choose from two types of water systems, first there is active solar water heating. Which has controls and circulating pumps? Then there are passive solar water heating systems, too. They use none of the pumps or control that others did.

Now We Know the Type, Let’s Calculate Your Water Heater Size

Now that you are at least somewhat familiar with the three types of unit could have, it is time to calculate your correct size. The size that you will need varies from household to household, actually.

In general, however, basing the size on the number of people per home is the most accurate way to gauge your ideal Water Heater Size and eventual selection of one.

Below it is easily bullet-pointed out for you basing the number of people in a home against the Water Heater Size in gallons.

  • 30-40 Gallon Water Heater Size for a one or two-person household
  • 40- 50 Gallon Water Heater Size for a three or four-person household
  • 50 Gallon minimum Water Heater Size for a household of five or more people.

Where Can I Find Out my Current Water Heater Size?

To see the Water Heater Size of the unit in your home right now, you need to look at the manufacturer’s label on the side of the tank. Not only does this tell you the size you have currently, but you can base your decision on size on that number and how often you run out of hot water.

If you would prefer, we here at Poole’s Plumbing would be happy to speak to you about any and all of your water heater questions or any plumbing questions we can be assistance with on top of that. After all, how do you think we became known as Raleigh’s top water heater experts? To contact us at Poole’s Plumbing, visit poolesplumbing.com

overflowing-toilet-pooles plumbing

I Have an Overflowing Toilet! What Can I Do?

The plumbing issues we deal with around the house can trigger a variety of responses from us upon first sight. While some might not evoke a quick or much emotion in response, one that certainly will is an Overflowing Toilet.

We have all had that “Oh no” moment when we realize the toilet is clogged and being to back up. So, nobody wants the contents to pour from the bowl and on to their floor, obviously. But an Overflowing Toilet is an issue that we have all faced and probably will again. That, unfortunately, we really can’t avoid. However, what we can do in this post is to remind and tell you of ways to react and quickly stop your Overflowing Toilet.

Stop that Overflowing Toilet at the Source, If You Can!

So, you have been overcome with that feeling of urgency after seeing your Overflowing Toilet. What should you do? Well, again stating the obvious, you want to get that water coming to the toilet shut off as soon as possible. The best way to do this is to locate and turn off your toilet’s main shut off valve.

To shut off the main valve upon seeing the Overflowing Toilet, you first must know where it is located. Usually, the water line that runs from the bathroom wall to your toilet is visible. This is most times where you will locate the toilet’s main shut off valve and the key to stopping the Overflowing Toilet. If you find the valve, turn it off, and then you have as long as it takes to clear the clog and get that toilet running normally again.

Now, what if you could not find the valve. This could be the case if it is located inside the wall or under the flooring tiles. Likewise, this valve is not turned much, unless in the case of an Overflowing Toilet. So, the valve could be rusty or just really difficult to turn. So, if the only way to shut that water source off is with the valve, and you have an Overflowing Toilet, whatever will you do?

The Backup Plan, Look First to the Tank

So, we have an Overflowing Toilet and there is no shut off valve insight. There is no time to waste here, as the water rises toward the edge of the bowl. So, you want to lift the lid off the tank and take a look first at the flapper.

The flapper is the rubber disc covering a hole at the bottom of the tank if you were not aware of this. If you look and it is open, meaning not covering the hole, reach in and close it manually. This will stop your Overflowing Toilet.

There is still a chance though that this will not work. So, if the flapper is not open or if for whatever reason it will not stay closed, look for the float ball. This component of your toilet floats on the water’s surface in the tank. Reach in and manually lift the float ball to the top of the tank, and the water will shut off.

We Stopped the Overflowing Toilet! Now What?

Well, one way or another, you have put a stop to the Overflowing Toilet. However, your work here is not yet done. You still need to get to the source of what was making the toilet overflow. Obviously, to do this, you must clear the clog. A few good hits to the bowl with a toilet plunger should do the job.

In some cases, though, a plunger just cannot cut it, So, if you are not able to clear that clog, call us here Poole’s Plumbing and we will be happy to come by and pop that clog loose for you. To contact us, on this or any of your plumbing issues, visit poolesplumbing.com


identify-toilet-problems-pooles-plumbing

Five Places or Things to Look for to Identify Toilet Problems

Your toilet is one-bathroom appliance that you like to count on to always be in. proper working order. that being said, it is inevitable that, much like all your bathroom appliances, there will be times when you do have some type of issue. Whether big or small, any problem you have with your toilet is immediately a huge inconvenience. On top of this, if the problem is not identified and then fixed in the early stages, it could lead to much larger and costlier plumbing issues. Thus, we have compiled a list of five ways or places you can check on your own to Identify Toilet Problems.

As we should all be well aware of, plumbing issues are never something to ignore. The reason we have compiled the below ways to Identify Toilet Problems is so you have a head start and can check and be sure you do not have any of these issues currently. Consequently, if you do Identify Toilet Problems, you will be able to address them in a timely and professional manner so that the problem does not persist or wind up costing you big in the long run.

Ways to Identify Toilet Problems Where You May Need to Replace

1) Cracked or Scratched Toilet Bowl

Pretty simple and straight forward method om checking this one. Simply look at the bowl and if for some reason it is scratched or cracked, you can do one of two things. The first is, the case of a smaller crack, you may. be able to fix this from home. However, if it is a sizable crack or cracks/scratches, this is not something you want to take care of yourself. However, the Raleigh area professionals at Poole’s Plumbing would be happy to help you through this issue.

2) Age: Your Toilet Has Gotten Old

Ok, so if working properly and fully functional, we have no problem with whatever age your toilet is. But just so you are aware, even if working properly, your old toilet may be costing you unnecessary money. This is because, by federal guidelines, toilets made and sold from 1994 on cannot use more than 1.6 gallons of water.

This can limit water usage and thus keep your bill down. Many older units hold much more than this. Anyhow, regardless of there being nothing wrong with a toilet that is up in age, you may want to contact us here at Poole’s in case there is an issue caused by the age of the unit. Many times, you will find that regardless of if you Identify Toilet Problems, in the long run you will save just by opting to replace the old and less efficient toilets.

Is it a Clog? Why Would it Be Leaking? Identify Toilet Problems and be able to Distinguish Between the Two 

Is it a clog or a leak? To Identify Toilet Problems and differentiate between the two is not difficult if you follow our easy guidelines in checking. In actuality, you can Identify Toilet Problems in either of these situations with the following tips.

3) Is My Toilet Clogged?

Well,  to Identify Toilet Problems in regard to a clog is not a difficult thing to see. However, to distinguish if you have a one-time clog or a constant problem is important for sure. So how do you Identify Toilet problems as persistent or not is simple? Once you pop the clog-free with your plunger, keep an eye out for the issue to happen again. If it is recurring, the best solution is usually to look into getting a new toilet altogether.

4) My Toilet Seems to Keep Leaking?

This, much like the above “persistent clog” is a red flag. By that we mean, if you notice the toilet is leaking often, and you have tried to fix it, yet it continues to do so, it is time for a new toilet.

5) Why is the Water Always So Low in My Toilet?

You may ask, how does the water level in my toilet relate to a clog or a leak? Well, to Identify Toilet problems, checking on your water level may be directly related to a clog. It may mean that a clog that is downstream a bit is your problem. If that isn’t the issue and the levels are low, be sure the water valve is turned on. Once you are certain of this, give us a call, and we can surely help you identify the problem.

You Identify the Toilet Problem First, Then Call your Friends at Poole’s

With these or any issues with your toilet, or other bathroom plumbing items, never hesitate if you are not sure to just pick up the phone. The number one name in emergency plumbers in Raleigh and across the Triangle area is Poole’s Plumbing. We would be happy to assist you at any step of the way along the identification process if you are unsure. Remember when it comes to a possible plumbing issue, it’s always best to be safe rather than sorry. To contact us, visit poolesplumbing.com


fall-plumbing-tips

5 Fall Plumbing Tips to Avoid

Many people who live in North Carolina would put enjoying four distinct and separate seasons as one of the perks of living in the Tar Heel State. No question, the changing of temperatures and weather experienced is certainly unique to each season in NC. However, with the difference in precipitation, and the switch from warm to cold temperatures, some household preparations must be made as the seasons change. By following the five Fall Plumbing Tips provided below, you can do your part to see that plumbing issues will not be a concern.

Looking at our Fall Plumbing Tips, these will help prepare both inside and outside of your home. We all know, that with the seasons changing can come unpredictable conditions. Thus, by doing each of these simple tasks and staying alert to give them a check periodically, you could be saving yourself both financially, and from an unnecessary mess!

Five Fall Plumbing Tips to Get You Ready for Season’s Change

Drain, Unhook, and Put Away the Hoses!

Of course, with dropping temperatures comes less and less lawn and yard maintenance. Thus, the first of our Fall Plumbing Tips will be putting away an item used almost exclusively in Spring and Summer, the garden hose.

Obviously, when the summer winds down, you will want to keep your hose for another year, so proper removal and storage is recommended. Likewise, you will want to make sure the hose is fully drained and then placed somewhere that it will not freeze as the Fall and Winter’s colder temperatures arrive.

If detached and allowed to freeze, the hose could expand and break. Even worse though in the case you hadn’t removed it from the outside faucet, the freezing process can lead to a much bigger problem. So, let’s remove, drain, and store properly before we move on with Fall Plumbing Tips.

Turning Things Off: Possibly the Most Important (and Easy) Entry of the Fall Plumbing Tips

A common thread you may start to notice here is how important it is to avoid anything from freezing at all costs. Nothing good in the way of plumbing is going to come from a water source, supply, pipe, etc. becoming frozen.

Your inside water supply and hose bibb are both main areas to be certain are shut off properly. In the case of the hose bibb, the first step is our above entry on the Fall Plumbing Tips. That being, remove the hoses. Next, check thoroughly all outdoor faucets for possible leaks. 

When sure there is no leakage, this is when we move to the inside water supply. Shut this down, and then return to the outside faucet, turn it on and drain any remaining water. Lastly, for extra protection, consider a hose bib cover or even a “frost-proof” hose bibb to be sure and eliminate any chances of a “freeze up.”

Staying on top of Your Sewer System

Whether most realize it or not, all three months, fall, winter, and spring can each have ill effects on a sewer system. A variety of issues can occur that are directly related to the colder temperatures and then eventually thawing out after the cold.

If you have ever experienced any sewer system issues, this is potentially a bi and costly enough issue that you may want to consult one of our specialists at Poole’s Plumbing actually. A discussion or visit from us to look at preventive maintenance or even an inspection could eventually save you big time in the long run.

Properly Maintaining Your Water Heater 

This is a part of our Fall Plumbing Tips, obviously, however, it also is a good idea to follow up on this year-round. Simple at-home maintenance and remembering to check for proper functionality can help you get the most from your water heater.

Water heaters normally tend to have anywhere from an 8-12-year lifespan. However, if you keep up on regularly flushing the unit this will both increase its efficiency and save you some money on bills as well heading into the Fall.

Last, But Certainly Not Least for Fall Plumbing Tips: Inspect Your Sump Pump

Usually found in your basement, the sump pump basically functions as a way to send water away from your home and to a place where it is no longer a problem. Thus, you can see how this is such an important entry among our Fall Plumbing Tips. 

Given the amount of precipitation we expect to see with the changing of the season each year, simply keeping watch that the sump pump is working correctly should seem a no brainer. If for some reason while monitoring, you notice it is not working, a call to your friends at Poole’s Plumbing can help you get the unit back working. Consequently, all you really need to do here is watch and in the case of a problem call immediately. Either way, with a little effort, this is a disaster you can avoid and a costly one at that.

The most trusted name in Raleigh are plumbers, Poole’s Plumbing understands that even if you follow our Five Fall Plumbing Tips, you still may have an issue. Likewise, you may simply want the peace of mind that a pro took a look at everything and you have no worry of becoming soaked or broke due to your plumbing this Fall. To contact us, visit poolesplumbing.com


Toilet-Paper-Alternatives-Pooles Plumbing

Toilet Paper Alternatives and More: What is Safe to Flush?

Toilet Paper. Two words that given the recent situation our entire country and the world, for that matter, have been faced with have maybe never received so much attention. For reasons unbeknownst to this writer, the general public upon hearing of the spread of a dangerous and potentially deadly virus sought out toilet paper. That’s actually putting it mildly. Toilet Paper Alternatives. Three words that we’d never think would have as much relativity as they recently have. Basically, our entire country went mad, racing to stores and hoarding as much “bathroom tissue” as they could carry to a cash register. To analyze the psyche and overall rationale of his reaction thankfully is not my job. However, by people stockpiling toilet paper it became and still is next to impossible without planning ahead to find the product in the store. This would create the need for the American public to seek Toilet Paper Alternatives.

What is a “Safe Flush???”

 
(You couldn’t make this stuff up…and you all know that if we weren’t currently living through it, the paragraph above would read as some type of joke or nonsense…but since it is our current reality, I digress… let’s move on…) So, back to our Toilet Paper Alternatives. We know there is a lot of uncertainty and reluctance when it comes to things we flush. In this article, we will take a closer look at whether these Toilet Paper Alternatives are safe to flush. Likewise, we will also take the time to educate you on items that you might possibly feel are a “safe flush.” We will explain some of these items can lead to a clog or blockage. A clog or blockage from Toilet Paper Alternatives could eventually “snowball” into your needing expensive and extensive plumbing repairs.
The Truth, the Whole Truth, and Nothing But the Truth about Flushable Wipes
 
So, what’s in a name, right? Flushable wipes…seems to be a no-brainer, may as well just overfill the shopping cart with these Toilet Paper Alternatives right now, right? Actually, wrong. While these wipes may come in handy when potty training a child or on a camping trip, it is a bad idea to flush these down your toilet.
 
To be clear on this, again, flushable wipes are useful in many situations as Toilet Paper Alternatives, but you don’t want them in your plumbing system. Yes, eventually these wipes will break down, but nowhere near as fast as regular toilet paper would. More likely than not, the continued and frequent usage of these type wipes will lead to a clog, which in turn will lead to an expensive fix for you.
 
Toilet-Paper-Pooles-Plumbing

Items such as bathroom wipes are not safe to put into your toilet for flushing.

The Garbage Can is for Garbage, a Toilet is Not (Chalk Up Another Headline that This Guy Never Thought Would Need Public Explaining to Functioning Adults )

 
So, we have now established that “flushable wipes” are not safe to flush into your system. “There’s got to be something I can use,” you must be thinking in regard to Toilet Paper Alternatives as images of barren and empty grocery store shelves dance in your head. Unfortunately, in case you skimmed over the sub headline above this paragraph, there are no safe Toilet Paper Alternatives. Neither toilets nor your plumbing system is made to have anything flushed down them with the exception of human waste, water, and the ever-elusive toilet paper.
 
Due to the emptiness of toilet paper aisles, we want to help so you know what Toilet Paper Alternatives are safe. Thus below is a list of items the should NOT be flushed down your toilet. As tempting as it may seem (?!?!), very clearly stated none of these items should be flushed:
 
  • Facial Tissues
  • Baby Wipes, Disinfectant Wipes, etc.
  • Toilet Bowl Scrub Pads
  • Napkins and Paper Towel
  • Dental Floss
  • Eggshells or Nutshells
  • Coffee Grounds
  • Oils and Greases
  • Hair
  • Sanitary Napkins, Tampons, Condoms, etc.
  • Cotton Balls or Q-Tips
  • Any Plastic at all
  • Diapers
  • Vitamins, Medi, or Pharmaceuticals
So, What Should I Do if I am “All Out”?
 
Basically, you can’t flush anything but toilet paper down your toilet without eventually it leading to a clog. Even the thicker style of toilet paper tends to build up and leads to a clog. This is yet anpother reason to be sure of your choice of Toilet Paper Alternatives.
 
So, if you are without toilet paper, we do have a couple suggestions. First,  inquired you=r grocery store about what time they get deliveries in and then be there that day when the store is restocking. This is one way  to be sure and replenish your supply. One other way around flushing at all would be available to anyone who has clean water. That alternative would be either having a bidet installed or using another alternative cleaning method, the “peri” bottle.
 
To explain, a bidet is a fixture that usually has spigots in which clean water comes through and cleans you. Likewise, a perineal irrigation bottle or peri-bottle can serve that same purpose. The peri-bottle provides and easy thorough cleaning and keeps you from flushing any Toilet Paper Alternatives down the drain.

In the End, If You Aren’t Sure….Don’t Flush Toilet Paper Alternatives

 
Ok, so given the topic, we gave a slightly sarcastic approach here in a few brief spots. However, here at Poole’s Plumbing, we realize that through these uncertain times there really was a big issuefinding toilet paper. This is why we wanted to remind you to not put things down your toilet that will lead to clogging. Consequently,  even Toilet Paper Alternatives appearing to be safe for flushing, can end up being anything but funny. It could even prove quinsy and costly. To conclude, we sincerely wish you all the best in your ongoing pursuit of toilet paper and for any of your home plumbing needs, check us out at poolesplumbing.com.
Pooles Plumbing-kitchen-water-conservation-tips

Kitchen Water Conservation Tips from Poole’s Plumbing

The most trusted name in Raleigh NC professional plumbers, Poole’s Plumbing, have some helpful pointers to help you save money and avoid wasting water with these Kitchen Water Conservation Tips.

These Kitchen Water Conservation Tips are all simple actions that can be taken by anyone around the house. Just staying on top of these suggestions will help you and your family save.

Kitchen Water Conservation Tips: Is the Water Running?

One of our Kitchen Water Conservation Tips entails simply watching how long the faucet is running during several activities. This comes into play during several kitchen activities, one being, when washing dishes by hand. This simple conservation method is to fill both sides of the sink up, utilizing one as a wash side and the other to rinse. Thus, the continuous stream of running water you’d usually waste doing this is eliminated.

Soaking Instead of a Rinse or a Scrub Equals Saving

Next, in our simple Kitchen Water Conservation Tips is to have some patience, which in turn will allow you to conserve.  To start with, while cleaning your pots and pans, let them soak long enough to soften the debris. This will make for an easier time scrubbing for you. Likewise, you will not be wasting the water pouring and pouring out of the faucet over the pans as you scrub away. Therefore,  if you are washing fruits and vegetables, filling a pan to do this, cuts down on much waste, as well. Once again, this savings comes from not having the continuous stream coming from the faucet in cleaning these items. To take that process a step further in conserving, after you’ve washed the produce, use the water from the pan to water plants around the house.

Let Dishwashers and Disposals Do Their Job

The next appliance to focus on with our Kitchen Water Conservation Tips where you can greatly save is the dishwasher. First, by only running it when full the average household can save 1,000 gallons of water per month.

Furthermore, if you have a newer model dishwasher, they are powerful enough and made to clean more thoroughly. Thus, you can cut back on the time spent rinsing. The garbage disposal is another item that by utilizing our simple Kitchen Water Conservation Tips you can save in areas you may not even have realized you were being wasteful. Most obviously, simply use the disposal only when necessary. Composting with and using the peeling and trimming from veggies or fruit will save you from wasting gallons of water while running the disposal.

Your own consumption of water is the last item we touch on in our Kitchen Water Conservation Tips. For your own drinking purposes, fill a pitcher with water to keep in the refrigerator. This keeps you from constantly refilling at the sink. Also, use the same glass throughout the day. This avoids dirtying several glasses and thus filling up the dishwasher for more frequently.

These easy-to-do- Kitchen Water Conservation Tips from the Raleigh plumbing experts at Poole’s Plumbing can get you on the right path. Consequently, in doing so, it can also conserve water and save on your water bill, too.

Water-Bill-Savings-Water-Meter

Water Bill Savings Await with A Few Easy Checkpoints

During these times of having to spend a lot more time in our homes, many are thinking of ways or projects to upgrade. While on quarantine and thinking of this, you can certainly achieve Water Bill Savings if you keep better tabs on your plumbing system. In this article, your friends here at Poole’s Plumbing will offer up eight reminders/tips that if you stay on top of will keep your household budget lower. So, in addition to being the “upgrade” you were hoping for, you will also save yourself money.

1.) Inspecting and Pumping Your Septic System

On average, it is recommended to have a household’s septic system inspected every three years by a professional. Similarly, a home’s septic tank should be pumped every three to five years.

2.) Water Bill Savings From Replacing Out-Dated Faucets

Water-Bill-Savings-Old-Faucet

Replacing older faucets with a newer, more efficient model can help conserve.

Getting back to the “upgrades” you are hoping to make while quarantined. Maybe your kitchen or bathroom faucets have become outdated? Well, the upgrade, in this case, could not only be more attractive in appearance. It more than likely will prove more attractive financially in the big picture too.

To explain, as faucets get older, they don’t just look as they’ve gotten older. Your faucet adjusts the amount of water passing through and in time can see your bill increase as they become less efficient. With more current designs always aiming to conserve and reduce flow, replacing old faucets is a sure way to help you save.

3.) Keep a Closer Eye on Your Water Meter

This should seem obvious once you read it. Water Bill Savings can stem from directly keeping a better eye on your water meter. By doing this, you can avoid or detect a possible leak, which will for sure lead to a higher bill.

The water meter in one’s home goes from the water mainline (outdoors) to a metered box also on the outside of your house.

4.) Recognizing Drips can Be Key in Water Bill Savings

Again, at the risk of pointing out the obvious comes the fourth entry on this list. That being said, when you notice puddles or standing water in your basement, this means you have a plumbing leak. 

A loose valve could be the cause of a leak. Likewise, it could be a cracked pipe, and either of these can cause mold and bacteria to form. If you see what you believe to be a leak, even if you can’t exactly identify where call the pros at Poole’s before things get out of hand.

5.) Water Heater Update = Water Bill Savings

Water-Bill-Savings-Laundry-Machine

By monitoring load size and avoiding unnecessary small loads, you can conserve and save when doing laundry.

When it comes to giving plumbing tips from Poole’s Plumbing, there is a reason why they are called the “water heater experts.” Thus, any questions or tips involving your water heater is in the best hands when being addressed by Poole’s. 

For the purpose of our article, Water Bill Savings, it would serve you best to replace your water heater every ten years. The innovations and technological advances in these units are so significant even annually to make a huge difference.

In a case that you don’t want to replace, have your water heater drained every six months. This flushes out any sediment and impurities. Likewise, it will improve the heater’s overall performance and as a result, keep bills lower. 

6) Washing Machines: Watch Your Usage and Load Sizes

These once again may seem like an obvious or common sense type thing when it comes to Water Bill Savings. However, a reminder is well worth mentioning if it leads to water conservation and Water Bill Savings.

To conserve and save in the “laundry room,” start by only running your machine when you have a full load. Likewise, making sure that you are keeping the load cycle on its appropriate setting helps save water and energy. It is also recommended to spread out your laundry throughout the week. While it may seem you are conserving time by getting all laundry done at once, this can actually cause septic tank issues.

7.) Water Bill Savings from Inspecting your Toilet

Water-Bill-Savings-Pooles-Plumbing

Poole’s Plumbing can help you save by conducting a thorough inspection of your plumbing system.

Another place that many may not think of that can lead to water conservation and savings is your toilet. By simply monitoring and being sure your toilet is running properly, can be quite a difference-maker actually.

Consequently, the toilet on average accounts for 25-30 percent of household water usage. Points to check and keep your eye on include the flapper valve in addition to just being sure of no leakage. An upgrade to a newer model toilet is another sure way to save. This especially can factor in if your current model is over ten years old. With the innovations and “eco-friendly” technological advances with newer toilets, the amount of water used by your toilet is reduced significantly through an upgrade.

8.) A Professional Inspection Now Leads to Important Savings Later

Calling a professional plumber from Raleigh’s most trusted name in plumbers, Poole’s Plumbing, can also lead to savings in the long run. 

Having a professional inspection of all of your home’s plumbing systems can improve performance and greatly reduce the risk of future plumbing disasters. This simple step can save you money on utilities and emergency plumbing calls in the long run.

 If you’re thinking about making some upgrades to your house this year, it’s important to put your home’s plumbing system on your list. Small leaks or malfunctioning appliances can quickly add to your monthly utility bills. Here are just a few simple plumbing tips that can help keep your household budget in check and help save you money.

To see all the services offered by the most trusted plumbers in the Raleigh area, Poole’s Plumbing, visit poolesplumbing.com.
Extending-Your-Water-Heaters-Lifespan

Extending Your Water Heaters Lifespan

When first purchasing a water heater, many factors can weigh into your selection process. Upon completing the proper research and settling on a specific unit that best fits your needs, you then want to keep up with maintenance. In an effort to help you maximize your purchase, this post will offer up some pointers to help you with Extending Your Water Heater Lifespan. In following these easy tips, you will not only optimize its efficiency but also save yourself money in the long run.

How Long Should My Water Heater Last?

This is a very valid question that basically anyone purchasing a water heater would be curious about. The actual answer to this question may vary slightly depending on your brand, type, or usage. However, generally, a water heater will work perfectly for a decade and in some cases longer. 

While ten years is a long time, why not take a few simple measures towards Extending Your Water Heaters Lifespan? With just a few easy maintenance tips and regular checking, you can make the heater last longer, while running safer and more efficiently.

Expanding-Your-Water-Heaters-Lifespan-Poole's-Plumbing

Testing the valve on your water heater is your very important first step

Tips for Extending Your Water Heaters Lifespan: Step One…the Valve Test

To begin with our water heater’s maintenance check, we will analyze the unit’s valve. This can be as easy as one action “test,” if all goes right upon our first method of checking. Regardless, even if it comes to a valve replacement, this is a simple procedure and one that is important in Extending Your Water Heaters Lifespan.

1- Test the Valve

 Our first tip in Extending Your Water Heaters Lifespan will have you taking a look at the valve. In case you aren’t sure, the valve can be found on the top or side of the unit. A function of the valve is to open automatically if the pressure has got too high in the tank. The tank could actually explode if the pressure were to get too high.

To test your valve, all you will need is an empty bucket. Then first, place the bucket under the water heater’s discharge pipe. Next, lift the lever on your pressure relief valve gently. This should release the water from the tank into your bucket. Consequently, by the water emptying out, you know that the valve is working correctly.

2- Replace the Valve (If Needed)

Just to be 100 percent clear, this step is unnecessary if the water empties from the tank as it should in the previous step. That being said, if the water does not empty, it is time to replace the valve in the best interest of Extending Your Water Heaters Lifespan.

This may sound like a big undertaking, however, replacing your valve in actuality, could not be simpler. To start the process, turn off the water, drain the tank, and unscrew the discharge pipe. Once these three steps are finished, next unscrew the old valve. Next, you will wrap the threads of the new valve you are installing with sealant tape and then screw it in. 

Extending-Your-Water-Heaters-Lifespan- Pooles

Draining your tank is essential to remove all sediment and debris.

To be sure this step is complete in this process of Extending Your Water Heaters Lifespan, check now for a leak. If the valve you replace was several years old, or never had been tested, it may leak. If that is the case, you need to replace the valve.

3-Check all of Your Work

It never hurts on any job to double-check your work and be sure that it is done correctly. To begin our check here, first close the shutoff valve. This valve is the one on the cold water supply which feeds your water heater. After this has been closed, turn on the hot water of any faucet in your home. 

This will release all pressure inside the water heater’s tank. If you have an electric unit, you will want to turn the power off at your main panel. Those with gas water heaters will simply turn the gas control dial to the off position. 

Tips for Extending Your Water Heaters Lifespan: Step Two…Drain the Tank

After you have completed checking the valves, step two in Extending Your Water Heaters Lifespan is draining the tank. More specifically, this part of our process is to flush any sediments or debris out of the bottom of the tank. The reasoning behind this is that the buildup of sediment in your tank will shorten the life of your water heater. Likewise, the sediment being present makes your unit have to work harder which equals a higher energy bill. Because there are many issues that can come about from sediment or debris in your tank, our next blog article will actually solely focus on draining your tank.

Most times when draining your tank, you will empty two or three gallons to be sure and get all sediment removed. However, always be sure to let the water flow out of the tank until you are no longer seeing any particles in the water. Basically, you are slowly opening the drain valve and letting all water run out until it’s is clear of any debris.

Tips for Extending Your Water Heaters Lifespan: Step Three…a Double Check and a Listen

Expanding-Your-Water-Heaters-Lifespan-Pooles-Plumbing

One of your last steps is to relight the pilot and restart your unit.

As you are readying to restart your water heater, there is no need to worry about a few noises you may hear. The sounds spoke of would resemble a gurgling or almost groaning type sound coming from your water heater. This is not anything to be alarmed by, it is simply the noise from air entering the system as the water drains.

That being said, you now want to be sure that your drain valve was closed tightly. If it does not, drain the tank completely, and replace that valve with a new one. Then you will want to restart your unit. Again, don’t worry about any gurgling or groaning noises coming from the heater. That sound is just air entering the system as water drains out. 

Tips for Extending Your Water Heaters Lifespan: Step Four…Time for a Restart

To continue with our final step in Extending Your Water Heaters Lifespan, we are going to restart the unit. To do so, open the shutoff valve and again let any faucet in the houses hot water run. This will purge any air from your system. Next, turn the power back on and relight your pilot. 

If the drain valve won’t close tightly when you’re done, drain your tank completely, unscrew the old valve and screw in a new one. To restart the water heater, open the shutoff valve and let the hot water run at any faucet to purge air from the system. Then turn on the power or relight the pilot. A turn of the dial to set the temperature to 120 degrees, and your check is done.

Summary and Items Needed to Extend the Lifespan

Extending-Your-Water-Heaters-Lifespan-Pooles Plumbing

One of the very few items you need for this job is a simple pair of slip joint pliers.

So, that was easier than you thought, wasn’t it? Just to recap, we start off on the road to Extending Your Water Heaters Lifespan by checking your valve. So upon finding out the valve is functioning right (or if it isn’t replacing it), we moved on to emptying the tank. Once we are sure all sediment and debris are gone, we double-check everything we have done before restarting the water heater.

One last helpful hint in this process is to list materials you will need. However, it is a shortlist, as you only need four items. You need a bucket, plumbers tape, rags, and slip-joint pliers. Oh yeah, and if the pressure relief valve did not work, you will need to replace that. So, now we think you will agree that this is an easy way to help Extending Your Water Heaters Lifespan.

For more information on installation or maintaining water heaters, visit poolesplumbing.com.
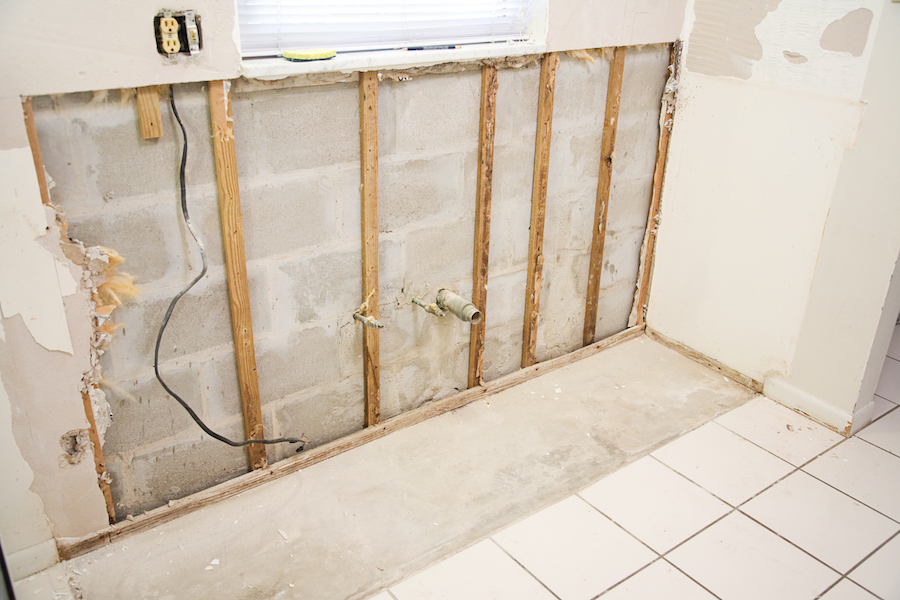
Stop-a-Running-Toilet

Flushing Away the Issue: How to Stop a Running Toilet

In this our next series of helpful “at-home” plumbing tips, we will address how to deal with various toilet issues. In many cases, simple monitoring and staying on top of toilet maintenance can help to avoid any major problems. For our first article in the series, we will go through a series of steps to help you Stop a Running Toilet. 

When addressing how to Stop a Running Toilet, there are several points and parts of the toilet that you will want to look at. In doing this troubleshooting, you can find the source of this annoyance and get on fixing it before it turns costly. Luckily, not only is finding the source of the problem somewhat easy but in most cases, the fix is a simple one too.

Stop-a-Running-Toilet-Poole's

The problem with your running toilet may just be that the flapper chain is too short or too long.

What Exactly Does it Mean When My “Toilet is Running?”

Before troubleshooting, it makes sense that you are sure you know what is going on in the case your “toilet is running.” While you may know this, it certainly does not hurt to review. 

To start, after you flush your toilet, water fills into the tank. As this happens, the water lifts a float that will shut the water off after it reaches the proper level. Likewise, there is a lever that will open the toilet’s flapper, causing the actual flush. The flapper then falls back into place when the water level goes down. This process can be interrupted, causing the toilet to keep running for several different reasons that leave the bowl unfilled following a flush and in some cases still running.

As noted above, typically one of four factors are going to play into how you can Stop a Running Toilet. With a thorough check for each, the issue can be narrowed down to reveal the problem. 

Common Possible Problem Areas to Address to Stop a Running Toilet

  • Flapper Seal or Flush Valve
  • Flapper Chain
  • Leaky Fill Valve
  • Old or Corroded Toilet Handle

Start with the Seal and Valve to Stop a Running Toilet

Stop-a-Running-Toilet-Poole's Plumbing

Troubleshooting your toilet’s fill valve and its parts may result in you being able to Stop a Running Toilet.

The first area to check in the instance of a running toilet is the flapper seal or flush valve. For older model toilets, there is a chain and flapper seal. On the contrary, for newer units, there is a flush valve. These three parts in one as compared to what is seen with the older models. These three parts are the flapper seal, overflow valve, and the actual flushing mechanism. 

Whether you have a brand new toilet or the same one for years, the seal eventually can become old and warped. When a seal is compromised, the water flow from the tank to the bowl becomes prohibited. The universally known way to check if you need to replace a flapper seal or flush valve is one involving food coloring. 

Yes, food coloring…Anyhow, you simply put a few drops of your food coloring into the water in your toilet’s tank. Then, after waiting a few minutes, simply check the toilet bowl. If upon checking, you see the water has become colored in the bowl without flushing, this means you will need to replace the flapper seal or flush valve to Stop a Running Toilet.

The “Too Long…or Too Short” of it. Checking the Flapper Chain

The next point that we want to check, to Stop a Running Toilet is the flapper chain. Like our check on the seal and valve, there are a few things to look for here. First, when your toilet was initially installed, the chain may have simply been too long or short. This would cause the flapper seal in some way to not close properly.

If your chain is too short, the seal will not shut and will allow water to run continuously. Consequently, if the chain is too long, it could also get in the way of the seal closing and prevent it from forming a watertight seal. Again to restate, this can be an easy fix for you. All you need to do to Stop a Running Toilet, in this case, is adjust the chain to proper functioning length.

Give Your Handle a Lift to Check for a Leak

The third possibility that may need to be addressed to Stop a Running Toilet is a leak in your fill valve. As with our earlier discussed issues, this could cause your toilet to run continuously.

To see if this is the issue, first, flush your toilet. Once you’ve flushed, lift the toilet’s flush arm while the tank is still refilling. This will stop the water flow if all is working correctly. If the water does keep flowing and starts pouring into the overflow valve, then this is your problem. To Stop a Running Toilet in this case, you will need to replace the fill valve, as this shows it leaks.

Whether You Loosen or Replace, a Sticky Handle Needs Fixing

Stop-a-Running-Toilet-Handle

If a toilet handle is tight, loosening may work, but a corroded handle must be replaced.

The last part that we will troubleshoot to Stop a Running Toilet is the toilet handle. When checking the handle, again begin with a regular flush. If upon flushing, you notice the handle staying down instead of moving back into place, we have an issue.

The issue with your toilet handle, in this case, is that it is either old, corroded, or just stiff. Regardless, any of those three scenarios call for a fix, as the entire time a handle is in that down position, the toilet is running. To Stop a Running Toilet by fixing the handle, first, try loosening it. If it no longer sticks after flushing, you’re good to go. If loosening does not help, you will need to take a closer look and simply replace any parts that have become corroded.

Done Troubleshooting and Still Didn’t Stop a Running Toilet…Give Us a Call

If you have completed an “at home” walk through each of these possibilities and not found the problem, give us a call! The number one name in Raleigh area plumbers, Poole’s Plumbing will come out, diagnose and fix the issue. Once and for all, one way or another we will help you Stop a Running Toilet! For more plumbing tips or to contact Poole’s Plumbing about taking care of your plumbing needs, visit poolesplumbing.com.
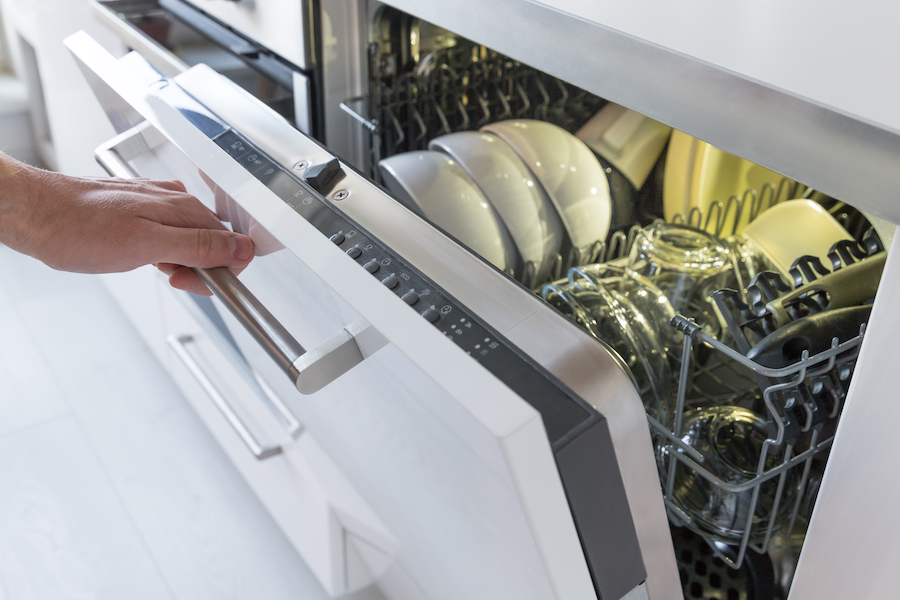
Do-it-Yourself-Plumbing-Tips-Sink-Trap

Simple and Easy Do it Yourself Plumbing Tips

When it comes to plumbing issues, many renters and homeowners don’t think twice. It’s simply pick up the phone and call the most trusted name in Raleigh area plumbers, Poole’s Plumbing. We certainly agree with your choice of plumber…especially in a situation which calls for our help! However, becoming the “most trusted” plumber around is a name that we earned and take very seriously! Thus, we would like to share some pointers for situations where you could easily take care of the issues at hand. Therefore, here are eight easy, Do it Yourself Plumbing Tips that if following the directions below, you should be able to tackle yourself.

Do It Yourself Plumbing Tips to Silence the “Noises and Creaks” 

We have all heard them. A strange creak that at first, we are unaware of its source. Well, one of the sources of those “creaks,” we can tell you is plumbing related. The good news is, not only is it an easy fix but with our Do it Yourself Plumbing Tips, you will be able to silence that creak in no time!

Do-it-Yourself-Plumbing-Tips

The noises and creaks you hear may be coming from your copper plumbing pipes.

Silencing the Pipes

To first explain, the “creaking” comes from hot water running through copper pipes. This causes the copper to expand and when it does, the pipe grinds against the pipe hangers and joists. The easy Do it Yourself Plumbing Tips to rectify this problem are as follows.

First, get some adhesive-backed felt at a nearby hardware store. Next, you cut that felt into strips. Once strips are ready, wrap them around the “noisy pipe.” In the meantime, you will want to remove each pipe hanger and wrap the pipe with the felt tape. Finally, once wrapped, you can refasten the hanger….and you can say goodbye to the unwanted creaky sounds!

Keeping Your Sink Quiet

Yet another “noisy” plumbing issue is one that occurs and originates underneath your two-basin stainless steel sink. As anyone can attest to with this type of sink, there can be the issue of somewhat loud vibrations and the “gong” effect. Not to worry though, as this also is an issue that should be no problem for you with our Do it Yourself Plumbing Tips. Basically with this issue, you will only need a can of expanding foam.

Once you have the foam, you will use it to fill the space between the two sides of your stainless steel sink basins. You can do this when the sink has already been installed, but the procedure is a bit easier to do if you “do the filling” before installation. Once you allow the foam to harden, then trim away any excess with a knife. By filling the space, the foam works once expanded to deaden the vibrations, while it absorbs and lessens the “gong” like sound also.

Do-it-Yourself-Plumbing-Tips-Steel-Sink

One way to avoid unwanted noise is to put expanding foam between the two bays of your stainless steel sink.

More Tips to Help “Drain, Flush, and Empty” a Situation

Whether it’s your toilet, sink, a trap or pipes, if there is a clog or an obstruction, your end goal is the same. Clear it through. Again, as stated above with the “noisy” issues, there are certainly times when a clog is going to warrant a call to the pros at Poole’s Plumbing. However, in the three following situations, you will be able to take these Do it Yourself Plumbing Tips to literally “clear” the issues up yourself!

Vacuum that Toilet

As already discussed, any type of obstruction in your pipes, whether the sink, toilet, or anywhere in your home, could lead to a major plumbing problem. Almost by instinct in these cases, we always reach for the plunger first, to try and knock loose and clear the clog. But, in the case that the plunger can not clear it through, there is a good chance you are looking at a more solid or hard object that is causing the problem. In actuality, without realizing it the plunging may push this type object deeper than it was at first.

Once again, this is no reason to fret though, as all you need in many cases is a wet/dry shop vacuum. Start by sucking any water out of the area with the obstruction. Then go in deeper and many times you will find whatever object is stuck will be sucked out by the power of the vacuum.

Do-it-Yourself-Plumbing-Tips-Toilet

Several of our Do it Yourself Plumbing Tips involve ways of approaching toilet issues that you may not have thought of before.

Plunge the Trap for Less of a Mess

The curved pipe located under your sink is commonly known as the “sink trap.”Over time, the traps can get plugged up with soap, hair, and other debris. This could lead to a huge mess if allowed to get out of hand and left unattended. Regardless of whether you are just emptying the trap or changing it, this is going to be a somewhat messy job. With another of our helpful Do it Yourself Plumbing Tips, you can at very least, lessen the mess, though.

Once again, the advice here will have you utilize a common item in the home, a plunger. Simply give your drain a few plunges before pulling the trap. This will at least remove any water from the trap, which will immediately make the job a bit less messy. Do remember, however, if you have a two-sided sink, cover/plug the other drain to contain the air pressure while you plunge.

The “Flush Bucket”

The final of our Do it Yourself Plumbing Tips is one that would more than likely take place when you are already having a plumbing project take place. To put the situation into perspective, let’s say that you have the Raleigh professionals from Poole’s Plumbing set to work on your toilet. So, you would turn off the water supply before they begin their work. This would create a situation where you can not use the toilet, as there would be no water in which to flush it, right?

Well, not necessarily, as with the next of our Do it Yourself Plumbing Tips, you can still get a few uses from your toilet even in this spot. All you need to do is before shutting off the water supply, fill several two-gallon buckets with water. This way, you can flush the toilet by dumping the water into the bowl. While it won’t refill after the flush, this will still work just the same for the one flush that you would need.

The most trusted name in Raleigh area plumbing, Poole’s Plumbing is always the top choice for your plumbing emergency or project. However, the relationship we have built and trust we’ve earned over the past twenty years with our customers is how we became that way. That being said, we are always happy to come out and fix any plumbing issues you may have. But, if we can save you the headache and some money with these Do it Yourself Plumbing Tips, then we are equally as happy to pass along our knowledge.