

Water Heater Maintenance Flush: When and How to Flush Your Water Heater
Water Heater Maintenance Flush — Homeownership entails many maintenance tasks, and preserving the longevity and efficiency of your water heater is among the most critical. Regularly flushing your water heater is a pivotal maintenance activity that combats sediment buildup, enhances energy efficiency, and ensures a consistent hot water supply. This article delves into the importance of flushing your water heater and provides a detailed, step-by-step guide to help you perform this essential task.
Why You Need to Flush Your Water Heater
Regular Maintenance
Incorporating water heater flushing into your routine home maintenance schedule is crucial. Over time, sediment naturally accumulates at the bottom of the tank, causing potential issues if left unchecked.
Maintained Water Temperature
A decrease in water temperature can often be attributed to sediment buildup. Sediment is an insulating barrier between the heating element and the water, reducing heat transfer efficiency.
Enhanced Energy Efficiency
A water heater free from sediment operates more efficiently. Sediment accumulation may force your water heater to work overtime, making it much harder to heat the water, consuming more energy, and increasing utility bills.
Extended Heater Lifespan
To significantly extend the lifespan of your water heater, you should regularly flush and maintain a schedule. Accumulated sediment can lead to corrosion and other damages, potentially shortening the unit's operational life.
Water Heater Maintenance Flush — How to Flush Your Water Heater:
Step-by-Step Guide
Step 1: Turn Off the Water Heater
Switching off the water heater's power supply or gas is a crucial safety step. This will prevent the heater from attempting to heat an empty tank.
Step 2: Gather Your Tools
Prepare a garden hose, a screwdriver, and gloves. Having these tools ready will streamline the process.
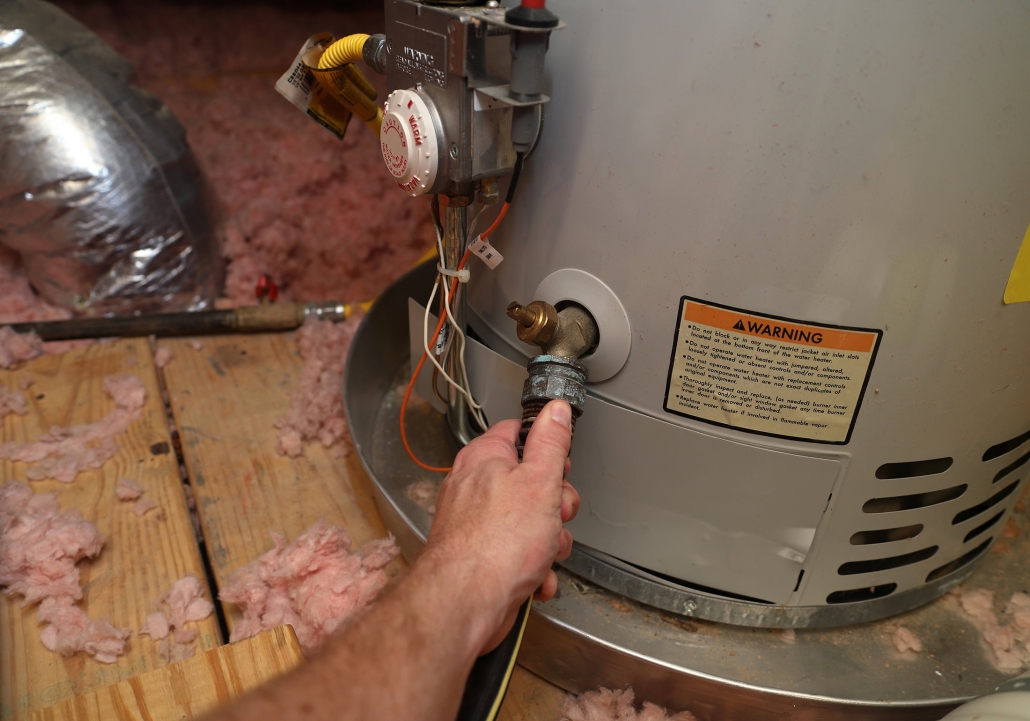
Step 3: Connect the Hose
You connect the hose by attaching the garden hose to the tank's drain valve at the bottom. Position the other end in a safe area where hot water can drain without causing damage.
Step 4: Open the Pressure Relief Valve
Open the pressure relief valve situated on the top of the tank. This allows air to enter and facilitates the smooth flow of water, preventing a vacuum from forming inside the tank.
Step 5: Drain the Tank
Opening the drain valve allows the water to flow out. This process might take some time, especially if there is significant sediment buildup. The water will be hot, so be cautious for safety.
Step 6: Flush the Tank
Once the water appears clear, close or shut the draining valve and refill the tank with fresh water. Repeat the draining process until the water is clean and free of sediment.
Step 7: Close the Valves
After achieving clear water flow, close the drain and pressure relief valves and disconnect the garden hose from the drain valve.
Step 8: Turn the Water Heater Back On
Restore power or gas to the water heater, putting it back into operation and ready to provide hot water again.
Step 9: Check for Leaks
Inspect all valves to ensure they are tightly closed and check for any leaks from the tank or connections. Tighten any loose valves as necessary.
Step 10: Monitor Performance
Observe the water heater's performance to ensure it is heating water properly. If any issues arise, consulting a professional may be warranted.
Resource: Residential Water Heater Safety
Conclusion
The initial maintenance task of flushing your water heater presents various issues and prolongs the lifespan of your appliance. By following the steps outlined in this guide, homeowners and DIY enthusiasts can efficiently execute this task and reap the benefits of a well-maintained water heater. Regular maintenance improves efficiency and reduces utility bills, making the effort worthwhile.
For more expert tips and guidance, visit www.poolesplumbing.com


