Plumbing News and Tips for Homeowners in the Raleigh NC Area, New Product Reviews, Water Heaters and Tankless water heater advice from local certified plumbers.

Clogged Drain? Learn the Basics of Drain Cleaning.

Clogged Drain? Learn the Basics of Drain Cleaning.

No one likes a clogged drain!

They can be smelly, unsanitary, and inconvenient. Fortunately, many simple solutions are available that don’t have to be difficult, messy, or expensive. Natural drain cleaners such as baking soda and vinegar are effective at breaking up grease and soap buildup in your pipes. For more challenging blockages like hair or food particles, you may need to use more powerful chemical products like liquid plumbers or enzymatic cleaners. If all else fails, there is always the option of hiring a professional plumber who will come in with specialized tools to clear out any stubborn clogs for good! No matter what solution you choose for your clogged drains, it doesn’t have to be an overwhelming task anymore.

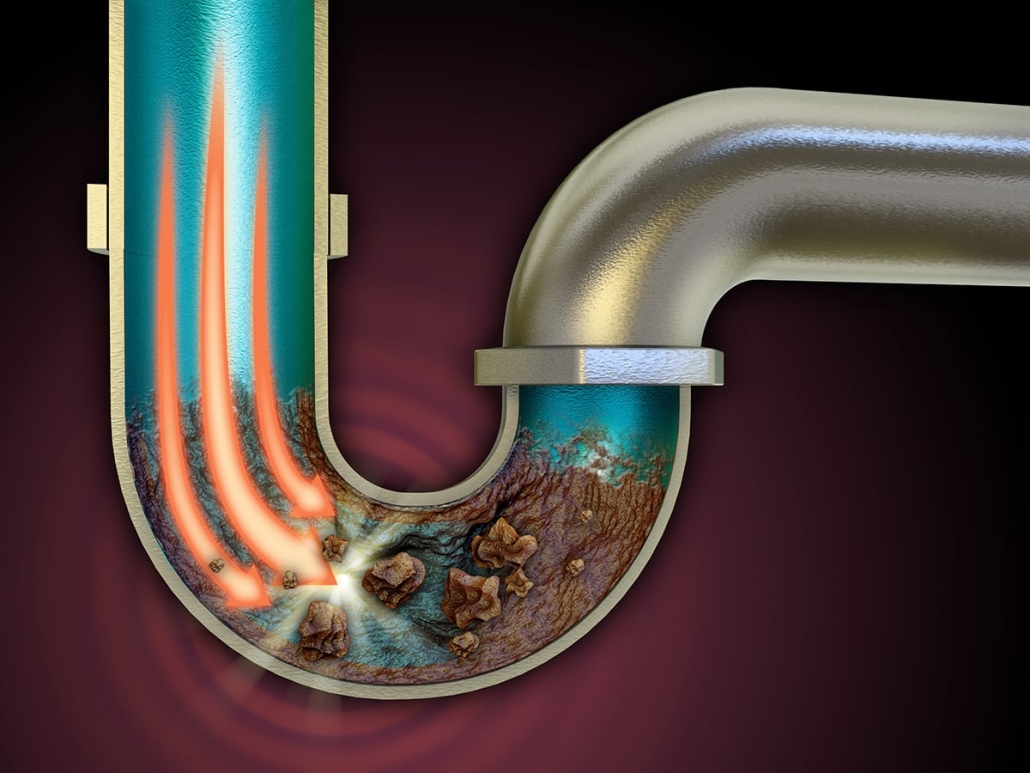
Drain cleaning and unclogging solutions don’t have to be difficult, messy, or expensive. The key is knowing how a drain works, what causes clogs and blockages, and how to tackle the job safely.

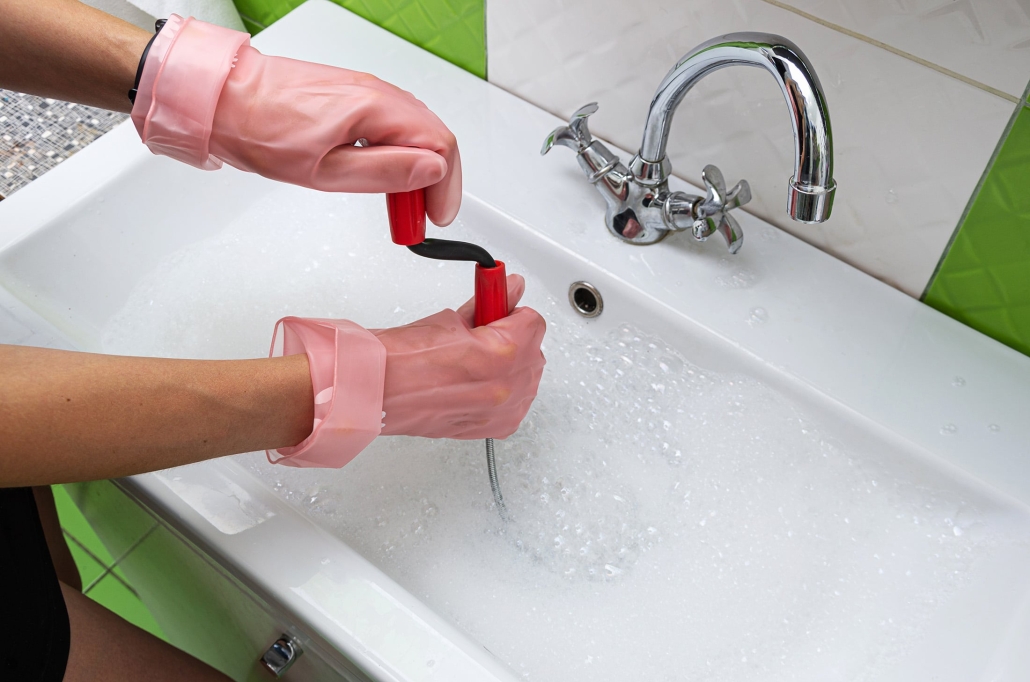
If you’re dealing with minor blockages caused by soap scum, hair, grease from cooking fat, coffee grounds, foreign objects accidentally flushed down the toilet, or small amounts of food buildup in kitchen sinks, then a good-quality plunger will usually do the trick. Use a flange plunger for bathrooms, creating a better seal around the drain’s opening. To get maximum plunging power, it’s best to fill the bowl or sink with enough water to cover the plunger cup and then use a steady, firm pressure. Another option is using a drain snake or auger. This tool has a long flexible cable that can be fed into the pipe to break up blockages and push them through the system.

Clogged Drain
A tablespoon of baking soda followed by a half cup of vinegar is one unclogging solution.

If these solutions don’t work, it’s time to look into more extreme measures such as chemical cleaners or professional drain cleaning services. Chemical cleaners should only be used as a last resort as they can contain harmful chemicals which could damage your pipes. Professional drain cleaning services usually involve high-pressure water jetting or cabling machines designed to cut through roots, grease, and other debris that might have been blocking your pipes.

Finally, preventative maintenance is the best way to avoid problems with blocked drains. Making sure that you dispose of food waste properly and using a mesh drain guard will help prevent clogs from occurring in the first place. Also, having a plumbing service maintenance contract may be beneficial.

By understanding the basics of how your drains work, assessing what’s causing any blockages, and taking the necessary steps to tackle the problem safely, you can be confident that you’ll be able to unclog your pipes quickly. With some patience and elbow grease, tackling a blocked drain doesn’t have to be such a daunting task! If issues still arise, contact Raleigh’s most trusted professional plumber at poolesplumbing.com.

Common Mistakes to Avoid when Installing Plumbing Fixtures

Common Mistakes to Avoid when Installing Plumbing Fixtures

Common Mistakes to Avoid when Installing Plumbing Fixtures — When installing new plumbing fixtures in a home or business, it’s easy to get carried away and overlook the finer details when installing new plumbing fixtures in your home. Plumbing is a complex system, and even tiny mistakes can mean big problems down the line. You should avoid a few simple mistakes when installing new plumbing fixtures to save time, money, and stress.

When installing new plumbing fixtures in your home, several common mistakes should be avoided to ensure the job is done correctly.

First, checking that all necessary tools and materials are available before starting any installation process is essential. This includes pipe wrenches, screwdrivers, Teflon tape, pipe cutters, and other specialty tools, depending on the type of fixture installed. Taking a few moments to ensure everything you need is ready can save you time in the long run.

Second, ensure all existing water lines are shut off before beginning installation. This ensures you don’t have gallons of water spilling out when making connections or adjustments.

Also, turn off any existing water supply lines before you start working on the fixture. This may seem obvious, but it’s easy to forget in the heat of the moment and can result in a big mess!

Some fixtures also require electricity for proper installation – if this is the case, ensure you are familiar with electrical wiring or hire a qualified electrician to do the job safely and correctly.

Common Mistakes to Avoid when Installing Plumbing Fixtures

If electricity is required for the fixture, hiring a qualified electrician to do any necessary wiring or installations safely and correctly is essential.

Third, install new plumbing fixtures and double-check all connections before turning on the water supply. Even small leaks or weak connections can cause significant problems down the line, so it pays to be thorough when installing fixtures. Ensure all pipes are securely connected and no loose parts remain before testing the new institution.

Finally, even if something doesn’t seem quite right during the installation process, don’t hesitate to start over from scratch if necessary – better safe than sorry! If a mistake is made during installation, it could mean more costly repairs down the road, so take care not to rush through it or cut corners to complete the job quickly.

By avoiding these common mistakes when installing new plumbing fixtures, you can ensure your project is successful and hassle-free! With just a little knowledge and preparation, you can ensure that your installation goes smoothly and with minimal stress. Don’t let plumbing woes get in the way of home improvement – plan and be prepared for any potential issues before they arise!

www.poolesplumbing.com

Benefits of A Professional Service Contract

Benefits of A Professional Service Contract

Benefits of a professional service contract. A professional plumbing service contract can benefit your home or business. Not only will you have access to trained experts and the latest cutting-edge equipment, but you’ll also be able to rest easy knowing that your system is in good hands.

It also helps ensure that your plumbing systems are running efficiently and up to code, ensuring your safety. Lastly, having reliable coverage through a service contract means that you don’t have to worry about making on-the-spot decisions when it comes to plumbing disasters – your trusted plumbing provider is always just a phone call away for any issue or concern.

Here are some of the advantages of signing up for a plumbing service contract.

Benefits of A Professional Service Contract

Lower Repair Costs: A plumbing service contract can save you money in the long run by helping to prevent costly repairs from developing over time. By signing up for regular maintenance visits, any minor problems can be caught early on and fixed before they become more significant. Additionally, if there is ever an emergency with your plumbing system, having a service contract could help keep repair costs down.

Improved Efficiency: Plumbing systems that are adequately maintained will work more efficiently and last longer. A professional plumbing contractor can help ensure your system is regularly inspected, tested, and serviced, so it runs at peak efficiency for many years.

Increased Safety: Poor plumbing maintenance can lead to serious health hazards and property damage from flooding or water leaks. With a service contract, you can rest assured that any issues related to your plumbing system are handled promptly and professionally by experts who know what they’re doing.

Professional plumbing services can be the difference between a minor inconvenience and a major headache. From routine maintenance to emergency repairs, qualified and experienced professionals are equipped to handle any plumbing situation efficiently and promptly. A skilled plumber can also diagnose potential problems before they become costly disasters, preventing expensive damages in time and money. Professional plumbers have access to the latest technology, tools, and materials, allowing them to tackle even the most challenging jobs. Their expertise also allows them to install or modify new systems quickly with minimal disruption. Overall, there is no substitute for professional knowledge and skill in plumbing services.

www.poolesplumbing.com
Preventing Plumbing Damage

Preventing Plumbing Damage — Spring Thaw tips for Saving Water and Preventing Damage

Preventing Plumbing Damage, the spring thaw is a time of dread for many homeowners, as it can mean plumbing nightmares. Exposed pipes may freeze, burst, and cause expensive water damage in the home. However, a few easy steps can prevent your plumbing from becoming an outdoor swimming pool this spring.

As the weather warms up and snow melts, it’s essential to maintain a healthy sewer system this spring. Spring thaw can cause flooding and other water-related damage if not properly managed, so homeowners and those responsible for keeping sewers must be aware of the risks and take proactive measures. Here are some tips on preparing your property for the spring thaw by conserving water and preventing potential damage.

First off: wrap up those exposed pipes! Insulation is your best friend when it comes to keeping lines from freezing. Even if you think the pipes are in an area that won’t freeze, it’s better to be safe than sorry. Just wrap them up with foam insulation, and you’ll be ready.

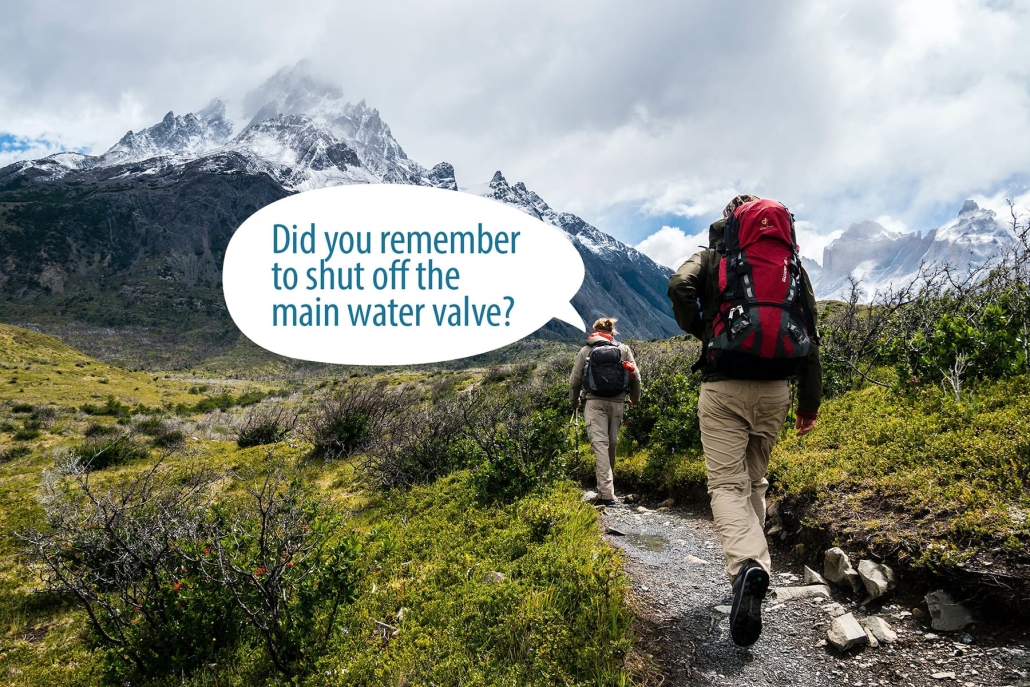
Next up: Know where to shut off your main water valve in an emergency. Please find out how to turn it off if a pipe bursts and you need to quickly stop the water flow, or make sure a professional show you how to locate and operate it.

Finally, if the pipe bursts or leaks, don’t panic! Go to your main valve, shut the water off, and immediately seek professional help. Trying to fix it yourself could lead to more damage and costlier repairs.

Preventing Plumbing Damage

Preventing Plumbing Damage
  1. Maintain your gutters: Taking care of your home’s gutters should always be at the top of any homeowner’s list for preventing water-related damage during the spring thaw. Cleaning out your gutter system regularly helps avoid ice damming – which can lead to flooding and basement moisture issues – and minimizes soil erosion and foundational damage risk.
  2. Inspect drains and downspouts: Make sure all of your home’s outdoor gutters and downspouts are in good condition, as well as any drainage systems on your property. Go ahead and check for any clogs or blockages that could slow the flow of water when the snow melts, leading to flooding or pooling around the foundation.
  3. Monitor spring showers: Spring showers can be unpredictable, so paying attention to weather forecasts and anticipating large storms that may cause flooding is essential. If needed, install sandbags or temporary barriers around vulnerable areas of your property to prevent water from entering buildings or damaging landscaping.
  4. Install a sump pump: To protect your home from potential flooding further, consider installing a sump pump to ensure that water is quickly and efficiently redirected away from your property. This can help minimize any damage caused by heavy spring rains or snowmelt.
  5. Preparing your property for the spring thaw can help conserve water and protect your family and home from costly repairs. With these tips in mind, you’ll be better equipped to handle whatever Mother Nature throws you this spring!

Take time to protect your home – be prepared now and rest easy all season long.

Happy thawing! | www.poolesplumbing.com

Eco-friendly Plumbing Solutions

Eco-friendly Plumbing Solutions Going green with eco-friendly plumbing solutions is a great way to demonstrate your commitment to reducing your environmental footprint and creating a healthier, safer environment for yourself, your family, and the planet. Eco-friendly plumbing solutions provide many benefits, including reduced water consumption, improved air quality, and fewer pollutants entering our waterways.

With new developments in technology and materials, it’s easier than ever to find plumbing solutions that are more environmentally friendly. 

Water conservation

Water conservation is essential for a sustainable future, and plumbing plays a vital role. Plumbing systems can be designed, installed, and maintained to conserve water in our homes, businesses, and institutions. We can reduce our water consumption without sacrificing comfort or convenience by implementing the proper measures.

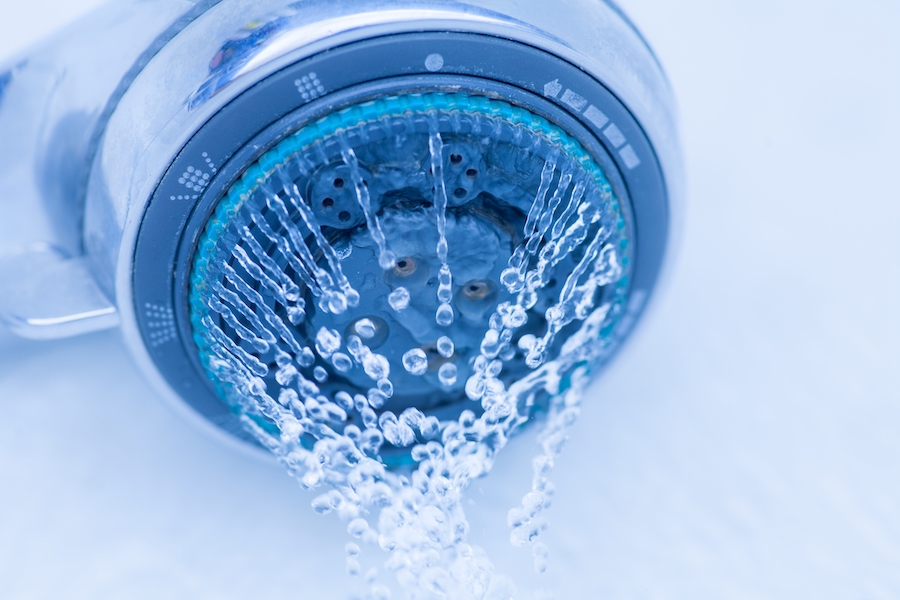
From low-flow fixtures to rainwater harvesting systems, there are many ways that plumbing professionals can help us save precious resources. Low-flow toilets use just 1 gallon per flush instead of the traditional 5 gallons, while low-flow shower heads reduce water usage by up to 60%. Rainwater harvesting systems collect runoff from roofs and other surfaces for reuse in gardening or laundry applications. Other techniques like grey water recycling involve diverting wastewater from sinks and showers back into toilet tanks, significantly reducing water waste.

Eco-friendly and sustainable living encompasses practices that strive to help reduce the environmental impact of everyday activities in our society.

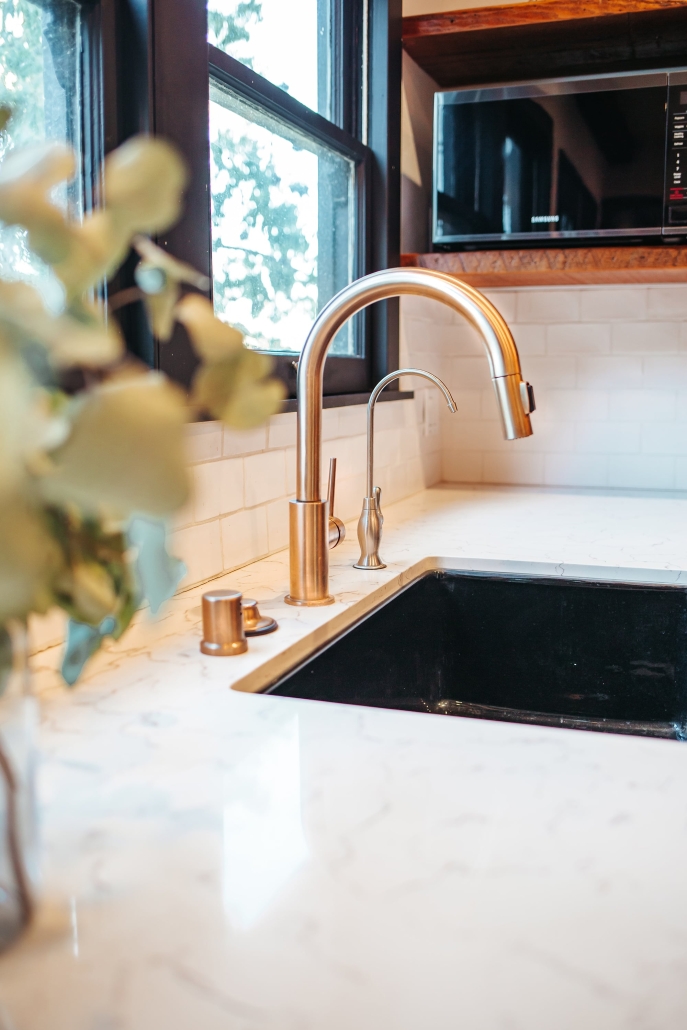
This includes reducing waste and conserving resources and your household. Low-flow faucets are one of the most common eco-friendly plumbing solutions available today. They help reduce water waste by limiting water use when filling containers or washing dishes. Tankless water heaters are also becoming increasingly popular, as they only heat water when needed, which helps reduce energy costs and eliminates standby energy losses associated with traditional storage tank systems. Other natural insulation products, such as recycled cotton fiber materials, can be installed in existing pipes to separate hot and cold air without harmful chemicals. In contrast, chemical-free cleaners made from natural ingredients such as baking soda and vinegar can clean drains without introducing additional pollutants into the environment.

Eco-friendly Plumbing Solutions

When selecting eco-friendly plumbing solutions for your home, it’s essential to research the various options available and determine which ones are best suited to meet your needs. For example, high-efficiency toilets are designed with special high-efficiency flush valves that use less water than regular models; this is great for reducing utility costs and water waste. In addition, showerheads with adjustable settings allow you to adjust the amount of water used each time you take a shower, which helps conserve water without sacrificing comfort or convenience.

Finally, when considering eco-friendly plumbing solutions, it’s essential to look for those certified by organizations like WaterSense or Energy Star. These certifications indicate that the product has been tested and verified to meet specific environmental standards to ensure its sustainability and longevity. Investing in these certified products can help ensure that your home’s plumbing system remains safe and efficient while also helping protect the environment around it. Eco-friendly plumbing solutions provide an excellent opportunity to reduce your utility bill while making your home more sustainable — something everyone should be proud of!

Learn more at www.poolesplumbing.com
The Love of Plumbing Celebrate This Year with a New Fixture

The Love of Plumbing Celebrate This Year with a New Fixture

Plumbing is a profession that not many people think of when they imagine a satisfying career. But for those who love it, plumbing can be an incredibly fulfilling job that brings joy to their customers and themselves.

Whether you’re a professional plumber or just interested in the trade, it’s easy to see why so many are drawn to this type of work. Plumbing requires problem-solving skills, creativity, and attention to detail – all attributes that satisfy any severe worker. And even better, plumbing has the potential for long-term career opportunities and immediate economic success.

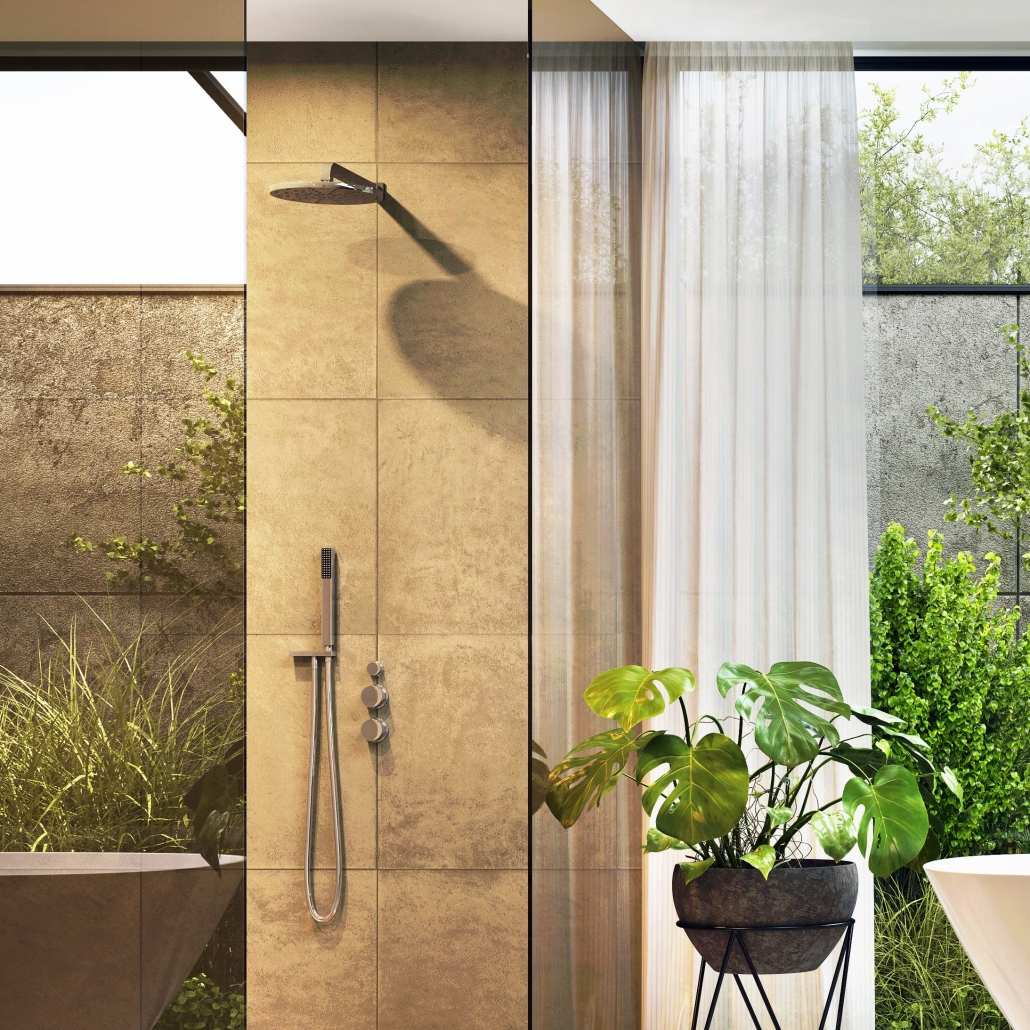
Investing in new plumbing fixtures can significantly affect how efficiently your home plumbing system runs. More recent models are often more energy efficient than older ones and provide more significant water pressure and temperature control. If you’ve ever endured cold showers because of low water pressure or been scalded by hot water due to faulty temperature controls, then investing in a newer model is definitely worth the money.

Besides the obvious benefits of improved performance, there are also aesthetic benefits from upgrading your plumbing fixtures. You can find plenty of stylish options available on the market today to fit any decorating style and budget – from modern looks with sleek surfaces to classic designs with ornate details and finishes. So upgrading your fixtures doesn’t have to be just about practicality – you can enjoy them while they look great simultaneously!

Another benefit of investing in new plumbing fixtures is that it saves you money on repairs down the line. Older institutions tend to wear out quicker over time, which means replacing them more often, something no one wants on their budget! By replacing faulty parts before they become too worn out, you will save time and money by avoiding costly repair bills later on down the road.

For those who find joy in plumbing work (and even those who don’t!), investing in new fixtures can be a rewarding experience with plenty of benefits for both your home and wallet alike! From improved efficiency and performance to aesthetic value and long-term savings – investing in new plumbing comes highly recommended for anyone looking for an upgrade.

The Love of Plumbing Celebrate This Year with a New Fixture. With the ever-growing list of plumbing fixtures available, deciding which one will best meet your needs can be challenging. Before making a decision, it is essential to consider the purpose of the fixtures and their intended use, as well as their design and aesthetic appeal. Contact your trusted plumber for ideas and recommendations from traditional styles for a classic look to more modern techniques for contemporary living to all the conventional methods.

What Every Homeowner Should Know About Plumbing Maintenance

What Every Homeowner Should Know About Plumbing Maintenance. Plumbing maintenance is an essential part of home ownership. Neglecting proper plumbing upkeep can lead to several costly problems that can be difficult and expensive to repair. Homeowners need to know the basics of plumbing maintenance to protect their homes and wallet from avoidable damages.

What Every Homeowner Should Know About Plumbing Maintenance

The first step of plumbing maintenance is prevention. Preventive measures such as cleaning drains, removing debris from gutters, and checking pipes regularly are important ways to avoid common clogs, leaks, and other damage. Homeowners should also be aware of water pressure levels in their homes, as high water pressure can cause pipe damage over time.

Homeowners need to understand the different types of materials used in plumbing systems, too. Various pipework will have different thresholds for temperature, pressure, and chemical composition – all things which must be considered when performing maintenance on plumbing systems. For example, brass fittings can corrode with exposure to chlorine over time; steel piping must be protected against corrosion; PVC piping should not come into contact with temperatures above 140°F; copper piping is vulnerable to pinhole leaks if exposed to acidic water; galvanized pipes may need replacing after as little as 15 years due to rusting; and PEX tubing needs protection from UV light exposure if it’s installed outdoors. Knowing the type of material used in your plumbing system is vital for proper maintenance protocols.

When performing repairs or replacements on a home’s plumbing system, they must be done correctly so there are no leaks or compromised seals that could cause further problems. It’s best practice for DIYers trying their hand at repairs or replacements themselves to consult with a qualified plumber beforehand, so they understand the steps required for a successful job.

Finally, homeowners should know that some fixtures may require replacement over time due to wear-and-tear or outdated technology. Toilets older than 15 years old use significantly more water than modern models do and should be replaced if possible; showerheads also become clogged or corroded over time, requiring periodic replacement; faucets may eventually start leaking or become stuck due to hard mineral deposits or corrosion build-up inside the aerator screen; old valves may leak due to worn parts needing replacement; and tankless water heaters may need descaling every 2-3 years depending on local conditions like the hardness of tap water (mineral deposits) in the area they’re located in. Keeping track of components in our homes that require regular maintenance is one way to ensure our homes remain safe and efficient throughout the year – saving money and protecting against unnecessary damages over time!

why you should always hire a licensed plumber

Why you should always hire a licensed plumber!

Why you should always hire a licensed plumber! There are many reasons you should always put into high consideration to hire a licensed plumber. First and foremost, licensed plumbers must adhere to strict safety standards when performing any work. This means that you can rest assured that your home and family are safe when a licensed professional is working on your plumbing. Additionally, licensed plumbers must keep up with the latest advancements to provide the best possible service.

Why you should always hire a licensed plumber!

This means that you can trust that a licensed plumber will have the knowledge and experience necessary to properly assess and resolve any plumbing issue you may be facing. Hiring a licensed plumber also provides peace of mind in knowing that should something go wrong, you have recourse through their licensing board. For all these reasons and more, it’s always best to hire a licensed professional when dealing with any plumbing issue.

Licensed plumbers undergo rigorous training and exams to ensure their knowledge is up-to-date to safely and effectively perform plumbing services. In addition, if you hire a licensed plumber, you have protection from potential errors or malfunctions. 

A licensed professional will be held accountable for their work, meaning if something goes wrong with the service provided, you have legal recourse to get it fixed or compensated for.

Finally, hiring a licensed plumber also provides peace of mind that the job was completed correctly and efficiently the first time around – saving you time, money and hassle.

All these factors combine to make it essential to hire a licensed professional when dealing with plumbing issues.

To become a licensed plumber, individuals must undergo comprehensive training and examinations. Training typically involves a combination of classroom learning and in-person apprenticeships under existing professionals, during which they learn the fundamentals of plumbing installation and repair. They must also pass licensing exams administered by their state or local government. 

These exams will test an individual’s knowledge of complex concepts such as mathematics, piping systems, electrical wiring, and much more. Once all the requirements have been met, an individual can be officially certified as a qualified plumber.

There is a wide range of plumbing jobs that require the expertise of a professional. These include installing and maintaining water, sewer, and gas pipes and repairing fixtures such as toilets, sinks, and faucets.

A professional plumber is also necessary for addressing any issues with the drainage system, and they can diagnose potential problems before they become expensive repairs. 

Raleigh licensed plumber

Professionals are highly recommended for more complex tasks such as replacing or relocating existing piping systems, replacing expired fixtures or installing new plumbing appliances. For all these reasons and more, it is always best to hire a licensed professional when dealing with any plumbing-related job.

For all licensed plumbing needs, contact Raleigh’s most trusted plumber at Poole’s Plumbing.

Choosing the right water heater for your home

Choosing the right water heater for your home

Choosing the right water heater for your home. Water heaters are one of the essential appliances in your home. They provide hot water for showers, washing dishes and clothes, and can even heat your home. However, with so many options, types, and sizes of water heaters, it can be challenging to know which one is right for you.

There’s more to owning a water heater than just heating water. Whether you’re thinking about buying a new one or already have one in your home, it’s essential to know the ins and outs of these appliances.

What you need to know about water heaters:

Choosing the right water heater for your home

How they work: Water heaters use electricity or gas to heat and store it in a tank. The tank size will determine how much hot water you have on hand at any given time.

What they cost: Water heaters can range from around $300 to $1,500. The price will depend on the unit’s type and size, the fuel it uses, and any special features it has.

How to choose the right one: When choosing a water heater, you’ll need to decide on the size, fuel type, and any special features you want. You’ll also need to consider your climate and how much hot water you typically use.

How to maintain them: Water heaters should be flushed out every six months to remove sediment build-up. This will help extend the unit’s life and ensure it works properly. You’ll also need to occasionally check the anode rod and replace it, if necessary.

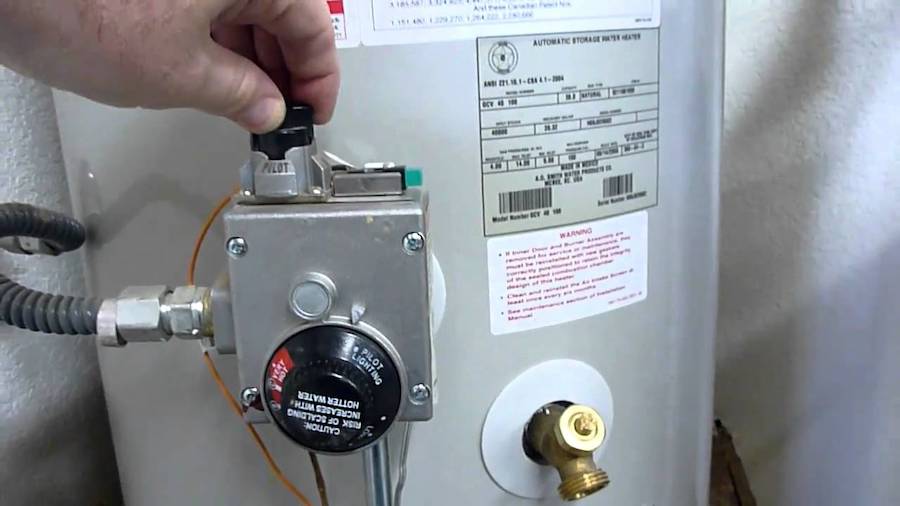
-If your water heater’s pilot light has gone out, you’ll need to relight it. Here are a few steps to take to get your pilot light burning again:

First, locate the pilot light assembly on your water heater. This is usually located near the bottom of the unit. Once you’ve found it, turn off the gas supply to the team. Then, use a flashlight to inspect the area around the pilot light for debris or blockages.

Next, use a small wire brush to clean off the tip of the pilot light assembly. Once that’s done, turn on the gas and use a long lighter to ignite the pilot light. Hold the flame close to the opening for at least 30 seconds before releasing it.

If the pilot light doesn’t stay lit, you may need to adjust the flame. To do this, turn the knob that controls the gas flow to the “low” setting and relight the pilot light. Once it’s lit, slowly turn the knob back to the “high” setting.

Here is a guide to the different types of water heaters and what you need to know before you buy one.

1. Storage Water Heaters

The storage water heater is the most common type of water heater. This type of water heater will store hot water in a tank and then uses a heating element to keep the water hot. Storage water heaters come in various sizes, so they can be used in homes of all sizes.

2. Tankless Water Heaters

Another type of water heater is the tankless water heater. This type of water heater does not store hot water in a tank. Instead, it heats water on demand, so you only use energy when you need hot water. Tankless water heaters are becoming increasingly popular because they are more efficient than storage water heaters.

3. Solar Water Heaters

Solar water heaters are sustainable by using the sun’s energy to heat water. They are a more environmentally friendly option than other types of water heaters and can save you money on your energy bills. However, solar water heaters require a sunny location and can be expensive to install.

4. Heat Pump Water Heaters

Heat pump water heaters will use electricity to move heat from one place to another. This type of water heater is more efficient than other water heaters and can save you money on energy bills. However, heat pump water heaters require a well-insulated space and can be expensive to install.

Understanding water heaters allow you to choose the right one for your home and budget. And by taking good care of it, you can enjoy many years of hot water.

For more information, contact Raleigh’s most trusted plumber at www.poolesplumbing.com.

Plumbing issues

How to Maintain Your Plumbing During the Coldest Months of Winter

How to Maintain Your Plumbing During the Coldest Months of Winter. January is often a time of new beginnings and resolutions as a new year starts. It can also be a chilly month, with winter weather in full swing as temperatures often dip below freezing. This may create issues for some plumbing systems, so if you are experiencing any problems, taking the necessary steps to prevent or address the case may be essential.

January is typical for plumbing issues, as colder temperatures can most definitely cause pipes to freeze or burst. Unfortunately, this can be expensive to fix and result in extensive damage, making it crucial to be aware of the potential risks during this month.

When a pipe freezes, water pressure increases, leading to a build-up of pressure that can eventually crack or burst the pipe. This can cause significant damage to the home and require expensive repairs.

To help mitigate the risk of water damage from frozen or burst pipes, you should take preventative measures such as insulating exposed pipes and setting your thermostat at 65 degrees or higher when you won’t be home for extended periods.

Additionally, identify and repair any leaking faucets or toilets before the winter months approach. Knowing how to shut off your home’s main water valve is also a must so you can quickly turn off the water supply if necessary.

Winter months can be tough on plumbing systems, but there are numerous products available to help protect and maintain them. Insulation is one of the essential items that should be used to protect pipes from freezing. Pipe sleeves, wraps, and covers will keep your lines from becoming too cold, and insulated faucet covers can prevent outdoor faucets from freezing. Additionally, installing a hot water recirculation pump may help reduce pipe-freezing problems, as it circulates already-hot water through the system when the outside temperature drops. Finally, consider investing in a submersible heater for home ponds or other water features to keep them running smoothly even in the coldest winter months. Always when in doubt, call your trusted plumber.

Homeowners can ensure their plumbing systems stay safe this winter season with all these products and techniques!

10 things you didn't know about plumbers

10 things you didn’t know about plumbers

Did you know that the first recorded use of the word “plumber” was in 1469? 

The Latin word for lead “plumbum.” This is where the term originates.

It was in the early 1800s that plumbing became a more common profession.

Plumbers are responsible for installing and maintaining pipes and fixtures in homes and businesses. They also repair and replace plumbing fixtures when they break.

Here are ten things you probably never knew about plumbers:

10 things you didn’t know about plumbers.If you think you know everything there is to know about plumbers, think again! These skilled professionals are responsible for keeping our homes and businesses safe, clean, and healthy – and they do it all while dealing with some pretty gross stuff. Here are ten things you probably never knew about plumbers:

1. Plumbers have to be able to withstand some pretty powerful smells.

2. They also have to be able to work in very tight spaces.

3. Plumbers must be strong enough to lift heavy pipes and fixtures.

4. They also need to use power tools safely and effectively.

5. Plumbers must know how to read blueprints and other technical drawings.

6. They also need to be able to troubleshoot problems quickly and efficiently.

7. Plumbers have to be able to work in all kinds of weather conditions.

8. They also have to be able to work long hours, often on call.

9. Plumbers need to be certified to practice their trade. Most plumbers are trained through apprenticeship programs. These programs typically last four to five years and combine on-the-job training with classroom instruction.

Plumbers must be licensed in most states. To become licensed, plumbers must pass an exam that tests their knowledge of the National Plumbing Code.

10. The median annual salary for a plumber was $51,450 in May 2019, and the job outlook for plumbers is projected to grow 4% through 2029, around the average growth rate for most occupations.

And last but not least, plumbers are genuinely unsung heroes!

Without them, our homes and businesses would be at risk for severe water damage – and that’s just the beginning. So next time you see a plumber working hard to keep your home or business running smoothly, give them a big thank you – they deserve it!

www.poolesplumbing.com
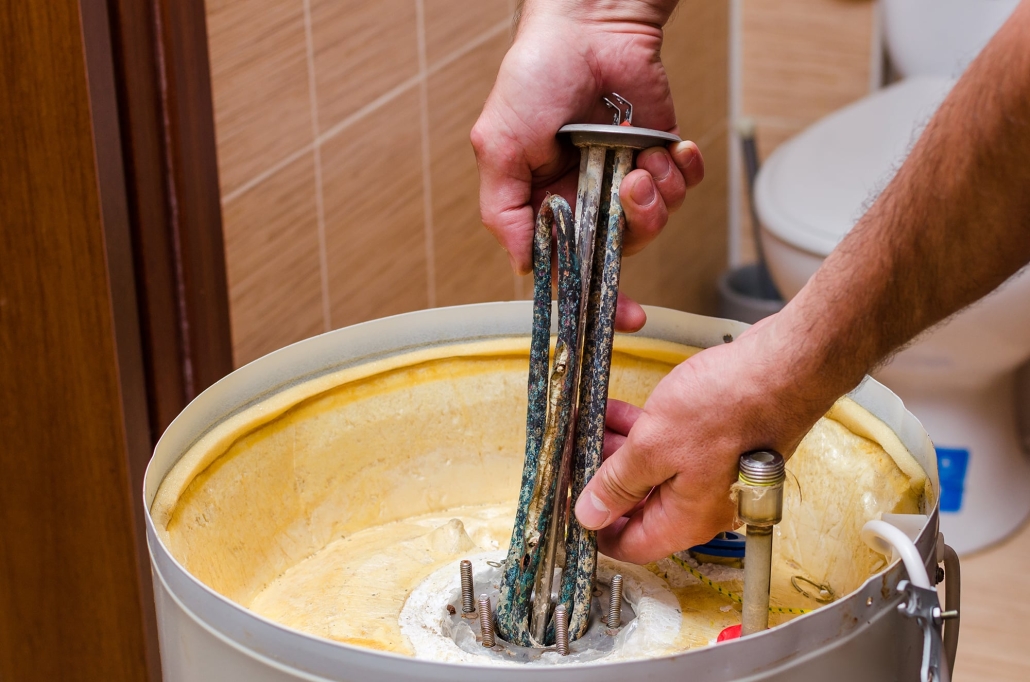
Types of water heaters explained

Types of water heaters explained

Types of water heaters explained, let’s take a look at the In’s and Out’s of Water Heaters. Water heaters are one of the essential appliances in your home. They provide hot water for showers, washing dishes and clothes, and can even be used to heat your home. But with so many different types and sizes of water heaters on the market, it can be challenging to understand and know which one is right for you.

There’s more to owning a water heater than just heating water. Whether you’re thinking about buying a new one or already have one in your home, it is essential to know the ins and outs of these appliances.

So, Here’s what you need to know about water heaters:

How they work: Water heaters use electricity or gas to heat water and store it in a tank. The tank size will determine how much hot water you have on hand at any given time.

What they cost: Water heaters can range from around $300 to $1,500. The price will depend on the size of the unit, the type of fuel it uses, and any special features it has.

How to choose the right one: When choosing a water heater, you’ll need to decide on the size, fuel type, and any special features you want. You’ll also need to consider your climate and how much hot water you typically use.

How to maintain them: Water heaters should be flushed out every six months to remove sediment build-up. This will help extend the unit’s life and ensure it works properly. You’ll also need to occasionally check the anode rod and replace it, if necessary.

-If your water heater’s pilot light has gone out, you’ll need to relight it. Here are a few steps to take to get your pilot light burning again:

First, locate the pilot light assembly on your water heater. This is usually found near the bottom of the unit. Once you’ve located it on the unit, turn off the gas. Then, use a flashlight to inspect the area around the pilot light for debris or blockages.

Types of water heaters explained

Next, use a small wire brush to clean off the tip of the pilot light assembly. Once that’s done, turn on the gas and use a long lighter to ignite the pilot light. Hold the flame close to the opening for at least 30 seconds before releasing it.

If the pilot light doesn’t stay lit, you may need to adjust the flame. To do this, turn the knob that controls the gas flow to the “low” setting and relight the pilot light. Once it’s lit, slowly turn the knob back to the “high” setting.

Types of water heaters explained.

Here is a small helpful guide to the different types of water heaters and what you need to know before you buy one.

1. Storage Water Heaters

The most common type of water heater that is most used is the storage water heater. The storage water heater will store hot water in a tank and then uses a heating element to keep the water hot. Storage water heaters come in various sizes so they can be used in homes of all sizes.

2. Tankless Water Heaters

Another type of water heater is the tankless water heater. This type of water heater does not store hot water in a tank. Instead, it heats water on demand, so you will only use energy when you need hot water. Tankless water heaters are becoming increasingly popular because they are more efficient than storage water heaters.

3. Solar Water Heaters

Solar water heaters use the sun’s energy to heat water. They are a more environmentally friendly option than other types of water heaters and can save you money on your energy bills. However, solar water heaters require a sunny location and can be expensive to install.

4. Heat Pump Water Heaters

So, heat pump water heaters move heat from one place to another using electricity. This type of water heater is more efficient than other water heaters and can save you money on energy bills. However, heat pump water heaters require a well-insulated space and can be expensive to install.

Understanding a bit more about water heaters will allow you to choose the right one for your home and budget. And by taking good care of it, you can enjoy many years of hot water.

For more information, contact Raleigh’s most trusted plumber at www.poolesplumbing.com.

Plumbing Tips

Plumbing Tips — Do not leave for vacation until you perform these tasks

If you’re taking a vacation or traveling for the upcoming holidays, you should take some essential plumbing steps before leaving your home. Failing to do so could result in costly repairs or even water damage.

Plumbing Tips, Let’s check out these four things you should do before going on vacation or leaving for the upcoming holiday season.

1. Shut Off the Water Supply

Plumbing Tips

This is the most critical step to protect your home’s plumbing while away. By shutting off the water supply, you’ll prevent any leaks or flooding that could occur while you’re gone.

Start by finding your home’s main water shut-off valve to shut off the water supply. This is usually located near your water meter location or where the main water line enters your home. Once you’ve found the shut-off valve, turn it clockwise to close.

If you need help finding where your home’s main water shut-off valve is located, or if you think it would be challenging to find in an emergency, consider installing a shut-off valve at each of your home’s plumbing fixtures. That way, it will allow you to efficiently and quickly shut off the water supply to any institution that starts leaking while you’re away.

2. Drain the Water From Your Pipes

Another essential step to take before going on vacation is to drain the water from your pipes. This will help prevent your pipes from freezing and bursting while you’re gone.

To do this, start by turning on all the faucets in your home and flushing all the toilets. This will help get rid of any standing water in your pipes.

Once all the water has been flushed from your pipes, turn off the main water shut-off valve and open all the faucets again. This will allow any remaining water in your pipes to drain out.

3. Disconnect Your Water Heater

If you’ll be traveling away from your home or office for an extended period, disconnecting your water heater is also a good idea. This will help prevent it from overheating and potentially causing a fire while you’re away. To disconnect your water heater, start by turning off the power to the unit. The next step should be to turn off the water supply to the team and open the drain valve to allow any water inside the unit to drain.

Once all the water has been drained from your unit, you can disconnect the water and power lines. Be sure to label these lines, so you know where to reconnect them when you return home.

4. Have a Neighbor Check-In

Finally, having a neighbor or friend check in on your home while you’re away is always a good idea. They can keep an eye out for any signs of leaks or flooding and contact you if there’s an issue.

It’s also a good idea to leave them your contact information in an emergency. That way, they can reach you immediately if there’s a problem.

These simple steps can help protect your home’s plumbing while you’re away on vacation or traveling for the holidays. Be sure to take care of these things before you leave so you then, in turn, may relax and enjoy your time away without worry.

If you are still unsure, contact Raleigh’s most trusted plumber. www.poolesplumbing.com
Clogged Dishwasher

Clogged Dishwasher

Knowing Where to Look

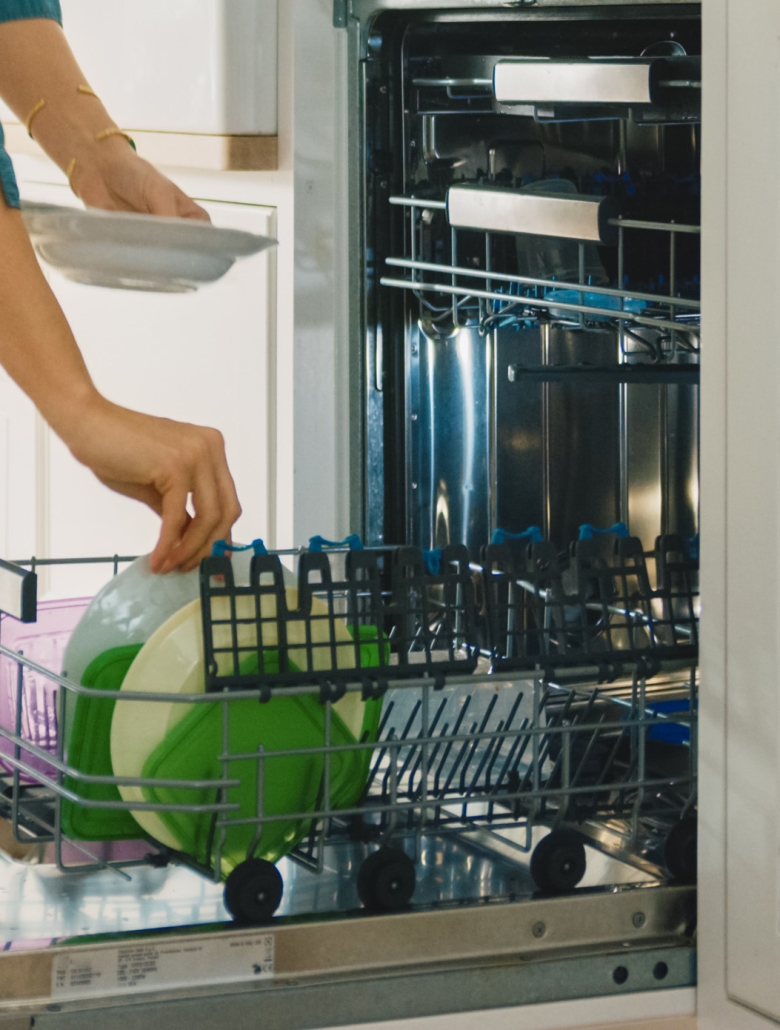
Diagnosing a clogged dishwasher, many appliances exist in today’s technologically advanced world, especially plumbing systems. One device that has been around for quite a while but once upon a time helped lessen our cleaning load in the kitchen drastically is the dishwasher. It continues to make our everyday life a bit easier, but getting used to its convenience, we sometimes panic if the machine has some issue. Typically, this is not something that can’t be identified, so there is no need to worry. Below, we will discuss the three more than likely spots to check for Common Dishwasher Clogs.

There are many ways that you can run into Common Dishwasher Clogs. Sometimes this can be as simple as a label from some container coming loose and clogging the machine. Regardless of what or how you experience these Common Dishwasher Clogs, they usually can be rectified relatively quickly and with some essential tools. Thus, when you notice a dishwasher problem, below are the three common areas it most likely will be found.

Where are the Three Most Common Dishwasher Clogs Located?

The three main areas in which you will find Common Dishwasher Clogs are the air gap, the drain hose, and the filtration system. Below, we will detail each of these areas and how and where to look for each. Likewise, we will explain how to fix the problem in each area.

1- Air Gap

If your dishwasher uses an air gap, it could be the location of your Common Dishwasher Clogs. It is located on top of your sink near the faucet. The purpose of an air gap is to allow the dishwasher to drain without waste or dirty water from the sink backing up into the machine. Obviously, from that description, you can tell that a clogged air gap could lead to problems.

Clogged Dishwasher

To clean out Common Clogged Dishwasher in the air gap:

• Take off the cover and plastic cap on the sink to access the drain hose from the dishwasher

• Use either an air gap brush or bottle brush to clean around your drain hose

• Push the brush through the line that runs to the sink until you can see it when looking into the drain.

How to Unclog Dishwasher – This video might be helpful!

2- Dishwasher Drain Hose

The drain hose attaches to the air gap or your sink and garbage disposal. If Common Dishwasher Clogs are experienced through the drain hose, below are steps to stop the problem.

• First, go to your breaker box and make sure the power to the dishwasher is shut off. So, if you also have a garbage disposal, be sure it is off.

• Shut off the water supply that runs to the dishwasher

• Place a towel with a shallow pan on top of it under your sink to catch spilling or splashing water

• Using the owner’s manual for your dishwasher, locate and then detach both ends of the drain hose

• Use a flexible brush to clean out any debris in the hose and all hose fittings, too

• Flush the drain hose with water using either a garden hose or the bathroom sink

• Reattach both ends of your drain hose

• Turn your power to these plumbing appliances back on and turn the water back on. Finally, run the dishwasher through its drain cycle (see video)

3- Filtration System

Our third and final location to look for Common Dishwasher Clogs is the filtration system. If you are unfamiliar with the filtration system, it is located under the spray arm on the bottom part of your dishwasher. With a filtration system, they can be configured differently depending on the brand or model of your dishwasher. So be sure to consult that owner’s manual (or look it up online) before cleaning it out.

If your filtration system is the issue, there is likely that a “non-food” item caused the problem. The reasoning behind assuming this is that the filtration system is good at taking care of chunks of food. Regardless of what is causing the clog, you’ll be happy to know the most advanced piece of equipment you’ll need to get rid of this clog is a screwdriver.

If These Common Dishwasher Clogs Aren’t the Problem

If you walked through all of these areas and still have Common Dishwasher Clogs, they may not be as common as initially thought. The problem could be with your garbage disposal or the sewer line. If this turns out to be, there is no need to worry. Just give us a call here at Poole’s Plumbing, and we are happy to assist with all your plumbing needs.

To contact the most trusted name in Raleigh plumbers, visit poolesplumbing.com.

Winterize your home, Winter is Coming!

Winterize your home; Winter is Coming! Winter can be challenging for many people, but it is also a time of beauty and wonder. Take the time to appreciate the quiet beauty of a winter day, and let the hope of new beginnings fill your heart.

For centuries, people have considered the winter season a time of rebirth and new life. In the Northern Hemisphere, the winter solstice allows us to mark the shortest day of the year and the longest night. For many cultures, this is a time of celebration when the sun is reborn and the days begin to grow longer.

As winter approaches, it’s time to start thinking about preparing your home’s plumbing for the cold weather; it’s time to winterize your home.

Here are a few tips to help you winterize your home:

winter is coming

1. Insulate your pipesThis is one of the most important things you can do to prevent your pipes from freezing. You can buy pre-insulated pipe wraps at most hardware stores or use old towels or newspapers to wrap them yourself. Ensure no gaps or tiny spaces where cold air can seep in.

2. Let your faucets drip: This may seem like a waste of water, but it helps prevent your pipes from freezing. The constant dripping of water keeps the water moving, which prevents it from freezing and causing your pipes to burst.

3. Keep your home warm: This may seem obvious, but it’s worth mentioning. The warmer your home is, the less likely your pipes will freeze. So crank up the heat and keep your home cozy all winter long.

4. Know where your main water shut-off valve is: If your pipes do freeze and burst, it is essential to know where your main water shut-off valve is on your system so you can quickly turn off the water and prevent further damage.

5. Call a professional Plumber: If you’re not comfortable doing any of the above yourself, or if you’ve tried everything and your pipes are still freezing, it’s time to call in a professional. Plumbers have the knowledge and experience to thaw your pipes and get your plumbing system back up and running in no time.

Tips like these will help you along the way to avoid costly repairs and the headache of dealing with frozen pipes this winter. So take some time to prepare your home’s plumbing for the cold weather, and you’ll be glad you did when winter comes around.

Raleigh’s most trusted plumber is www.poolesplumbing.com.

why does my water taste bad?

Why does my water taste bad?

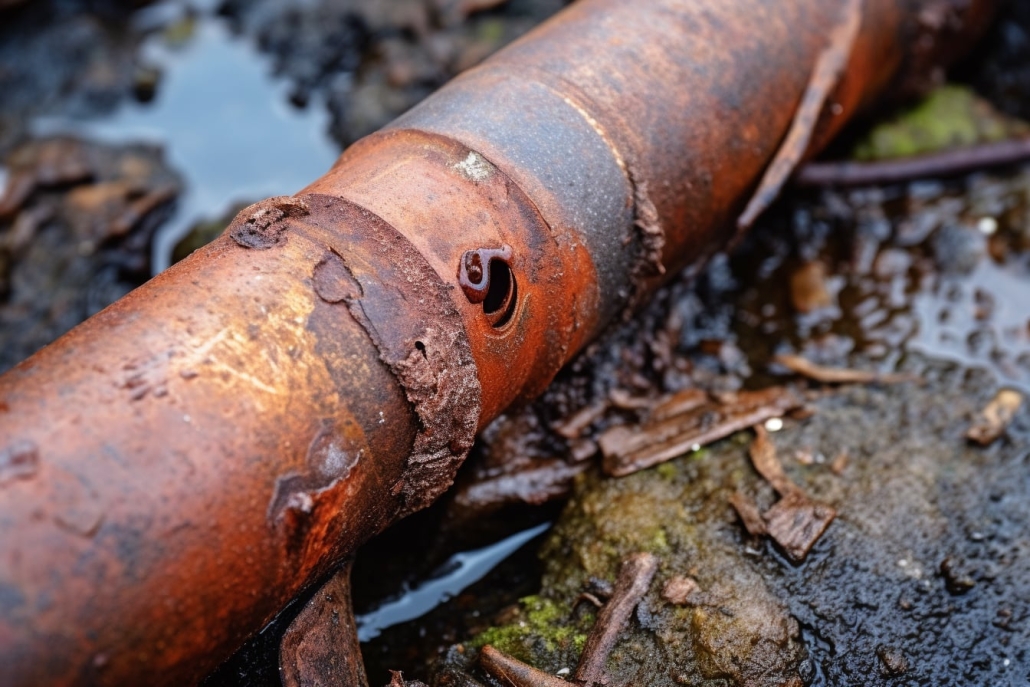
If your water has a reddish tint, this is likely due to rust. Rust occurs when iron in the water pipes begins to erode. Although rust is not always harmful to your health, it can be unpleasant to drink or use for cooking. If you have rusty water, you can do a few things to improve the situation.

Why does my water taste bad?

– We first recommend that you check with your local water supplier to see if there is anything they can do. So, if the rust is coming from your water pipes, you may be able to adjust the pH of the water coming in to make it less corrosive.

– You can also try filtering your water using a pitcher filter or a faucet-mounted filter. Doing this step may not remove all the rust, but it will make the water less rusty and palatable.

– If you are on a well, you may want to have your water tested for iron levels. If there is too much iron in your water, it can be treated with a filtration system or a water softener.

– Finally, if all else fails, you can always try to improve the appearance of your water by adding a little bit of lemon juice or vinegar. This will not make the water less rusty but may make it more palatable.

Why does my water taste bad?

Is it your pipes?

Rusty pipes are a common problem in many homes. While they may not seem a big deal, they can be pretty dangerous. Left untreated, rusty pipes can lead to severe issues like water contamination and leaks.

If you have rusty pipes in your home, you must take care of them immediately, and there are a few different ways you may do this. One option is to replace the lines. This may be expensive, but it’s usually the best option in the long run.

Another option is to try a pipe repair kit. These kits usually come with a rust-resistant coating that you can apply to the pipes. This can help to prevent further rusting and may even be able to repair some of the damage that’s already been done.

If you’re unsure how to handle rusty pipes, it’s always best to call a plumber. They can inspect the lines and advise on how to fix them. In most cases, they’ll be able to do the job right in your home.

Rusty pipes are a severe problem that should be taken care of as soon as possible. If you have them in your home or office, don’t hesitate to call a plumber or use a repair kit. With a little effort, you can keep your pipes in good condition and avoid any serious problems down the road.

Pipe repair kits can be found at most hardware stores. They usually come with everything you need to apply the rust-resistant coating. Always follow the directions carefully so you don’t damage the pipes further.

If you have questions about using a pipe repair kit or are unsure whether it’s the right solution for your problem, you can always ask a plumber. They’ll be able to help you figure out what’s best for your particular situation.

Rusty pipes are a common problem, but they don’t have to be a big deal. With a little effort, you can fix them and avoid any serious issues down the road.

Contact Raleigh’s most trusted plumber at www.poolesplumbing.com.

Unclog a Shower Drain

Unclog a Shower Drain

If you’ve never had to unclog a shower drain you’re lucky. Many issues can arise that almost immediately tell you there is a plumbing problem. The unmistakable sound of a dripping faucet. The noticeable wetness from a leaky toilet. More so than any “telltale” sign, regardless of the issue, though, is that undeniably funky odor coming from your shower drain. This, combined with you noticing the water level higher as you take that morning rinse, means you have probably got a drainage issue. Luckily, your friends here at Poole’s Plumbing have you covered, as below we will instruct you on how to Unclog a Shower Drain.

Now, this is not the most complicated of plumbing issues, nor is it an impossible fix. However, there are a few ways that depending on the blockage; you might need to approach to Unclog a Shower Drain. No worries, though, as we assure you above, we will run through each of these ways. In the end, one way or another, we will get rid of that smell and, most importantly, open up that blockage.

10 Things You Should Never Rinse Down Your Sink

Unclog a Shower Drain Manually

Ideally, this will be the way you Unclog a Shower Drain. Finding and removing whatever obstructs the water from passing through your drain would end the issue. These obstructions can be anything from gobs of hair, oils, soaps, or other debris. But, just removing the cover and Unclogging a Shower Drain by removal will make for a fast solution in many cases. If you can use pliers or even a gloved hand to do this, perfect, case closed, and problem solved. However, if you can see the clog but can not get at it, follow the instructions below and use a simple wire coat hanger to Unclog a Shower Drain.

  1. Use a pair of wire cutters to cut your hanger to the right of the hook
  2. Bend the wire until it is one long, straight wire, and the hook at the top can be used as a handle
  3. Use a pair of needle-nosed pliers to pinch a small hook on the end of your long wire
  4. Lower and guide your hooked wire into the shower drain until you feel some type of resistance. That resistance is your clog.
  5. When you feel this mass, to Unclog a Shower Drain, rotate and poke the wire until you can feel it grasp the clog. Then pull it up and out of the drain. You may need to repeat this a few times to remove all debris fully.

If for some reason the hanger wire does not reach or is not strong enough to pull a clog, follow \the basic same method to Unclog a Shower Drain, but use a hand snake in the place of the wire.

Kitchen Ingredients to Combat the Clog

Now, as we said, the first way would be ideal to Unclog a Shower Drain. But we also said we know some clogs are worse than others. Likewise, people develop and have their own methods that they grow to trust. Other ways to safely Unclog a Shower Drain that have been used over the years include the use of some basic kitchen ingredients.

This way of unclogging a Shower Drain will keep your hands clean and usually are effective. Below we have three different “potions” for your shower drain that will get things flowing right again.

  • Liquid Dish Soap- Yep. That is exactly what it states. Pour between a half and a full cup of liquid dish soap directly into the shower drain. Wait 20-30 minutes, then flush through with extremely hot or even boiling water.
  • Baking Soda and Vinegar Combo- A safe alternative to harsh chemicals when looking to Unclog a Shower Drain. This involves first pouring one cup of baking soda into your drain. Immediately following that, pour one cup of distilled white vinegar into the same drain. Then cover the drain and again wait 20-30 minutes. At that point, flush with boiling water, and you should be successful in this attempt to Unclog a Shower Drain.
  • The “Fizzy Cola” Method- It is what it sounds like. No surprises here; just looking to Unclog a Shower Drain simply. To use this method, pour a liter of cola (or fizzy, carbonated soda) down the drain. Follow this with our trusty boiling water, which is said sometimes to do the trick.

What About When Already Dealing with Standing Water?

This is a valid question with a not-so-difficult-to-accomplish answer. If your clogged drain already has you with water standing as you shower, we simply start by grabbing the plunger. Placing its head over the drain, plunge up and down quickly between five and ten times. Pull away from the drain and repeat this simple process if needed. You will begin to see the standing water recede, and to Unclog a Shower Drain completely, refer to the above methods once the standing water has been cleared.

What if None of These Helps to Unclog a Shower Drain

These may seem obvious and easy ways to unclog. But the truth is, these methods are proven to work. If you try these, though, and they do not work, you may need some professional help. The most reliable name in Raleigh area plumbers, Poole’s Plumbing, is here and waiting to assist you with this or any other of your plumbing needs.

To contact the most trusted name in Raleigh plumbing for over two decades, visit poolesplumbing.com.

When do you need a pluming inspection?

When do you need a plumbing inspection?

So exactly, when do you need a plumbing inspection? Many individuals don’t think about their plumbing until something goes wrong. But, having a regular plumbing inspection can help prevent many problems from occurring in the first place. A plumbing inspection can help identify potential problems before they cause severe damage to your home. For example, a leaking pipe can be fixed before it causes water damage to your floor or walls. A clogged drain can be cleared before it causes sewage back into your home.

In addition to preventing damage, a plumbing inspection can also help save you money. So, fixing a small problem before it becomes a big problem can save you a lot of money in the long run.

So, schedule a plumbing inspection today if you want to protect your home and save money. So, if you own a home, you know that maintaining your plumbing is essential to keeping your home in good condition.

But what about when it’s time to buy a new home?

Or renovate your home?

How can you be sure that the plumbing is up to par?

The best way to do this is to perform a plumbing inspection. This will allow you to look closely at all the piping and fixtures in the home and identify any potential problems. Here’s how to do it:

1. Start by turning on all of the faucets in the house, both hot and cold. Turn them on and let them run for a few minutes to see if there are any leaks.

2. Check all the toilets to ensure they are flushing correctly. If you notice any leaks, make a note of them.

3. Inspect all exposed piping in the basement and in the crawl space; this way, you can look for any signs of corrosion or damage.

4. Have a professional plumber come to the home and perform a pressure test on the system. This will help identify any hidden leaks.

5. Ask the homeowner for copies of any recent plumbing maintenance or repair records. This will then give you an idea of how well the system has been cared for.

When do you need a plumbing inspection?
Does a new house need a plumbing inspection?

So, by following these steps, you can be sure that you’re getting a home with plumbing that is in good condition. Don’t forget to have a professional inspect the system before you finalize your purchase!

Think about all the things that rely on plumbing in your home – from flushing the toilet to taking a shower, cooking, and cleaning. Now imagine what would happen if something went wrong with your home’s plumbing system. A small leak could quickly become a big problem, and a broken pipe could cause extensive damage.

That’s why it’s essential to have your home’s plumbing inspected regularly. A professional plumber can identify and repair problems before they become significant issues. An inspection can also help you save money by catching problems early on when they are typically more accessible and less expensive to fix.

So don’t wait for a problem with your plumbing to call a professional. You can always schedule an inspection today and rest easy knowing your home’s plumbing is in good hands.

Pros:

1. You can catch problems early. Regularly inspecting your plumbing can see issues before they become big and expensive to fix.

2. You can avoid disasters. Plumbing problems can cause all sorts of disasters, from flooding your home to damaging your foundation. By getting an inspection, you can prevent these disasters.

3. You’ll know what needs to be fixed. Once your inspector finds problems with your plumbing, you’ll know exactly what needs to be fixed. This may definitely save you time and money in the long run.

Overall, having a plumbing inspection done periodically is a good idea. It can catch problems early, avoid disasters, and save you money in the long run.

Contact Raleigh’s most trusted plumber at www.poolesplumbing.com.

Garbage Disposal Leaking

Why is My Garbage Disposal Leaking?

If you have a garbage disposal, chances are good that you’ve had to deal with a garbage disposal leaking issue at some point. And while a little leak might not seem like a big deal, it can be dangerous. Water and electrical appliances don’t mix well, so even a tiny amount of water can cause severe damage to your disposal (and your home).

So why exactly does a garbage disposal leak? There are a few different reasons, but the most common one is wear and tear. Over time, the seals and gaskets at your disposal can break down, allowing water to seep. This will be especially true if you use your disposal frequently or put challenging items down the drain (like bones or coffee grounds).

Garbage Disposal Leaking

Another possible reason for a leak is that your disposal isn’t installed correctly. This is quite common, so it’s always a good idea to have a professional look at your disposal to ensure everything is in its proper place.

Finally, something is also possibly blocking the drain of your garbage disposal, and if this is the case, water will build up in the removal and eventually start leaking out. The best way to deal with this issue is to remove whatever is blocking the drain and run some water through the disposal to ensure everything is clear.

If you’re dealing with leaking garbage disposal, don’t panic. There are many different things you can do to fix the problem. First, try tightening the bolts that hold the removal in place. This might stop the leak, at least temporarily.

So, if that doesn’t work, you can try using some plumber’s putty to seal any cracks or gaps around the disposal. Be sure to follow the directions on the package carefully, as too much putty can cause more leaks.

So finally, if all else fails, you may need to replace your garbage disposal entirely. This is usually a last resort, but it may be necessary if your disposal is old or damaged beyond repair.

No matter what’s causing your garbage disposal to leak, it’s essential to deal with the issue as soon as possible. Water and electrical appliances don’t mix, so a small leak can cause significant damage. So, with a little bit of troubleshooting, you should be able to fix the problem and get your disposal back in working order in no time.

The garbage disposal can, at times, indeed be a nice luxury to have. Making for easier cleanup and more straightforward removal of select food waste, the convenience in some respects is undeniable. However, as with any plumbing appliance, there can be issues if the disposal performance is somehow hindered. This can lead to your Garbage Disposal Leaking.

If you find your Garbage Disposal Leaking, it could be due to multiple causes. While there could be another factor in your Garbage Disposal Leaking, we will walk you through several things to look for below. These items include where you see the Garbage Disposal Leaking, a probable cause for this, and, if possible, a remedy.

When You See the Garbage Disposal Leaking From its Top

The garbage disposal is usually connected to your sink by the flange and plumber’s putty. Garbage Disposal Leaking occurs here somewhat commonly if the connection between the sink drains and sink flange is not tight enough. The problem can also persist if the relationship between the drain and flange has become eroded over time.

Remedies When Probable Cause is Loose Sink Flange

• Check the mounting bolts connecting the drain and flange to be sure they are tight enough

• Be sure that the plumber’s putty helping seal the disposal is not compromised. If it is, loosen the bolts, add new putty, and retighten the bolts back in place

You Notice the Garbage Disposal Leaking from its Side

In many kitchens, the drain pipe from a dishwasher is connected to your garbage disposal. When functioning normally and adequately, that drain line connection removes excess food debris and water from the dishwasher into the garbage disposal. If for some reason, this pipe is obstructed or loosely connected, this can explain your Garbage Disposal Leaking.

Remedies When Probable Cause is the Drain Line Connection

• A rubber gasket and screws connect your main drain line. If the metal clamp connecting the dishwasher to the disposal is loose, tighten it with a screwdriver and say goodbye to your Garbage Disposal Leaking

• The hose connecting the dishwasher and disposal may also be the issue. Look for cracks or dried-out areas in this connection. So, if there is any damage to the hose, you can end the Garbage Disposal Leaking by getting a replacement hose.

If the Garbage Disposal Leaking is Coming from Its Bottom

One thing that can happen with almost any product or appliance is it can simply get old. Thus, the Garbage Disposal Leaking you’re seeing may result from age. In actuality, if you notice leakage just at the bottom and no drips from above, it is usually the disposal being worn out. Causing this is that internal seals deteriorate over time.

Remedies When Probable Cause is a Busted Internal Seal

• Inspect the actual body of your disposal. If you’re seeing Garbage Disposal Leakage, find cracks or wet spots to know precisely where. Again, those internal seals, if worn out, can eventually lead to these types of leaks and must be replaced

• Keep an eye out for the positioning of your garbage disposal under your sink. It may have been bumped or shifted out of place. If it has, checks the seals and putty and realign as needed to stop the Garbage Disposal from Leaking.

As you may now realize, there are various reasons you may see your Garbage Disposal Leaking. Hopefully, from our information, you can now recognize a leak and identify where it is on the disposal. Likewise, with the suggested remedies, you should be able to, in many cases, fix the problem.

If you are not comfortable fixing or feel something else is causing Garbage Disposal Leaking, give us a call.

Just visit poolesplumbing.com to contact the most trusted name in the Raleigh area, plumbers, and we’re happy to help solve all your plumbing problems.

how to clean a sump pump

What is a sump pump and How do I clean it?

Sump pumps are one of those items that you don’t think about until you need to invest in one. And then, you’re thrilled you have one! A small sump pump is installed in the lowest part of your basement or crawlspace. Its job is to remove groundwater accumulated around your foundation and prevent it from flooding your basement or crawlspace.
While most homes have a sump pump, not all sump pumps are created equal. There are different types of sump pumps; the right one will depend on your specific needs. So, for example, if you live in an area with a high water table, you’ll need a sump pump that can handle a higher volume of water.

Sump pumps are relatively simple devices, but they can help keep your basement or crawlspace dry. If you’re unsure if you need a sump pump or which type is right for you, talk to a professional contractor specializing in waterproofing basements and crawlspaces. They can help you determine whether a sump pump is necessary for your home and which type would suit your situation.

If you have a sump pump, you know it can be a lifesaver during heavy rains or when there is a lot of water around your home. But, like any other mechanical device, sump pumps must be maintained and cleaned regularly to ensure they are working correctly. Let’s take a look at this step-by-step guide on how to clean your sump pump:

How to clean a sump pump
Example of a submergible pump

How to clean

  1. For safety precautions, you will first need to start by disconnecting all the power to your pump and the area in which you work.
  2. Next, you will want to remove the cover to the sump pit. This will give you access to the pump itself.
  3. Using a garden hose, flush the inside of the sump pit or hole. This will allow the removal of any dirt or debris that has accumulated inside.
  4. Once the sump pit is clean, you can now remove the pump from the hole.
  5. Disassemble the pump so that you can access all of the different parts.
  6. Using a soft brush, clean off all of the different parts of the sump pump. The impeller is sensitive, so ensure that you pay special attention to the impeller, as this is what helps move the water.
  7. Once all the parts are clean, you can reassemble the sump pump and put it back into the sump pit.
  8. Reconnect the power to your sump pump and test it to ensure it works properly.

So, following these simple steps may ensure that your sump pump is clean and working correctly. Regular maintenance will help prolong your pump’s life and keep your home safe from flooding.