Plumbing News and Tips for Homeowners in the Raleigh NC Area, New Product Reviews, Water Heaters and Tankless water heater advice from local certified plumbers.

3 of the Top Problems in Plumbing Systems

3 of the Top Problems in Plumbing Systems

Let’s dive into 3 of the top problems in plumbing systems. Homeownership comes with many responsibilities, and maintaining the plumbing system is one of the most crucial yet often overlooked tasks. Whether you’re a seasoned homeowner, a DIY enthusiast, or a property manager, understanding common plumbing issues and their solutions can save you time, money, and headaches.

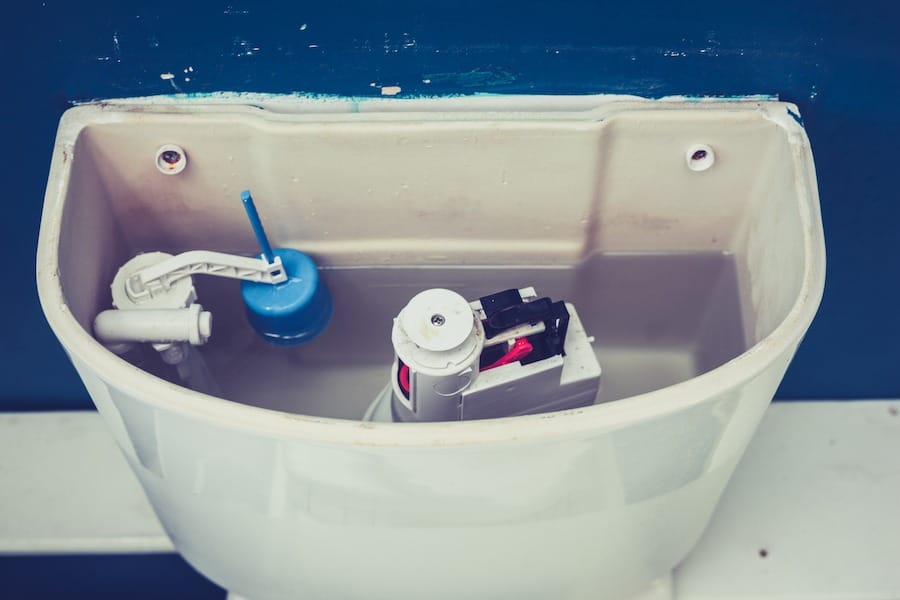
Running Toilets

Issue: A running toilet is not just an annoyance; it can save significant water and inflate your utility bill. The constant sound of flowing water usually indicates some internal components malfunctioning.

Solution:

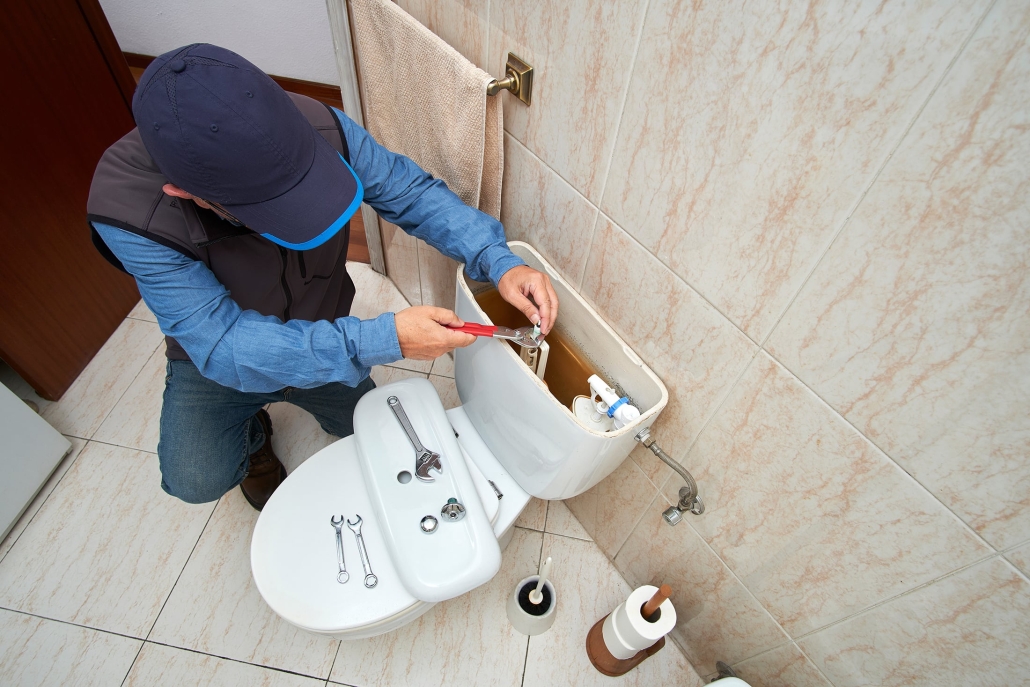
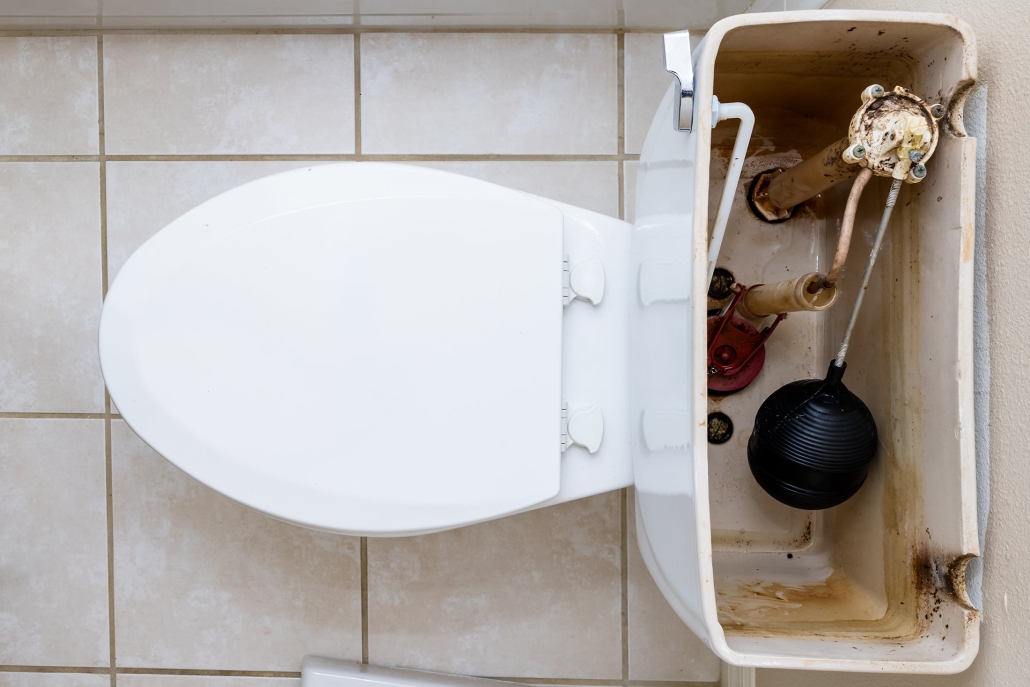
  • Identify the Source: Open the toilet tank and inspect the flapper, flush, and fill valve.
  • Replace the Flapper Valve: Often, the flapper valve becomes worn out and fails to seal properly. Replacing it is straightforward.
  • Adjust the Float: The toilet will continuously run if the water level is too high. Adjusting the float can help control the water level inside the tank.
  • Check the Refill Tube: Ensure the refill tube is short enough and fits correctly above the overflow pipe.
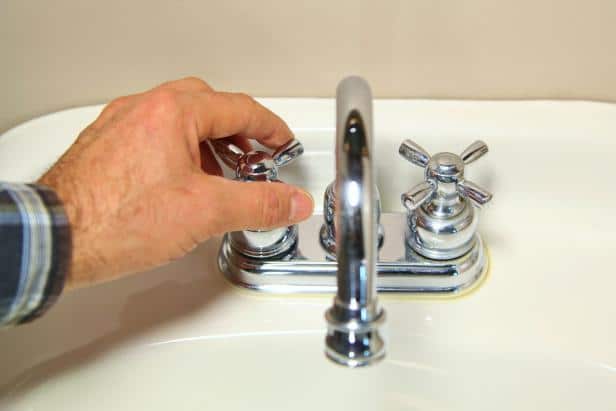
  • Dripping Faucets

Dripping Faucets

Issue: Dripping faucets are more than just a source of irritation; if left unaddressed, they may eventually lead to increased water bills and potential water damage. A dripping faucet usually indicates a problem with the internal mechanisms, such as the washer, O-ring, or valve seat.

Solution:

  • Turn Off the Water Supply: Before you begin, turn off the water supply to the faucet.
  • Replace the Washer: The washer is a common culprit for leaks. Unscrew the faucet handle and replace the old washer with a new one.
  • Inspect the O-ring and Valve Seat: If replacing the washer doesn’t solve the issue, check the O-ring and valve seat for signs of wear and tear. Replace if necessary.
  • Call a Professional: If the problem persists after you’ve tried these steps, it may be best to consult a professional plumber for a more in-depth inspection.
  • Clogged Drains

Clogged Drains

Issue: Clogged drains are a frequent issue in many households, often caused by the accumulation of hair, soap, grease, and food particles. Persistent clogs can lead to slow drainage, unpleasant odors, and water damage.

Solution:

  • Use a Plunger: A plunger can effectively remove minor clogs in sinks and toilets. Make sure to use a plunger designed for the type of drain you’re working on.
  • Apply a Drain Snake: For more stubborn clogs, a drain snake (or auger) can reach deeper into the pipes to try and break up the blockage.
  • Natural Remedies: A baking soda and vinegar mixture can help dissolve minor clogs. To use this natural remedy, pour the baking soda mixture down the drain, wait about 30 minutes, and then flush with hot water.
  • Chemical Cleaners: While chemical drain cleaners are effective, they should be used sparingly because they can damage pipes over time.
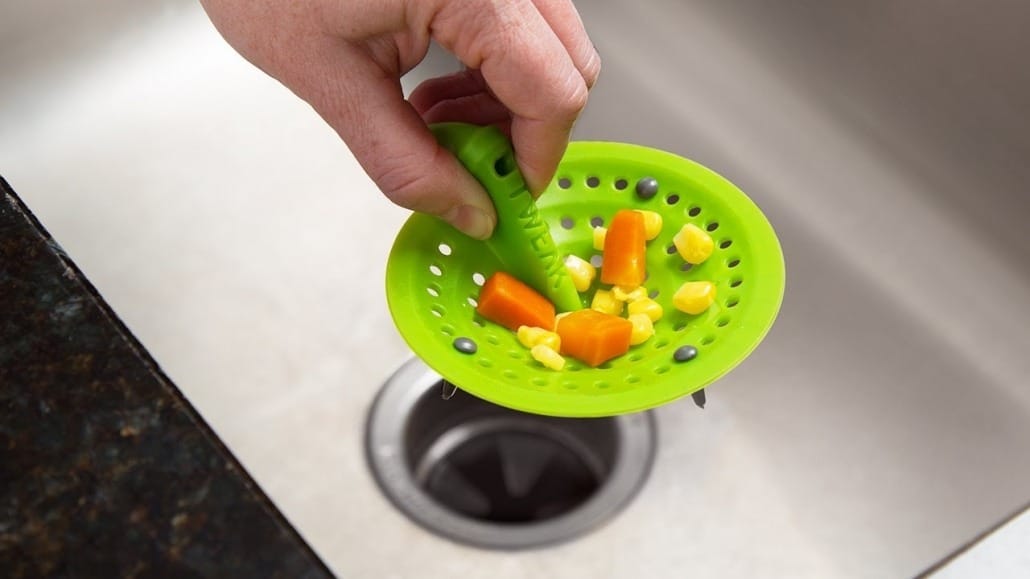
  • Preventive Measures: Install drain screens to catch debris, and regularly clean your drains to prevent buildup.
Certified Raleigh Plumbers

Just Call Poole’s Plumbing of Raleigh, NC
919-661-6334

Preventive Maintenance Tips

  • Regular Inspections: Regularly inspect your plumbing system to catch issues before they become significant problems. During these regular inspections, look for signs of leaks, corrosion, and wear on all visible pipes and fixtures.
  • Proper Disposal: Be mindful of how you flush your toilets and pour down your drains. Avoid disposing of grease, coffee grounds, and fibrous foods in the kitchen sink.
  • Seasonal Preparations: Prepare your plumbing for colder months by insulating pipes to prevent freezing and bursting.

When to Call a Professional

So, as many plumbing issues can be resolved with many different DIY methods, some situations require the expertise of a professional plumber:

  • Complex pipe repairs or replacements
  • Persistent leaks that cannot be traced to a specific source
  • Major sewer line problems
  • Water heater malfunctions

Knowing when to call a professional may help prevent costly repairs and ensure the longevity of your plumbing system.

Conclusion

Plumbing issues are inevitable in homeownership, but many can be managed with some knowledge and effort. By understanding common problems like running toilets, dripping faucets, and clogged drains, you can proactively resolve these issues and maintain your home’s plumbing system effectively. Remember, preventive maintenance is critical; don’t hesitate to call a professional when in doubt.

Stay vigilant, address issues promptly, and enjoy a hassle-free plumbing experience!

Resources: https://raleighnc.gov/water

www.poolesplumbing.com

Low Water Pressure Causes and Solutions

Low Water Pressure: Causes and Solutions

Understanding Low Water Pressure

Low water pressure in your home can be frustrating and inconvenient. Weak water flow can disrupt your daily activities, whether you’re trying to shower or water your garden. Fortunately, identifying the underlying causes and implementing practical solutions can restore normal water pressure. This article aims to help homeowners, DIY enthusiasts, and property managers understand why they might be experiencing low water pressure and how to fix it.

Common Causes of Low Water Pressure

Clogged or Partially Closed Water Supply Valves

Mineral Deposits

Unlocking Your Home’s Full Flow: Diagnosing and FixOne of the most straightforward causes of low water pressure is a clogged or partially closed water supply valve. These valves control the flow of water to different areas of your home. Water flow will be restricted if they are fully open or obstructed.

Buildup of Mineral Deposits or Sediments

Over time, mineral deposits or sediments can accumulate inside your pipes, reducing the inner diameter available for water flow. This buildup often occurs in homes with hard water and can significantly impede water pressure.

Leaks in the Plumbing System

Leaks, whether visible or hidden, can lead to a drop in water pressure. Water escaping from the system means less flow through your taps is available, leading to reduced pressure.

Issues with Municipal Water Supply

Sometimes, the problem is outside your home but with the municipal water supply. Pipe damage or high demand in your area can temporarily lower the water pressure. Raleigh, NC Water and Sewer Link: https://raleighnc.gov/water-and-sewer/water-service-faq

Malfunctioning or Incorrectly Sized Water Pressure Regulators

Water pressure regulators control the water pressure entering your home from the municipal supply. If these regulators malfunction or are incorrectly sized, they can cause inconsistent or inadequate water pressure.

How to Fix Low Water Pressure

Check Water Supply Valves

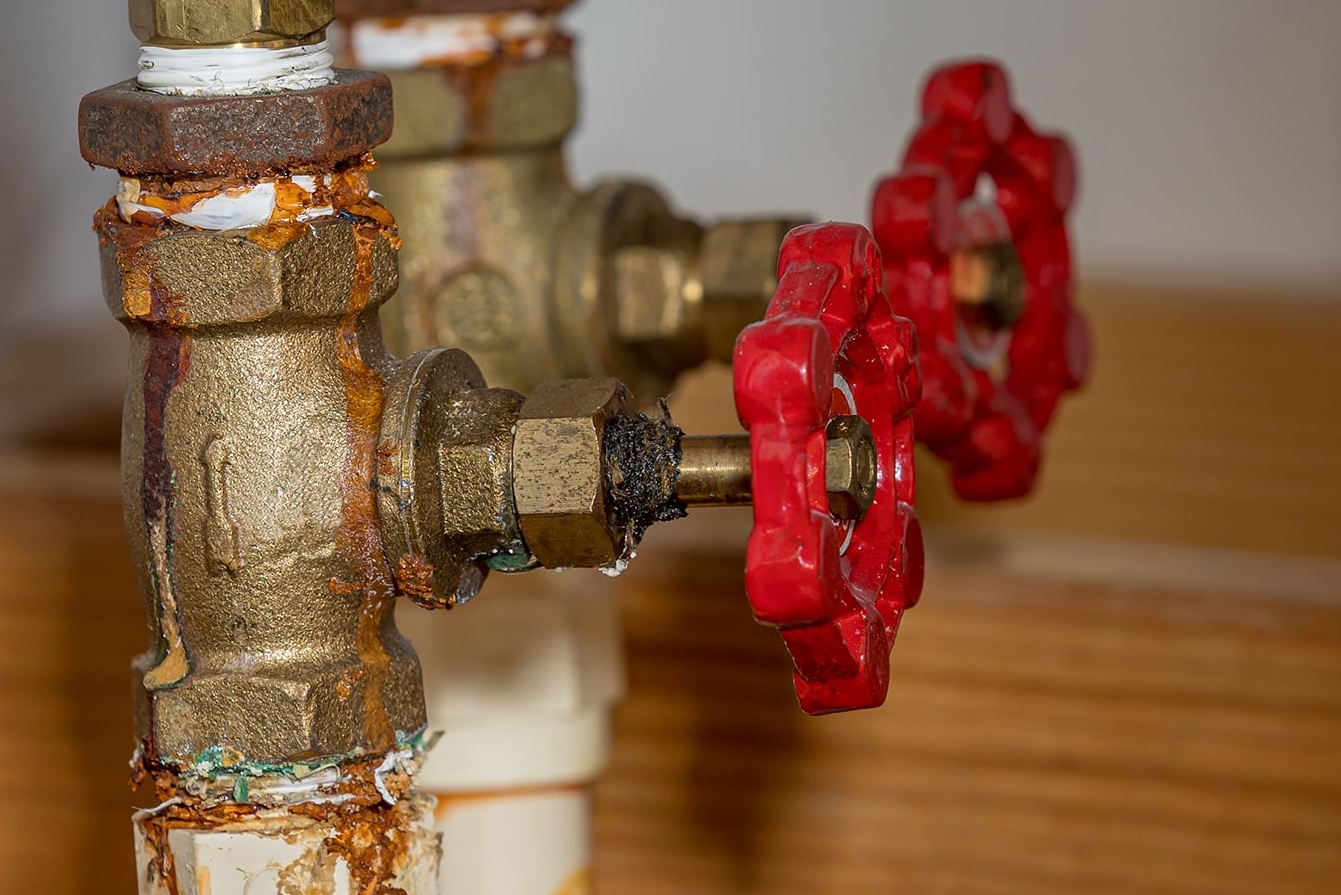
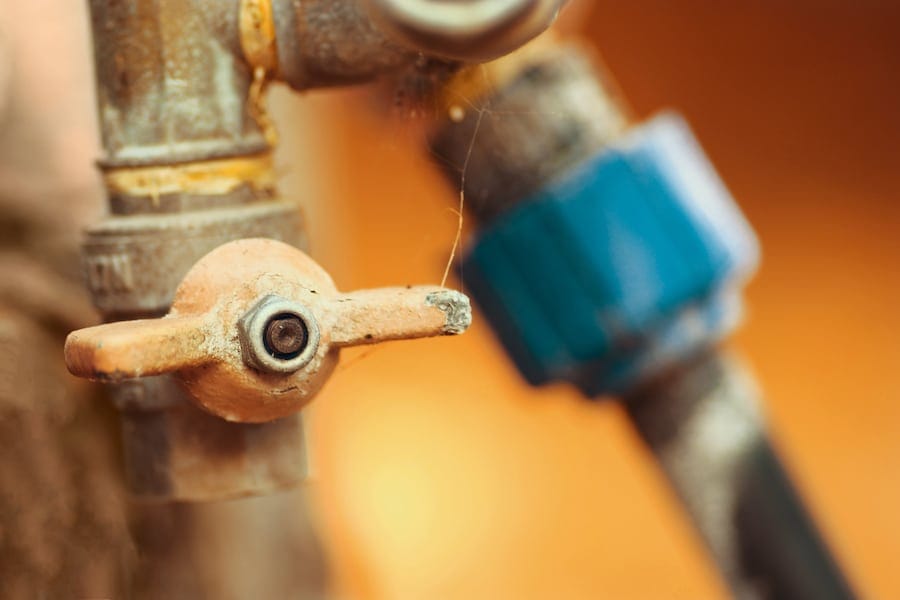
Indoor-Spring-Plumbing-Tips-Sticky-Valve-Pooles-Plumbing

Start by inspecting the water supply valves leading to the affected areas. Ensure they are fully open and free of any obstructions. Adjusting the valves to their correct positions can often immediately resolve issues with low water pressure.

Address Mineral Buildup

If mineral deposits are suspected, consider installing a water softener to treat hard water and prevent future buildup. Additionally, a descaling agent can help clean out existing deposits in the pipes, thereby improving water flow.

  1. Inspect for Leaks
  2. To look for any signs of leaks, conduct a thorough inspection of your plumbing system, as leaks can often be found around fixtures, while hidden leaks may require a professional plumber to locate them. Repairing leaks promptly will restore normal water pressure and prevent further damage to your home.
  3. Contact Your Local Water Authority

If no issues are found within your home, contacting your local water authority is essential. They can confirm whether there are any problems with the municipal water supply and provide information on when full service will be restored.

Check the Water Pressure Regulator

A malfunctioning or improperly sized water pressure regulator can be tricky to diagnose. Have a professional plumber check the regulator for any issues. They can adjust or replace it to ensure consistent and adequate water pressure.

Normal PSI for residential water pressure is between 45-80 psi for the average water pressure range. Residential water pressure ranges between 45 and 80 psi. Water pressure under 40 psi is considered low. A psi between 20 and 30 is very low and is below the minimum required by most building codes.

Conclusion

Raleigh, NC Plumber, and Residential Resource Link: https://raleighnc.gov/water-and-sewer/water-service-faq

www.poolesplumbing.com

Maintaining your water heater

Water Heater Maintenance Flush: When and How to Flush Your Water Heater

Water Heater Maintenance Flush — Homeownership entails many maintenance tasks, and preserving the longevity and efficiency of your water heater is among the most critical. Regularly flushing your water heater is a pivotal maintenance activity that combats sediment buildup, enhances energy efficiency, and ensures a consistent hot water supply. This article delves into the importance of flushing your water heater and provides a detailed, step-by-step guide to help you perform this essential task.

Why You Need to Flush Your Water Heater

Regular Maintenance

Incorporating water heater flushing into your routine home maintenance schedule is crucial. Over time, sediment naturally accumulates at the bottom of the tank, causing potential issues if left unchecked.

Maintained Water Temperature

A decrease in water temperature can often be attributed to sediment buildup. Sediment is an insulating barrier between the heating element and the water, reducing heat transfer efficiency.

Enhanced Energy Efficiency

A water heater free from sediment operates more efficiently. Sediment accumulation may force your water heater to work overtime, making it much harder to heat the water, consuming more energy, and increasing utility bills.

Extended Heater Lifespan

To significantly extend the lifespan of your water heater, you should regularly flush and maintain a schedule. Accumulated sediment can lead to corrosion and other damages, potentially shortening the unit’s operational life.

Water Heater Maintenance Flush

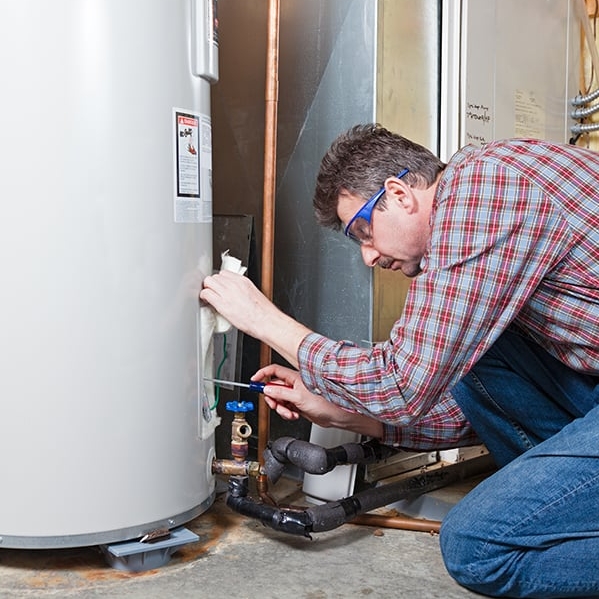
Water Heater Maintenance Flush — How to Flush Your Water Heater:

Step-by-Step Guide

Step 1: Turn Off the Water Heater

Switching off the water heater’s power supply or gas is a crucial safety step. This will prevent the heater from attempting to heat an empty tank.

Step 2: Gather Your Tools

Prepare a garden hose, a screwdriver, and gloves. Having these tools ready will streamline the process.

Step 3: Connect the Hose

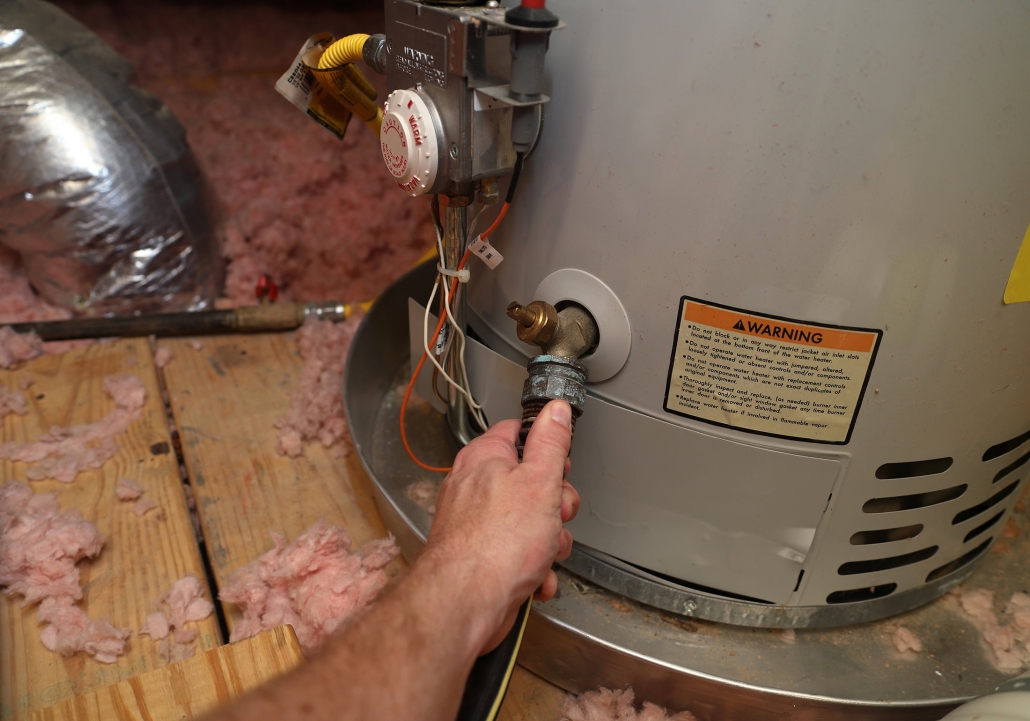
You connect the hose by attaching the garden hose to the tank’s drain valve at the bottom. Position the other end in a safe area where hot water can drain without causing damage.

Step 4: Open the Pressure Relief Valve

Open the pressure relief valve situated on the top of the tank. This allows air to enter and facilitates the smooth flow of water, preventing a vacuum from forming inside the tank.

Step 5: Drain the Tank

Opening the drain valve allows the water to flow out. This process might take some time, especially if there is significant sediment buildup. The water will be hot, so be cautious for safety.

Step 6: Flush the Tank

Once the water appears clear, close or shut the draining valve and refill the tank with fresh water. Repeat the draining process until the water is clean and free of sediment.

Step 7: Close the Valves

After achieving clear water flow, close the drain and pressure relief valves and disconnect the garden hose from the drain valve.

Step 8: Turn the Water Heater Back On

Restore power or gas to the water heater, putting it back into operation and ready to provide hot water again.

Step 9: Check for Leaks

Inspect all valves to ensure they are tightly closed and check for any leaks from the tank or connections. Tighten any loose valves as necessary.

Step 10: Monitor Performance

Observe the water heater’s performance to ensure it is heating water properly. If any issues arise, consulting a professional may be warranted.

Resource: Residential Water Heater Safety

Conclusion

The initial maintenance task of flushing your water heater presents various issues and prolongs the lifespan of your appliance. By following the steps outlined in this guide, homeowners and DIY enthusiasts can efficiently execute this task and reap the benefits of a well-maintained water heater. Regular maintenance improves efficiency and reduces utility bills, making the effort worthwhile.

For more expert tips and guidance, visit www.poolesplumbing.com

Hard Water the Troublesome Effects on Your Plumbing System

When it comes to maintaining a household, water quality is only sometimes the first thing on a homeowner’s mind. However, hard water presents a unique challenge that can impact your home’s plumbing system. Characterized by a high mineral content—calcium and magnesium—hard water can lead to inefficiencies, malfunctions, and even failures in the plumbing infrastructure. Here are the main problems caused by hard water and why it’s essential to address them.

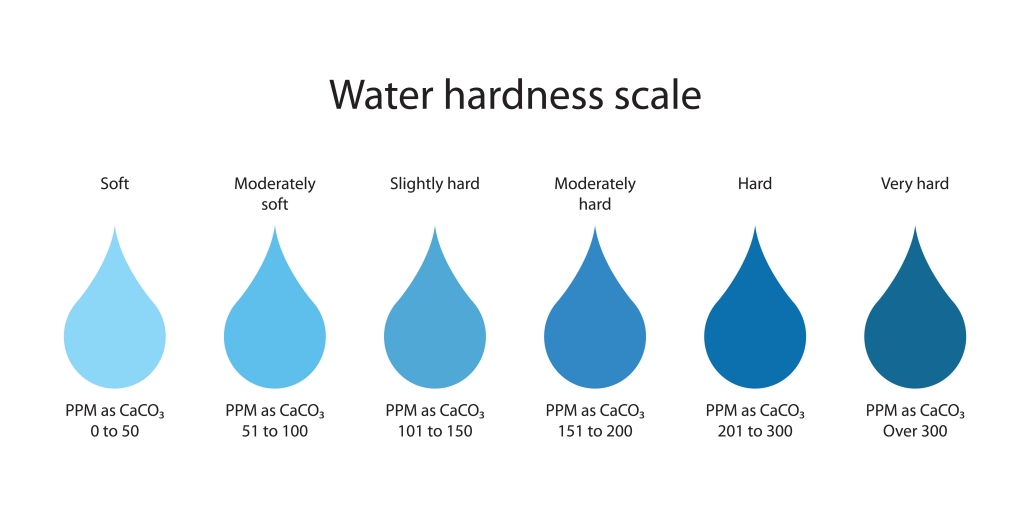
Hard Water, Water Hardness Scale

Limescale Buildup: The Sneaky Culprit

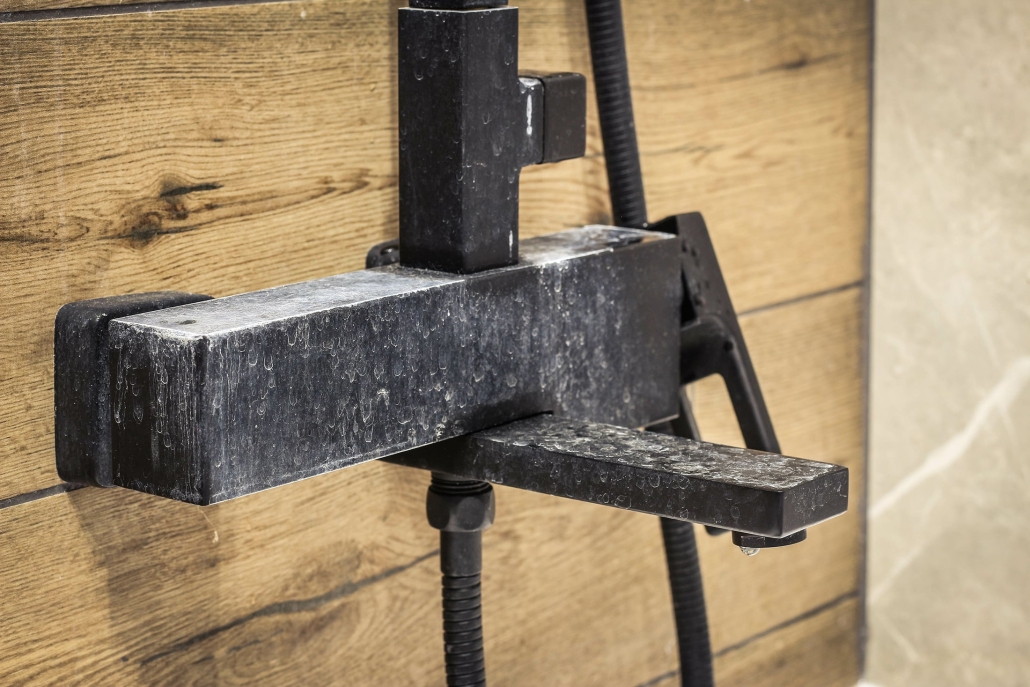
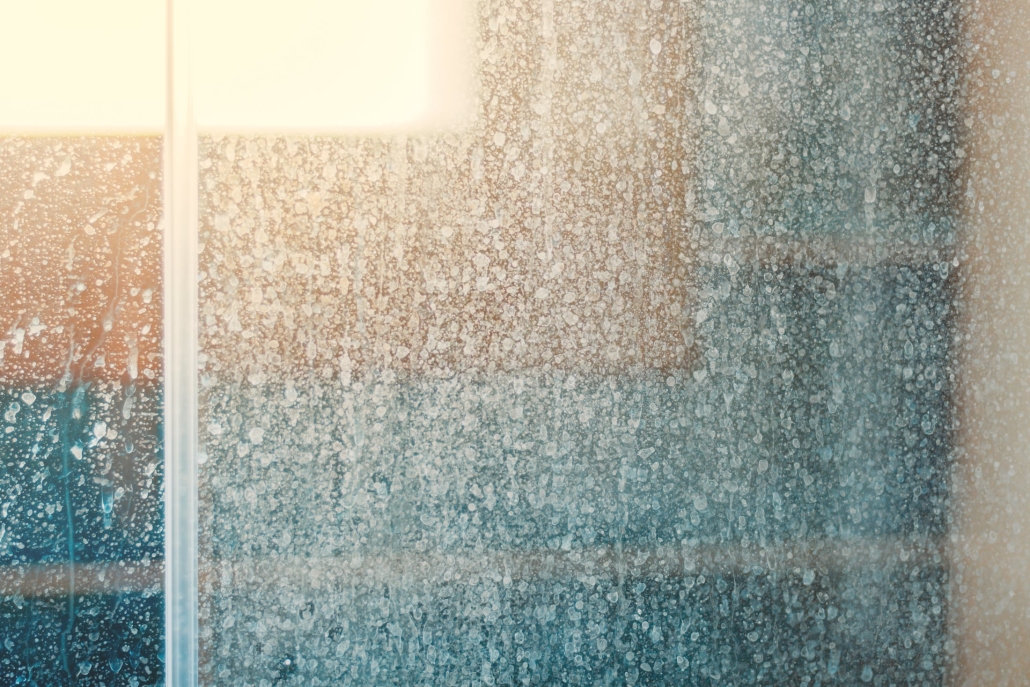
Limescale is notorious for its silent but gradual accumulation. Forming a white, chalky residue due to the minerals in hard water, it sticks to the insides of pipes, fixtures, and appliances, often going unnoticed until the damage is significant. Over time, limescale can:

  • Clogged water pipes reduce the efficiency of water flow and increase the pressure within the pipes.
  • Create insulating layers inside water heaters and boilers, which may lead to higher energy consumption and premature wear.
  • Damage fixtures such as faucets and showerheads affect their functionality and aesthetic appeal.

Reduced Water Flow: A Trickle of Trouble

A direct consequence of limescale buildup is the reduction in water flow. In showers and faucets, this can manifest as a weak stream that frustrates users and complicates daily tasks. In severe cases, clogged pipes could disrupt water supply to parts of the house, calling for costly plumbing repairs or replacement. Reduced flow also accelerates the wear and tear on your water-dependent appliances, which can lead to the following:

  • Increased energy bills due to decreased efficiency.
  • Reduced lifespan of appliances such as dishwashers and washing machines.
  • Inconsistent water heating results in uncomfortable temperature fluctuations during showers or washing dishes.

Corrosion: The Slow Destruction

While not as immediately noticeable as other issues, corrosion is a slow destroyer of plumbing systems in the presence of hard water. The mineral deposits not only react with the material of the pipes but also erode the inner surfaces over time. Corrosion can lead to:

  • It leaks as the pipe’s material weakens and eventually gives way.
  • Contaminated water, where corroded metal may seep into the water supply, poses potential health risks.
  • Expensive overhauls of plumbing systems due to widespread damage.

Conclusion

Hard water is a minor nuisance caused by additional cleaning to remove mineral stains. Yet its true impact lies beneath the surface, gradually compromising the integrity of your plumbing system. Homeowners need to be aware of these issues and consider water-softening solutions to mitigate the effects of hard water. Otherwise, they may face a relentless cycle of maintenance and repair that could otherwise be avoided with softer water.

Remember, the health of your plumbing is vital to the well-being of your home. By taking proactive steps against hard water, you protect your pipes and appliances and invest in the longevity and efficiency of your entire domestic water system.

Useful link: https://raleighnc.gov/water-and-sewer/services/raleigh-water-reports

www.poolesplumbing.com

Diagnose Common Plumbing Issues

How to Diagnose Common Plumbing Issues Yourself

Plumbing issues in your home can range from minor inconveniences to major headaches, disrupting your day-to-day life. Early detection and diagnosis are key to minimizing damage and stress.

Diagnose Common Plumbing Issues

Understanding how to spot and diagnose common plumbing issues allows you to decide whether it’s a quick fix or time to call the professionals. Here’s a guide to help you identify and diagnose four common plumbing issues: leaky faucets, running toilets, clogged drains, and low water pressure.

Leaky Faucets

Diagnosis Leaky Faucets

Symptoms:

  • Dripping or trickling sound
  • Water pooling around the base of the faucet
  • Increased water bills

Diagnosis:

Leaky faucets are often the result of worn-out washers or O-rings, the small disks that seal the connection between the faucet and the pipe. Over time, these parts can deteriorate or become loose, allowing a small but persistent water flow to escape.

How to Check:

Turn off the faucet’s water supply. Disassemble the faucet handles to access the washers or O-rings inside. Check these parts for signs of wear or damage.

Diagnosis Running Toilets

Running Toilets

Symptoms:

  • Constant running water sound in the toilet
  • Frequent toilet tank refills when not in use
  • Unusually high water bills

Diagnosis:

A running toilet is often caused by a flapper issue or a problem with the fill valve. The flapper is a rubber seal that stops the water in the tank from entering the bowl. If it’s not sealing correctly, water will continuously leak into your bowl, causing the tank to refill repeatedly.

How to Check:

Look at the flapper and inspect it for signs of wear or warping. If it looks damaged, replace it. Also, check the fill valve’s adjustment mechanism to ensure it stops the incoming water at the correct level in the tank.

Diagnosis Clogged Drain

Clogged Drain

Symptoms:

  • Water back up from the sink drain
  • Slow drainage in the sink or bathtub
  • Gurgling sounds coming from the drains

Diagnosis:

Clogged drains are usually the result of debris buildup, like hair, grease, or soap scum, which obstructs water flow. In kitchens, grease and food particles are common culprits, while bathroom sinks and showers often accumulate hair and soap scum.

How to Check:

Begin by physically examining the drain. Remove any visible obstruction with gloves or a drain snake. A plunger or a chemical drain cleaner (used with caution) may be effective for deeper clogs.

Low Water Pressure

Diagnosis Low Water Pressure

Symptoms:

  • When you are experiencing weak water flow from faucets or shower heads
  • Difficulty operating multiple water sources simultaneously
  • Changes in water pressure at different times of day

Diagnosis:

Low water pressure can stem from clogged aerators, corroded plumbing, or a municipal water supply problem.

How to Check:

First, clean the faucet’s aerator – the screen at the end of the faucet – by unscrewing it and removing any debris. If this doesn’t improve the pressure, the issue might be more complex, such as a leak or blockage in your home’s main pipes.

When to Call a Professional

While some plumbing issues may be remedied by using the DIY approach, others require the expertise of a professional plumber. If you’re unsure of the diagnosis, if the problem persists after your initial fix, or if the issue is with your main water line or sewer line, it’s time to call in an expert. Attempting complex repairs alone can lead to further damage and costly repairs.

Remember, early diagnosis and appropriate action may save you from experiencing the inconvenience and expense of major plumbing disasters. Stay vigilant, perform regular checks on your plumbing system, and don’t hesitate to seek professional help when needed.

Tankless Water Heaters vs. Storage Tank Water Heaters

Tankless Water Heaters vs. Storage Tank Water Heaters

The Battle of the Boilers: Tankless Water Heaters vs. Traditional Water Heaters

Tankless Water Heaters vs. Storage Tank Water Heaters — As the spring season arrives and the earth awakens from its winter slumber, many homeowners are gearing up for a season of renovation and repair; high on this list is the ever-important decision of how to upgrade or replace their water heaters. With technologies evolving rapidly, the choice between traditional and tankless water heaters has become increasingly pivotal. At their core, both systems aim to provide your home with a reliable hot water supply. Still, their operational differences and long-term benefits spotlight the diverging roads of water heating. This guide illuminates the intricacies of tankless and traditional water heaters, helping you make an informed decision tailored to your home’s needs.

The Tank Tradition

Traditional water heaters are the household stalwarts we’ve grown accustomed to, operating through a relatively simple process. A large tank, usually holding 40 to 60 gallons of water, is heated by gas or electricity. The heated water is then stored until needed, ensuring your home has a constant hot water supply for bathing, washing dishes, and laundry. The chief advantages of traditional water heaters lie in their lower upfront cost and the familiarity homeowners have with their operation, having used similar models in the past.

However, the conveniences of the traditional model come with a few caveats. First, the “standby heat loss” – a process where heat escapes through the tank walls even when there is no hot water demand – increases energy consumption. Secondly, the finite storage capacity may lead to “cold showers” when multiple users deplete the tank’s supply. These factors indicate the need for a more streamlined, energy-efficient alternative, bringing us to tankless water heaters.

The Tankless Triumph

Tankless Water Heaters vs. Storage Tank Water Heaters
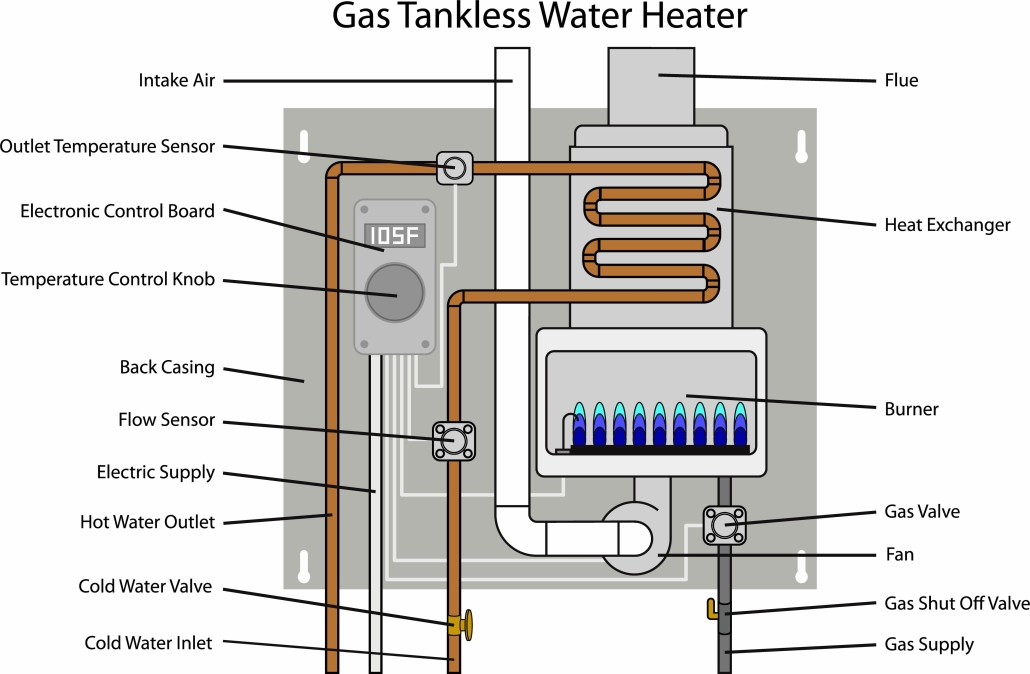
An example of an undersized tankless system that was forced to use a booster to increase groundwater temperature. Always consult a professional to size a tank for your area and family size needs.

Tankless water heaters, also known as on-demand or instantaneous water heaters, have emerged as an energy-efficient and space-saving solution, aiming to rectify many of the limitations of their traditional counterparts. Based on a “heat-on-demand” principle, tankless models use high-powered burners or electric coils that allow the system to rapidly heat water as needed rather than storing it in a tank. The absence of storage renders standby heat loss a non-issue, significantly reducing energy consumption and utility bills.

Moreover, the on-demand nature of these water heaters ensures a continual supply of hot water, with no risk of a cold shower, making them particularly suitable for large households or commercial settings. So, due to their compact size, tankless water heaters can be conveniently installed in areas with premium space, like closets or under sinks. These potential space savings make tankless models popular for homeowners planning a remodel or building a new home.

The advantages of tankless water heaters also extend to their longevity, with many models offering 20 years or more compared to a traditional unit’s 10-15-year span. This factor, combined with energy savings, means tankless water heaters provide a substantial return on investment despite their higher upfront cost.

Factors to Consider

When determining which type of water heater is best for your home, there are several critical considerations to weigh:

  • Upfront Cost: While tankless water heaters are more expensive to purchase and install, their long-term efficiency and longevity can offset the initial investment over time.
  • Energy Efficiency: Tankless models are typically 8-34% more energy-efficient than their traditional counterparts, according to the US Department of Energy.
  • Hot Water Demand: Homes with a high demand for hot water may benefit most from tankless systems.
  • Space Considerations: The compact size of tankless heaters makes them an excellent choice in homes with limited space.
  • Ventilation: Tankless water heaters generally require a larger gas pipe and a new, sealed vent, a factor to consider during installation in your home.
  • Environmental Impact: Tankless water heaters can reduce water heating costs by up to 50%, resulting in a lower environmental impact. With their energy-efficient design, tankless models play a role in helping conserve energy resources and reduce greenhouse gas emissions. This is a significant advantage and a strong argument for environmentally conscious homeowners who favor tankless water heaters. So, the choice between traditional and tankless water heaters hinges on your home’s unique requirements, budget, long-term goals, and the convenience and energy efficiency you prioritize.

Conclusion

As we embark on a new season, upgrading your water heater offers a prime opportunity to enhance your home’s comfort, efficiency, and value. By weighing the differences between tankless and traditional models, homeowners can make a discerning choice that suits their needs, aligns with their eco-friendly aspirations, and leads to considerable energy savings. Whichever path you choose, the sound of hot water filling your morning shower accompanies a confident start to the day – reminding us that with proper care and consideration, every home can find its source of warmth and comfort.

www.poolesplumbing.com

From Drips to Disaster: A Comprehensive Guide to Home Plumbing Systems

A Comprehensive Guide to Home Plumbing Systems

A Comprehensive Guide to Home Plumbing Systems. From drips to disaster, every homeowner knows plumbing basics: a faucet that leaks or that mysterious sound of running water from an unseen source. But, as with many parts of homeownership, your plumbing can become a more complicated beast when things go wrong. This guide aims to demystify the world of home plumbing, from understanding the anatomy of your system to troubleshooting common issues and knowing when to call in the professionals.

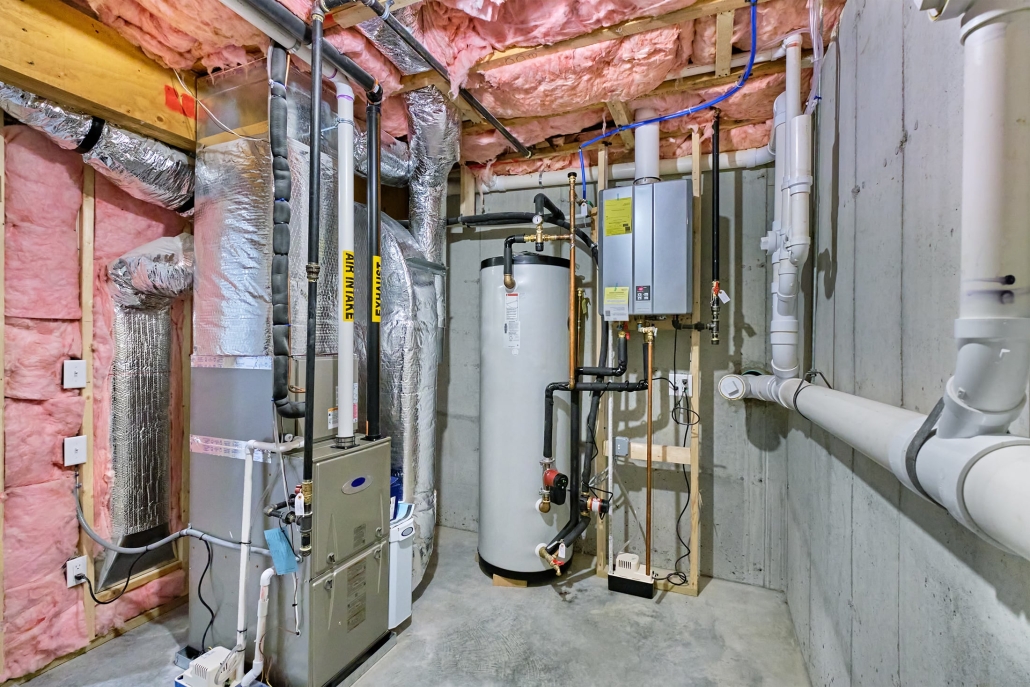
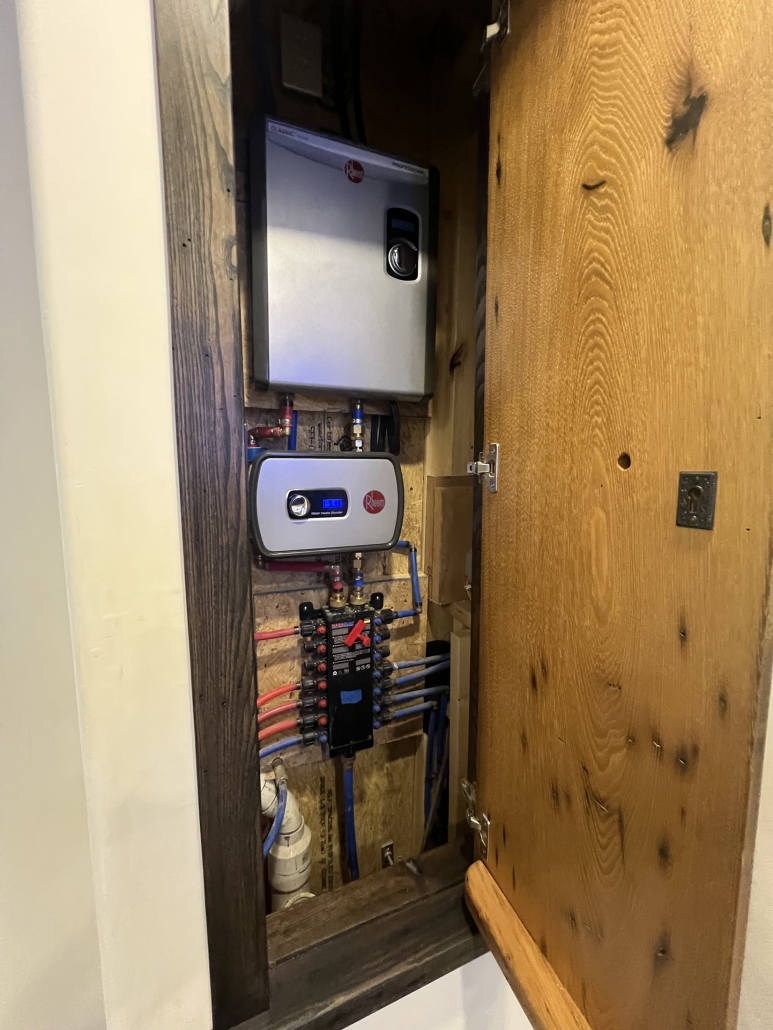
Supply Lines and Tankless water heater

The Basics: An Overview of Home Plumbing Systems

The heart of your home’s plumbing is the network of water supply and waste removal pipes. For most homes, this includes main water lines that run underground from the municipal water meter to the house and a series of secondary supply lines that branch out to various fixtures. The main waste pipe, known as the sewer line, carries waste from the home to the municipal sewer system or, in rural areas, a septic tank.

Critical Elements of Your Plumbing System:

  • Supply Lines: Deliver clean water to your faucets and appliances
  • Shutoff valves: Allow you to isolate water flow to specific fixtures or, in emergencies, to the entire house
  • Drainpipes: Carry waste water away from the house
  • Vents: Prevent airlocks in drainpipes, allowing waste to flow freely
  • Traps: Catch debris to prevent clogs and prevent sewer gases from entering the home

Your Day-to-Day Routine: How to Maintain Your Plumbing

In preventing costly repairs, proper maintenance helps. Here are some simple maintenance tips:

  • Check for leaks: Routinely inspect visible pipes and fixtures for signs of leaks.
  • Test faucets and shutoff valves: Make sure faucets aren’t dripping and shutoff valves are functioning
  • Avoid major clogs: Be mindful of what you flush or pour down drains; consider using drain screens and avoiding harsh chemical drain cleaners.

Common Issues, Easy Solutions: Troubleshooting Your Plumbing

Your plumbing system is remarkably robust, but it’s not invincible. Here’s a quick guide to troubleshooting and addressing some common plumbing issues:

  • Low water pressure: If you experience low water pressure in faucets and fixtures, this could be due to a partially closed shutoff valve or a blockage in the aerator on your faucet. First, check the valve; if it’s open, unscrew the aerator and clean out any debris.
  • Clogged drains: Most often caused by hair, soap, and other solids buildup. Plungers, drain snakes, and homemade remedies like baking soda and vinegar can usually do the trick, but severe clogs may require professional attention.
  • Running toilets: Typically caused by a faulty flapper, which fails to seal the water passageway after flushing. Replacing the flapper is a straightforward fix, but if you need clarification, a plumber can help.
  • Leaky faucets and pipes: Often the result of worn-out washers, O-rings, or gaskets. You can replace these yourself, but if in doubt, call a plumber to prevent water damage.
faucets and fixtures
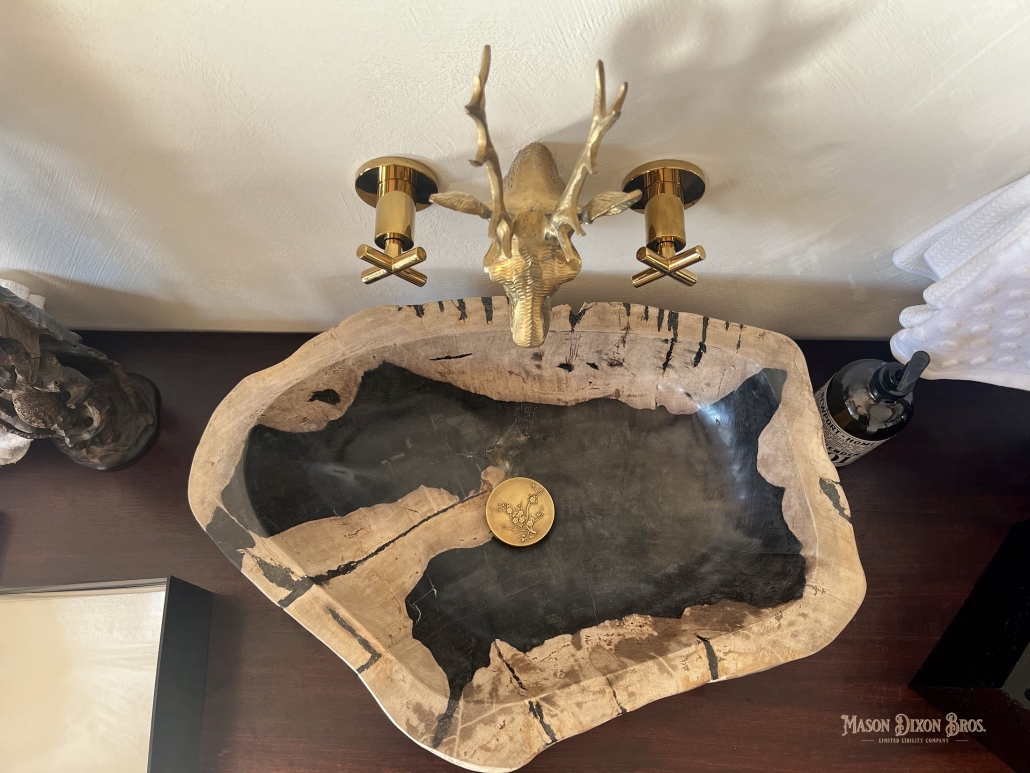
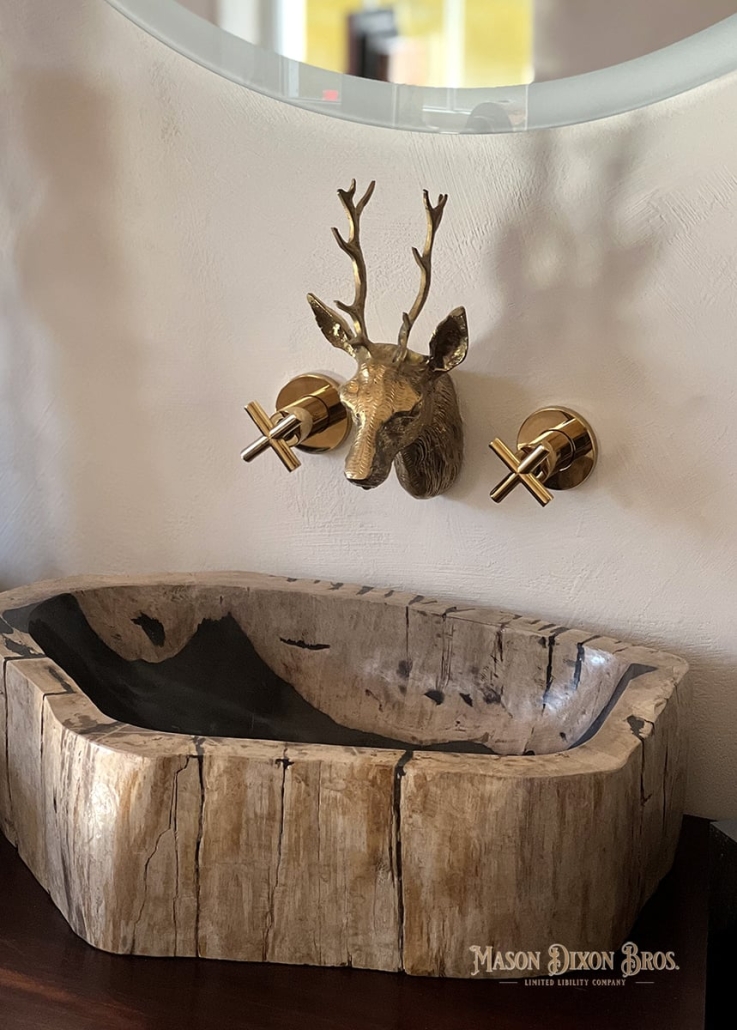
Mason & Dixon Brothers: Custom sink basin design, petrified wood, hand-made deer head faucet, wall-mount design.

When to Call for Help: Signs Your Plumbing Needs Professional Attention

While a savvy homeowner can tackle many plumbing issues, there are sure signs that indicate you should call in a professional:

  • Persistent clogs: Regular clogs may indicate a more significant issue in your drainage system
  • Poor water quality: Rusty, foul-smelling water can indicate a problem within your water main
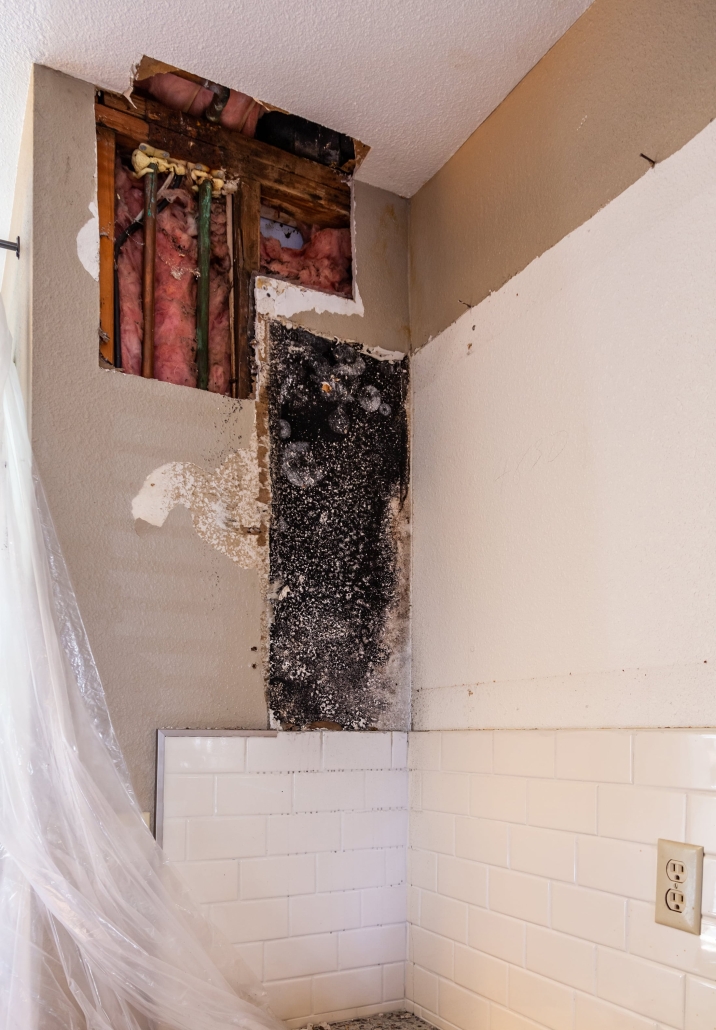
  • Noticing water stains or mold growth: These may indicate leaks or improperly vented appliances
  • Reduced pressure: Sudden changes in water pressure may signal a hidden leak
  • Unexplained water on floors or in cabinets

Addressing these issues promptly is crucial to prevent damage to your home and prevent escalating repair costs.

Beyond the Basics: Upgrading Your Plumbing System

Consider a system upgrade if your home is older or showing signs of plumbing system wear and tear. Newer technologies, like tankless water heaters, can improve energy efficiency and save money. Additionally, modern piping materials, such as PEX, offer longer-lasting performance than traditional copper or PVC and are less prone to freezing.

Remember, properly functioning plumbing is vital to keeping our homes comfortable and safe. Regular maintenance, understanding the basics of your plumbing system, and knowing when to call in the professionals can help ensure your plumbing works efficiently and effectively.

www.poolesplumbing.com

Bathroom Remodel

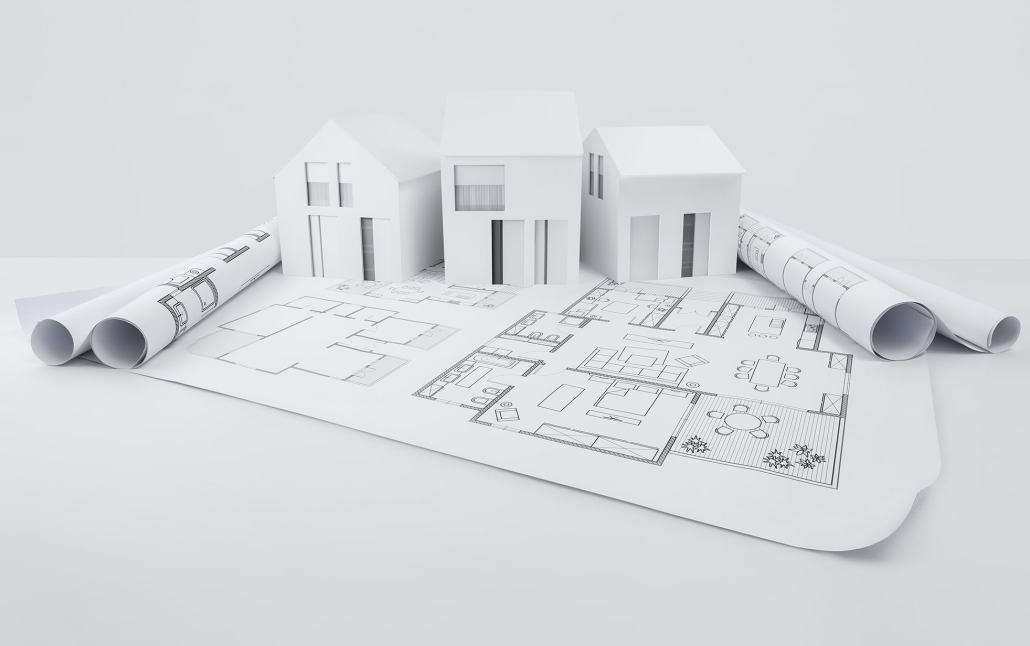
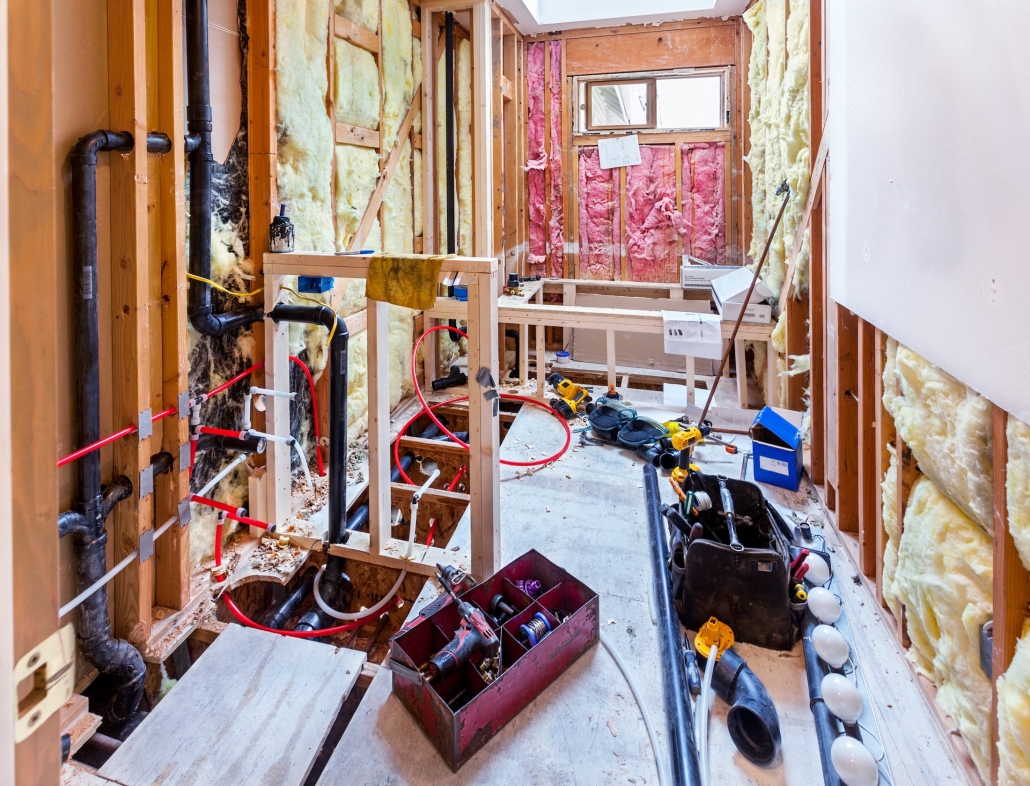
A bathroom remodel isn’t just about upgrading fixtures and aesthetics; it’s also an opportunity to ensure that everything, including your plumbing, is in optimal condition. From minor updates to full-scale renovations, understanding the plumbing basics can make a significant difference in the success and efficiency of your project. This guide provides a comprehensive look at what you need to know about plumbing for your bathroom remodel, covering everything from planning and budgeting to working with professionals and everyday challenges.

Planning the Remodel: What You Need to Consider

  1. Existing Plumbing Layout: One of the first things to consider is the placement of your existing plumbing. Changing the layout can add significant expenses, as it may require opening up walls and floors to reroute pipes.
  2. Water Efficiency Upgrades: Consider switching to water-efficient fixtures as part of your remodel. This can lower your water bill and be more environmentally friendly.
  3. Future-Proofing: If you plan to live in your home for years, consider adding features that make aging in place easier. This may include barrier-free showers, strategically placed grab bars, and additional lighting.
  4. Ventilation: A crucial but often overlooked aspect is the bathroom’s ventilation, which helps remove excess moisture that can lead to mold and mildew. Ensure your remodel includes a properly working exhaust fan or a window for ventilation.

Working with Professionals

  1. Plumbing Contractors: It’s firmly advisable to consult with a professional plumber, especially if you’re considering significant changes to the layout or fixtures. They can assess your home’s current plumbing condition and offer options that fit your ideas, visions, and budget.
  2. Permits: Your plumber can help determine whether your remodel requires permits. They can also assist with obtaining the necessary paperwork, ensuring your project is up to local building codes and regulations.
  3. Scheduling: Coordinating with your plumber is critical to a successful remodel. Discuss timelines early, as plumbing work is often done in the early stages of renovation before walls are sealed and finishes are completed.

    Check out some of the Top architects and designers in the Raleigh area!

Joint Plumbing Projects for a Bathroom Remodel

  1. Fixture Upgrades: Replacing sinks, toilets, and tubs/shower units is a straightforward way to update your bathroom. While many fixtures can be switched with minimal impact on the plumbing, ensuring the existing plumbing configurations support the new fixtures is essential.
  2. Pipe Replacement: Older homes may have outdated pipes that need replacing. Common considerations include material (e.g., copper vs. PEX) and upgrading to larger pipes to improve water flow and system efficiency.
  3. Adding Bathroom Features: New features like a whirlpool tub or a steam shower may require additional plumbing installation. Detailed planning is essential to incorporate these features seamlessly.
  4. Water Heater Upgrade: Increasing the size or type of water heater (e.g., from tanked to tankless) can support your bathroom’s increased demand for hot water, especially if you’re adding an enormous bathtub or high-flow shower system.

Dealing with Common Plumbing Challenges of a Bathroom Remodel

  1. Hidden Leaks: Walls opened up during a remodel may reveal hidden leaks in the plumbing. So, addressing these issues early on is essential to preventing more significant problems.
  2. Drainage Issues: If you’re experiencing slow drainage or backups, now is the best time to address these issues. Your contractor or plumber may inspect pipes using a camera to identify and correct drainage problems.
  3. Low Water Pressure: Consider adding a booster pump or increasing pipe size to improve water pressure, mainly if you’re adding high-flow fixtures that may tax your existing plumbing system.

Budgeting for Plumbing Costs

Bathroom remodel plumbing costs vary widely based on the project’s scope, the age and configuration of your home, and the specific plumbing fixtures and materials you choose. A good rule of thumb is to allocate 15-20% of your bathroom remodel budget to plumbing work. This can cover everything from labor and materials to unforeseen expenses.

Conclusion

A successful bathroom remodel requires thoughtful planning, expert advice, and a commitment to quality. By taking your plumbing considerations seriously, you can ensure the final product is beautiful but also functional and efficient. Whether updating a few fixtures or embarking on a complete overhaul, understanding the plumbing ins and outs will make your project successful.

Contact Pooles Plumbing for all your needs.

www.poolesplumbing.com

Bathroom Plumbing

Mastering Bathroom Plumbing: A Step-by-Step Guide

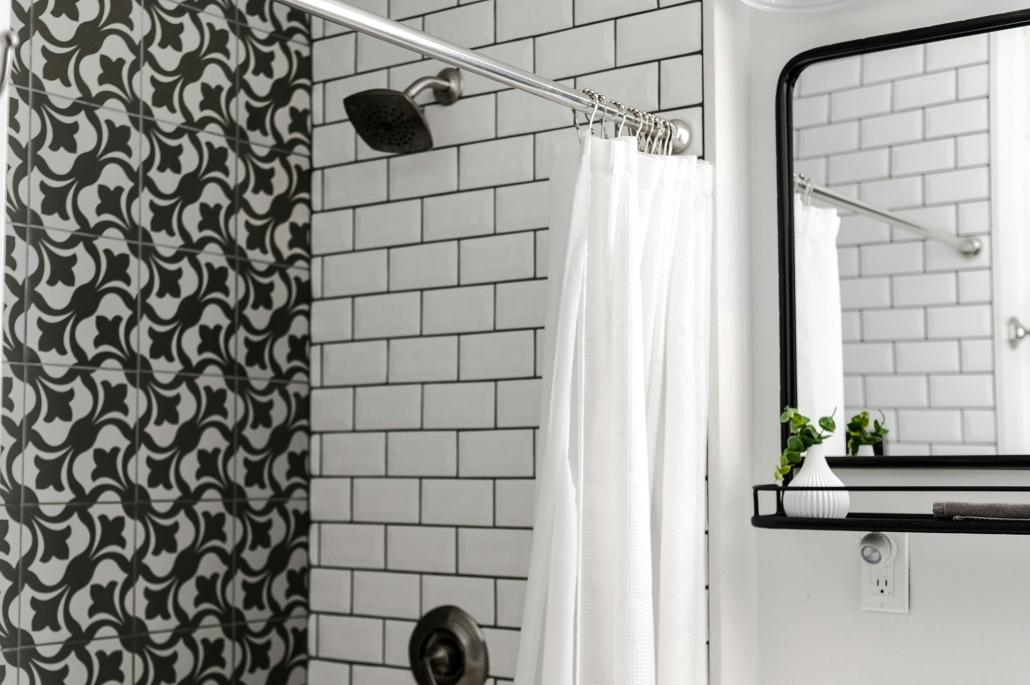
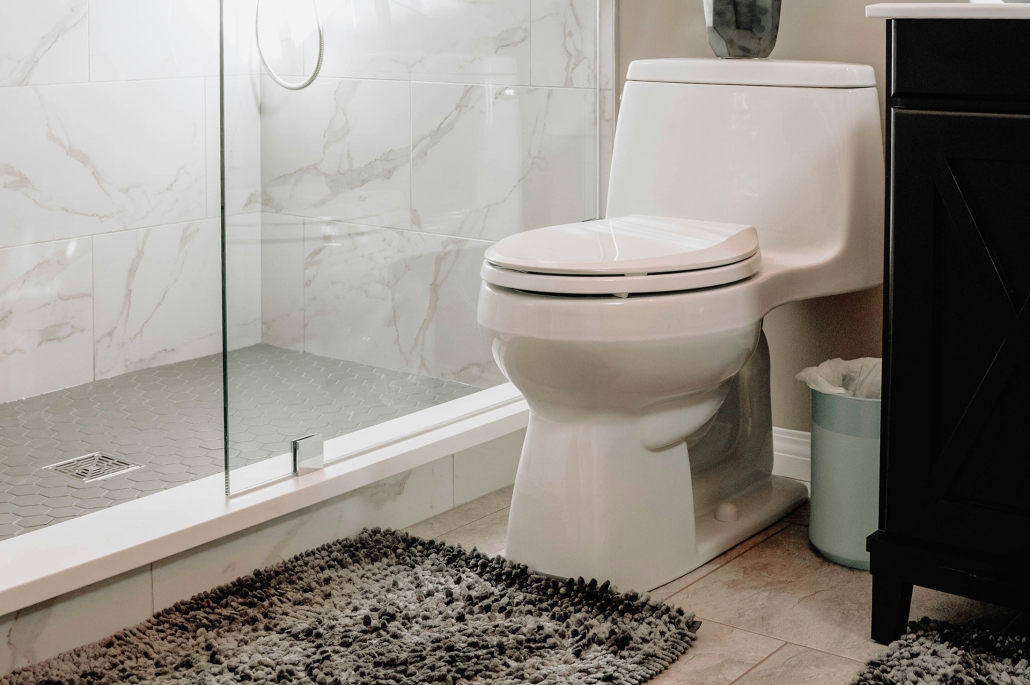
Bathroom Plumbing, whether you’re an aspiring plumber, a DIY enthusiast, or a homeowner looking to tackle bathroom repairs and installations, this guide is designed to help you understand the basics of plumbing a bathroom. This step-by-step guide will cover the essentials of plumbing a shower and a toilet and outline the essential tools you’ll need for the job.

By mastering these fundamental bathroom plumbing skills, you can save money on repairs, improve the functionality of your bathroom, and gain a satisfying sense of self-reliance. Remember, while DIY projects can be advantageous, always remember to consult or hire a professional plumber if a task becomes too complex or regulations require licensed work.

Tools You’ll Need

  • Plumbing Wrench
  • Plunger
  • Pipe Cutter
  • Teflon Tape
  • Adjustable Wrench
  • Screwdriver
  • Level
  • Hacksaw

Ensure you have all the necessary tools before starting your project, as being prepared makes the process smoother and safer.

How to Plumb a Shower

How to Plumb a Shower

Step 1: Preparation

Before you begin, ensure you have access to your bathroom’s plumbing. Shut off the water supply to avoid any unwanted spills.

Step 2: Install the Shower Tray

If you’re installing a new shower, begin by placing your shower tray and ensuring it’s level. Use the adjustable wrench to adjust the feet of the tray or add shims as necessary.

Step 3: Connect the Waste Pipe

Connect the waste pipe to your shower tray’s waste hole. Ensure this connection is tight and sealed correctly to prevent leaks.

Step 4: Fit the Shower Unit

Mount your shower unit on the wall, following the manufacturer’s instructions. Ensure the connections to your water supply are secure and leak-free.

Step 5: Install the Shower Head and Controls

Attach the shower head to the unit and the controls to the wall. Use Teflon tape on any threaded connections to create a watertight seal.

Step 6: Test the Shower

Once everything is installed, turn on the water supply and check for leaks. Make adjustments as needed.

How to Plumb a Toilet

How to Plumb a Toilet

Step 1: Remove Existing Toilet (if applicable)

If replacing an old toilet, shut off the water supply and flush to remove any remaining water. Unscrew the bolts, lift the toilet, and scrape off any old wax ring material from the flange.

Step 2: Position the New Toilet Base

Place the new wax ring on the flange, put the toilet base over the ring, line up the bolts with the holes, and press down to create a seal.

Step 3: Secure the Toilet Base

Screw the nuts onto the bolts to secure the toilet base, being careful not to over-tighten and crack the porcelain.

Step 4: Attach the Toilet Tank

Set the tank on the base and secure it with the provided bolts and nuts, again avoiding over-tightening.

Step 5: Connect the Water Supply Line

Connect the water supply line to the tank and open the valve to fill the tank.

Step 6: Test the Toilet

Flush the toilet several times to ensure that it fills and drains correctly. Check around the base and the connection to the water supply for any signs of leaks.

Plumbing a bathroom requires attention to detail and a careful approach. Always double-check connections for leaks and ensure everything is secure and level. Practice makes perfect, and the more you work on plumbing, the more proficient you’ll become.

For those just starting, remember that every homeowner and professional plumber once knew nothing about plumbing—it’s all about learning and growth. Good luck with your bathroom plumbing projects, and may your pipes flow smoothly!

www.poolesplumbing.com

hard water

The Troublesome Effects of Hard Water on Your Plumbing System

Hard Water – When it comes to maintaining a household, water quality is only sometimes the first thing on a homeowner’s mind. However, hard water presents a unique challenge that can impact your home’s plumbing system. Characterized by a high mineral content—calcium and magnesium—hard water can lead to inefficiencies, malfunctions, and even failures in the plumbing infrastructure. Here are the main problems caused by hard water and why it’s essential to address them.

Limescale Buildup: The Sneaky Culprit

Limescale is notorious for its silent but gradual accumulation. Forming a white, chalky residue due to the minerals in hard water, it sticks to the insides of pipes, fixtures, and appliances, often going unnoticed until the damage is significant. Over time, limescale can:

  • Clogged water pipes reduce the efficiency of water flow and increase the pressure within the pipes.
  • Create insulating layers inside water heaters and boilers, which may lead to higher energy consumption and premature wear.
  • Damage fixtures such as faucets and showerheads affect their functionality and aesthetic appeal.
hard water, Raleigh plumber
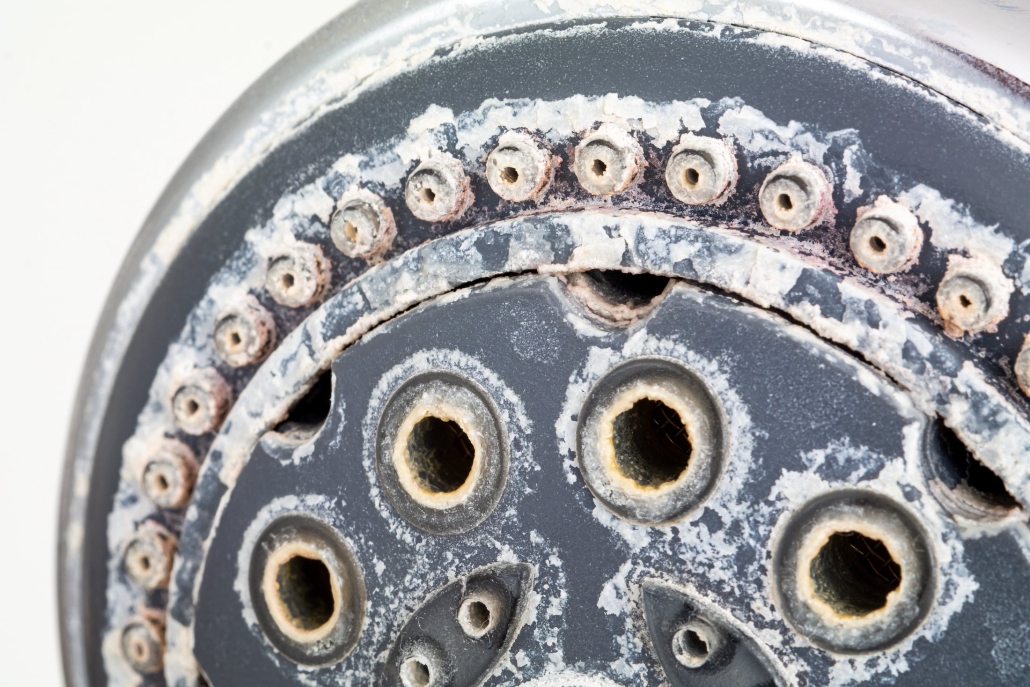
Shower head with hard water deposit all around the sprinklers

Reduced Water Flow: A Trickle of Trouble

A direct consequence of limescale buildup is the reduction in water flow. In showers and faucets, this can manifest as a weak stream that frustrates users and complicates daily tasks. In severe cases, clogged pipes could disrupt water supply to parts of the house, calling for costly plumbing repairs or replacement. Reduced flow also accelerates the wear and tear on your water-dependent appliances, which can lead to the following:

  • Increased energy bills due to decreased efficiency.
  • Reduced lifespan of appliances such as dishwashers and washing machines.
  • Inconsistent water heating results in uncomfortable temperature fluctuations during showers or washing dishes.

Corrosion: The Slow Destruction

While not as immediately noticeable as other issues, corrosion is a slow destroyer of plumbing systems in the presence of hard water. The mineral deposits not only react with the material of the pipes but also erode the inner surfaces over time. Corrosion can lead to:

  • It leaks as the pipe’s material weakens and eventually gives way.
  • Contaminated water, where corroded metal may seep into the water supply, poses potential health risks.
  • Expensive overhauls of plumbing systems due to widespread damage.

Conclusion

Hard water is a minor nuisance caused by additional cleaning to remove mineral stains. Yet its true impact lies beneath the surface, gradually compromising the integrity of your plumbing system. Homeowners need to be aware of these issues and consider water-softening solutions to mitigate the effects of hard water. Otherwise, they may face a relentless cycle of maintenance and repair that could otherwise be avoided with softer water.

Remember, the health of your plumbing is vital to the well-being of your home. By taking proactive steps against hard water, you protect your pipes and appliances and invest in the longevity and efficiency of your entire domestic water system.

Potential Health Impacts of Hard Water
https://www.ncbi.nlm.nih.gov/pmc/articles/PMC3775162/

www.poolesplumbing.com

Plumbing Experience

Plumbing Experience! Could You Ace a Plumber’s Interview? A Homeowner’s Game Show Challenge

Plumbing Experience! Welcome to the ultimate homeowner game show challenge! You might be used to asking the questions when hiring a plumber, but have you ever considered what it would be like on the other side of the interview? As you stand in the hypothetical candidate’s shoes, we’ll find out if you have the chops to answer the tough questions a plumber might face. Put on your thinking cap and grab your wrench; it’s time to play “Could You Ace a Plumber’s Interview?”

Round 1: Plumbing Experience

We all start somewhere, and for our first round, we’re zeroing in on experience—something every seasoned plumber should have under their belt. Imagine you’re the one donning the overalls.

Question 1: “Could you walk us through the most complex plumbing project you’ve ever tackled?”

Possible Homeowner Answer: “Uh, does unclog the toilet with a plunger count?”

Question 2: “What’s your experience with different types of piping materials?”

Possible Homeowner Answer: “There’s more than one type?”

The reality is, as a homeowner, your plumbing experience may boil down to some DIY fixes. That’s why you hire the professionals, right?

Round 2: Problem-Solving Scenarios

This round is all about thinking on your feet. Here we go!

Question 3: “A client calls complaining of a ‘phantom flush‘—their toilet seems to flush by itself. What could be the cause?”

Possible Homeowner Answer: “Is that like a ghost? Should I call Ghostbusters?”

Question 4: “How would you address a sudden drop in water pressure throughout a house?”

Possible Homeowner Answer: “Check if someone forgot to pay the water bill, maybe?”

Its explicit problem-solving scenarios can get tricky. With the right know-how, your best guess might cut it in a room full of plumbers.

Round 3: Knowledge of Building Codes

Building codes keep our water flowing and our homes safe. How well do you know them, the homeowner?

Question 5: “Do you know and can you explain the difference between a vent stack and a stack vent?”

Possible Homeowner Answer: “One’s a stack, and the other’s a… vent? Do I phone a friend?”

Question 6: “What specific codes pertain to water heater installations?”

Possible Homeowner Answer: “They need to be… installed correctly?”

Yikes! This round might show that some things are best left to the experts.

Final Round: The Lightning-Fast Code Trouble-Shoot

Think fast—these rapid-fire questions won’t wait for anyone!

Quick Question 1: “What is a P-trap, and why is it important?”

Quick Question 2: “Define ‘sweating a pipe.’ What does this involve?”

Quick Question 3: “What would you use a plumber’s snake for?”

Phew! Did you keep up, or did the questions wash you away like a burst pipe?

Conclusion

Well, how did you do with your plumbing experience? Maybe you discovered you’re a plumbing savant, or perhaps you found newfound respect for the pros with all the answers. Remember, no matter how well you fared in our mock plumbing showdown, it’s always a safe bet to leave it to qualified plumbers when natural leaks spring.

So, knowing which questions to ask and understanding the answers for those plumbing issues beyond your trusty plunger’s powers is just as important. You may not be ready to don the plumber’s toolkit, but being an informed homeowner—that’s a win in any book.

www.poolesplumbing.com

3 Fun Takeaways for Non-Plumbers

Plumbers have a wealth of knowledge that spans beyond tools; codes and problem-solving are part of the daily dance.

Experience matters, but as a homeowner, knowing how to hire the right help is just as crucial.

You might not be ready to join the ranks of professional plumbers, but understanding the basics can help you better communicate your issues—and appreciate the solutions they provide!

Testing Your Sump Pump

Testing Your Sump Pump and Determining Its Lifespan

Testing your sump pump is essential in households with basements or crawl space access. It is designed to remove excess water that may accumulate in these areas due to heavy rainfall, melting snow, or rising groundwater. However, like any mechanical device, a sump pump can fail at any time, and it is crucial to test and maintain it regularly to ensure its proper functioning.

Why Test Your Sump Pump?

Regularly testing your sump pump is vital as it gives you peace of mind, knowing it will work when needed. It also allows you to identify potential issues early on and address them before they become more costly problems. Moreover, if there is a power outage or a sudden increase in water level, you will be confident that your sump pump can handle it.

How to Test Your Sump Pump

Testing your sump pump is a simple process that should be done at least twice a year. Here’s how:

testing your sump pump
  1. Locate the outlet pipe: This will carry water from the sump pump to the outside of your home.
  2. Check the power source: Ensure the sump pump is connected and plugged into a properly working outlet and connected to a ground fault circuit interrupter (GFCI) for added safety.
  3. Fill the sump pit with water: Slowly pour enough into the sump pit until you reach your pump’s float switch or trigger point. This mimics how the sump pump would activate during a natural flood.
  4. Observe the sump pump: As the water level rises in the pit, your sump pump should automatically turn on and start pumping out water. Once it reaches the bottom of the pit, it should shut off.
  5. Check for any issues: While the sump pump is running, listen for any strange noises, vibrations, or leaks. If you notice anything unusual, it may be a sign of a problem that needs to be addressed.
  6. Repeat the test: After the sump pump has turned off, refill the sump pit and repeat the process to ensure it turns on and off correctly.

If your sump pump fails to turn on or off during the test, it could indicate a malfunction that requires professional attention.

How Long Will a Sump Pump Last?

Testing Your Sump Pump, a sump pump lifespan will vary depending on several factors, such as quality, usage, and maintenance. On average, a sump pump can last 5-10 years. However, some high-quality pumps can last up to 25 years with proper maintenance.

Determining the Size of Your Sump Pump

The size of your sump pump is crucial as it determines its ability to handle water flow in your basement or crawl space. Here are some factors to consider when determining the size you need:

  • The size and depth of your basement or crawl space: Larger spaces require a bigger sump pump to handle more water.
  • The average rainfall in your area: If you live in an area with heavy rain, you may need a larger sump pump to keep up with the water flow.
  • The soil type around your home: Clay and compact soils tend to hold onto water, requiring a more powerful sump pump to remove it.

We recommend consulting a professional plumber at Pooles Plumbing or a sump pump specialist to help determine the right size for your needs.

Conclusion

Testing your sump pump regularly and understanding its lifespan and size requirements are crucial steps in maintaining a functional and efficient sump pump. Following these guidelines protects your home and investment from potential water damage caused by floods or rising groundwater. Prevention is always better than dealing with the aftermath of a failed sump pump. So, make it a priority to test and maintain your sump pump to keep your home safe and dry all year round.

www.poolesplumbing.com

Are bath bombs safe for your plumbing?

Are bath bombs safe for your plumbing?

Are bath bombs safe for your plumbing? Don’t Let This Popular Trend Harm Your Plumbing! Bath bombs are a popular item these days, and it’s no wonder why. They come in various colors, shapes, and scents, making bath time more enjoyable and relaxing. But if you’re worried about your plumbing when using a bath bomb, don’t be! This article will discuss what a bath bomb is and whether it can impact your plumbing.

What is a bath bomb, and why do I need one?

It is a hard-packed mixture of Epsom salts, amazing essential oils, and other ingredients that create a fizzy reaction when dropped in water. These delightful little balls are designed to add color, scent, and moisturizing agents to your bathwater, creating a spa-like experience in your home.

Bath bombs are typically made by mixing citric acid and baking soda, which, when wet, create a chemical reaction that produces carbon dioxide. This is what causes the fizzing sensation and gives off a delightful aroma. Many bath bombs also contain other ingredients, such as oils, salts, and butter, to enhance the overall experience.

Can Bath Bombs Affect Your Plumbing?

Many people wonder if the ingredients in bath bombs can clog or damage their plumbing. If you use them correctly, bath bombs should not adversely affect your pipes.

However, it’s important to note that some older homes may have outdated plumbing systems that could be more susceptible to clogging. If this is the case, it’s best to consult a professional plumber before using bath bombs regularly.

Tips for Using Bath Bombs Safely

bath bomb

To relax and ensure your plumbing stays in top shape while enjoying a relaxing bath bomb, here are some tips to keep in mind:

  • Use bath bombs sparingly: While they may be tempting to use every time you take a bath, limiting their use can help prevent potential issues.
  • Keep an eye on the drain: Run hot water for a few minutes after draining your bath to help flush any remaining residue down the pipes.
  • Use a filter: If you’re worried about small pieces of the bath bomb clogging your drain, use a filter or mesh bag over the drain before adding the bomb to your bath.
  • Don’t use too many at once: Using multiple bath bombs simultaneously may create excessive oils and butter, potentially causing a build-up in your pipes.

Conclusion

In conclusion, bath bombs are a fun and relaxing addition to any bath routine. They can elevate your self-care experience and leave you feeling rejuvenated. And with proper usage and maintenance, they should not adversely affect your plumbing. So treat yourself to a luxurious bath experience with the peace of mind that your pipes will be fine. Happy soaking! So, don’t let the fear of damaging your plumbing stop you from enjoying these delightful little creations. Just remember to use them wisely and take some precautions to ensure the health of your pipes. Questions? Contact Raleigh’s most trusted plumbers at Pooles Plumbing!

With that, you can sit back, relax, and let the bath bomb do its magic. Enjoy!

www.poolesplumbing.com

How to Avoid Plumbing Disasters

How to Avoid Plumbing Disasters Before a Date Night

How to Avoid Plumbing Disasters – As professional plumbers, we have seen our fair share of date nights ruined by unexpected plumbing disasters. These emergencies, from clogged toilets to burst pipes, can be stressful and embarrassing for you and your date. But fear not because with proper precautions and regular maintenance, you can avoid these disasters before they even happen.

Schedule Regular Plumbing Maintenance

— I know it may not be the most romantic thing to do, but scheduling regular plumbing maintenance is crucial in preventing any unpleasant surprises on date night. A professional plumber can inspect for signs of wear or damage to fixtures, pipes, and drains and address them before they become more significant. This will give you peace of mind and ensure that your plumbing system is in top shape for your special evening.

Schedule Regular Plumbing Maintenance

Be Mindful of What Goes Down the Drain

One common cause of plumbing disasters is clogs from items being flushed or put down the drain that shouldn’t be there. Before your date night, remind yourself and others to only human waste and toilet paper. Additionally, avoid putting grease, oils, and scraps from food down the kitchen sink, as this may clog your pipes. Consider installing drain covers or filters in your sinks and tubs to catch any hair or debris that could cause a backup.

Check Your Water Pressure

Having low water pressure may indicate an underlying plumbing issue, such as a leak or a clogged pipe. Before your date night, take a few minutes to check the water pressure in your home. You can do this by simultaneously turning on all faucets and showers and seeing if the pressure is consistent. Call a plumber to inspect for potential problems if there is a notice of any significant changes or fluctuations in pressure.

Know Your Shut-Off Valves

It’s essential in a plumbing emergency to know, locate, and mark precisely where the main water shut-off valve is situated in your home. This valve controls water flow into your home and can be crucial in preventing further damage from a burst pipe or severe leak. Ensure you and your household members know how to shut off the water supply in an emergency.

Have a Plunger Handy

Even with proper maintenance and precautions, emergencies can still happen. That’s why it’s always a good idea to have a plunger on hand in case of a clogged toilet or sink. Ensure you know how to use one properly – you don’t want to worsen the situation by misusing it.

Conclusion

Date nights are meant to be unique and stress-free, and with these tips, you can ensure that your plumbing won’t get in the way. Remember to schedule regular maintenance, be mindful of what goes down the drain, check your water pressure, know your shut-off valves, and have a plunger handy. By taking these precautions, you’ll be able to enjoy your date night without any unexpected plumbing disasters. Happy dating! So, these are some tips from a professional plumber’s perspective on avoiding plumbing disasters before a date night. With proper maintenance and precautions, you can prevent any unpleasant surprises and ensure that your special evening goes smoothly. Remember, taking care of your plumbing avoids disasters and maintains the functionality and longevity of your plumbing system. So, don’t wait for an emergency – schedule regular maintenance and keep your plumbing in top shape.

www.poolesplumbing.com

Common Plumbing Issues and How to Fix Them

Essential Plumbing Maintenance: Tips and Tricks from the Pros

Essential Plumbing Maintenance: Developing or having plumbing issues is an inevitable part of owning a home. These problems, from clogs to leaks, can cause frustration and inconvenience if mishandled. However, with some basic knowledge and helpful tips or hints from the pros, you can learn how to handle these plumbing issues like a professional.

Understanding Your Plumbing System

Before delving into specific plumbing issues, you should understand your home’s system. Most homes have two central plumbing systems: the water supply system and the drainage system. The water supply system brings clean water into your home through pipes connected to a main water line, while the drainage system removes waste and used water from your home through drainpipes.

Essential Plumbing Maintenance, Common Plumbing Issues and How to Fix Them

Don’t let plumbing issues, cut into your me time! Call Poole’s Plumbing in the Raleigh, NC Area today!

Common Plumbing Issues and How to Fix Them

Clogs

One of the most common plumbing issues homeowners face is clogged drains. Regularly clogged drains may be caused by a buildup of hair, grease, or other debris in your drain pipes. You will need a plunger and drain cleaner to clear a clog. Begin by using the plunger to create suction and loosen the clog. If that doesn’t work, try a drain cleaner that should be specifically designed for your type of clog. Please avoid using chemical drain cleaners, which can harm your pipes and the environment.

Leaks

Leaky pipes or fixtures can cause severe water damage if addressed slowly. To locate a leak, check all visible pipes and fixtures for any signs of water. You can also turn off the main water supply and check your water meter to see if it is still running, indicating a leak somewhere in your system. Depending on the location and severity of the leak, you may need to call a professional plumber for repairs.

Running Toilets

A continuously running toilet may seem minor, but it can waste significant water and increase your water bill. To fix this problem, check the toilet tank’s flapper valve to ensure it is sealing correctly. If needed, replace the flapper or any other damaged parts in the tank.

Low Water Pressure

Mineral buildup in pipes or a malfunctioning pressure regulator may cause low water pressure. To increase water pressure, try cleaning the aerator on your faucet or adjusting the water pressure regulator if you have one.

Prevention Tips for Future Plumbing Issues

Preventing plumbing issues before they happen is always the best course of action. Here are some helpful tips to keep your plumbing system in top shape:

  • Regularly clean and maintain your drains using a boiling hot water mixture of vinegar and baking soda or a natural drain cleaner.
  • Try to avoid flushing anything other than toilet paper down the toilet to prevent clogs.
  • Replace and inspect pipes for any signs of leaks or corrosion.
  • In an emergency, always know where your main shut-off valve is located.

By following these tips and understanding your plumbing system, you can handle common plumbing issues like a pro. However, if the problem is beyond your expertise or requires specialized equipment, please call a plumber at Pooles Plumbing for assistance. Proper maintenance and prevention are crucial to keeping your plumbing system functioning smoothly.

Helpful Links:  North Carolina Building Code – Plumbing Only

O

www.poolesplumbing.com

How to install a Dishwasher

How to Install a Dishwasher

How to install a Dishwasher — Installing a dishwasher may seem daunting, but even if you are not a professional plumber with years of experience, I can assure you that it is easier than it may seem. In fact, with the right tools and knowledge, you can easily install a dishwasher in your home without having to call for professional help.

Gather the Necessary Tools

How to Install a Dishwasher

Before you begin the installation process, ensure you have all the necessary tools. These include a dishwasher installation kit, a screwdriver, pliers, and an adjustable wrench. It is also essential to purchase, or if you have on hand, safety gear items like gloves and goggles and clothing cover-ups to protect yourself from any potential hazards.

Turn Off the Water Supply

The first step in installing a dishwasher is to turn off the water supply, which may be done by closing the shut-off valve under your sink. If you cannot locate the shut-off valve, you may need to turn off the main water supply to your home.

Prepare the Area

Next, prepare the area where you will be installing the dishwasher. Ensure enough space for the dishwasher to fit comfortably and the floor is level. It is also essential to ensure no obstructions in the way, such as pipes or wires.

Connect the Water Supply

Once you have prepared the area, it’s time to connect the water supply. This is usually done through a flexible hose connected to the hot water valve under your sink. Make sure the hose is securely attached and that there are no leaks.

Install the Drain Line

Next, you will need to connect the drain line. This is usually done by attaching a flexible drain hose from the dishwasher to your kitchen sink’s drain pipe. You may need to secure the hose with clamps to prevent any leaks.

Secure the Dishwasher in Place

Now that you have connected the water supply and drain line, it’s time to secure the dishwasher. Use screws to attach the dishwasher to the surrounding cabinets to prevent it from tipping over during use.

Test the Dishwasher

Once everything is securely in place, turn on the water supply and test your dishwasher. Run a cycle to ensure no leaks, and the dishwasher is functioning correctly.

Final Checks

Before considering the installation process complete:

  1. Take the time to do some final checks.
  2. Make sure all connections are secure and that there are no leaks.
  3. Check that the dishwasher is level and that the door can open and close properly.

Additional Tips

Here are a few additional tips to make your installation process smoother:

  • Always read the instruction manual carefully before beginning the installation.
  • Make sure to use the correct size and type of screws for attaching the dishwasher.
  • If drilling holes in cabinets, be extra careful not to hit wires or pipes.
  • Before installing, turn off all power sources in the area to prevent any potential electrical accidents.
  • If you need clarification on any step in the process, seek professional help.

Conclusion

Installing a dishwasher may seem intimidating, but proper preparation and caution can be easily accomplished. Always prioritize safety and follow the manufacturer’s instructions for best results. Remember, if you have any issues or questions, seek a professional for help.

www.poolesplumbing.com

Maintaining your water heater

Maintaining Your Water Heater Essential Knowledge

Maintaining your water heater is an important task that should be noted. Having a well-maintained water heater can last up to 15 years, while a neglected one may only last half as long. You can also save money on utility bills and improve energy efficiency by performing regular maintenance.

Here are some essential tips for maintaining your water heater:

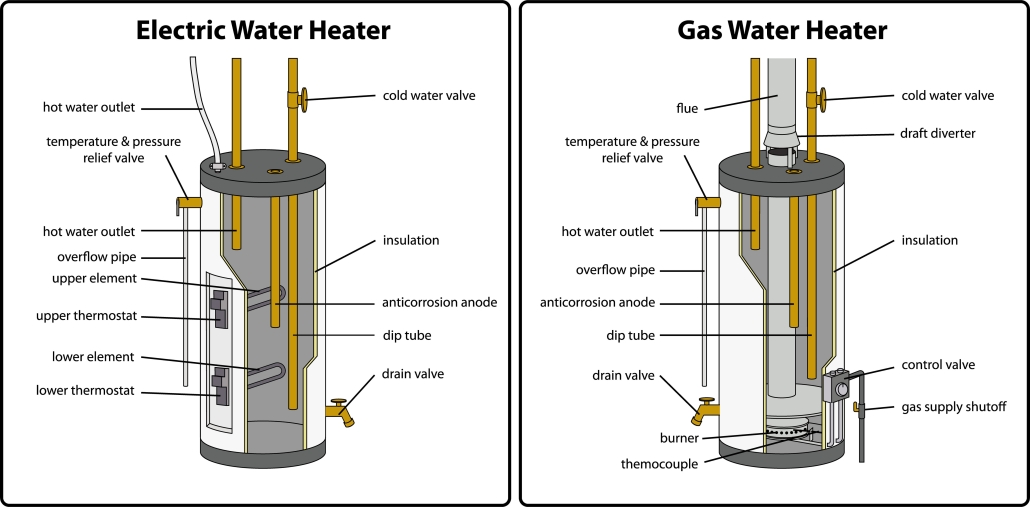
An important safety feature of your water heater is the pressure relief valve. It helps prevent excessive pressure buildup, which may be hazardous and cause damage to your system. To check the valve, lift it and let it snap back into place. If you hear a gurgling sound or notice small amounts of water trickling out, this is a sign that the valve may need to be replaced.

Drain and flush your tank

Over time, sediment and minerals can accumulate in your water heater tank, causing buildup, which may lead to corrosion and reduce the efficiency of your system. To help prevent this, it is recommended to drain and flush your tank at least once a year. Doing this will help remove any sediment or debris built up and keep your water heater functioning properly.

Water heater maintenance

Inspect the anode rod

A sacrificial metal component is the anode rod, which helps protect your water heater from corrosion. Over time, this rod can become depleted and may need to be replaced to maintain the optimal performance of your system. Inspecting the anode rod every 3-5 years and replacing it if necessary is recommended.

Insulate your water heater

Insulating your water heater may improve its energy efficiency by reducing heat loss. This is especially important for older models or those in unheated areas such as garages or basements. You may also purchase a pre-cut insulation blanket or use a DIY method with fiberglass insulation.

Check for leaks

Regularly checking for leaks is vital to catch and address any potential issues before they become costly problems. Inspect the fittings, pipes, and connections for signs of leakage. If you notice any water pooling around your water heater, it’s best to call a professional plumber to fix the issue.

In addition to these tips, you should be familiar with the specific maintenance requirements for your water heater. Different water heaters (such as gas or electric) may have different maintenance needs. Consult the manufacturer’s manual for recommended maintenance tasks and intervals.

Conclusion

Your water heater is essential to your home’s plumbing system and requires regular maintenance to stay in top condition. Regularly checking the pressure relief valve, draining and flushing your tank, inspecting the anode rod, insulating your water heater, and checking for leaks help your system to last and be efficient. Remember to consult your manufacturer’s manual for specific maintenance requirements. Keep your home safe, efficient, and comfortable with these essential tips for maintaining your water heater.

Additional Tips

  • Keep your water heater’s temperature to 120°F (49°C) to prevent severe burns or scalding and to save energy.
  • Testing the temperature and pressure relief valve once a year ensures it functions appropriately.
  • Hiring a professional plumber for complex maintenance tasks or if you need help performing them yourself. They can also help identify potential issues with your water heater and address them before they become significant problems.
  • If you have hard water, consider installing a water softener to help reduce mineral buildup in your water heater and other appliances.
  • Keep the area around your water heater clean and clutter-free for easy access during maintenance checks.

Regular maintenance is vital to keeping your water heater running smoothly and efficiently. Make it a priority to incorporate these tasks into your annual home maintenance routine, and you’ll have peace of mind knowing that your water heater is in good condition. Contact Pooles Plumbing with any concerns.

www.poolesplumbing.com

Water Filtration Systems Raleigh NC

The Ultimate Guide to Water Filtration Systems for Your Home

water filtration

Water is a basic necessity of life, and as homeowners, it’s important to ensure that the water we consume and use in our homes is safe and clean. While water filtration systems have been in use for decades, the latest technology and advancement have brought about newer and more efficient ways to filter water. Choosing the right water filtration system can seem like a daunting task as there are several options available on the market. In this blog, we’ll explore the different types of water filtration systems available for residential homes, compare the latest technology for water filtration and highlight the benefits and cons of each. We’ll also take a look at the most purchased or installed filtration system in the United States and what’s likely to be installed in the North Carolina region.

water filtration types

Reverse Osmosis Filtration System:

Reverse osmosis systems work by sending water through a semi-permeable membrane that filters out impurities. They are effective at removing particles like silt, rust, and chlorine while also removing harmful contaminants like bacteria, viruses, and heavy metals. However, these systems are slow and can waste a lot of water, as it uses about three to four times more water than it produces.

Carbon Filtration System activated carbon

Carbon Filtration System:

Carbon filtration systems work by using activated carbon to absorb impurities from the water. They are effective at removing chlorine, volatile organic compounds (VOCs), and sediment from the water. These are the most common types of water filters used in homeowner’s refrigerators. However, they are less effective at removing minerals, fluoride, and other contaminants that aren’t easily absorbed by carbon.

UV (Ultraviolet) Disinfection System:

UV disinfection systems work by using ultraviolet light to kill bacteria and viruses found in the water. They work best in conjunction with another filtration system as they’re not effective in removing particulate matter or other contaminants. while they are effective at killing bacteria and viruses, the bulbs must be replaced periodically and are expensive.

Water Softener System:

Water softeners work by removing hard ions and minerals from the water, mainly magnesium and calcium. They basically replace the minerals with salt ions to make the water “softer”. Water softeners are effective at reducing the hard water spots caused by hard water, and it prevents damage done to clothes when using hard water to wash them. However, it can have a negative effect on people who have high blood pressure, and the excessive sodium content is harmful to the environment.

Ceramic Filtration System:

Ceramic filtration systems work by using a porous ceramic filter to trap bacteria and other microorganisms. These are typically promoted for outdoor use and areas without access to mains water. While they are easy to clean and maintain, they are less effective at treating other contaminants like sediment and minerals.

In conclusion, choosing the right water filtration system depends on the specific needs and concerns of your household. It’s important to take into account the types of contaminants present in your water, and the possible effects of the type of water you consume.

In the United States and North Carolina region, most water filtration systems in use are carbon-based and UV disinfection systems. Water filtration technology continues to evolve and improve, and we expect to see even more efficient and effective systems in the future. We encourage you to consult with a professional to determine which type of filtration system is best for your household and protect your family until some sort of universal filtration system can be enacted at a community level. Contact Poole’s Plumbing for a Water Filtration Consultation, we can help you select the right system for your home.

What Projects Do Plumbers Do?

What Projects Do Plumbers Do?

What Projects Do Plumbers Do? — When you think of a plumber, the first thing that probably comes to mind is fixing a leaky faucet or unclogging a drain. However, plumbers do much more than that. They are skilled professionals who specialize in working with water supply and drainage systems. In this blog post, we will take a closer look at the various projects plumbers do and how they can benefit you as a homeowner.

leaky faucet

Installation of Plumbing Systems

One of the most critical projects plumbers do is installing new plumbing systems. This can include the installation of a new water heater, pipes, toilets, showers, and sinks. Plumbers are trained to assess your home’s water supply and drainage needs and can help you choose the best installation systems. They will also ensure that everything is installed correctly and working properly.

Repair and Maintenance of Plumbing Systems

Plumbing systems can develop problems over time and require repairs or maintenance. Plumbers can fix issues such as leaks, clogs, broken pipes, and malfunctioning water heaters. They also offer regular maintenance services such as drain cleaning and water heater flushing to prevent problems from occurring in the first place. Regular maintenance can prolong the life of your plumbing system and save you money in the long run.

Bathroom and Kitchen Remodels

If you are planning a bathroom or kitchen remodel, a plumber should be part of your team. Plumbers can help you design your new space and install new plumbing systems and fixtures to make your vision a reality. They can help you choose the best materials and methods for your budget and needs. A professional plumber can ensure your remodel is done correctly, on time, and within budget.

Water Treatment and Purification Systems

Plumbers can also help you improve the quality of your water supply by installing water treatment and purification systems. These systems can remove impurities, chemicals, and pollutants from the water supply in your home. They can also improve the taste and smell of your water. A plumber can help you choose the best water treatment and purification systems that meet your needs.

Emergency Plumbing Services

Plumbing emergencies can happen at any time, day or night. Plumbing emergencies such as burst pipes, overflowing toilets, and broken water heaters can cause a lot of damage to your home if not addressed immediately. That’s where emergency plumbing services come in. Plumbers can respond quickly to your emergency and fix the problem before it causes too much damage.

Learn more about the ongoing education and certification of a plumber at the he American Society of Plumbing Engineers website. https://www.aspe.org/about/education-research/

Conclusion: Plumbers do much more than fix leaky faucets and unclog drains. They are skilled professionals who can help install, repair, and maintain your home’s plumbing system. They can also help with bathroom and kitchen remodels, water treatment and purification systems, and emergency plumbing services. As a homeowner, hiring a professional plumber can save you time, money, and stress in the long run. So, the next time you have a plumbing problem, remember that a plumber can handle much more than just a leaky faucet — Contact Poole’s Plumbing Certified Professional Raleigh Plumbers for all your plumbing needs.

Tankless Vs. Tank Water Heaters: Which One to Choose?

Tankless Vs. Tank Water Heaters: Which One to Choose? — Choosing a water heater for your home might seem like an easy task, but with a plethora of options available in the market, it can quickly become overwhelming. While the most common types are tank and tankless water heaters, you might be wondering which one is better. In this blog post, we’ll explain the differences between the two and list the pros and cons of each to help you make an informed decision.

Tank Water Heaters

Tank Water Heaters

Tank water heaters store hot water in a tank, which is heated by gas or electric power. The heater kicks in when the temperature drops below the set level, and then it warms the water back up to the desired temperature. Tank water heaters are cheaper than tankless heaters, and many people are more familiar with them.

Pros of a Tank Water Heater:

  • Purchase and installation cost is lower than that of a tankless heater
  • Can handle multiple outlets running at the same time
  • Installation is simpler than a tankless heater
  • Larger tanks are available to provide a bigger capacity of hot water storage.

Cons of a Tank Water Heater:

  • Water in the tank can lose heat and therefore waste electricity or gas
  • Lifespan is generally shorter than tankless heaters
  • Tanks require space to store which may not be ideal for homes with limited space or living in communal buildings.
Tankless Water Heaters

Tankless Water Heaters

A tankless water heater does not store hot water. Instead, when you turn on a hot water faucet, water is heated with a gas burner or electric element as it passes through the current of pipes. This means you only get hot water on-demand, and nothing is wasted by being stored away in a tank.

Pros of a Tankless Water Heater:

  • Energy-efficient since no energy is being wasted in storing water
  • Takes up less space than a tank water heater
  • Higher lifespan than a tank water heater
  • On-demand hot water that is always available

Cons of a Tankless Water Heater:

  • Installation and purchase cost is higher than that of a tank heater
  • Cannot handle several water outlets operating simultaneously
  • In cold areas, they might require larger units with higher heating capabilities to cope with the high demand to ensure adequate supply of hot water
  • Can be a bit complex to install and may require a professional plumber

Conclusion:

Both Tank and Tankless water heaters have advantages and disadvantages. When deciding which type of water heater you want to purchase, or upgrade too, you will need to consider factors such as your living situation, location, family size, and energy-use habits. If you have a large family and limited hot water needs, a tank water heater can be a great option. On the other hand, if you’re environmentally-conscious, a tankless water heater could be the best choice. Your budget and installation costs, as well as the long-term cost savings, should also inform your decision. With this information, you can choose which option is most suitable for your home.

When considering switching from a tank to a tankless water heater, it’s crucial to consult a professional plumber. This is because there are specific permits and regulations that need to be followed when installing a new water heater, vs just replacing an existing one. A plumber can also help determine the right size and type of tankless water heater for your household’s needs, as well as advise on any potential installation issues that may arise.
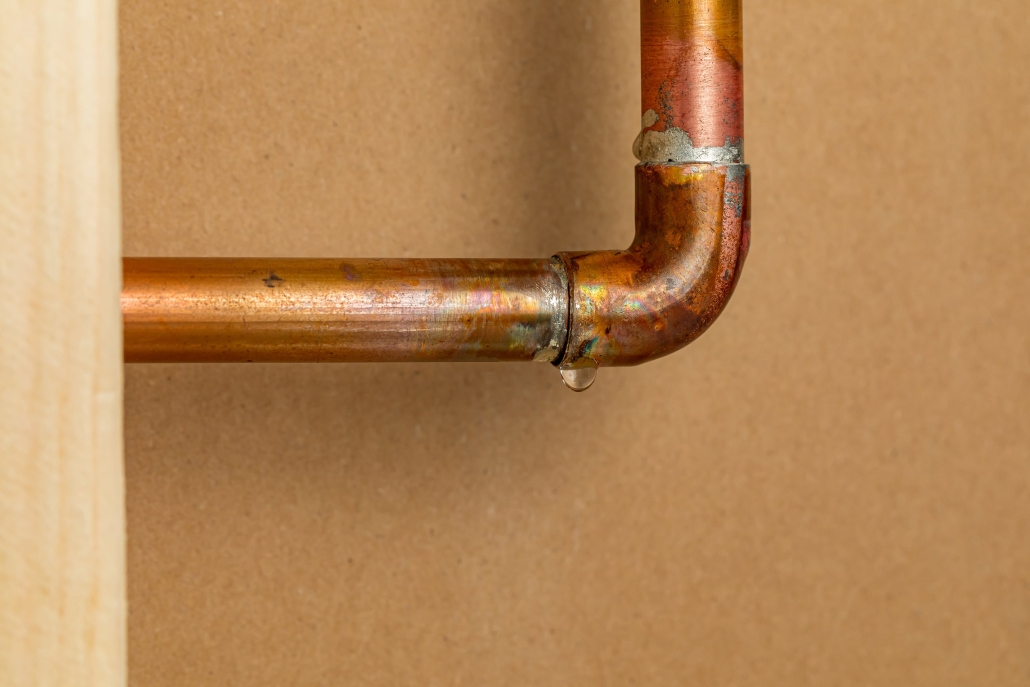
Contact one of Poole’s Plumbing’s certified and insured, expert water heater installers to learn more about worry-free plumbing and making the switch to a tankless water heater. With their expertise, you can have peace of mind knowing your new water heater is installed correctly and efficiently. In conclusion, both options have their own set of advantages and disadvantages, so it ultimately comes down to personal preference.