Plumbing News and Tips for Homeowners in the Raleigh NC Area, New Product Reviews, Water Heaters and Tankless water heater advice from local certified plumbers.

Clogged Drain? Learn the Basics of Drain Cleaning.

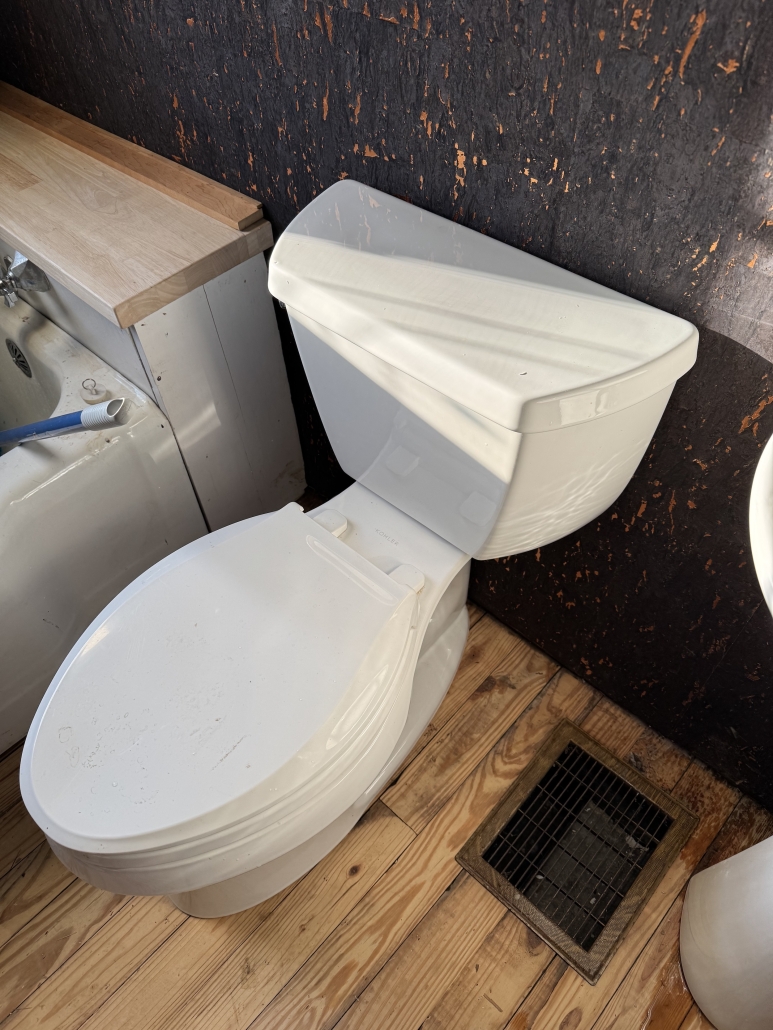
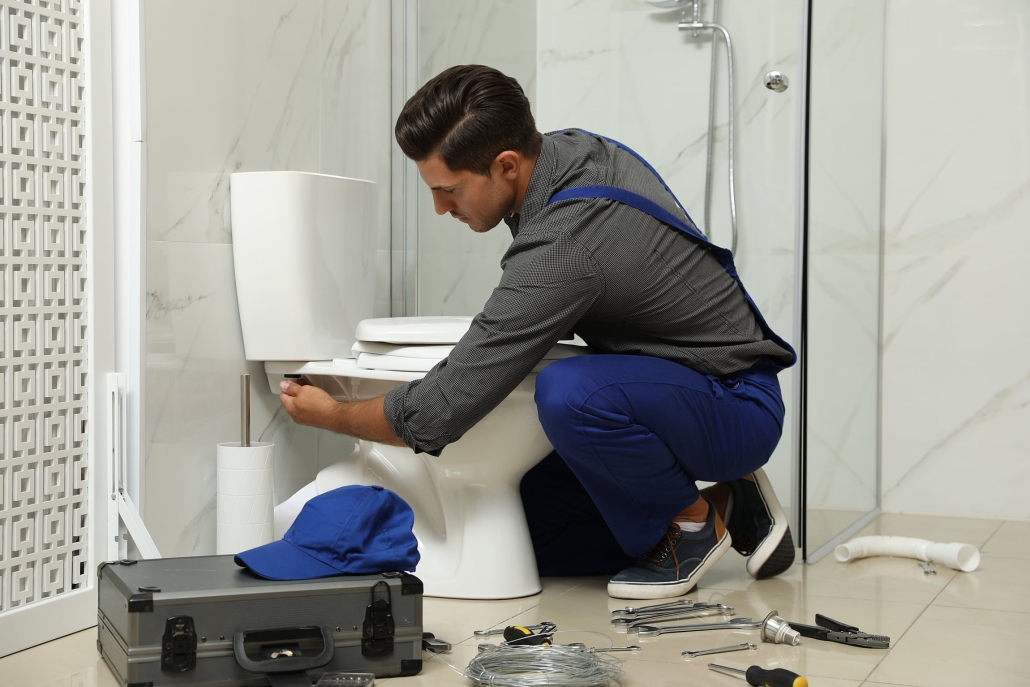
Unclogging Your Toilets: Expert Tips and Tricks

Unclogging Your Toilets: When your bathroom turns into a battleground of clogged toilets and standing water, it’s not just frustrating—it can halt your whole day. Homeowners in Raleigh, NC, and elsewhere often dread these situations, unsure whether to pick up a plunger or call a professional. Worse yet, persistent drainage problems can indicate a deeper issue lurking in your pipes.

With the right expert tips and patience, you can tackle these problems head-on. This guide will help homeowners and DIY plumbing enthusiasts identify the root causes of clogged toilets, understand the step-by-step process of unclogging, and know when to seek professional help.

What Causes Clogged Toilets and Drains?

clog

Before jumping into solutions, it’s helpful to understand why clogs happen in the first place. There are a few usual suspects that lead to toilet and shower clogs.

Flushing Non-Flushable Items
Today’s toilets are designed to handle human waste and toilet paper—nothing more. Products such as wipes labeled “flushable,” feminine hygiene products, cotton swabs, and paper towels can create blockages in your pipes.

Buildup in Pipes
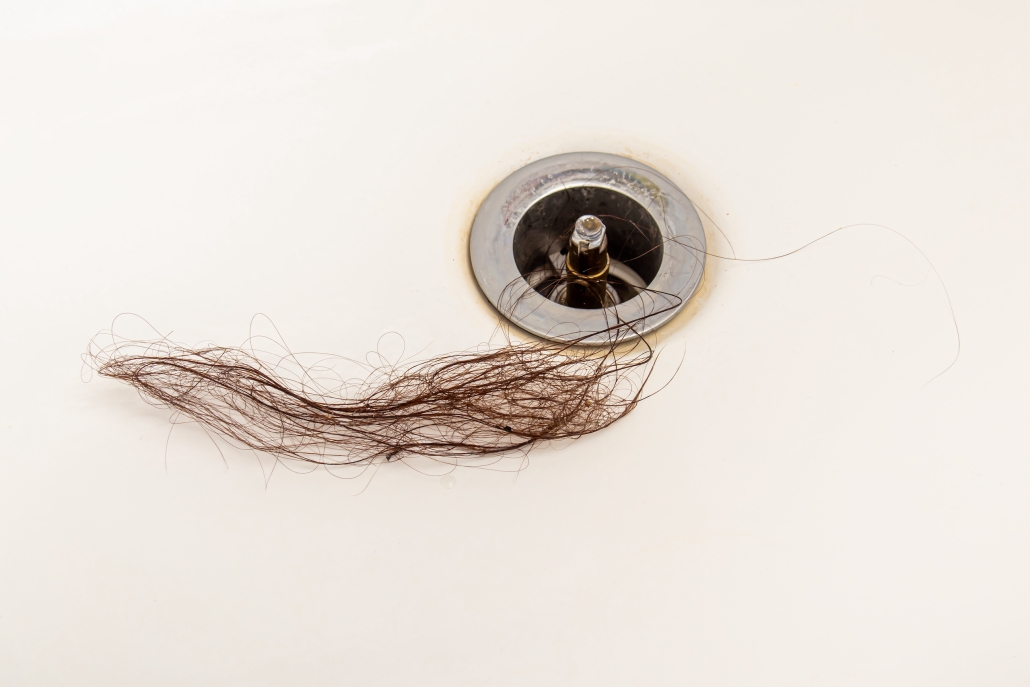
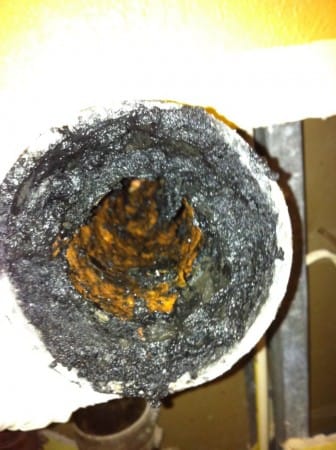
Over time, grease, soap residue, hair, and debris can accumulate in your pipes. It is especially common in drains connected to showers and sinks, eventually causing slow water flow or complete blockage.

Tree Roots Interfering with Sewer Lines
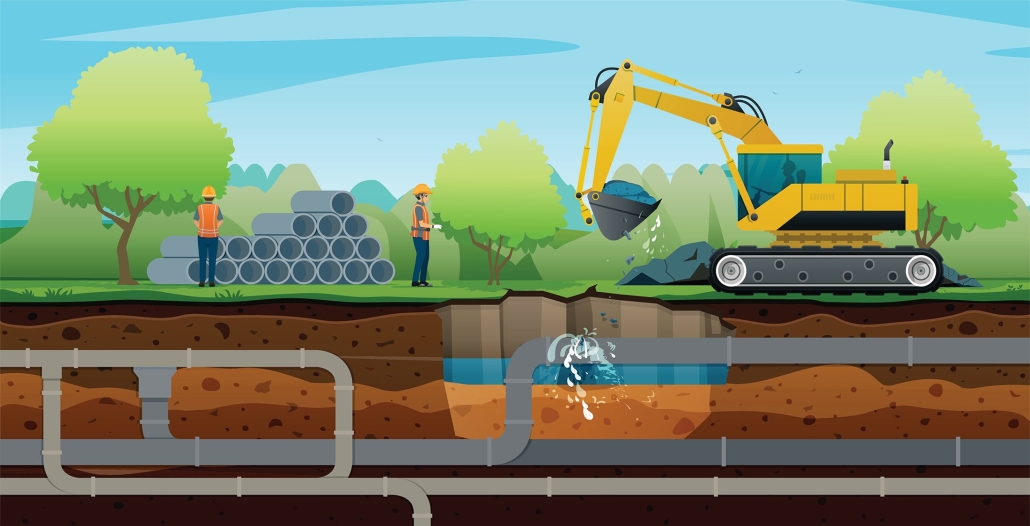
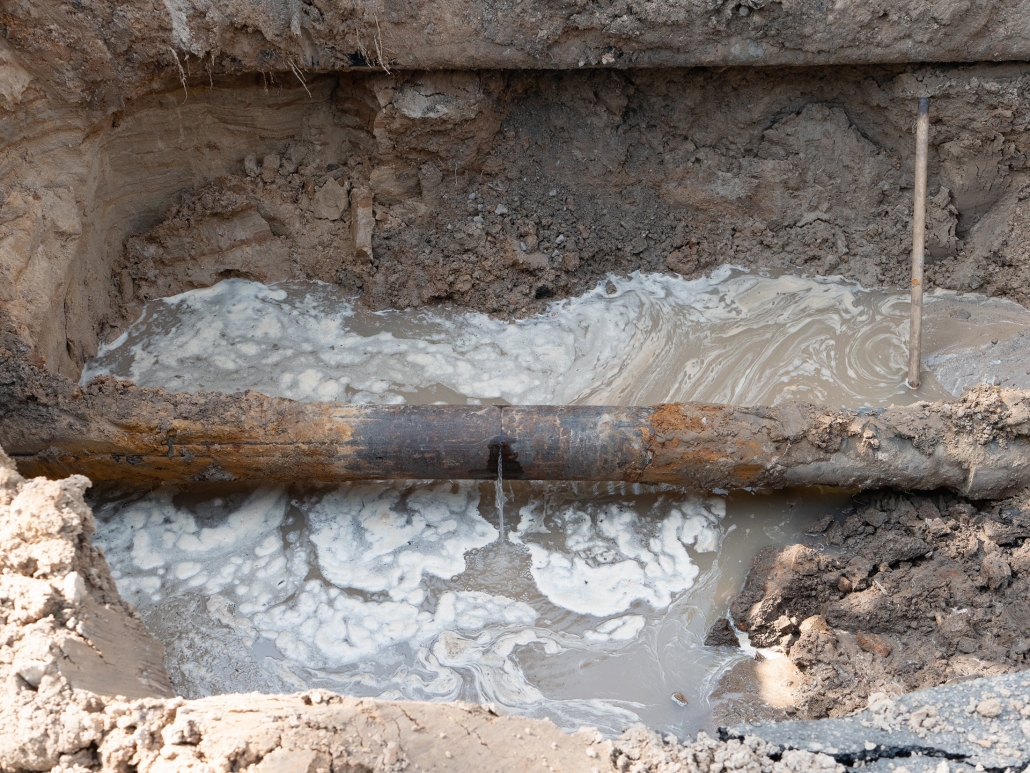
Tree roots are a surprising but common issue for those living in suburban or older areas of Raleigh, NC. Roots can grow into underground sewer lines, leading to severe blockages that require professional intervention.

Old or Faulty Plumbing
Older homes may suffer from outdated plumbing systems. Corroded or damaged pipes are prone to blockages and collapse, complicating common clogs.

DIY Plumbing Fixes for Clogged Toilets and Drains

drain clog

Now that you understand what might be causing your plumbing woes, it’s time to fix it. Below, we’ve broken down practical steps to help you resolve these issues safely and effectively.

Start with a Plunger
Sometimes, the most straightforward tools yield the best results. A plunger can often dislodge minor clogs in toilets or sink drains. Here’s how to get the best out of your plunger technique:

  • Ensure there’s enough water covering the plunger head for a tight seal.
  • Use firm, controlled plunges up and down to create pressure that loosens the clog.
  • Repeat this motion several times before checking if the blockage clears.

Try a Drain Snake
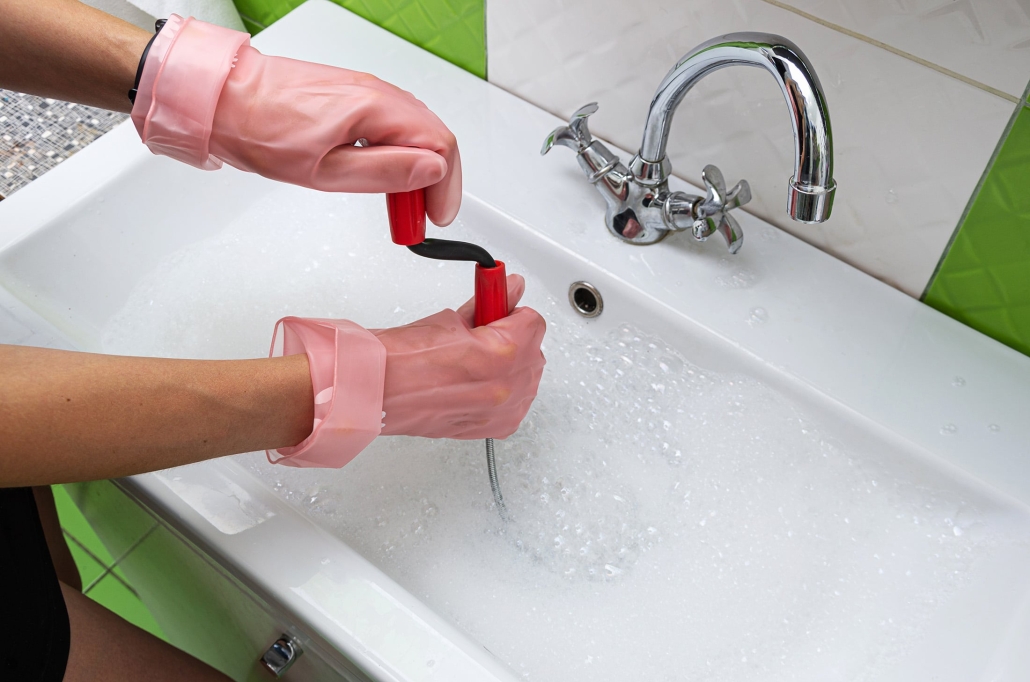
A plumber’s snake (or drain auger) can be incredibly effective for blockage deeper in the pipes. Snake the drain with the auger tool into the drain and crank the handle slowly to push through or pull out clogs. For toilets, opt for a closet auger to avoid causing damage.

Use a Baking Soda and Vinegar Mixture
This mixture is a safe and environmentally friendly option. It is beneficial for minor blockages caused by grease or build-up in shower drains.

  • Pour approximately 1/2 cup of baking soda and 1/2 cup of vinegar down the drain.
  • Cover the drain to contain the bubbling reaction.
  • Wait about 15-20 minutes before flushing with hot water.

Check the Shower Drain for Hair
Shower drains frequently clog because of hair buildup. Remove the drain cover and use a drain stick or tweezers to extract hair and debris.

Use Hot Water with Dish Soap for Toilets
For toilet clogs not caused by physical objects, hot water combined with dish soap can help break down build-up.

  • Pour a few tablespoons of dish soap into the toilet bowl.
  • Follow with a bucket of hot (not boiling) water.
  • Wait a few minutes and flush to see if the clog clears.

Use a Wet/Dry Vacuum for Stubborn Clogs
For more challenging clogs, try using a wet/dry vacuum. Ensure the vacuum is set to “wet” mode and use the hose to suction out the blockage. Create a tight seal between the vacuum hose and the clogged pipe.

Unclogging Your Toilets: When to Call a Professional

While many clogs can be tackled with DIY efforts, some require professional intervention. Knowing the signs of a more serious issue can save you from more extensive, costlier complications.

Recurring Clogs
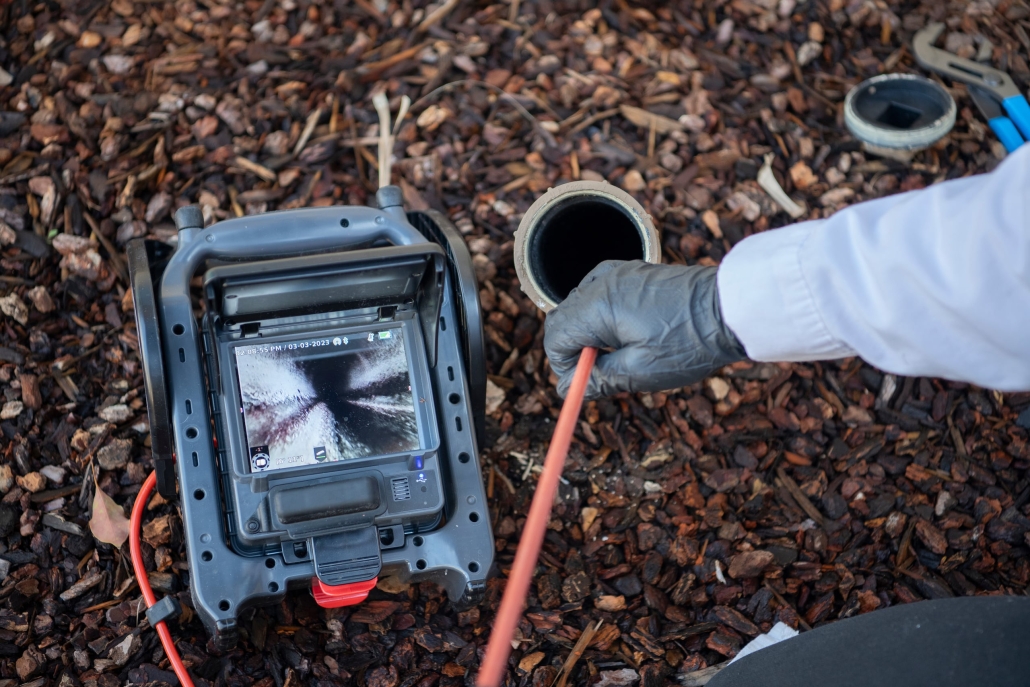
If toilets or drains frequently clog despite your best efforts, this could indicate a deeper problem in your plumbing system. Professional tools, like hydrojetting or sewer cameras, may be required to diagnose and fix the issue.

Water Backing Up into Multiple Fixtures
When multiple drains in your home back up simultaneously, it often indicates a main sewer line issue. This is not a DIY fix—call a professional plumber immediately.

Noticeable Sewer Odor
If you notice a foul odor around your drains or yard, it’s a sign of a severe blockage or sewer line damage that demands expert attention.

Tree Root Intrusion into Sewer Lines
Tree roots wreak havoc on underground plumbing. Specialized equipment is required to break through the blockage; some repairs may involve replacing damaged pipe sections.

Why Homeowners in Raleigh, NC, Trust Poole’s Plumbing

Unclogging Your Toilets

At Poole’s Plumbing, we understand that clogged toilets and drains can feel overwhelming. That’s why we’ve built a reputation for reliability, professionalism, and high-quality service in Raleigh, NC, and surrounding areas.

The Poole’s Plumbing team of licensed and professional trained plumbers can quickly diagnose and settle any plumbing issue, no matter how complex. Plus, we operate 24/7 because plumbing issues rarely happen on a schedule. When you choose us, you’re choosing guaranteed satisfaction—always done right the first time.

If you’re struggling with clogged toilets or a backed up plumbing system in the Raleigh, NC area, don’t wait until the problem worsens. Contact Poole’ ‘s Plumbing today to schedule an inspection or emergency service. Call 919-661-6334 or visit www.poolesplumbing.com.

Final Thoughts

A clogged toilet or drain can disrupt your home and cause major headaches. But by understanding the root causes, applying practical techniques, and knowing when to call in the professional plumber, you can minimize the impact of these issues.

Your best allies for a clog-free home are routine maintenance, mindful habits, and quality plumbing services. Don’t let plumbing problems spiral out of control—reach out to a trusted expert like Poole’s Plumbing and enjoy peace of mind knowing your home is in good hands.

Common Winter Plumbing Issues in Raleigh

Most Requested Plumbing Services in Raleigh, NC During Winter

Common Winter Plumbing Issues in Raleigh and How to Fix Them  

Winter in Raleigh, North Carolina, brings chilly temperatures, festive gatherings, and, unfortunately, a host of plumbing problems. Understanding the most common winter plumbing issues can help homeowners, property managers, and even DIY enthusiasts prevent costly repairs and save time. Whether frozen pipes, overworked water heaters, or holiday-induced clogs, winter challenges demand prompt and practical solutions.

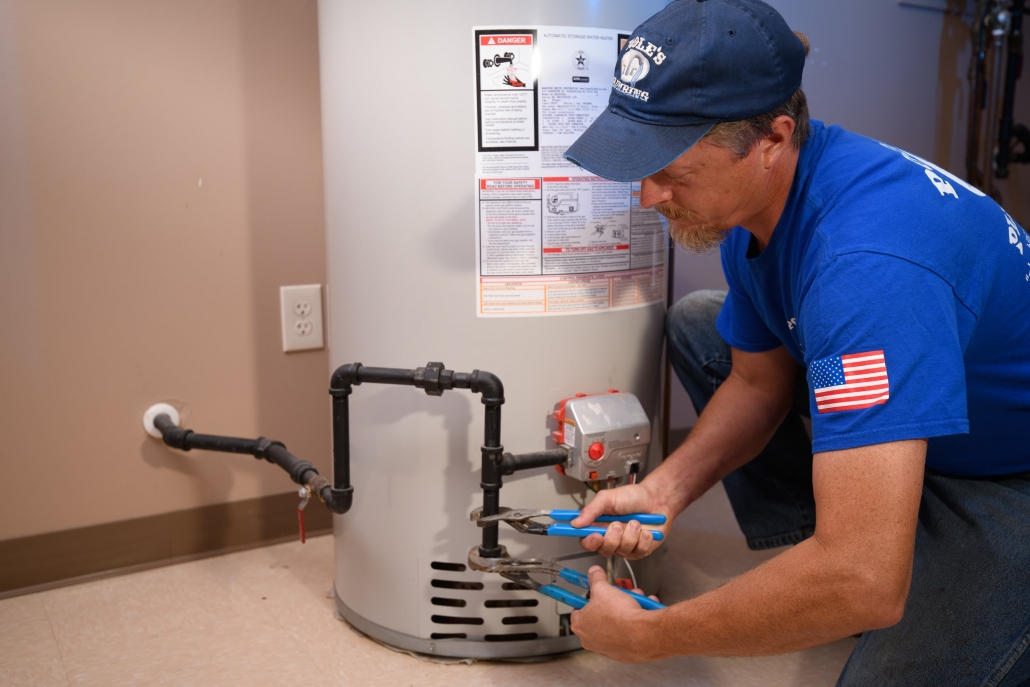
Most Requested Plumbing Services in Raleigh, NC – At its core, plumbing during winter is all about preparation and maintenance. If you’ve faced these problems before or are simply looking to safeguard your home this season, we’re breaking down the most requested plumbing services in Raleigh to keep your home running smoothly.

The Top Winter Plumbing Issues and Solutions

Most Requested Plumbing Services in Raleigh, NC During Winter

Frozen Pipe Repairs – The Winter Plumbing Headliner  

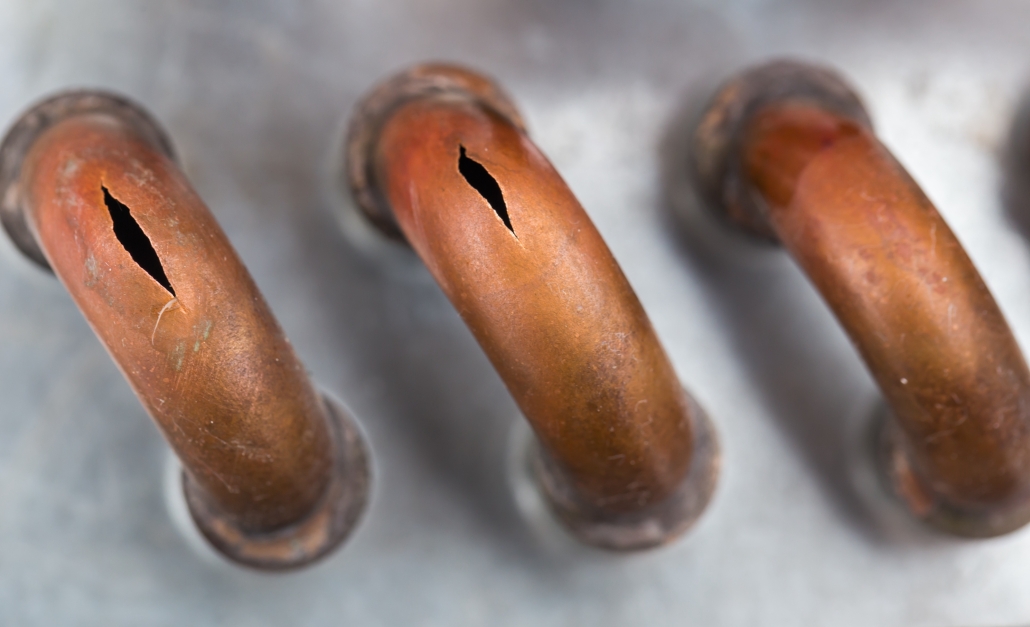
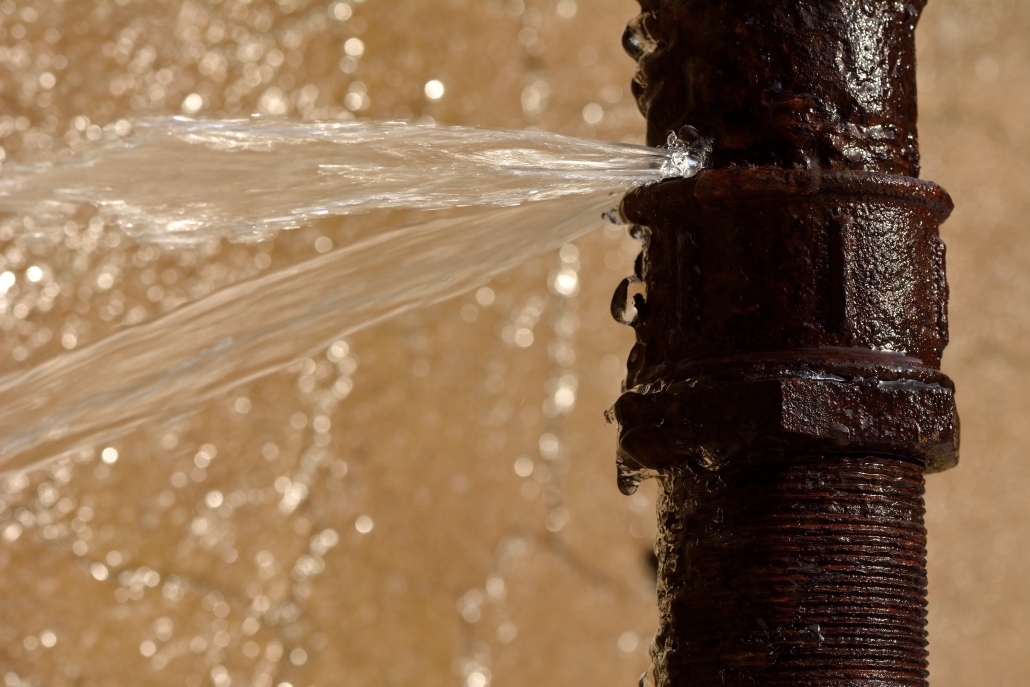
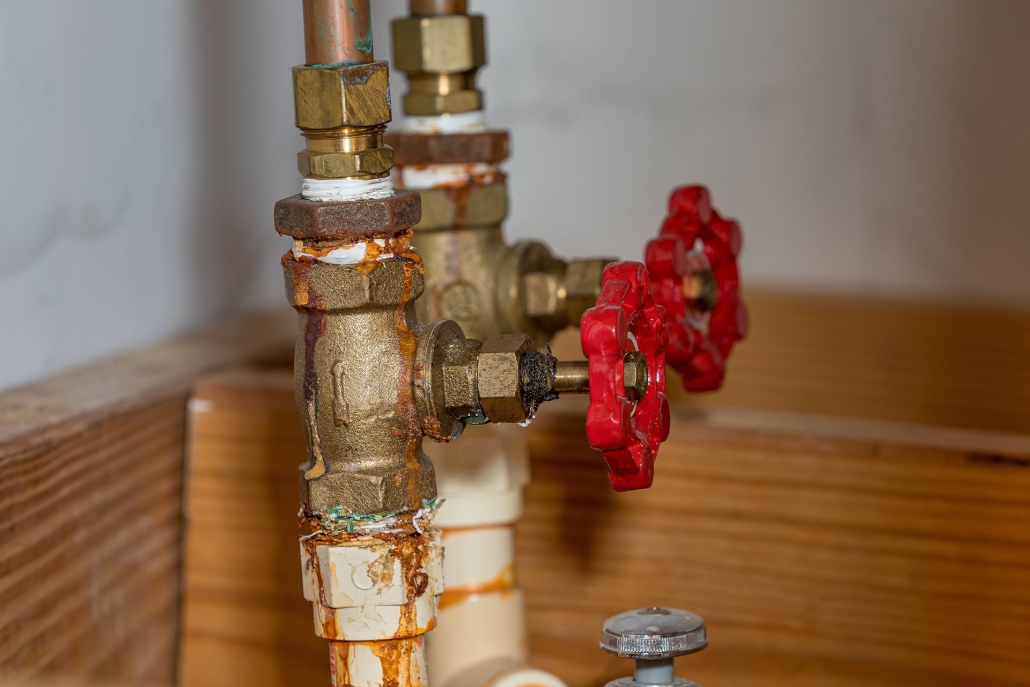
Frozen pipes are the leading cause of winter plumbing nightmares. When temperatures in Raleigh dip below freezing, water inside pipes—especially those located in uninsulated areas or near exterior walls—can freeze, expand, and create immense pressure that can cause the pipes to crack or burst.  

Warning Signs of Frozen Pipes:

  • Reduced or no water flow from your faucets
  • Frost or condensation forming on exposed pipes
  • Strange smells coming from your drains (a sign of ice blockages preventing proper airflow)

The damage caused by burst pipes can lead to significant water damage, necessitating immediate professional repair.  

Preventative Measures:

  • Wrap exposed pipes with insulation
  • Open cabinet doors beneath sinks to allow warm air to circulate
  • Keep faucets dripping on especially cold nights to prevent freezing

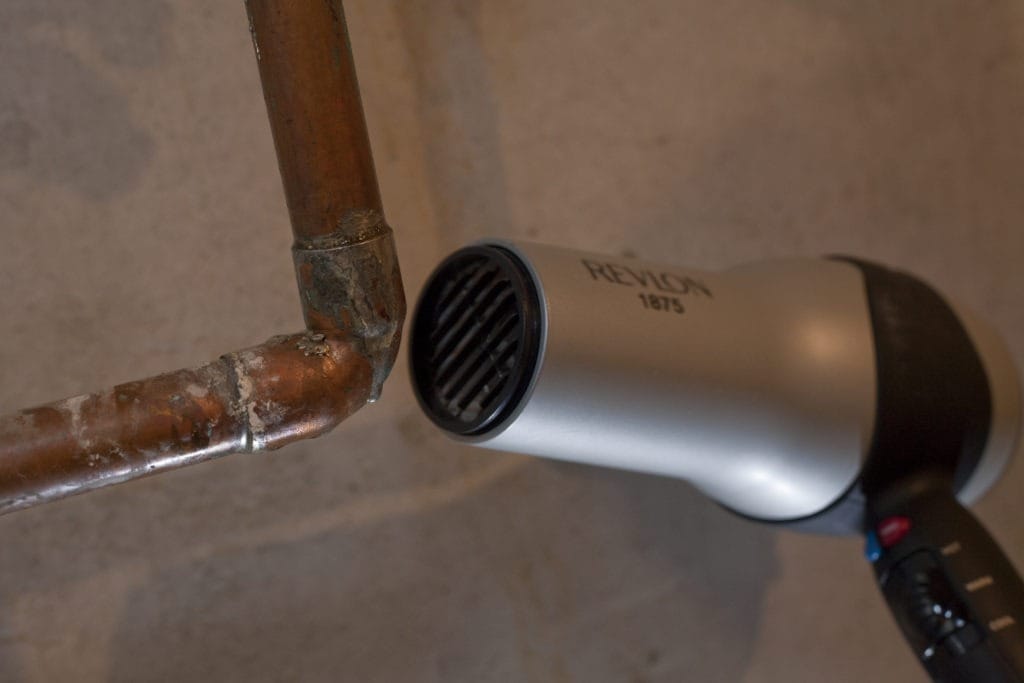
Pro tip: If you suspect frozen pipes that haven’t burst, use a hairdryer to gradually warm them, or call a professional plumber for targeted thawing before any cracks occur.

Water Heater Problems – Overworked and Under Pressure  

During the colder months, water heaters are put to the test. Whether running extra-long showers or heating water for constant use, the strain can lead to reduced hot water supply, strange noises, or even leaks.  

Common Issues:

  • Limited hot water output due to sediment buildup
  • Leaking water heater tanks caused by thermal expansion
  • Inefficient heating due to outdated or undersized units  

If you notice lukewarm water or unusual sounds like popping and cracking, it’s time to prioritize an inspection or repair. Ignoring water heater issues can leave you literally in the cold.  

Our Recommendation:

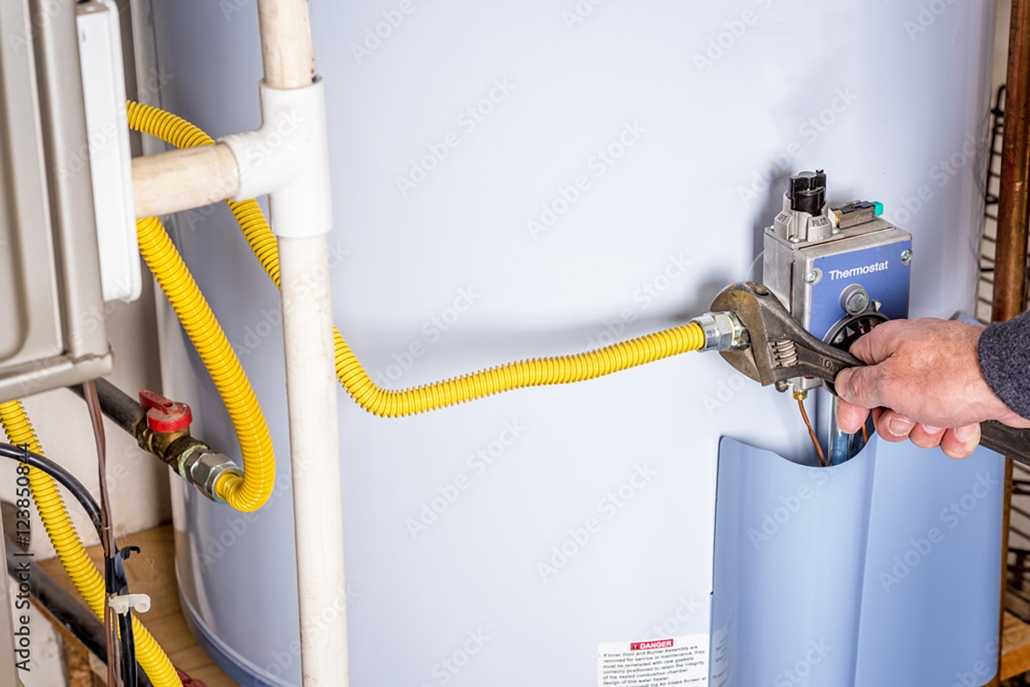
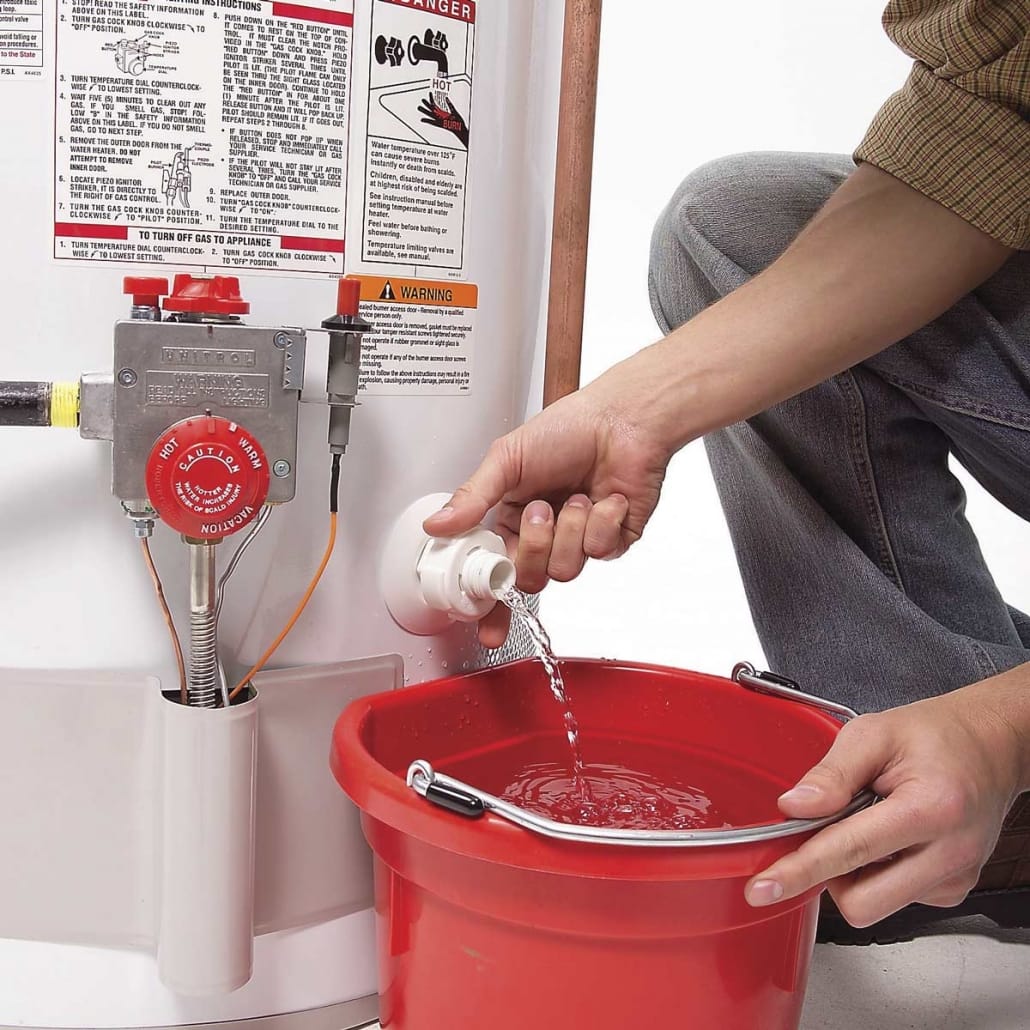
Schedule an annual maintenance check, especially before winter begins. Professionals can flush the tank to remove sediment and inspect for leaks, and ensure the thermostat is functioning efficiently.

Clogged Drains – The Post-Holiday Blues  

Raleigh households see a significant increase in plumbing service calls for clogged drains during the holiday season. Kitchen drains become incredibly vulnerable with more cooking, baking, and dishwashing.  

Main Culprits:

  • Grease, oil, and fats solidify in pipes
  • Food scraps clogging drains (especially starchy or fibrous items like potato peels and coffee grounds)
  • Increased soap and detergent residue  

Prevention Tips:

  • Avoid pouring grease and oil down the drain; instead, collect them in a disposable container
  • Always use a sink strainer to catch food debris
  • Run hot water along with dish soap periodically to clear minor buildups  

If clogs persist, DIY remedies like plunging may help, but professional plumbers thoroughly clear the pipes to provide a permanent fix.

Sump Pump Malfunctions – Overwhelmed by Snowmelt  

While snow is rare in Raleigh, heavy rains or occasional snowmelt can still cause water to return to basements, particularly if sump pumps malfunction. Sump pumps are the unsung heroes of winter, preventing foundation flooding by redirecting water.  

Signs Your Sump Pump May Need Attention:

  • Persistent strange noises during the operation  
  • Pump cycles on and off too frequently or runs non-stop  
  • Standing water in your basement despite the pump  

Proactive Steps:

  • Test your sump pump regularly—pour a bucket of water into the basin to ensure it activates  
  • Clear obstructions from the discharge pipe to maintain water flow  
  • Invest in a battery backup pump for emergencies  

A sump pump failure, especially in winter, can lead to significant flooding and costly water damage. Regular maintenance can save you stress down the road.

Frozen Outdoor Faucets – Winterizing is Key  

If not properly winterized, outdoor faucets and hose bibs can freeze, leading to water leakage or burst pipes outside and inside your home.  

How it Happens:

Exposed faucets are more prone to freezing, and when left connected to hoses, trapped water expands as it freezes, cracking pipes or damaging your home’s plumbing system.  

Winterization Checklist:

  • Disconnect and store outdoor hoses  
  • Shut off the outdoor water supply and drain the pipes  
  • Install insulated covers or frost-free hose bibs  

If you’re already dealing with damage, call a professional plumber to safely inspect and replace the affected components.

Septic Tank Issues – The Hidden Winter Problem  

For homes with septic systems, freezing temperatures in Raleigh can spell trouble. Freezing weather can cause septic lines to clog or slow, while improper maintenance leads to tank overflow.  

Winter Septic System Problems:

  • Frozen drain fields prevent proper wastewater absorption  
  • Slow drains or backups caused by clogged septic lines  
  • Odors emanating from the yard or drains  

Tips for Prevention:

  • Schedule a septic tank inspection before winter  
  • Avoid parking heavy vehicles on the drain field to prevent soil compacting  
  • Insulate exposed septic lines to maintain efficiency  

Septic repairs can be costly, so preventative care is always worth investing time and resources.

Avoid Winter Plumbing Woes with Professional Help  

While some plumbing issues can be resolved with some DIY know-how, winter-related problems often require the attention of experienced professionals. Raleigh homeowners trust skilled plumbers to provide reliable services, from frozen pipe repairs to clogged drain fixes. Depend on their expertise to keep your home running smoothly.  

At Poole’s Plumbing, we pride ourselves on offering top-quality solutions to keep your home cozy and worry-free throughout the season.  

  • 24/7 Emergency Services for unexpected plumbing issues  
  • Affordable and transparent pricing with no hidden fees
  • Highly trained technicians dedicated to customer satisfaction  

When winter plumbing problems strike, depend on Raleigh’s trusted plumbing experts to get the job done right—every time. Their reliability will give you peace of mind during the winter season.

Stay Prepared and Call Us Today  

Don’t wait until plumbing issues escalate—regular maintenance and professional help are key. Schedule your service today and protect your home this winter. Whether you’re facing frozen pipes, a stressed water heater, or recurring clogs, our team is here to help.

Uncommon Winter Plumbing Problems

Uncommon Winter Plumbing Problems You Might Not Be Aware Of (And How to Fix Them)

Uncommon winter plumbing problems can occur when the mercury drops. Most of us know the typical winter plumbing issues like frozen pipes and clogged drains. However, lesser-known plumbing problems can cause as much havoc if left unchecked. Whether you’re a homeowner or a property manager, understanding these uncommon issues can save you from unexpected repairs and keep your plumbing running smoothly throughout the colder months.

The Problem:

Water heater strain: during winter, your water heater works overtime to provide warm water for showers, dishes, and laundry. People must realize that this increased demand can lead to overworked heating elements or sediment buildup.

The Solution:

Uncommon Winter Plumbing Problems
  • Regular Maintenance: Scheduling annual maintenance checks will ensure your water heater is functioning efficiently.
  • Flush the Tank: Flushing the tank at the start of winter can remove sediment buildup and improve efficiency.
  • Consider an Upgrade: If your water heater is old, consider an energy-efficient model that can handle increased winter demand.

The Problem:

Outdoor Faucet Issues: Even if your outdoor faucets aren’t used during winter, they can cause problems. Water left in the pipes can freeze and expand, leading to leaks or burst pipes when temperatures rise.

The Solution:

  • Disconnect Hoses: Always disconnect garden hoses before the first frost.
  • Install Frost-Proof Faucets: Consider installing frost-proof outdoor faucets for added protection.
  • Insulation: Insulate exposed pipes connected to outdoor faucets to prevent freezing.
  • Septic Tank Complications

The Problem:

Septic tank: Frigid temperatures in cold weather can affect the function of your septic tank. The ground can freeze, making it difficult for the tank to process waste efficiently.

The Solution:

  • Scheduling Regular Pumping: Ensure your septic tank is pumped regularly to prevent overflows.
  • Insulate the Area: Cover the area above the tank and pipes with insulating blankets or mulch to prevent freezing.
  • Monitor Usage: Avoid overusing water during extreme cold periods to reduce strain on the septic system.
  • Ice Damming and Roofing Leaks

The Problem:

Roof: Ice damming occurs when melting snow refreezes on your roof, potentially leading to leaks. While primarily a roofing issue, it can affect plumbing systems by causing water intrusion.

The Solution:

  • Roof Insulation: Proper attic insulation can prevent heat loss that contributes to ice damming.
  • Melt Cables: Install heat cables to prevent ice dams from forming.
  • Gutter Maintenance: Clean gutters regularly to avoid blockages that contribute to damming.
  • Sump Pump Failure

The Problem:

Sump pump: Sump pumps prevent water accumulation in basements. Cold weather can cause them to freeze or malfunction, leading to basement flooding.

The Solution:

  • Test Regularly: Test your sump pump before winter hits to ensure it’s operational.
  • Backup Power Supply: Consider installing a backup battery system to keep the sump pump running during power outages.
  • Insulation: Insulate discharge lines to prevent freezing.

Winter weather can introduce a range of plumbing challenges, some of which take time to notice. By staying proactive and addressing these uncommon issues, you may prevent costly damage and ensure your plumbing systems remain reliable throughout the season.

Need expert advice or assistance? Contact a professional plumber to give your home the winter-ready stamp of approval. Stay warm and worry-free this winter!

The Ultimate Guide to Upgrading to Tankless Water Heaters in Raleigh NC

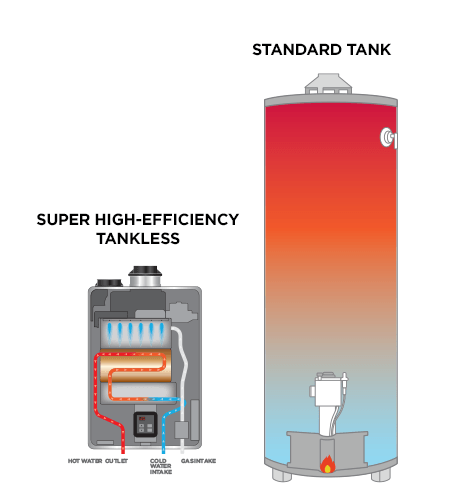
Tankless Water Heaters —Are you tired of running out of hot water during your morning shower or simply looking to save on your energy bills? Upgrading to a tankless water heater might be the solution you’ve been searching for. A reliable hot water supply is essential in Raleigh, NC, where the climate can be unpredictable. This guide will walk you through replacing your old tank water heater with a new, efficient tankless model. From understanding sizing and zone specifications to navigating local permits, we’ve got you covered.

Assess Your Current System

Before making the switch, evaluating your current water heating setup is essential. Start by identifying the type of water heater you currently have. Is it electric, natural gas, or propane? Understanding your existing energy source will help you determine the most compatible tankless model.

Consider the capacity of your current tank. A typical tank water heater holds between 30 and 50 gallons, but tankless systems work differently. They heat water on demand, so you only need a small storage capacity. Instead, you must assess your household’s peak hot water demand. How many showers, dishwashers, and washing machines might be running simultaneously? This information will be crucial in selecting the right tankless unit.

Finally, note the age and condition of your current water heater. An older system might indicate outdated plumbing or electrical wiring, which could affect the installation of a new tankless heater. If you’re uncertain about the state of your current setup, it’s always a good idea to consult a professional.

tankless water heaters

Choose the Right Tankless Unit

Choosing the right tankless water heater for your needs involves understanding the different available types. Raleigh, NC, has three main options: natural gas, electric, and propane. Each has its advantages and considerations.

Natural gas tankless heaters are famous for their efficiency and lower operating costs. They heat water quickly and are an excellent choice for larger households. However, they do require access to a natural gas line. Always check if it’s available in your area and at your home.

Electric tankless heaters are versatile and can be installed almost anywhere. They are ideal for smaller households or point-of-use systems in specific home parts. Large electric units require significant power, possibly necessitating an upgraded circuit panel.

Propane tankless heaters offer similar benefits to natural gas but are often used in rural areas where natural gas lines aren’t available. They provide efficient heating but may involve higher fuel costs than natural gas.

Obtain Necessary Permits

In Raleigh, NC, switching to a tankless water heater requires adhering to local building codes and regulations. Before installation, you’ll need to obtain the necessary permits. This ensures that your new system complies with safety standards and is installed correctly.

Start by contacting your local building department or permit office. They will provide information on the specific permits required for your project. Typically, you’ll need permits for plumbing and electrical work and any structural modifications if your new unit requires additional space.

Hiring a licensed contractor or plumber can simplify the permitting process. They are familiar with local regulations and will ensure your installation meets all necessary codes. Additionally, a professional installation often comes with a warranty, providing peace of mind for your investment.

Installation Process

Installing a tankless water heater involves several steps and should ideally be handled by a qualified professional. Here’s what you can expect during the process.

Firstly, the old tank water heater needs to be removed. This includes disconnecting water, gas, or electric lines and safely disposing of the old unit. Next, the new tankless system is mounted, typically on a wall, which frees up floor space.

Once the unit is securely installed, the appropriate connections are made. This involves securing gas lines and ensuring proper venting for natural gas or propane heaters. Electric units require wiring to be connected to your home’s electrical system and, as mentioned, may need a circuit panel upgrade.

Finally, the system is tested to ensure it functions correctly and efficiently. The installation professional will check water flow rates and temperature settings to verify that your new heater meets your household’s needs.

Tankless Water Heaters Raleigh NC

Cost Considerations

Switching to a tankless water heater is an investment, so it’s essential to understand the associated costs. While the initial purchase price of a tankless system can be higher than that of a traditional tank, the long-term savings often justify the expense.

Tankless units typically last longer—up to 20 years compared to traditional tanks’ 10-15 year lifespan. Their on-demand heating capability means you only pay for hot water when needed, reducing energy bills significantly.

Installation costs vary depending on the job’s complexity and whether additional work, like upgrading electrical panels or gas lines, is necessary. Getting multiple quotes from reputable contractors in Raleigh, NC, is wise to ensure you’re getting a fair price.

Maintenance

Maintaining your tankless water heater will ensure its longevity and efficiency. Fortunately, these systems require less maintenance than traditional tanks, but some crucial tasks remain to remember.

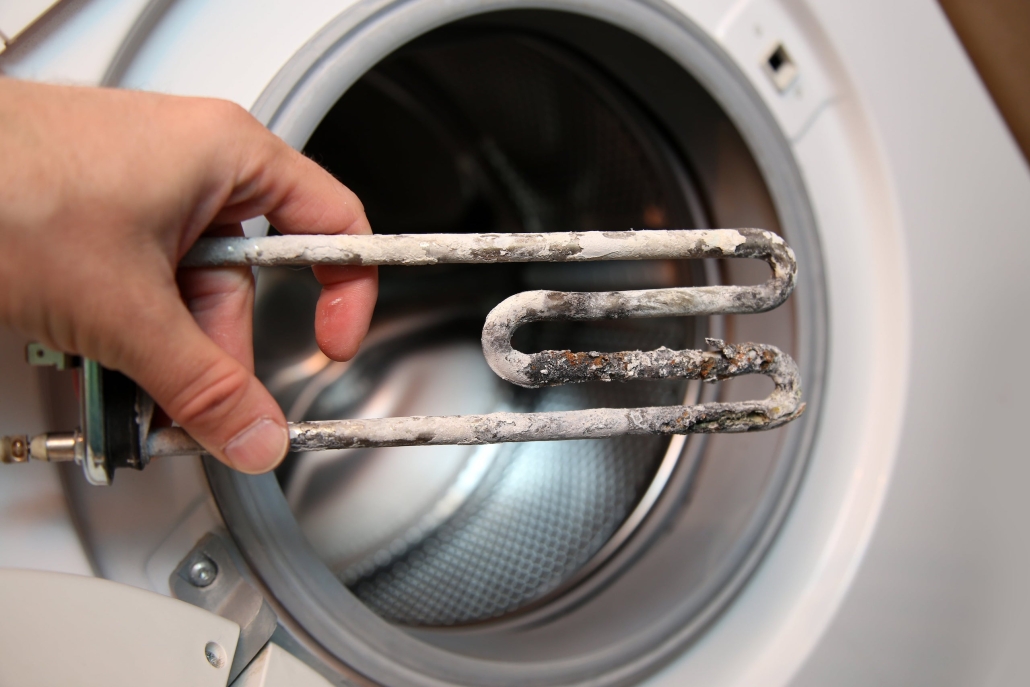
Regular descaling is essential, especially if you live in an area with hard water. Mineral buildup can affect the heater’s efficiency and lead to potential issues. Most manufacturers recommend descaling the unit once a year.

It’s also essential to check and clean the system’s filters regularly. Blocked filters can impede water flow and reduce efficiency. Refer to your unit’s manual for specific maintenance instructions, and consider scheduling an annual service check with a professional.

Space Requirements

One of the appealing features of tankless water heaters is their compact size. Unlike bulky tank systems, tankless units can be mounted on walls, freeing up valuable floor space in basements or utility rooms.

Consider the location of your current water heater and whether the new tankless system can be installed in the same space. Proper ventilation, especially for gas and propane models, may also affect placement options.

For electric models, proximity to the circuit panel is essential, especially if an upgrade is necessary. Consult with your installer to determine the best location for your new unit based on your home’s layout and existing infrastructure.

Conclusion

Upgrading to a tankless water heater is a smart choice for Raleigh, NC, homeowners, property managers, and property owners looking to improve energy efficiency and enjoy endless hot water. Following the steps outlined in this guide, you can transition smoothly and enjoy the many benefits tankless systems offer.

Remember to assess your current system, choose a suitable unit, obtain permits, and hire a professional for installation. Properly maintaining your tankless water heater will provide years of reliable service. Ready to take the plunge? Consult local experts to find the best system for your needs and budget.

Poole’s Plumbing the Tankless Pros

Contact Poole’s Plumbing’s tankless water heater pros if you’re considering switching. We’ve installed thousands of tankless systems across Raleigh, NC, and the Triangle area of North Carolina. Ask about our Best Price Guarantee on water heaters today!

Plumbing Emergencies

How to Prepare for Plumbing Emergencies: A Professional Plumber’s Perspective

Plumbing Emergencies — A plumbing emergency may strike when you least expect it, turning your peaceful home into chaos. While no one likes to think about the potential for water damage or a backed-up sewage system, being prepared can make all the difference in mitigating damage and reducing stress. This guide will explore how to effectively prepare for common plumbing emergencies from a professional plumber’s perspective.

Common Plumbing Emergencies

Before we get into preparation tips, let’s highlight some of the most common plumbing emergencies:

  • Burst Pipes: Frigid temperatures may cause pipes to freeze and burst, leading to significant water damage.
  • Clogged Toilets: A blocked or overflowing toilet can become messy if not handled promptly.
  • Leaky Faucets and Fixtures: While these leaks may seem minor, they can lead to significant water wastage and increased bills over time.
  • Sewer System Backup: This unpleasant issue can cause raw sewage to return to your home, posing a health hazard.
  • Water Heater Failure: A broken water heater may lead to cold showers and potential flooding in your utility room.
Plumbing Emergency

Steps to Prepare for Plumbing Emergencies

  • Know Your Plumbing Layout

Understanding your home’s plumbing layout is crucial for dealing with emergencies effectively. Locate and label all critical components, such as:

  • Main water shut-off valve
  • Individual shut-off valves for sinks, toilets, and appliances
  • Water heater
  • Sewage cleanout points

Having this information at your fingertips will allow you to act swiftly when an emergency arises.

  • Stock Up on Essential Tools

Ensure you have an essential plumbing toolkit to handle minor issues until professional help arrives. Essential tools include:

  • Plunger for clogged toilets and drains
  • Pipe wrench for loosening or tightening pipes
  • Plumber’s tape to seal small leaks temporarily
  • A bucket for collecting water
  • Learn Basic Plumbing Repairs

Familiarizing yourself with basic plumbing repairs can be incredibly useful. Watch online tutorials or attend a community workshop to learn how to:

  • Unclog a toilet or drain
  • Replace a faucet washer
  • Temporarily patch a leaking pipe

These skills can provide immediate relief before a plumber can address the issue.

  • Insulate Your Pipes

Insulating pipes can prevent bursts, especially if you live in an area prone to freezing temperatures. Using foam pipe insulation or heat tape reduces the risk of pipes freezing during winter.

  • Regular Maintenance and Inspections

A professional plumber may catch potential issues by scheduling regular maintenance before they escalate. Annual inspections of your water heater, sewer lines, and plumbing fixtures can save you from costly repairs down the line.

  • Create an Emergency Plan

Develop a clear action plan that outlines steps to take during various plumbing emergencies. Share this plan with family members or roommates, ensuring everyone knows how to:

  • Shut off the main water supply
  • Deal with a minor leak
  • Contact emergency plumbing services
  • Have a Trusted Plumber on Speed Dial

Research and choose a reliable local plumber before an emergency occurs. Their contact information is readily available, which ensures you can get professional assistance as soon as possible.

Conclusion

While plumbing emergencies can be stressful, being prepared may significantly reduce their impact on your home and peace of mind. By understanding your plumbing system, acquiring basic repair skills, and having a plan, you’ll be equipped to handle these situations effectively.

If you need expert assistance or have questions about your plumbing system, don’t hesitate to contact a professional plumber. They’re always ready to help you maintain a safe and functional home.

Smart Plumbing Shut Off-Valves

Smart Plumbing Shutoff Valves: A Must-Have for Homeowners and Property Managers

Water damage is one of the most common and costly issues faced by homeowners and property managers. Imagine coming home from a vacation to find your kitchen flooded or discovering a burst pipe in the middle of the night—it’s a nightmare. Fortunately, smart plumbing shutoff valves offer a solution that can protect your property from such disasters.

Understanding Smart Plumbing Shutoff Valves

Smart plumbing shutoff valves are devices installed in your home’s plumbing system that automatically shut off the water supply when a leak is detected. These valves are part of the growing trend of smart home devices aimed at improving convenience and safety for homeowners.

Key Benefits

  1. Prevent Costly Water Damage

By automatically shutting off the water supply at the first sign of a leak, smart shutoff valves can save you thousands of dollars in repair costs.

  1. Remote Control

These devices can be controlled remotely via a smartphone app, allowing you to shut off your home’s water supply from anywhere in the world. This feature is especially beneficial during vacations or extended absences.

  1. Protection Against Frozen Pipes

Smart valves can detect low temperatures and shut off water to prevent pipes from freezing and bursting during winter months.

  1. Water Bill Savings

Leaks can significantly increase your water bills. These valves detect and stop leaks early, preventing unnecessary water usage.

  1. Easy Integration

Smart shutoff valves can be easily integrated with existing smart home systems, adding an extra layer of convenience.

Types of Smart Shutoff Valves

According to This Old House, there are three main categories of smart water shutoff valves:

  • Point Sensor-Activated Valves

These use sensors placed in high-risk areas like under sinks or near water heaters. When a sensor detects water, it signals the main valve to shut off the supply. This system is effective but relies on strategic sensor placement.

  • Valve Body-Activated Systems

These systems learn your household’s water usage patterns and detect irregularities that may indicate leaks. They offer comprehensive coverage but may trigger false alarms with changes in usage patterns.

  • Hybrid Systems

Combining features of both systems, hybrid valves offer greater accuracy and flexibility, reducing the risk of false alarms.

Installation and Maintenance

Installing a smart water shutoff valve may require some plumbing skills, but many homeowners can handle it themselves. However, hiring a professional plumber can ensure proper installation and adherence to building codes. Regular maintenance, such as cleaning sensors and testing the system, is essential for optimal performance.

Smart Plumbing Shutoff Valves
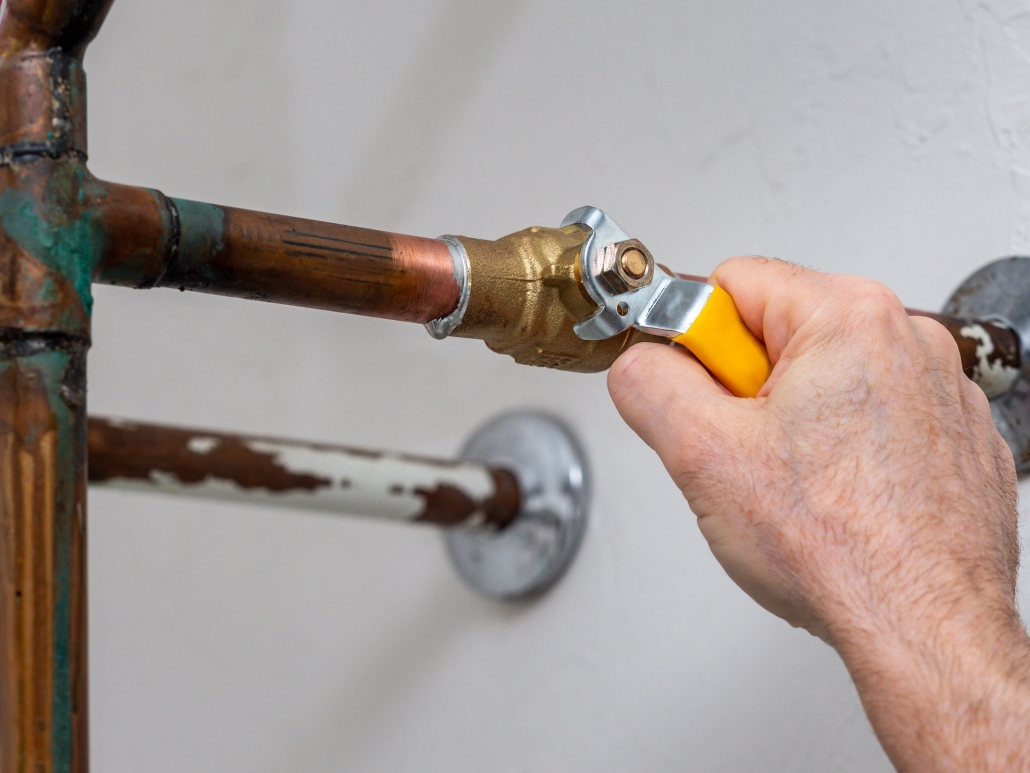
Knowing where to locate your home’s water valve is essential in the case of an unexpected plumbing disaster. A regular check to be sure the valve is not sticking is recommended.

Choosing the Right Valve

When selecting a smart shutoff valve, consider the following features:

  • Alert Settings

Ensure the system can send notifications when issues arise.

  • App Functionality

Look for user-friendly apps for easy monitoring.

  • Battery Backup

Choose a model with a battery backup for power outages.

  • Integration

Consider how the valve will work with your other smart home devices.

Conclusion

Smart plumbing shutoff valves are a worthwhile investment for any homeowner or property manager. They provide peace of mind, protect against costly water damage, and integrate seamlessly into modern smart homes. Whether you’re just starting to explore smart home technology or looking to add another layer of security to your property, these devices are a smart choice.

Protect your property today by considering the benefits and options available with smart plumbing shutoff valves. Don’t wait for a disaster to strike—be proactive in safeguarding your home.

If you’re thinking of installing a smart shutoff valve in your home or property in the Raleigh, NC, call Poole’s Plumbing and make sure it’s installed right the first time. You’ll have peace of mind knowing that if there is a leak, the smart shutoff valve will stop it and notify you.

s

Slab Leak

Slab Leak Solutions

Slab Leak Mysteries Solved for Homeowners

Many unexpected issues can arise in homeownership, testing your patience and resources. A slab leak is a mysterious and often concealed problem that can wreak havoc if left unaddressed. However, understanding slab leaks and how to fix them can bring a sense of relief and control, especially for those with homes built on slab foundations. In this Slab leak guide, we’ll unravel the mystery of slab leaks, explore their implications, and provide practical solutions to address them.

What is a Plumbing Slab Leak?

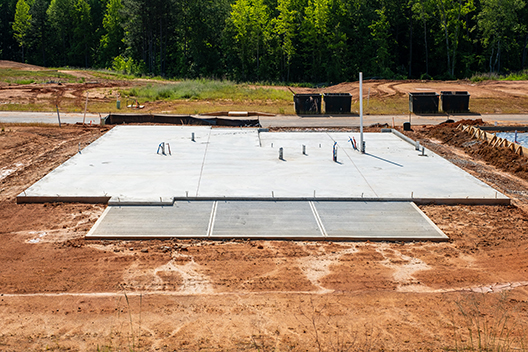
A plumbing slab leak occurs when a water pipe beneath your home’s concrete foundation develops a leak. This often happens for various reasons, including corrosion, shifting soil, or poor installation. Pipes under your slab foundation are part of your home’s plumbing system, carrying water to and from your fixtures. When these pipes develop leaks, the water has nowhere to go but into the slab itself or your home’s foundation. The thought of water leaking beneath your foundation can be unsettling. It’s like a silent intruder, causing potential damage without your immediate knowledge. Slab leaks are often invisible to the eye and cause significant structural issues if not detected early. We’ll discuss spotting these sneaky leaks before they cause extensive harm.

Beneath the surface of your home’s foundation lies a network of pipes working tirelessly to keep your household running smoothly. Understanding how slab leaks occur can give you the upper hand in maintaining your home’s integrity. Explore why these leaks happen and how they can impact your home.

How Bad is a Slab Leak?

Slab leaks are more than annoying; they can threaten your home’s structural integrity. The escaping water from these leaks can erode the soil under your house’s foundation, allowing it to shift and crack. This will lead to uneven floors, cracks in walls, and even compromise the stability of your home.

Imagine a small trickle of water slowly eroding the ground beneath your home. Over time, this can lead to sinkholes, causing your foundation to settle unevenly. The consequences are not just limited to structural damage; they can also lead to increased water bills and mold growth in hidden areas.

The financial implications of slab leaks should not be underestimated. Beyond the immediate repair costs, you may face expenses related to restoring your home’s structure and addressing water damage by understanding the seriousness of slab leaks and taking proactive steps to mitigate these risks.

How to Detect a Slab Leak

Detecting a slab leak early in the game can save your wallet from potentially even more costly repairs. Here are some signs to watch for:

Unexplained Increase in Water Bills

A shocking increase in your water bill, with no change in usage, could be a sign of a hidden leak. Slab leaks will waste water continuously, leading to a higher water bill each month. Monitoring your water bills can provide early clues about potential leaks.

Damp or Warm Spots on Flooring

Unusual dampness or warm spots on your floors, especially in rooms with plumbing, may indicate a slab leak. This occurs when water escapes the pipes and seeps into your home’s flooring. If you notice such spots, it’s time to investigate further.

Low Water Pressure

A sudden decline in water pressure indicates water is escaping from your pipes before reaching your fixture. Slab leaks reduce the efficiency of your plumbing system, causing noticeable changes in water pressure throughout your home.

How to Fix a Slab Leak

Once you’ve detected a slab leak, promptly addressing it to stop further damage to your home is crucial. Here are the steps to fix a slab leak:

Consult a Professional

Slab leaks require professional attention. Poole’s Plumbing has the expertise and tools to detect and fix leaks efficiently. Using advanced equipment like thermal imaging, borescope cameras, and even acoustic leak detectors, they can pinpoint with high precision the exact location of a leak even through concrete without unnecessary excavation.

Choose the Right Repair Method

After locating the leak, professionals will determine the best repair method. This could involve sawing into the concrete to access the damaged pipe, repiping, epoxy pipe coating, or rerouting the plumbing around the affected area. The goal is to fix the leak while minimizing disruption to your home.

Monitor for Future Leaks

After repairs, monitoring your plumbing system for any signs of future leaks is essential. This diligent approach to regular maintenance and inspections can help prevent new leaks from forming, extending the lifespan of your plumbing and protecting your home. It’s a responsible step every homeowner should take.

What to Do if You Suspect a Slab Leak

If you suspect a slab leak, it’s essential to act swiftly. Here’s what you should do:

Turn Off the Water Supply

To prevent further leakage turn off the main water supply to the entire house. This will stop the water waste and prevent further damage, making it easier for professionals to assess the situation. Your main water valve is usually located near the perimeter of your home or in a utility area.

Contact a Plumbing Expert

Contact a trusted plumbing service like Poole’s Plumbing for a thorough inspection. Their slab leak detection expertise ensures they can address the problem effectively. With years of experience and satisfied customers, you can trust their professionalism and dedication.

Document the Issue

Take notes and photographs of the affected areas. Thorough documentation will be important for insurance claims and communicating the problem to the plumbing professionals. Communication is critical to ensuring an efficient repair process.

Conclusion

Slab leaks might be hidden from view, but their impact can be profound. By understanding slab leaks, how to detect them, and the steps to fix them, you can take proactive steps to safeguard your home and wallet. Remember, early detection and professional intervention are crucial in preventing extensive damage, empowering you to take control of your home’s safety.

At Poole’s Plumbing, we pride ourselves on our expertise and commitment to the quality service we give to each homeowner. Don’t wait until it’s too late. If you suspect a slab leak in the Raleigh, North Carolina area, contact Poole’s today. Our licensed professionals are ready to assist you with precise and accurate slab leak detection and repair, ensuring your home remains a safe haven. For more information and customer reviews, visit our website and discover why homeowners trust us with their plumbing needs.

Remember, early detection and professional intervention are crucial in preventing extensive damage. If you suspect a slab leak, don’t hesitate to take action. Your home and your wallet will thank you.

Fixing Your Flush Valve

Fixing Your Flush Valve Before Brown Friday Strikes

Fixing Your Flush Valve — Thanksgiving is around the corner, and you know what that means—Brown Friday, the busiest day for plumbers, is fast approaching. Why? Because everyone’s plumbing gets a workout over the holidays. And trust us, you do not want to be on a first-name basis with your plumber that day. Let’s get those toilets ready for action!

Keeping your toilet in tip-top shape is crucial for household convenience and water conservation. At its heart lies the flush valve, the unsung hero responsible for releasing water from the tank to the bowl. If it’s acting up, you might find yourself facing a running toilet or half-hearted flushes, which isn’t just annoying but also a drain on your utility bill. Here’s your guide to fixing it, DIY style.

Spotting a Flush Valve Gone Rogue

Before you roll up your sleeves, know the signs of a rebellious flush valve:

  • Running Toilet: If your toilet keeps running like it’s training for a marathon, blame the flush valve or flapper.
  • Incomplete Flush: Still seeing ghosts of flushes past? Your flush valve might be slacking.
  • Drip, Drip, Drip: Constant dripping into the bowl? That seal isn’t sealing.

Tools for the Job

You’ll need:

  • Adjustable wrench
  • Screwdriver
  • Sponge or towel
  • New flush valve
    (Most flush valves are interchangeable, but it depends on the size of the ceramic flush hole in the tank.)
  • Replacement flapper (optional, if yours has seen better days)
  • Bucket or container

Having your tools ready makes you feel like a real pro!

How to Tame Your Flush Valve in 5 Steps

Fixing Your Flush Valve
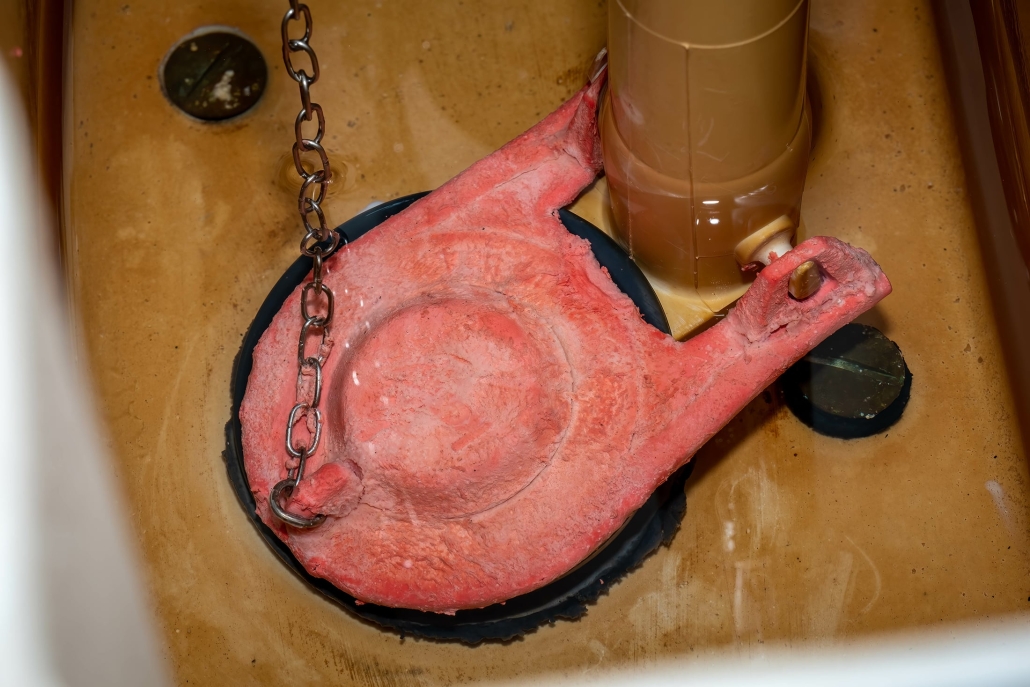
Rubber flapper valve with severe chlorine damage.

Step 1: Shut Off the Water Supply

Turn the shut-off valve clockwise behind the toilet until the water stops. Flush once to empty the tank, then use a sponge to soak up any stubborn water.

Step 2: Drain the Tank

Ensure the tank is bone dry to avoid a watery mess later. Use your trusty sponge or towel to mop up.

Step 3: Remove the Misbehaving Flush Valve

  • Detach the water supply line at the tank’s bottom with an adjustable wrench.
  • Unscrew the two bolts that are holding the tank to the bowl and gently lift it off, setting it aside carefully.
  • Unscrew the locknut to locate and remove the old flush valve. Be gentle on the plastic parts; they’re fragile!

Step 4: Meet the New Flush Valve

  • Insert the new valve into the tank’s hole like it’s going home.
  • Hand-tighten the locknut to secure it.
  • Reattach the flapper valve chain to the flush lever. Teamwork makes the dream work!

Step 5: Reassemble the Tank

  • Carefully place the tank back on the bowl, lining up bolts with holes.
  • Tighten bolts evenly to avoid any porcelain drama.
  • Reconnect the water supply line.

Testing and Maintenance Tips

Fire up the water supply and watch the tank fill. Flush and admire your handiwork:

  • Look for leaks around the base and between the tank and bowl. Tighten connections if needed.

To keep things running smoothly:

  • Regularly check the flush valve and flapper for wear.
  • Clean the tank’s interior to prevent mineral buildup.

Conclusion

Repairing your flush valve is easier than cooking a turkey and less stressful, too! By tackling the issue head-on, you’ll keep your water bill in check and your toilet in top form.

If things go south, and you’re up to your elbows in leaks, give Poole’s Plumbing a call. Our emergency service is available 24/7. Just dial our main number and press option 9 to speak with an on-call technician. We’re here to ensure your plumbing stays drama-free, even on Brown Friday!

Sewage Leak

Sewage Leak How serious is it?

Sewage leaks are not just a nuisance; they may also pose serious health hazards and cause extensive damage to your property. Understanding how to detect sewer leaks, what causes them, and what steps to take can save you a lot of trouble and expense. This guide will provide you with everything you need to know about dealing with sewer leaks, including when it’s time to call in the professionals.

How to Detect Sewer Leaks

Detecting a sewer leak early can prevent minor issues from becoming major headaches. Here are some signs to watch for:

Unpleasant Odors
A persistent foul smell, indoors or outdoors, can indicate a sewer leak. This odor is often similar to rotten eggs and can be pretty overpowering.

Slow Drains
If water drains slowly from the sinks, bathtubs, or toilets, this could be a sign of a blockage or leak in the sewer line.

Gurgling Noises
Gurgling sounds from your drains or toilet may indicate trapped air in the sewer line due to a leak or blockage.

Lush Patches of Grass
If you notice an unusually green grass area or a lush patch of grass in your yard, it could be a sign that a sewer leak is providing extra nutrients to that area.

Foundation Cracks
Sewer leaks can lead to soil erosion, which can crack your home’s foundation. If you notice new cracks, it’s worth investigating further.

Pest Infestation
A sudden increase in rodents or insects around your home can signify a sewer leak, as these pests are often attracted to moisture and waste.

Common Causes of Sewer Leaks

Understanding what causes sewer leaks can help you take preventive measures. Here are some common culprits:

Tree Roots
With a growing tree, the roots naturally seek out water sources and can infiltrate sewer lines through tiny cracks or joints, eventually causing significant damage.

Corrosion
Over time, sewer pipes, especially cast iron ones, can corrode and weaken, leading to leaks.

Blockages
Kitchen grease, hair, and other debris can accumulate in the sewer line, causing blockages, increasing pressure, and leading to leaks.

Ground Shifting

Natural shifts in the ground caused by construction, earthquakes, or settling can cause sewer lines to crack or become misaligned.

Aging Infrastructure

Older sewer systems are more susceptible to leaks due to wear and tear. Materials like clay and cast iron, commonly used in older systems, are particularly vulnerable.

What to Do if You Suspect a Sewer Leak

If you think you have a sewer leak, acting quickly can minimize damage and repair costs. Here’s what you should do:

Confirm the Leak
Check for the signs mentioned earlier to confirm your suspicion. You can also conduct a simple dye test by adding a few drops of food-grade food coloring to the toilet tank. Then, see if it appears in the bowl without flushing the toilet.

Shut Off the Water Supply
If you confirm a leak, shut off the main water supply to prevent further damage.

Avoid Using Drains
Only use sinks, toilets, or other drains once the issue is resolved to avoid exacerbating it.

Document or write down the affected damaged area.
Take photos or videos of the affected areas for insurance purposes.

When to Call a Professional

While minor blockages can sometimes be dealt with using a plunger or drain snake, sewer leaks are generally not DIY-friendly. Here’s when you should call a professional:

Persistent Symptoms
If you’ve noticed persistent symptoms of a leak despite your efforts, it’s time to call in the experts.

Multiple Affected Areas
If multiple drains in your home show signs of a problem, there is likely a deeper issue in the main sewer line.

Structural Damage
Any signs of structural damage, like foundation cracks or sinkholes, should be addressed by professionals immediately.

Unidentified Source
If you can’t identify the source of the leak, a professional can perform a thorough inspection, often using specialized equipment like cameras to pinpoint the issue.

Health Concerns
If the sewer leak is causing health issues or unbearable odors, immediate professional intervention is crucial.

Resource: EPA’s compliance goal

Sewer Leaks

Conclusion

Sewer leaks can be a severe issue, but knowing how to detect them, understanding their causes, and taking appropriate action can keep your home safe and sanitary. While many minor problems can be handled independently, don’t hesitate to call in professionals for more persistent or severe issues.

Preventive measures like regular inspections and mindful waste disposal can help maintain a healthy sewer system. For more clarification or expert advice, contact or consult a professional plumber.

www.poolesplumbing.com

No Hot Water

No Hot Water, Why do I suddenly have no hot water?

No hot water, What to Do When Your Water Heater Won’t Heat Up – Water heaters are essential appliances in most homes, providing hot water for everyday needs like showers, dishes, and laundry. But what happens when you turn on the tap and nothing but cold water comes out? This article will explore common issues with both standard and tankless water heaters and outline the steps you should take to resolve the problem.

Standard Water Heater Malfunction

Common Issues

  1. No Power or Gas Supply:
  2. Electric water heaters rely on a steady power supply to heat water. A tripped circuit breaker or a blown fuse could be the culprit.
  3. Gas water heaters depend on a consistent flow of natural gas. So, Before anything, you must look to see if the gas valve is open and the pilot light is lit.
  4. Faulty Thermostat:
  5. The thermostat regulates the water’s temperature. If it malfunctions, it may not signal the heater to turn on.
  6. Broken Heating Elements:
  7. Electric water heaters use heating elements. The heating elements heat up to provide warm or hot water.
  8. These elements can burn out over time and may need replacement.
  9. Sediment Build-Up:
  10. Over time, minerals from hard water may affect the tank’s efficiency as sediment accumulates at the bottom. This sediment build-up can insulate the water from the heat source, causing lukewarm water.
  11. Leaking Tank:
  12. A tank leak can prevent water from reaching the desired temperature. In severe cases, a complete tank replacement might be necessary.
Standard Water Heater

Steps to Take

  1. Check the Power or Gas Supply:
  2. Make sure the unit is receiving power or gas. You must reset the circuit breaker or check the fuse box for electric heaters. For gas heaters, ensure the gas valve is open and the pilot light is on,
  3. Inspect the Thermostat:
  4. Adjust the thermostat settings and see if it triggers the heater. If not, it might need replacement.
  5. Examine the Heating Elements:
  6. Electric heaters may need a multimeter to test the heating elements for continuity. Replace if necessary.
  7. Flush the Tank:
  8. Drain the tank to remove sediment build-up. This can improve efficiency and restore proper heating.
  9. Check for Leaks:
  10. Look for any visible signs of leakage. If you find a leak, contact a professional for repair or replacement.

Tankless Water Heater Malfunction

Common Issues

  1. Insufficient Power or Gas Supply:
  2. Like standard heaters, tankless systems require a consistent power or gas supply. Any disruption can impact performance.
  3. Cold Water Sandwich:
  4. This phenomenon occurs when there’s a brief burst of cold water during a hot water usage cycle, often due to a lag in heating.
  5. Mineral Build-Up:
  6. Like standard heaters, tankless systems can suffer from mineral build-up, especially in challenging water areas. This can clog the system and inhibit heating.
  7. Flow Sensor Issues:
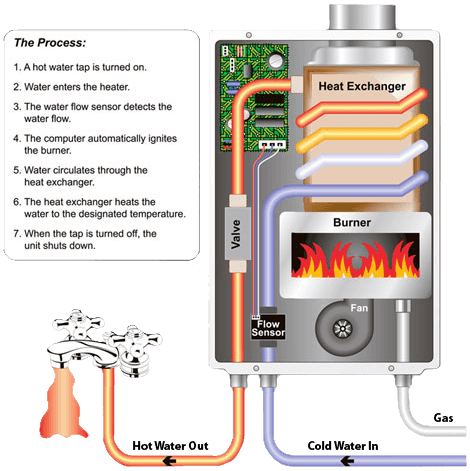
  8. The flow sensor detects water movement and signals the unit to start heating. If it malfunctions, it may not trigger the heating process.
  9. Exhaust or Air Supply Blockage:
  10. Tankless heaters require proper ventilation. As a safety measure, any exhaust or air intake blockage can cause the tankless unit to shut down.

Steps to Take

Tankless water heater Malfunction
  1. Verify Power or Gas Supply:
  2. Ensure the unit has power or gas. Reset the unit if necessary and check for tripped switches or closed gas valves.
  3. Check for Error Codes:
  4. Modern tankless water heaters will display error codes. Refer to your user manual for help in understanding and addressing these codes.
  5. Clean or Replace the Flow Sensor:
  6. If the flow sensor is dirty or defective, clean or replace it. This resolves issues related to water flow detection.
  7. Descale the Unit:
  8. Regularly descale your tankless heater to prevent mineral build-up. Use a vinegar solution or a commercial descaling kit.
  9. Ensure Proper Ventilation:
  10. Check that the exhaust and air intake areas are free from obstructions. Clear any blockages to ensure the system operates safely and effectively.
No Hot Water?

When to Call a Professional

While many issues can be addressed with basic DIY skills, others require professional intervention. If you need more clarification or are uncomfortable performing any troubleshooting steps, it’s best to call a professional.

A professional plumber will accurately diagnose the problem and perform necessary repairs, ensuring your water heater is back up and running smoothly.

Understanding common plumbing issues and taking appropriate action can minimize downtime and keep your hot water flowing. Remember, regular maintenance is vital to prolonging the life of your water heater, be it a standard or tankless model.

www.poolesplumbing.com

Leaking Plumbing Behind a Wall The Hidden Dangers

Leaking Plumbing Behind a Wall — Imagine this scenario. You wake up one morning, step into your living room, and notice a dark, damp spot on your pristine wall. You touch it, and it feels cold and wet. Panic sets in as you realize you might have a hidden leak. This is not just an inconvenience; it’s a potential ticking time bomb.

In this blog post, we’ll explore the hidden dangers of leaking plumbing behind walls, particularly for homeowners in North Carolina. You’ll learn about the health risks, how to detect leaks, and why a professional inspection is crucial. Stay with us to protect your home and health from unseen water damage.

Dangers of Leaking Water Lines Behind Walls

When water leaks behind walls, it’s not always immediately noticeable. Over time, even a tiny leak can cause significant structural damage to your home. The water can seep into wooden beams, leading to rot and weakening your house’s framework. It can compromise your home’s foundation, causing cracks and instability.

Additionally, leaking water lines can damage electrical wiring hidden behind walls. This creates a severe fire hazard, posing a risk to your safety. In North Carolina, where homes often face humid conditions, the dangers of hidden leaks are even more pronounced because moisture can spread more rapidly.

Health Concerns of Leaked Water Behind Walls

Beyond the structural risks, hidden leaks can also pose severe health threats. Moist environments foster mold and mildew growth, which can spread throughout your home unnoticed. Mold spores can eventually become airborne, impacting your home’s indoor air quality and leading to respiratory issues, especially in children and the elderly.

Some common health issues and cons caused by mold include allergic reactions, asthma attacks, and other respiratory ailments. Long-term exposure can even lead to chronic conditions. Identifying and eradicating mold as soon as possible is essential to ensure a healthy living environment.

Leaking Plumbing Behind a Wall

Signs of a Leak Behind a Wall

Detecting hidden leaks early can save you a lot of trouble. Here are some telltale signs:

  • Unexplained Increase in Water Bills: If your water bills are unusually high, you might have a hidden leak.
  • Damp Spots on Walls or Floors: Dark, wet patches indicate a leak.
  • Mold or Mildew in Unusual Places: Mold growth not directly related to bathroom or kitchen areas is a red flag.
  • Peeling Paint or Wallpaper: Moisture behind walls can cause paint or wallpaper to peel.
  • Musty Odors: Persistent damp smells are often caused by hidden mold and mildew.

How to Detect Leaking Pipes That Can’t Be Seen Behind Walls

Detecting hidden leaks requires a combination of vigilance and technology. Here are some methods to identify leaks behind walls:

  • Use a Moisture Meter: A moisture meter can detect dampness levels in your walls, alerting you to potential leaks.
  • Infrared Cameras: These devices show temperature differences in walls, helping you spot damp areas.
  • Listen for Drips: Turn off all faucets and listen closely for the sound of dripping water.
  • Monitor Water Meter: Check your water meter, then refrain from using any water for a few hours. If the meter changes, you likely have a leak.

Why a Professional Plumbing Inspection Is Important If You Suspect a Leak Behind a Wall

While DIY methods can help, nothing beats a professional inspection. Poole’s Plumbing has the expertise and tools to detect and fix leaks efficiently. They can conduct thorough checks using advanced equipment like thermal imaging cameras and acoustic leak detectors.

In North Carolina, Poole’s Plumbing is one of the most trusted names in the industry. With their professional services, they can quickly identify and repair leaks, saving you from potential damage and costly repairs. Don’t put off addressing a suspected leak; the longer it leaks, the more damage it will cause.

Prevent Structural Damage

Hidden leaks can cause severe structural damage. Water weakens wood, corrodes metal, and deteriorates drywall. Over time, this can lead to significant repairs and even compromise the integrity of your home. A professional inspection can help catch these issues early, preventing long-term damage.

Safeguard Your Health

Mold and mildew are more than unsightly; they’re hazardous to your health. Addressing hidden leaks can prevent mold growth and ensure a healthier living environment. Your family’s well-being is worth the effort to keep your home dry and mold-free.

Save on Utility Bills

Hidden leaks waste water, driving up utility bills. You can save money on your monthly water expenses by detecting and fixing leaks promptly. Over time, these savings can add up, making the investment in professional inspections worthwhile.

Protect Your Investment

Your home, your most significant investment. Ensuring it remains in good condition is crucial for maintaining its value. Regular plumbing inspections and timely repairs protect your investment, ensuring your home remains a safe and comfortable place to live.

Enhance Home Comfort

Leaks create damp, musty environments that are uncomfortable to live in. By keeping your home dry, you enhance its comfort and livability. Regular maintenance ensures your house is pleasant and healthy for you and your family.

Environmental Responsibility

Fixing leaks promptly is also an environmentally responsible practice. Water is a precious resource, and wasting it through leaks is detrimental to the environment. Maintaining your plumbing contributes to sustainability efforts, conserving water for future generations.

Long-Term Cost Savings

Investing in regular plumbing inspections can save you money in the long run. Early detection and repair prevent more severe damage, reducing the need for costly repairs. It’s a proactive approach that pays off over time.

Advanced Leak Detection Technologies

Modern technology has made leak detection more accurate and less invasive. Tools such as thermal imaging cameras and acoustic detectors allow plumbers to pinpoint leaks without tearing down walls. These technologies enable efficient repairs, minimizing disruption to your home.

Routine Maintenance

Regular maintenance checks are essential for preventing hidden leaks. Professional plumbers can inspect your entire plumbing system, identifying potential issues before they escalate. This proactive approach keeps your plumbing in top condition, reducing the risk of unexpected leaks.

Conclusion

Hidden leaks behind walls are more than just a nuisance; they seriously threaten your home and health. By understanding the risks that hidden leaks can cause in your house and taking proactive measures, you can protect your home from structural damage, safeguard your family’s health, and save on utility bills.

If you suspect a leak, don’t wait—contact Poole’s Plumbing today. Their professional inspections and advanced detection methods ensure your home remains safe, dry, and comfortable. Don’t put it off; the longer it leaks, the more damage it will cause. Book a Poole’s Plumbing house inspection now and secure your home’s future.

Leak Detection

Leak Detection and Toilet Repair!

With the proper knowledge, you can tackle some of the most common plumbing problems head-on. This article covers two essential aspects of plumbing maintenance: leak detection and toilet repair. Whether you’re a homeowner, a property manager, or a DIY enthusiast, understanding these basics can save you time and money.

The Importance of Leak Detection

Water leaks can damage your property, lead to higher water bills, and even pose health risks due to mold growth. Early detection is critical to preventing these issues.

Leak Detection

Common Signs of a Leak

Unexplained Increase in Water Bills: A sudden increase in your water utility bill is the first sign of a hidden leak in your system.

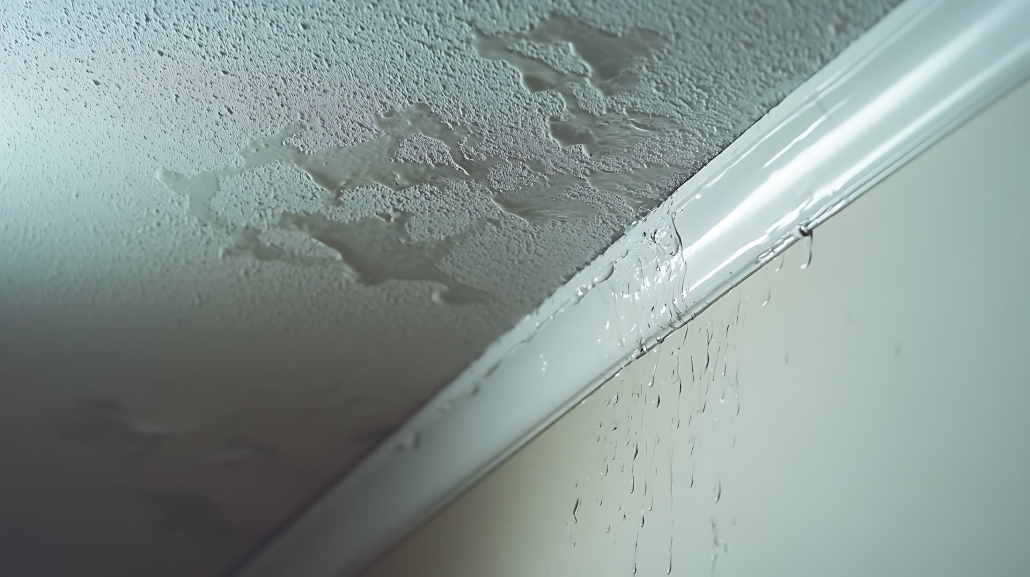
Damp or Discolored Walls and Ceilings: Visible water stains or a musty smell can indicate a leak behind your walls or ceilings.

Dripping Sounds: Hearing water when all faucets are turned off is a telltale of a leak.

Low Water Pressure: A drop in water pressure can result from a leak in the main water line.

How to Detect Leaks

Check Your Water Meter:

  • Turn off all water sources in your home.
  • Read the water meter and note the reading.
  • Wait for an hour without water, then recheck the meter. A change in the reading indicates a leak.

Inspect Common Leak Areas:

Faucets and Showerheads: Look for drips and puddles around bathroom and kitchen fixtures.

Toilets: Add a few drops of any food-grade or based coloring to the toilet tank, and if that color seeps into the bowl within 30 minutes without flushing, there’s a leak.

Under Sinks: Check for dampness or water stains in cabinets under sinks.

Pipes and Hoses: Inspect visible pipes and hoses for cracks, corrosion, or loose connections.

Use Leak Detection Tools:

Leak Detectors: Electronic devices can sense moisture and sound alarms when a leak is detected.

Thermal Imaging Cameras: These can identify temperature differences behind walls, indicating potential leaks.

Toilet Repair

Toilet Repair Basics

A leaky or malfunctioning toilet can waste up to 200 gallons of water daily, adding unnecessary costs to your water bill. Here are some common issues and how to fix them.

Common Toilet Problems

  • Running Toilet: Water continuously flows into the bowl, often due to a faulty flapper.
  • Weak Flush: Low water levels in the tank or a clogged rim jet can cause this problem.
  • Leaking Base: Water pooling around the toilet base typically indicates a seal or wax ring issue.
  • Clogs: Frequent clogs can result from flushing inappropriate items or a blockage in the sewer line.

How to Fix Common Issues

Fixing a Running Toilet:

Replace the Flapper:

  • Turn off your main water supply to the toilet.
  • To empty the tank completely, remove the toilet tank lid from the back and then flush the toilet to empty the tank completely.
  • Unscrew the flapper from the bottom of the tank and replace it with a new one.
  • Turn the water supply back on and test the flush.

Improving a Weak Flush:

Adjust the Water Level:

Open the tank on your toilet and check the water level. It should be about an inch below the overflow tube.

Adjust the float arm or fill valve to raise the water level.

Clean the Rim Jets:

Clear mineral deposits or debris from the rim jets under the toilet bowl’s edge with a wire hanger.

Repairing a Leaking Base:

Replace the Wax Ring:

Turn off the water supply and flush the toilet to empty the tank.

Disconnect the main water supply line and unbolt the toilet from the floor.

Lift the toilet and set it aside, then remove the old wax ring.

Then, please place a new wax ring on the flange and reinstall the toilet to ensure it sits evenly.

Reconnect the water supply line and test for leaks.

Clearing a Clog:

Use a Toilet Plunger:

Before starting the process, ensure sufficient coverage of the plunger cup.

Position the plunger over the drain, push down firmly and pull up quickly. Repeat until the clog is cleared.

Auger for your toilet:

Insert the Auger or drill tool into the toilet bowl and crank the handle to push the cable through the trap.

Once the clog is reached, twist and push to break it up, then pull the drill out.

Conclusion

Maintaining your plumbing system through regular leak detection and prompt toilet repairs can prevent costly damages and save on water bills. Those who prefer a helping hand should consider booking a professional plumber for more complex issues.

If you’re ready to tackle your next plumbing challenge, remember that knowledge is your best tool.

www.poolesplumbing.com

When DIY Plumbing Projects Go Wrong

When DIY Plumbing Projects Go Wrong, Do I Need a Plumber?

When DIY Plumbing Projects Go Wrong. In today’s age of YouTube tutorials and DIY blogs, tackling home repair projects on your own is tempting. However, Plumbing issues often present unique challenges that can quickly escalate from minor inconvenience to significant problems. If you’re wondering, “Do I need a plumber?” Let’s weigh the pros and cons, highlighting the risks and costs associated with DIY plumbing.

The Allure of DIY

There’s no denying the satisfaction that comes from completing a DIY project. It feels empowering to fix something with your own hands, and it can also be a way to save money. Many homeowners take pride in handling minor repairs and maintenance tasks around the house. However, when it comes to plumbing, things can get tricky fast.

Common DIY Plumbing Projects

Some everyday plumbing tasks that homeowners often attempt include:

• Unclogging drains
• Fixing leaking faucets
• Replacing showerheads
• Installing new toilets or sinks

While these tasks may seem straightforward at first glance, they can quickly become complicated without the right tools and expertise.

The Hidden Costs of DIY Plumbing

Do I need a Plumber?

Misdiagnosis
One of the most common risks of DIY plumbing is misdiagnosing the problem. A leak from a faucet is a symptom of a more significant issue within your plumbing system. Without proper training, you might fix the visible problem while ignoring the underlying cause, leading to more critical issues.

Inadequate Tools and Materials
DIY individuals may need access to specialized tools and high-quality materials like professional plumbers. Using inadequate tools can result in a temporary fix that doesn’t hold up or, worse, cause additional damage that requires more extensive repairs.

Code Violations
Residential plumbing work often needs to comply with local building codes and regulations. A professional plumber is well-versed in these requirements and ensures that work meets legal standards. DIY projects might inadvertently violate these codes, leading to fines, potential safety hazards, and complications when selling your home.

Time and Effort
What might start as a simple weekend project can quickly become time-consuming. If the project goes differently than planned, you could spend countless hours troubleshooting, making multiple trips to the hardware store, and dealing with the frustration of not having running water or a functioning bathroom.

Potential for Increased Damage
Incorrectly installed or repaired plumbing can lead to significant water damage. A small leak can quickly become a flood, damaging floors, walls, and personal belongings. Potential water damage can also result in mold growth, posing health risks and requiring expensive remediation.

When to Call a Professional Plumber

While a handy homeowner can handle some minor plumbing tasks, there are certain situations where calling a professional plumber is the best course of action:

Major Leaks
If you have a significant leak or suspect a pipe has burst, it’s crucial to call a plumber immediately. Significant leaks can cause extensive water damage in a short amount of time.

Persistent Clogs
If you’ve tried to unclog a drain multiple times without success, it might indicate a deeper issue within your plumbing system. Professionals can diagnose and fix the problem using specialized equipment.

Low Water Pressure
Consistently low water pressure can indicate a severe issue, such as pipe corrosion, hidden leaks, or problems with the water supply line. Professionals can identify the leading cause and provide a lasting solution.

Remodeling Projects
Hiring a professional is essential if your project involves a bathroom or kitchen remodel, including moving or installing new plumbing. Incorrectly installed pipes can lead to leaks, code violations, and other costly problems.

Water Heater Issues
Water heaters are complex appliances that require proper installation and maintenance. If you’re experiencing problems with your water heater, such as inconsistent temperatures or strange noises, it’s best to consult a professional.

Conclusion

While the DIY approach can be rewarding and cost-effective for some home repairs, plumbing often requires the expertise of a professional. Misdiagnosing issues, using inadequate tools, and violating building codes can increase costs and potential damage. When in doubt, it’s always better to err on caution and call a licensed plumber. Doing so can save you time, money, and the stress of dealing with preventable plumbing disasters.

If you’re facing a plumbing dilemma and are trying to decide whether to tackle it yourself or call in the pros, consider the potential risks and benefits. Sometimes, the peace of mind that comes with knowing the job is done right is worth every penny.

www.poolesplumbing.com

Top Plumbing FAQs Answered

Top Plumbing FAQs Answered

Top Plumbing FAQs Answered – Plumbing issues can undoubtedly become a real headache whether you’re a homeowner, a DIY enthusiast, or a property manager. To help you tackle some of the most common plumbing dilemmas, we’ve compiled a list of frequently asked questions and comprehensive answers. Let’s dive in!

1. Why is my faucet dripping?

Dripping faucets can be more than an annoyance; it can also waste water over time. Here are some common causes and solutions:

  • Worn-out Washer: A worn-out washer is the most common cause of a dripping faucet. Replacing the washer can solve the problem.
  • O-ring Issues: If the O-ring is loose or worn out, it can cause leaks. Tightening or replacing the O-ring can fix this.
  • Corroded Valve Seat: Corrosion can develop around the valve seat, leading to leaks. You may need to replace it or have it professionally serviced.
  • What should I do if my toilet keeps running?

Having a continuously running toilet may waste gallons of water each day. Here’s what you can check and fix:

  • Flapper Chain: Ensure the chain connected to the flapper is short enough and short enough. Adjust it so the flapper closes appropriately.
  • Flapper Valve: A worn-out flapper valve may not seal correctly. Replacing the flapper often solves the issue.
  • Float Adjustment: The float may be set too high, causing water to enter the overflow tube continuously. Adjust the float to the correct level.

2. How can I prevent clogged drains?

Preventing clogs makes it easier than dealing with them once they occur. Here are some proactive tips:

  • Use Drain Guards: Install drain guards to capture debris such as hair, food particles, and other debris before they go down the drain.
  • Avoid Pouring Grease: Grease can solidify in your pipes and cause clogs. So, dispose of grease in a container and throw it in the trash.
  • Regular Cleaning: Clean your drains with baking soda and vinegar, followed by hot water.

3. Why is my water pressure low?

Low water pressure can be frustrating, mainly affecting your daily routine. Here are some potential causes and solutions:

  • Clogged Aerator: Mineral deposits can clog the aerator in your faucets, reducing water pressure. Remove and clean the aerator to restore pressure.
  • Leaks: Check your pipes for leaks, as they can lead to reduced water pressure. Fix any leaks promptly.
  • Pressure Regulator: If your home has a pressure regulator, it may need adjustment or replacement.

4. What are the signs of a hidden leak?

Having hidden leaks can cause significant damage over time. Look out for these warning signs:

  • Water Stains: Discolored patches on walls, ceilings, or floors can indicate a hidden leak.
  • Mold Growth: Excess moisture from leaks can lead to mold and mildew growth.
  • Unusually High Water Bills: A sudden spike in water usage and your bill could indicate an undetected leak.

5. How do I thaw frozen pipes?

Here’s how to safely thaw them out, as frozen pipes may burst and cause extensive damage.

  • Open Faucets: Open or turn on the faucet connected to the frozen pipe. This will allow the water to flow once it melts.
  • Apply Heat: Heat the frozen section of the pipe with a hairdryer or other heating sources, like a heating pad or warm towels.
  • Avoid Open Flames: Never use an open flame as your heat source to thaw pipes; it may damage the pipes and pose a fire hazard.

6. When should I call a professional plumber?

While many plumbing issues can be handled with DIY knowledge, some require professional expertise. Consider calling a plumber if you encounter any of the following:

  • Major Leaks: A professional should handle significant water leaks, especially those involving main water lines.
  • Sewer Backups: Backed-up sewage poses health risks and should be addressed by a licensed plumber.
  • Water Heater Problems: Your water heater may have several issues or concerns, such as strange noises or inconsistent hot water, requiring professional attention.
professional plumber

Conclusion

Understanding plumbing basics may save you time, money, and frustration. For more complex problems, don’t hesitate to call in the experts.

Feel free to share your plumbing tips or questions in the comments below! Remember, a little maintenance goes a long way in keeping your plumbing system running smoothly.

If you spot a leak in your area, you can report it here in the Raleigh, NC, Area! Raleigh Water & Sewer Report Leak

www.poolesplumbing.com

Top 5 Plumbing Myths Debunked

Top 5 Plumbing Myths Debunked

Top 5 Plumbing Myths Debunked — Plumbing issues can definitely be a homeowner’s worst nightmare. But when it comes to fixing these problems, there’s a lot of misinformation out there. This article will debunk some of the most common plumbing myths, helping homeowners and DIY enthusiasts avoid costly mistakes.

Myth 1: “If It’s Draining, There’s No Clog”

One of the most persistent myths is that there’s no clog as long as water drains. A partial clog can restrict water flow and lead to more significant issues. Slow drainage or gurgling sounds are often early signs of a developing clog that must be addressed before becoming a significant problem.

What to Do:

  • Regularly use a drain cleaner to maintain clear pipes.
  • Pouring grease down the drain is something you should not do as it can solidify and cause blockages.
  • Use a drain guard to catch hair and debris.

Myth 2: “Lemons Clean Your Garbage Disposal”

While many individuals like to use lemons to make their garbage disposal smell fresher, they won’t clean it. The citric acid in the lemons can corrode the metal components over time.

What to Do:

  • Instead of lemons, use ice cubes and dish soap to clean your disposal. The ice helps to dislodge debris, while the soap cuts through grease.

Myth 3: “Flushable Wipes Are Safe to Flush”

Despite what the packaging might say, flushable wipes are unsafe for your plumbing system. These wipes do not break down as quickly as toilet paper, leading to potential clogs and damage to your sewer system.

What to Do:

  • Stick to toilet paper for flushing and dispose of wipes in the trash.

Myth 4: ” Having A Brick in the Toilet Tank Saves Water”

However, placing a brick in your toilet tank to save water is an old trick that does more harm than good. The brick can disintegrate over time, causing damage to the toilet’s internal parts. It also needs to displace the water, leading to efficient flushing correctly.

What to Do:

  • Invest in a low-flow toilet designed to save water without compromising on performance.

Myth 5: “Plunging Harder Will Clear Any Clog”

While using brute force with a plunger may seem like a good idea, it can worsen the clog or damage your pipes.

What to Do:

  • Use gentle, steady pressure with the plunger. If that doesn’t work, try an enzyme-based drain cleaner or call a professional plumber.

Conclusion: the Top 5 Plumbing Myths Debunked

Avoiding these common plumbing myths can save you time, money, and frustration. By understanding the truth behind these myths or misconceptions, you can take better care of your home’s plumbing system. If you need more clarification about tackling a plumbing issue, it’s always best to consult a professional.

Feel free to share this article with fellow homeowners and DIY enthusiasts to spread the knowledge and keep those pipes running smoothly!

www.poolesplumbing.com

Residential Plumbing Maintenance

How Climate Affects Residential Plumbing Maintenance

Residential Plumbing Maintenance for your home’s plumbing system can be challenging, and you must consider your local climate. Whether you live in a temperate, arid, or tropical region, the weather plays a significant role in how you should care for your pipes. Let’s explore how plumbing maintenance varies across these climates and provide actionable tips to keep your system running smoothly.

Temperate Regions

In temperate regions, where seasonal temperature fluctuations are common, homeowners must protect their plumbing systems from freezing during winter. Here are some essential tips:

  • Insulating Pipes: Wrap exposed pipes with insulation to prevent them from freezing and bursting. Pay close attention to pipes in unheated areas like attics, basements, and garages.
  • Allowing Faucets to Drip: During frigid spells, allow faucets to drip slightly. This helps prevent freezing by keeping water moving through the pipes.
  • Regular Maintenance: Check for leaks and inspect water pressure regularly to avoid unexpected plumbing issues.

Arid Regions

Arid climates, characterized by low humidity and high temperatures, present unique plumbing challenges, particularly concerning hard water. Here’s how to manage your plumbing in such conditions:

  • Install a Water Softener: Hard water is common in arid regions, causing mineral buildup in pipes. Installing a water softener may mitigate this issue, extending the lifespan of your plumbing system.
  • Regular Descaling: Periodically descale faucets, showerheads, and other fixtures to remove mineral deposits and maintain water flow.
  • Monitor Water Usage: High temperatures can increase water evaporation rates, so be mindful of your water usage and fix any leaks promptly to conserve water.

Tropical Areas

Clear Gutters and Downspouts

Heavy rains and high humidity are typical in tropical regions, leading to water damage and flooding if not appropriately managed. Here are some essential tips for plumbing maintenance in tropical climates:

  • Clear Gutters and Downspouts: Regularly clean gutters and downspouts to ensure they are debris-free. This may prevent water from accumulating and causing damage to your home’s foundation and plumbing system.
  • Install Backflow Preventers: Heavy rains can cause sewer systems to back up. Installing backflow preventers can protect your home from potential sewage contamination.
  • Check for Leaks: Regularly inspect your plumbing system for leaks, as high humidity can exacerbate water damage over time.

Universal Plumbing Maintenance Tips

Regardless of the climate you live in, there are some universal plumbing maintenance tips that every homeowner, property manager, and DIY enthusiast should follow:

  • Inspect Regularly: Regular inspections help you catch minor issues before they become significant problems. Check your pipes and fixtures for leaks, rust, and corrosion.
  • Monitoring Water Pressure: Ensure your water pressure is within the recommended range. High water pressure can strain your plumbing system and lead to leaks.
  • Be Proactive: Address any minor issues immediately. Ignoring small leaks or blockages can lead to costly repairs later.
  • Seasonal Maintenance: Tailor your maintenance routine according to the season. For example, winterize your pipes in colder months and focus on clearing gutters during rainy seasons.

Conclusion

Taking care of your residential plumbing system requires attention to the specific climate in which you reside. By following the climate-specific tips outlined above and adhering to universal maintenance practices, you can ensure that your plumbing system remains efficient and durable. Consider consulting a plumbing professional who understands your local climate conditions for more personalized advice.

So, don’t wait until a minor plumbing issue becomes a major headache. Stay proactive, and your plumbing system will thank you!

Contact us or visit our website for more expert tips and advice. Happy plumbing!

www.poolesplumbing.com

How to Fix a Leaking Toilet

How to Fix a Leaking Toilet

Fix a Leaking Toilet — A leaking toilet may be more than just an everyday nuisance; it can also waste water and increase your utility bill. Fortunately, many common issues that cause a toilet to leak can be fixed with a few tools and some basic know-how. In this article, we’ll guide you through the steps to identify and fix the most common causes of a leaking toilet.

Tools You’ll Need

Before you begin, gather the following tools:

  • Adjustable wrench
  • Screwdriver
  • Plumber’s tape
  • Replacement parts (flapper valve, fill valve, wax ring, etc.)
  • Bucket (to catch any excess water)
  • Towel or sponge (to wipe up any spills)

Common Issues Causing Toilet Leaks

Loose or Deteriorated Mounting Bolts

Loose or deteriorated mounting bolts can cause the toilet to rock and leak water from the wax ring seal.

Faulty Water Supply Line

A faulty water supply line can cause leaks at the connection points to the tank or bowl.

Loose or Deteriorated Mounting Bolts

Loose or deteriorated mounting bolts can cause the toilet to rock and leak water from the wax ring seal.

Faulty Water Supply Line

A faulty water supply line can cause leaks at the connection points to the tank or bowl.


Step-by-Step Guide to Fixing a Leaking Toilet

Step 1: Turn Off the Water Supply

Locate the shut-off valve behind the toilet. After doing this, turn the shut-off valve clockwise, which will stop the water flow.

Step 2: Emptying the Tank

To drain all of the water from the tank, flush the toilet, and then you may use a rag, towel, or sponge to remove any remaining water.

Step 3: Inspect the Flapper Valve

To inspect the flapper valve, you need to remove the tank lid. After removing the tank lid and the valve appears worn or damaged, you may replace it with a new one.

How to Replace the Flapper Valve:

  1. Remove the old flapper by detaching it from the chain and the pegs at the base of the overflow tube.
  2. Then, attach the new flapper to the pegs and reconnect the chain.
  3. Adjust the chain length so the flapper can fully close.

Step 4: Check the Fill Valve

The fill valve will need to be checked and inspected along with the fill valve for any signs of damage or looseness. If it’s damaged, replace it with a new fill valve.

How to Replace the Fill Valve:

  1. Unscrew the old fill valve from the bottom of the tank using an adjustable wrench.
  2. Please insert the new fill valve and secure it.
  3. You will need to reconnect the water supply line and tighten the nut.

Step 5: Examine the Tank and Bowl for Cracks

Check the tank and bowl for any visible cracks. If you find any, you may need to replace the entire toilet.

Step 6: Secure the Mounting Bolts

If the toilet rocks, check the mounting bolts at the base. Use your wrench tool to tighten them, but be careful not to overtighten them, as this can crack the porcelain.

Step 7: Replace the Wax Ring

If water leaks from the toilet’s base, the wax ring might need to be replaced.

How to Replace the Wax Ring:

  1. Turn off the water supply and empty the tank.
  2. Disconnect the water supply line.
  3. Use a tool to remove the bolts that secure the toilet to the floor.
  4. Be careful; lift the toilet off the flange and set it aside.
  5. Use a tool to scrape off the old wax ring from the flange.
  6. Replace the old wax ring with the new wax ring on the flange.
  7. Be careful to lower the toilet back into place onto the flange, ensuring the bolts pass through the holes in the base.
  8. Use your tools to tighten the bolts and reconnect the water supply.

Step 8: Check the Water Supply Line

Inspect the water supply line for leaks. Replace the line and use the plumber’s tape to secure the connections if necessary.

Step 9: Turn On the Water Supply

Turn the shut-off valve counterclockwise to restore the water supply. Flushing the toilet will allow you to check for any remaining leaks.

How to Fix a Leaky Toilet

Conclusion

Fixing a leaking toilet can save money and prevent further damage to your bathroom. You can confidently tackle most toilet leaks by following these steps and identifying the common issues. If you need help with any steps, consult a professional plumber.

Remember, a well-maintained toilet conserves water and ensures a trouble-free bathroom experience.

www.poolesplubing.com

Cracked Toilet

When to Replace Your Toilet

When to Replace Your Toilet. Most don’t think much about our plumbing until something goes wrong. Whether it’s a dripping faucet, a wet spot under the sink, or an issue with the toilet, these problems can grab our attention quickly. However, waiting for a crack or leak before addressing toilet issues isn’t necessary. In this article, Poole’s Plumbing will walk you through several signs indicating it might be time to replace your toilet. By keeping an eye on these indicators, you can avoid significant problems.

Obvious Issues and Subtle Signs

when to replace your toilet

When to Replace Your Toilet — Sometimes, the signs of a toilet problem are obvious—water is visible, or the unit won’t flush. But there are less apparent issues worth checking for. We have listed five key indicators that it’s time to replace your toilet. If you notice any of these, it’s better to act now rather than wait for a bigger problem.

1. Cracks in the Toilet Tank

If you see water pooling around your toilet, there’s likely a crack in the tank or a bad seal. A cracked tank can lead to continuous leaks and water damage. The only solution? Replace your toilet. Even if you can’t see the crack, contact Poole’s Plumbing for an inspection. We can confirm the issue and replace the toilet if needed.

2. An Old Toilet

Think back to when your toilet was installed. If it’s from before 1994, it’s time for an upgrade. Federal regulations have made modern toilets more water-efficient, saving both the environment and your water bill. Consider a dual-flush toilet for better efficiency.

3. A Wobbly or Unsteady Toilet

An unsteady or wobbling toilet is never normal. Tightening some bolts might temporarily fix the flooring underneath, which could compromise it. When you feel the wobble, it’s a sign to replace your toilet and check the flooring under the toilet.

4. Frequent Repairs

If you’re constantly fixing your toilet, it’s time to consider a replacement. Repeated small problems can add up to a significant issue. Investing in a new toilet will save you time and money in the long run.

5. Round Bowl Toilets

Round bowl toilets are becoming outdated. Upgrading to an oblong bowl offers more comfort and stays cleaner. They also allow fewer odors to escape, making them a better choice overall.

Trust Raleigh’s Top Plumbers

If you’ve noticed these signs, it’s probably time to replace your toilet. Contact Poole’s Plumbing, the most trusted name in Raleigh, North Carolina, for plumbing services. We can assess your situation and provide the best solution. Visit poolesplumbing.com to get started.

Following these tips, you can identify when to replace your toilet and avoid more significant issues. For any plumbing needs, Poole’s Plumbing is here to help.

3 of the Top Problems in Plumbing Systems

3 of the Top Problems in Plumbing Systems

Let’s dive into 3 of the top problems in plumbing systems. Homeownership comes with many responsibilities, and maintaining the plumbing system is one of the most crucial yet often overlooked tasks. Whether you’re a seasoned homeowner, a DIY enthusiast, or a property manager, understanding common plumbing issues and their solutions can save you time, money, and headaches.

Running Toilets

Issue: A running toilet is not just an annoyance; it can save significant water and inflate your utility bill. The constant sound of flowing water usually indicates some internal components malfunctioning.

Solution:

  • Identify the Source: Open the toilet tank and inspect the flapper, flush, and fill valve.
  • Replace the Flapper Valve: Often, the flapper valve becomes worn out and fails to seal properly. Replacing it is straightforward.
  • Adjust the Float: The toilet will continuously run if the water level is too high. Adjusting the float can help control the water level inside the tank.
  • Check the Refill Tube: Ensure the refill tube is short enough and fits correctly above the overflow pipe.
  • Dripping Faucets

Dripping Faucets

Issue: Dripping faucets are more than just a source of irritation; if left unaddressed, they may eventually lead to increased water bills and potential water damage. A dripping faucet usually indicates a problem with the internal mechanisms, such as the washer, O-ring, or valve seat.

Solution:

  • Turn Off the Water Supply: Before you begin, turn off the water supply to the faucet.
  • Replace the Washer: The washer is a common culprit for leaks. Unscrew the faucet handle and replace the old washer with a new one.
  • Inspect the O-ring and Valve Seat: If replacing the washer doesn’t solve the issue, check the O-ring and valve seat for signs of wear and tear. Replace if necessary.
  • Call a Professional: If the problem persists after you’ve tried these steps, it may be best to consult a professional plumber for a more in-depth inspection.
  • Clogged Drains

Clogged Drains

Issue: Clogged drains are a frequent issue in many households, often caused by the accumulation of hair, soap, grease, and food particles. Persistent clogs can lead to slow drainage, unpleasant odors, and water damage.

Solution:

  • Use a Plunger: A plunger can effectively remove minor clogs in sinks and toilets. Make sure to use a plunger designed for the type of drain you’re working on.
  • Apply a Drain Snake: For more stubborn clogs, a drain snake (or auger) can reach deeper into the pipes to try and break up the blockage.
  • Natural Remedies: A baking soda and vinegar mixture can help dissolve minor clogs. To use this natural remedy, pour the baking soda mixture down the drain, wait about 30 minutes, and then flush with hot water.
  • Chemical Cleaners: While chemical drain cleaners are effective, they should be used sparingly because they can damage pipes over time.
  • Preventive Measures: Install drain screens to catch debris, and regularly clean your drains to prevent buildup.
Certified Raleigh Plumbers

Just Call Poole’s Plumbing of Raleigh, NC
919-661-6334

Preventive Maintenance Tips

  • Regular Inspections: Regularly inspect your plumbing system to catch issues before they become significant problems. During these regular inspections, look for signs of leaks, corrosion, and wear on all visible pipes and fixtures.
  • Proper Disposal: Be mindful of how you flush your toilets and pour down your drains. Avoid disposing of grease, coffee grounds, and fibrous foods in the kitchen sink.
  • Seasonal Preparations: Prepare your plumbing for colder months by insulating pipes to prevent freezing and bursting.

When to Call a Professional

So, as many plumbing issues can be resolved with many different DIY methods, some situations require the expertise of a professional plumber:

  • Complex pipe repairs or replacements
  • Persistent leaks that cannot be traced to a specific source
  • Major sewer line problems
  • Water heater malfunctions

Knowing when to call a professional may help prevent costly repairs and ensure the longevity of your plumbing system.

Conclusion

Plumbing issues are inevitable in homeownership, but many can be managed with some knowledge and effort. By understanding common problems like running toilets, dripping faucets, and clogged drains, you can proactively resolve these issues and maintain your home’s plumbing system effectively. Remember, preventive maintenance is critical; don’t hesitate to call a professional when in doubt.

Stay vigilant, address issues promptly, and enjoy a hassle-free plumbing experience!

Resources: https://raleighnc.gov/water

www.poolesplumbing.com

Low Water Pressure Causes and Solutions

Low Water Pressure: Causes and Solutions

Understanding Low Water Pressure

Low water pressure in your home can be frustrating and inconvenient. Weak water flow can disrupt your daily activities, whether you’re trying to shower or water your garden. Fortunately, identifying the underlying causes and implementing practical solutions can restore normal water pressure. This article aims to help homeowners, DIY enthusiasts, and property managers understand why they might be experiencing low water pressure and how to fix it.

Common Causes of Low Water Pressure

Clogged or Partially Closed Water Supply Valves

Mineral Deposits

Unlocking Your Home’s Full Flow: Diagnosing and FixOne of the most straightforward causes of low water pressure is a clogged or partially closed water supply valve. These valves control the flow of water to different areas of your home. Water flow will be restricted if they are fully open or obstructed.

Buildup of Mineral Deposits or Sediments

Over time, mineral deposits or sediments can accumulate inside your pipes, reducing the inner diameter available for water flow. This buildup often occurs in homes with hard water and can significantly impede water pressure.

Leaks in the Plumbing System

Leaks, whether visible or hidden, can lead to a drop in water pressure. Water escaping from the system means less flow through your taps is available, leading to reduced pressure.

Issues with Municipal Water Supply

Sometimes, the problem is outside your home but with the municipal water supply. Pipe damage or high demand in your area can temporarily lower the water pressure. Raleigh, NC Water and Sewer Link: https://raleighnc.gov/water-and-sewer/water-service-faq

Malfunctioning or Incorrectly Sized Water Pressure Regulators

Water pressure regulators control the water pressure entering your home from the municipal supply. If these regulators malfunction or are incorrectly sized, they can cause inconsistent or inadequate water pressure.

How to Fix Low Water Pressure

Check Water Supply Valves

Indoor-Spring-Plumbing-Tips-Sticky-Valve-Pooles-Plumbing

Start by inspecting the water supply valves leading to the affected areas. Ensure they are fully open and free of any obstructions. Adjusting the valves to their correct positions can often immediately resolve issues with low water pressure.

Address Mineral Buildup

If mineral deposits are suspected, consider installing a water softener to treat hard water and prevent future buildup. Additionally, a descaling agent can help clean out existing deposits in the pipes, thereby improving water flow.

  1. Inspect for Leaks
  2. To look for any signs of leaks, conduct a thorough inspection of your plumbing system, as leaks can often be found around fixtures, while hidden leaks may require a professional plumber to locate them. Repairing leaks promptly will restore normal water pressure and prevent further damage to your home.
  3. Contact Your Local Water Authority

If no issues are found within your home, contacting your local water authority is essential. They can confirm whether there are any problems with the municipal water supply and provide information on when full service will be restored.

Check the Water Pressure Regulator

A malfunctioning or improperly sized water pressure regulator can be tricky to diagnose. Have a professional plumber check the regulator for any issues. They can adjust or replace it to ensure consistent and adequate water pressure.

Normal PSI for residential water pressure is between 45-80 psi for the average water pressure range. Residential water pressure ranges between 45 and 80 psi. Water pressure under 40 psi is considered low. A psi between 20 and 30 is very low and is below the minimum required by most building codes.

Conclusion

Raleigh, NC Plumber, and Residential Resource Link: https://raleighnc.gov/water-and-sewer/water-service-faq

www.poolesplumbing.com